Page 111 of 172
8-12
8
5. Insert the dipstick completely into the oilfiller hole, and then remove it again to
check the oil level.TIPThe engine oil should be between the mini-
mum and maximum level marks.
6. If the engine oil is at or below the mini-mum level mark, remove the right rear
panel by removing the quick fastener
screws and bolts, and then add sufficient
oil of the recommended type to raise it to
the correct level.
1. Engine oil dipstick
1
1. Maximum level mark
2. Minimum level mark
3. Oil filler hole1
2
3
UB427BE0.book Page 12 Friday, February 5, 2016 2:14 PM
Page 115 of 172
8-16
8
TIPBe sure to wipe off spilled oil on any parts af-
ter the engine and exhaust system have
cooled down. NOTICEECB00301In order to prevent clutch slippage (since
the engine oil also lubricates the clutch),
do not mix any chemical additives. Do
not use oils with a diesel specification of
“CD” or oils of a higher quality than
specified. In addition, do not use oils la-
beled “ENERGY CONSERVING II” or
higher.
Make sure that no foreign material en-
ters the crankcase.
12. Start the engine, and then let it idle for
several minutes while checking it for oil
leakage. If oil is leaking, immediately turn
the engine off and check for the cause.
13. Turn the engine off, wait at least 10 minu-
tes, and then check the oil level and cor-
rect it if necessary.
14. Install the right rear panel by installing the
bolts and the quick fastener screws.
15. Lower the cargo bed.EBU36050Final gear oilCheck the oil level and change the final gear
oil at the intervals specified in the general
maintenance and lubrication chart.
Checking the final gear oil level 1. Park the vehicle on a level surface.
Recommended engine oil: See page 10-1.
Oil quantity: Without oil filter cartridge replacement:2.20 L (2.33 US qt, 1.94 Imp.qt)
With oil filter cartridge replacement: 2.30 L (2.43 US qt, 2.02 Imp.qt)
UB427BE0.book Page 16 Friday, February 5, 2016 2:14 PM
Page 116 of 172
8-17
8
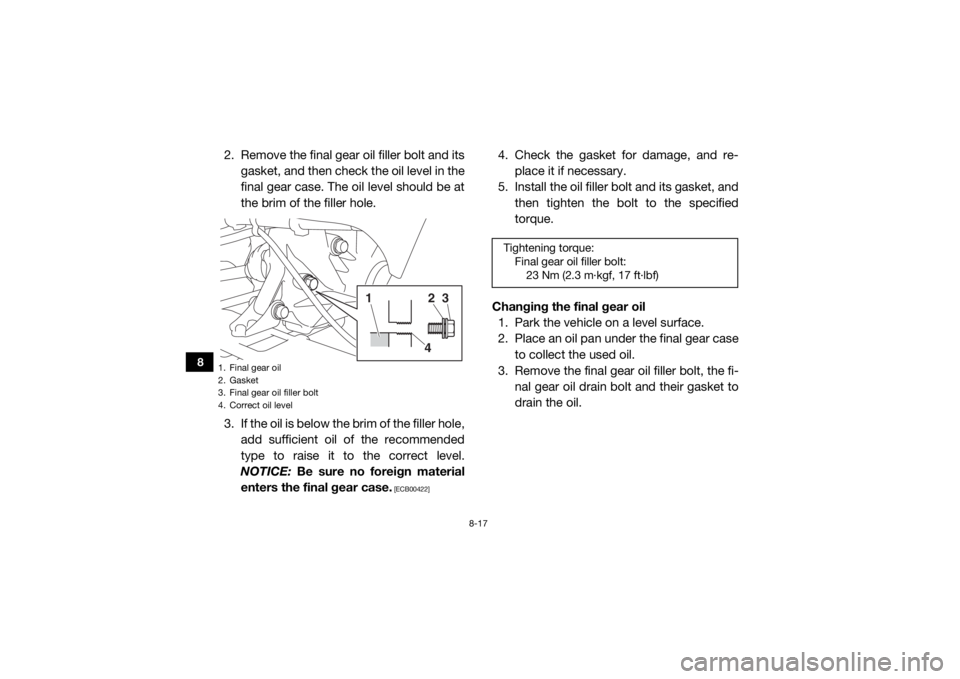
2. Remove the final gear oil filler bolt and itsgasket, and then check the oil level in the
final gear case. The oil level should be at
the brim of the filler hole.
3. If the oil is below the brim of the filler hole, add sufficient oil of the recommended
type to raise it to the correct level.
NOTICE: Be sure no foreign material
enters the final gear case.
[ECB00422]
4. Check the gasket for damage, and re- place it if necessary.
5. Install the oil filler bolt and its gasket, and then tighten the bolt to the specified
torque.
Changing the final gear oil 1. Park the vehicle on a level surface.
2. Place an oil pan under the final gear case to collect the used oil.
3. Remove the final gear oil filler bolt, the fi- nal gear oil drain bolt and their gasket to
drain the oil.
1. Final gear oil
2. Gasket
3. Final gear oil filler bolt
4. Correct oil level
24
3
1
Tightening torque:Final gear oil filler bolt:23 Nm (2.3 m·kgf, 17 ft·lbf)
UB427BE0.book Page 17 Friday, February 5, 2016 2:14 PM
Page 117 of 172
8-18
8
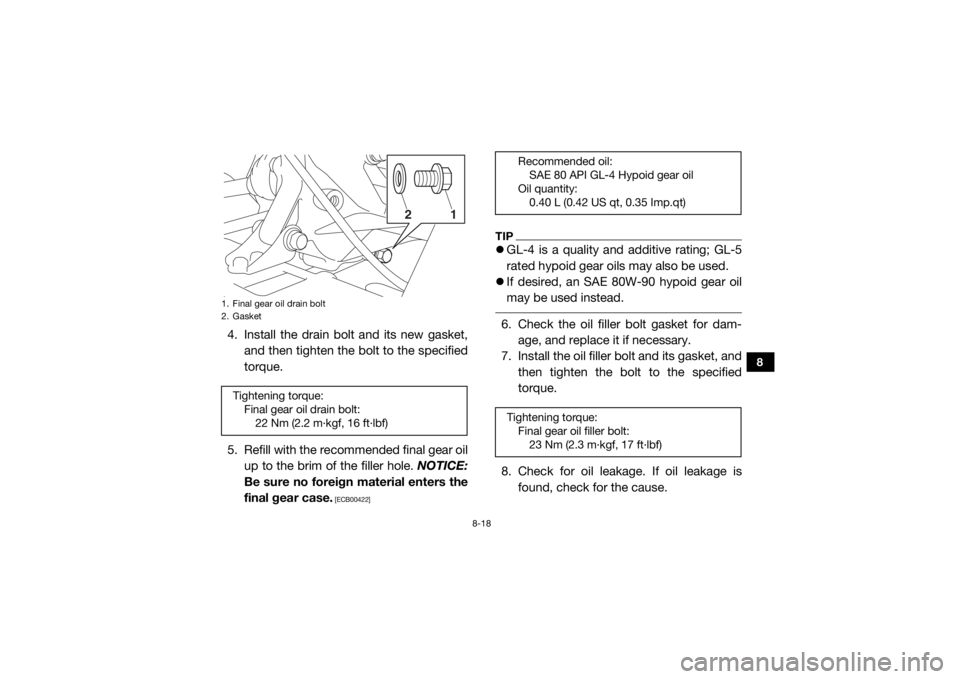
4. Install the drain bolt and its new gasket,and then tighten the bolt to the specified
torque.
5. Refill with the recommended final gear oil up to the brim of the filler hole. NOTICE:
Be sure no foreign material enters the
final gear case.
[ECB00422]
TIP GL-4 is a quality and additive rating; GL-5
rated hypoid gear oils may also be used.
If desired, an SAE 80W-90 hypoid gear oil
may be used instead. 6. Check the oil filler bolt gasket for dam-
age, and replace it if necessary.
7. Install the oil filler bolt and its gasket, and
then tighten the bolt to the specified
torque.
8. Check for oil leakage. If oil leakage is found, check for the cause.
1. Final gear oil drain bolt
2. GasketTightening torque:Final gear oil drain bolt:22 Nm (2.2 m·kgf, 16 ft·lbf)
21
Recommended oil:SAE 80 API GL-4 Hypoid gear oil
Oil quantity: 0.40 L (0.42 US qt, 0.35 Imp.qt)
Tightening torque: Final gear oil filler bolt:23 Nm (2.3 m·kgf, 17 ft·lbf)
UB427BE0.book Page 18 Friday, February 5, 2016 2:14 PM
Page 118 of 172
8-19
8
EBU36060Differential gear oilCheck the oil level and change the differential
gear oil at the intervals specified in the gener-
al maintenance and lubrication chart.
Checking the differential gear oil level1. Park the vehicle on a level surface.
2. Remove the differential gear oil filler bolt and its gasket, and then check the oil lev-
el. It should be up to the brim of the filler
hole.
3. If the level is low, add sufficient oil of therecommended type to raise it to the
specified level. NOTICE: Be sure no for-
eign material enters the differential
gear case.
[ECB00412]
4. Check the gasket for damage, and re- place it if necessary.
5. Install the differential gear oil filler bolt and its gasket, and then tighten the bolt
to the specified torque.1. Differential gear oil filler bolt
2. Gasket
3. Differential gear oil
4. Correct oil level
1
2
3
4
UB427BE0.book Page 19 Friday, February 5, 2016 2:14 PM
Page 120 of 172
8-21
8
6. Check the oil filler bolt gasket for dam-age, and replace it if necessary.
7. Install the differential gear oil filler bolt and its gasket, and then tighten the bolt
to the specified torque.
8. Check for oil leakage. If oil leakage is found, check for the cause.EBU32990CoolantThe coolant level should be checked before
each ride.
Checking the coolant level
1. Park the vehicle on a level surface.
2. Check the coolant level in the coolant reservoir when the engine is cold as the
coolant level varies with engine tempera-
ture.
TIPThe coolant should be between the minimum
and maximum level marks. 3. If the coolant is at or below the minimumlevel mark, remove the coolant reservoir
cap, add coolant to the maximum level
mark, install the reservoir cap.
Tightening torque:Differential gear oil filler bolt:23 Nm (2.3 m·kgf, 17 ft·lbf)
1. Coolant reservoir cap
2. Maximum level mark
3. Minimum level mark
123
UB427BE0.book Page 21 Friday, February 5, 2016 2:14 PM
Page 135 of 172
8-36
8
As the brake pads wear, it is normal for the
brake fluid level to gradually go down. A low
brake fluid level may indicate worn brake
pads and/or brake system leakage; therefore,
be sure to check the brake pads for wear and
the brake system for leakage. If the brake fluid
level goes down suddenly, have a Yamaha
dealer check the cause before further riding.EBU32520Brake fluid replacementComplete fluid replacement should be done
only by trained Yamaha service personnel.
Have a Yamaha dealer replace the following
components during pe riodic maintenance or
when they are damaged or leaking.
Replace the oil seals every two years.
Replace the brake hoses every four years.EBU32530Checking the brake pedalHave a Yamaha dealer check the brakes at
the intervals specified in the periodic mainte-
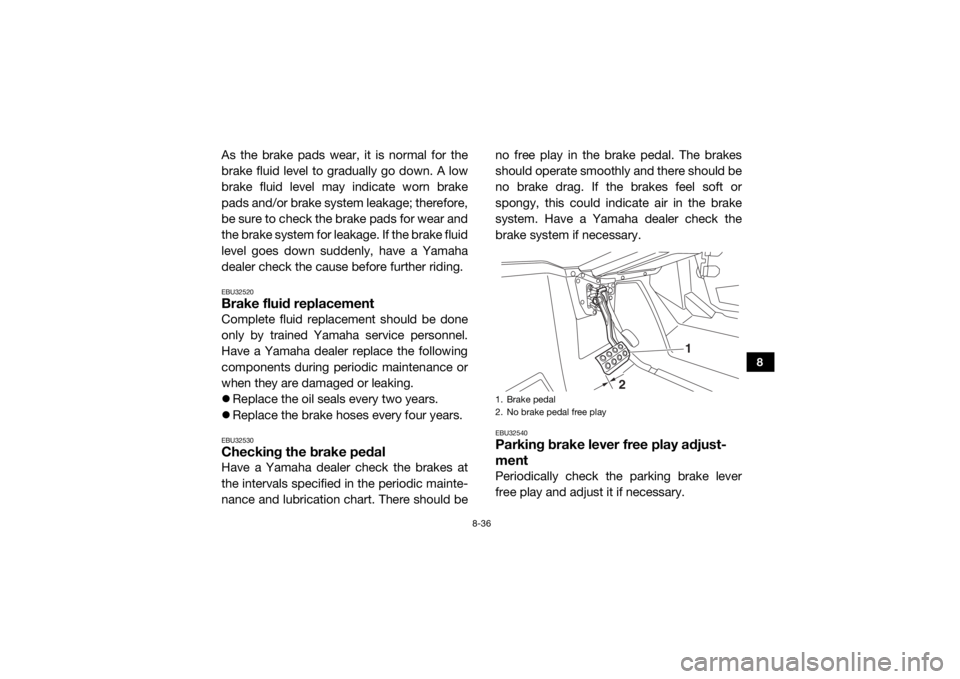
nance and lubrication chart. There should be no free play in the brake pedal. The brakes
should operate smoothly
and there should be
no brake drag. If the brakes feel soft or
spongy, this could indicate air in the brake
system. Have a Yamaha dealer check the
brake system if necessary.
EBU32540Parking brake lever free play adjust-
mentPeriodically check the parking brake lever
free play and adjust it if necessary.1. Brake pedal
2. No brake pedal free play
1
2
UB427BE0.book Page 36 Friday, February 5, 2016 2:14 PM
Page 142 of 172
8-43
8
tilled water. However, the battery lead con-
nections need to be checked and, if
necessary, tightened.
WARNING
EWB03410Avoid battery contact with skin, eyes, or
clothing. Shield eyes when working near
batteries. Keep out of reach of children.
You could be poisoned or severely burned
by the sulfuric acid in battery electrolyte. In
case of accidental contact with battery
electrolyte:
EXTERNAL: Flush with water.
INTERNAL: Drink large quantities of water
or milk. Follow with milk of magnesia,
beaten egg, or vegetable oil. Get prompt
medical attention.
EYES: Flush with water for 15 minutes and
get prompt medical attention.
WARNING
EWB03420Batteries may produce explosive gases.
Ventilate when charging or using in a
closed space. Keep batteries away from
sparks, flames, cigarettes, or other sourc-
es of ignition. To remove the battery
1. Turn the key to “ ” (off).
2. Remove the hood. (See page 8-10 for hood removal and installation proce-
dures.)
3. Remove the air intake duct panel by re-
moving the quick fastener screws.
UB427BE0.book Page 43 Friday, February 5, 2016 2:14 PM