2017 VAUXHALL VIVA reverse light
[x] Cancel search: reverse lightPage 18 of 201
![VAUXHALL VIVA 2017 Owners Manual 16In briefManual transmission automatedR:reverse, engage only when
vehicle is stationaryN:neutralD:automatic modeM:manual mode<:upshift in manual mode]:downshift in manual mode
Manual transmission aut VAUXHALL VIVA 2017 Owners Manual 16In briefManual transmission automatedR:reverse, engage only when
vehicle is stationaryN:neutralD:automatic modeM:manual mode<:upshift in manual mode]:downshift in manual mode
Manual transmission aut](/manual-img/38/19573/w960_19573-17.png)
16In briefManual transmission automatedR:reverse, engage only when
vehicle is stationaryN:neutralD:automatic modeM:manual mode<:upshift in manual mode]:downshift in manual mode
Manual transmission automated
3 114.
Starting off
Check before starting off ● Tyre pressure and condition 3 155,
3 187.
● Engine oil level and fluid levels 3 138.
● All windows, mirrors, exterior lighting and number plates are
free from dirt, snow and ice and
are operational.
● Proper position of mirrors, seats, and seat belts 3 27, 3 34,
3 38.
● Brake function at low speed, particularly if the brakes are wet.Starting the engine
● Turn key to position 1.
● Move the steering wheel slightly to release the steering wheel
lock.
● Manual transmission: operate clutch and brake pedal.
Manual transmission automated:
operate brake pedal.
Automatic transmission: operate
brake pedal and move selector
lever to P or N.
● Do not operate accelerator pedal.
● Turn key to position 3 and
release.
Page 87 of 201

Instruments and controls85automatic switching on of the
rear window wiper when reverse
gear is engaged.
● Languages : Scroll through the list
and select the desired language.
● Lighting
Exterior lighting by unlocking :
Activates or deactivates the entry
lighting.
Exit Lighting : Activates or
deactivates exit lighting and
changes lighting duration.
● Power Door Locks
Stop door lock if door open :
Activates or deactivates the door locking function while a door is
open.
Delayed Door Lock : Activates or
deactivates the delayed door
locking function. This feature
delays the actual locking of the
doors until all doors are closed.
● Remote Lock, Unlock, and Start
Remote Unlock Feedback :
Activates or deactivates the
hazard warning flasher feedback
whilst unlocking.Remote Lock Feedback :
Changes what kind of feedback
is given when locking the vehicle.
Remote Door Unlock : Changes
the configuration to unlock only
the driver's door or the whole
vehicle whilst unlocking.
Auto Relock Doors : Activates or
deactivates the automatic relock
function after unlocking without
opening the vehicle.
● Restore Factory Settings :
Resets all settings to the default settings.
● Valet Mode :
Activated, all vehicle displays are locked and no changes may be
performed within the system.
See Infotainment manual.
Personal settings 7" Colour-Info-Display
Press ;, select Settings and
then Vehicle on the touch-screen.
In the corresponding submenus the
following settings can be changed:
Settings ● Climate & Air Quality
Auto Fan Max Speed : Modifies
the level of the cabin airflow of the climate control in automatic
mode.
Air Conditioning Mode : Controls
the state of the cooling compressor when the vehicle is
started. Last setting
(recommended) or at vehicle
start is either always on or always
off.
Page 88 of 201

86Instruments and controlsAuto Defog: Supports
windscreen dehumidification by
automatically selecting the
necessary settings and
automatic air conditioning mode.
Auto Rear Defog : Automatically
activates heated rear window.
● Collision / Detection Systems
Park Assist : Activates or
deactivates the ultrasonic
parking assist.
● Comfort and Convenience
Chime Volume : Changes the
volume of warning chimes.
Personalization By Driver :
Activates or deactivates the
personalisation function.
Auto Wipe in Reverse Gear :
Activates or deactivates
automatic switching on of the
rear window wiper when reverse gear is engaged.
● Lighting
Exit Lighting : Activates or
deactivates and changes the
duration of exit lighting.● Power Door Locks
Unlocked Door Anti Lock Out :
Activates or deactivates the door
locking function while a door is open.
Delayed Door Lock : Activates or
deactivates the delayed door locking function. This feature
delays the actual locking of the
doors until all doors are closed.
● Remote Lock, Unlock, Start
Remote Unlock Light Feedback :
Activates or deactivates the
hazard warning flasher feedback whilst unlocking.
Remote Door Unlock : Changes
the configuration to unlock only
the driver's door or the whole
vehicle whilst unlocking.
Relock Remotely Unlocked
Doors : Activates or deactivates
the automatic relock function
after unlocking without opening
the vehicle.Telematics service
OnStar
OnStar is a personal connectivity and
service assistant with integrated
Wi-Fi hotspot. The OnStar service is available 24 hours a day, seven days a week.
Notice
OnStar is not available for all
markets. For further information,
contact your workshop.
Notice
In order to be available and
operational, OnStar needs a valid
OnStar subscription, functioning
vehicle electrics, mobile service and
GPS satellite link.
To activate the OnStar services and
set up an account, press Z and speak
with an advisor.
Page 96 of 201

94LightingParking lights
When the vehicle is parked, the
parking lights on one side can be
activated:
1. Switch off the ignition.
2. Move the turn signal lever all the way up (right parking lights) or
down (left parking lights).
Confirmed by an acoustic signal and
the corresponding turn signal control
indicator.
Reversing lights
The reversing light comes on when
the ignition is on and reverse gear is
selected.
Misted light covers
The inside of the light housing may
mist up briefly in poor, wet and cold weather conditions, in heavy rain or
after washing. The mist disappears
quickly by itself; to help switch on the
headlights.Interior lighting
Instrument panel illumination control
Brightness of the following lights can
be adjusted when the exterior lights
are on:
● instrument panel illumination
● Info-Display
● illuminated switches and operation elements
Turn thumb wheel A and hold until
the desired brightness is obtained.
Page 117 of 201

Driving and operating115Transmission automatically shifts to
N upon starting. There may be a slight
delay.
Starting is not possible if all brake
lights fail.
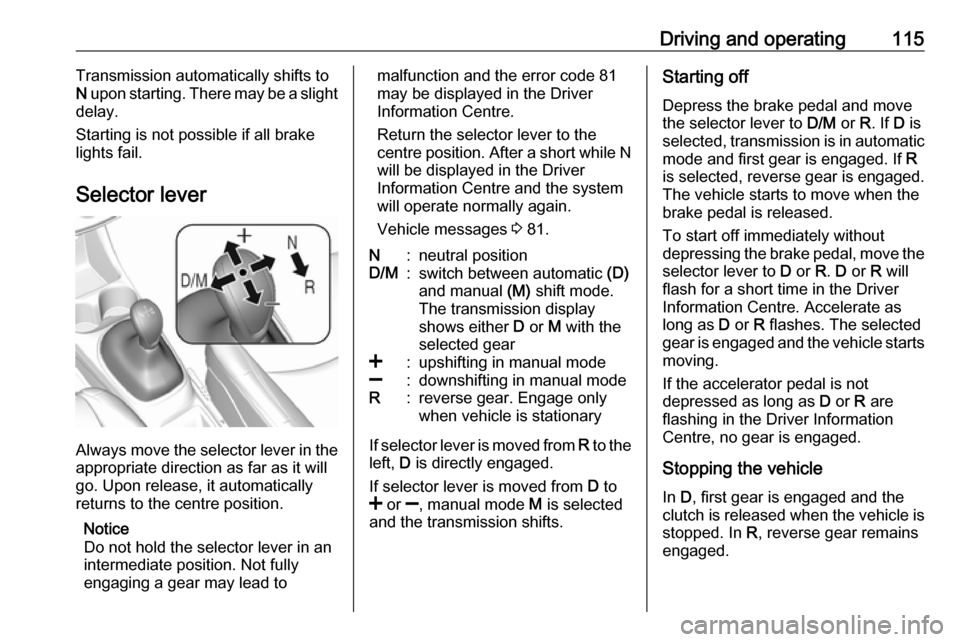
Selector lever
Always move the selector lever in the
appropriate direction as far as it will
go. Upon release, it automatically
returns to the centre position.
Notice
Do not hold the selector lever in an
intermediate position. Not fully
engaging a gear may lead to
malfunction and the error code 81
may be displayed in the Driver
Information Centre.
Return the selector lever to the
centre position. After a short while N
will be displayed in the Driver
Information Centre and the system
will operate normally again.
Vehicle messages 3 81.N:neutral positionD/M:switch between automatic (D)
and manual (M) shift mode.
The transmission display
shows either D or M with the
selected gear<:upshifting in manual mode]:downshifting in manual modeR:reverse gear. Engage only
when vehicle is stationary
If selector lever is moved from R to the
left, D is directly engaged.
If selector lever is moved from D to
< or ], manual mode M is selected
and the transmission shifts.
Starting off
Depress the brake pedal and move
the selector lever to D/M or R. If D is
selected, transmission is in automatic mode and first gear is engaged. If R
is selected, reverse gear is engaged.
The vehicle starts to move when the
brake pedal is released.
To start off immediately without
depressing the brake pedal, move the selector lever to D or R. D or R will
flash for a short time in the Driver
Information Centre. Accelerate as
long as D or R flashes. The selected
gear is engaged and the vehicle starts moving.
If the accelerator pedal is not
depressed as long as D or R are
flashing in the Driver Information
Centre, no gear is engaged.
Stopping the vehicle In D, first gear is engaged and the
clutch is released when the vehicle is
stopped. In R, reverse gear remains
engaged.
Page 171 of 201

Vehicle care1693. Connect the black lead to thenegative terminal of the booster
battery.
4. Connect the other end of the black
lead to a vehicle grounding point,
such as the engine block or an
engine mounting bolt. Connect as far away from the discharged
vehicle battery as possible,
however at least 60 cm.
Route the leads so that they cannot
catch on rotating parts in the engine
compartment.
To start the engine: 1. Start the engine of the vehicle providing the jump.
2. After five minutes, start the other engine. Start attempts should be
made for no longer than
15 seconds at an interval of
one minute.
3. Allow both engines to idle for approx. three minutes with the
leads connected.4. Switch on electrical consumers (e.g. headlights, heated rear
window) of the vehicle receiving
the jump start.
5. Reverse above sequence exactly when removing leads.Towing
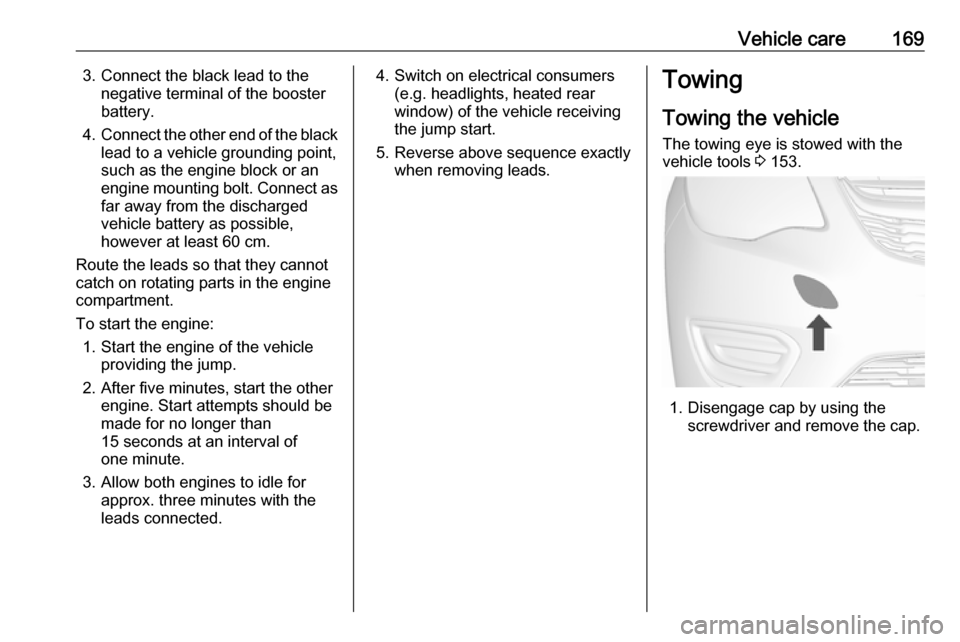
Towing the vehicle The towing eye is stowed with thevehicle tools 3 153.
1. Disengage cap by using the
screwdriver and remove the cap.