Page 509 of 668
509
4-3. Do-it-yourself maintenance
4
Maintenance and care
VERSO_EE_OM64517E
Right side
Move the washer fluid filler open-
ing.
Remove the securing clip.
Move the washer fluid filler
opening.
After replacing the bulbs, make
sure to firmly install the washer
fluid filler opening and secure it
with the clip.
■ After replacing the bulbs
Left side
Make sure to secure the upper
part of the air cleaner duct with
the clip.
Right side
Make sure to secure the washer
fluid filler opening with the clip.
Page 511 of 668
511
4-3. Do-it-yourself maintenance
4
Maintenance and care
VERSO_EE_OM64517E
Unplug the connector while pull-
ing the lock release.
Replace the light bulb, and install
the bulb base.
Align the 3 tabs on the light bulb
with the mounting, and insert.
Turn and secure the bulb base.
Shake the bulb base gently to
check that it is not loose, turn the
headlight low beam on once and
visually confirm that no light is
leaking through the mounting.
Install and turn the cover to the
closed position.
Closed position
Page 513 of 668
513
4-3. Do-it-yourself maintenance
4
Maintenance and care
VERSO_EE_OM64517E
Unplug the connector while pull-
ing the lock release.
Replace the light bulb, and install
the bulb base.
Align the 3 tabs on the light bulb
with the mounting, and insert.
Turn and secure the bulb base.
Shake the bulb base gently to
check that it is not loose, turn the
headlight high beam on once and
visually confirm that no light is
leaking through the mounting.
Install and turn the cover to the
closed position.
Closed position
Page 515 of 668
515
4-3. Do-it-yourself maintenance
4
Maintenance and care
VERSO_EE_OM64517E
Unplug the connector while
depressing the lock release.
Turn the bulb base counterclock-
wise.
Replace the light bulb, and install
the bulb base.
Align the 3 tabs on the light bulb
with the mounting, and insert.
Turn and secure the bulb base.
Page 522 of 668
522
4-3. Do-it-yourself maintenance
VERSO_EE_OM64517E
Attach the cover claws spanning
over the entire perimeter.
Finally, confirm that the outside
claw is securely fitted.
■ Back-up light/rear fog light, tail light and rear turn signal light
Open the back door and remove
the cover.
Peel back the cushion material.
Cushion
material
Page 526 of 668
526
4-3. Do-it-yourself maintenance
VERSO_EE_OM64517E
Make sure that the cover is
secured by pressing on the
entire cover.
■ Lights other than the above
If any of the lights listed below has burnt out, have it replaced by
any authorized Toyota dealer or repairer, or another duly qualified
and equipped professional.
● Headlights (discharge headlights)
● Front position lights/daytime running lights (discharge head-
lights)
● High mounted stoplight
● Stop lights
Page 528 of 668

528
4-3. Do-it-yourself maintenance
VERSO_EE_OM64517E
WARNING
■ Replacing light bulbs
● Turn off the lights. Do not attempt to replace the bulb immediately after
turning off the lights.
The bulbs become very hot and may cause burns.
● Do not touch the glass portion of the light bulb with bare hands.
When it is unavoidable to hold the gl ass portion, use and hold with a clean
dry cloth to avoid getting moisture and oils on the bulb.
Also, if the bulb is scratched or dropped, it may blow out or crack.
● Fully install light bulbs and any parts used to secure them. Failing to do so
may result in heat damage, fire, or water entering the headlight unit. This
may damage the headlights or cause condensation to build up on the lens.
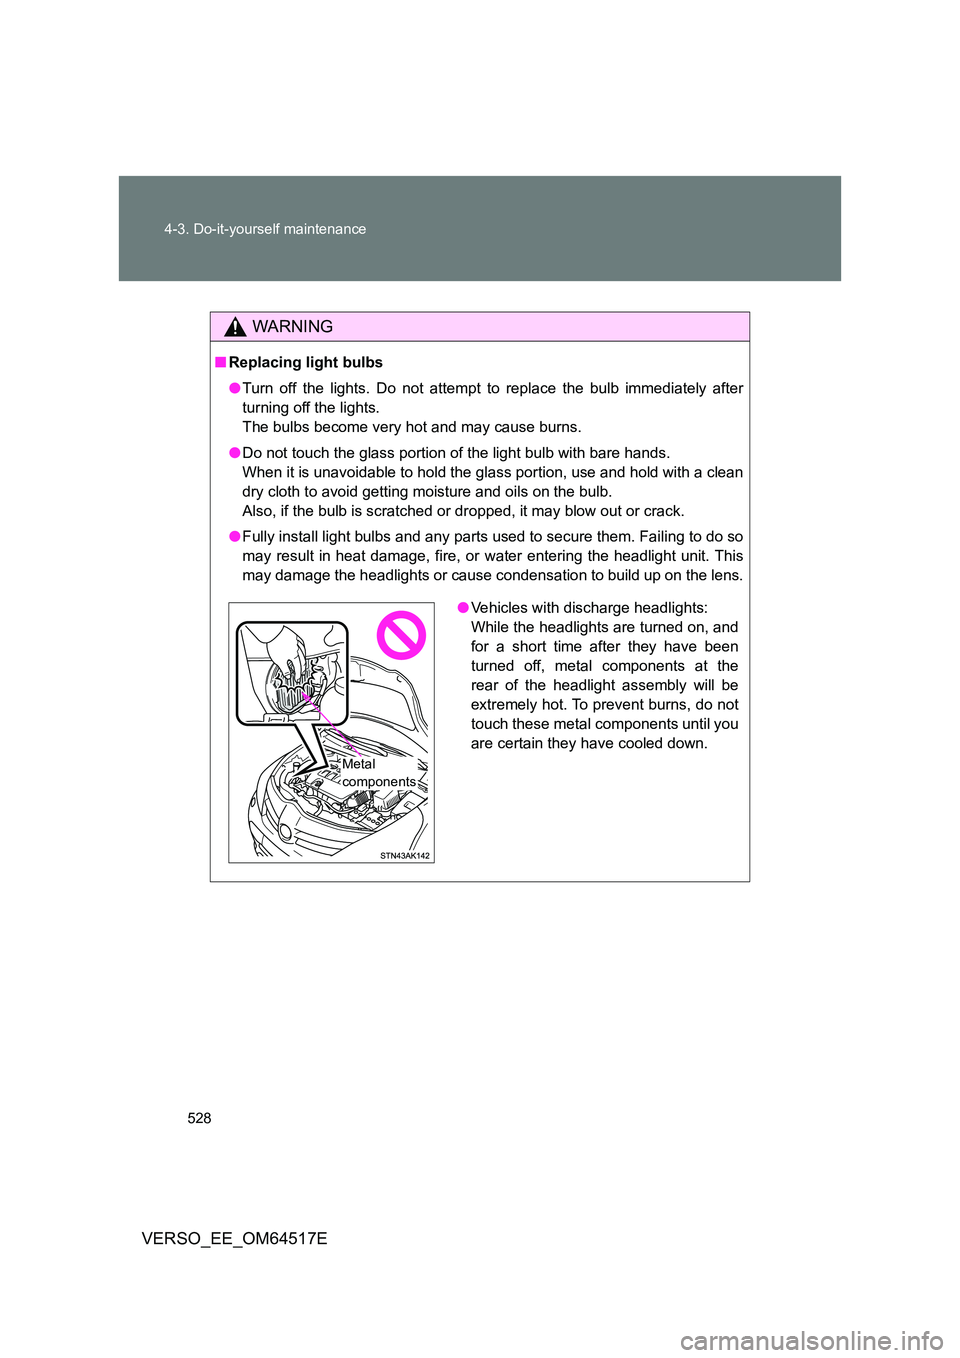
● Vehicles with discharge headlights:
While the headlights are turned on, and
for a short time after they have been
turned off, metal components at the
rear of the headlight assembly will be
extremely hot. To prevent burns, do not
touch these metal components until you
are certain they have cooled down.
Metal
components
Page 535 of 668
5
535
5-1. Essential information
When trouble arises
VERSO_EE_OM64517E
Using a flatbed truck
If your vehicle is transported by a
flatbed truck, it should be tied
down at the locations shown in
the illustration.
If you use chains or cables to tie
down your vehicle, the angles
shaded in black must be 45
Do not overly tighten the tie
downs or the vehicle may be
damaged.
Emergency towing
If a tow truck is not available in an emergency, your vehicle may be
temporarily towed using cables or chains secured to the emergency
towing eyelets. This should only be attempted on hard surfaced roads
for at most 80 km (50 miles) at under 30 km/h (18 mph).
A driver must be in the vehicle to steer and operate the brakes. The
vehicle’s wheels, drivetrain, axles, steering and brakes must be in
good condition.
Front