2017 TOYOTA PRIUS PRIME air condition
[x] Cancel search: air conditionPage 621 of 784

PRIUS PRIME_OM_OM47A88U_(U)
6217-3. Do-it-yourself maintenance
7
Maintenance and care
With the glove box fully open,
slightly lift up the glove box and
pull toward the seat to detach
the bottom of the glove box.
Do not use excessive force if the
glove box does not detach when
lightly pulled. Instead, pull toward
the seat while slightly adjusting the
height of the glove box.
Remove the filter cover.
Unlock the filter cover.
Move the filter cover in the
direction of the arrow, and then
pull it out of the claws.
Remove the filter case.
Remove the air conditioning fil-
ter from the filter case and
replace it with a new one.
The “\bUP” marks shown on the fil-
ter should be pointing up.
When installing, reve rse the steps listed.
5
6
1
2
7
8
9
Page 622 of 784

622
PRIUS PRIME_OM_OM47A88U_(U)
7-3. Do-it-yourself maintenance
■Checking interval
Inspect and replace the air conditioning filter according to the maintenance
schedule. In dusty areas or areas with heavy traffic flow, early replacement
may be required. (For scheduled maintenance information, please refer to the
“Scheduled Maintenance Guide” or “Owner’s Manual Supplement”.)
■ If air flow from the vents decreases dramatically
The filter may be clogged. Check the filter and replace if necessary.
WARNING
■When replacing the air conditioning filter
Observe the following precautions. Failure to do so may result in the air
conditioning system operating during the procedure, possibly resulting in
injury.
● Check that the charging connector is not connected
The air conditioning may operate due to the “Climate Prep” (→P. 147) or
“Traction Battery Cooler” (→P. 127) setting.
● Do not use the Remote Air Conditioning System
Page 623 of 784

PRIUS PRIME_OM_OM47A88U_(U)
6237-3. Do-it-yourself maintenance
7
Maintenance and care
NOTICE
■When using the ai r conditioning system
Make sure that a filter is always installed.
Using the air conditioning system without a filter may cause damage to the
system.
■ When removing the glove box
Always follow the specified procedure to remove the glove box ( →P. 620). If
the glove box is removed without following the specified procedure, the
hinge of the glove box may become damaged.
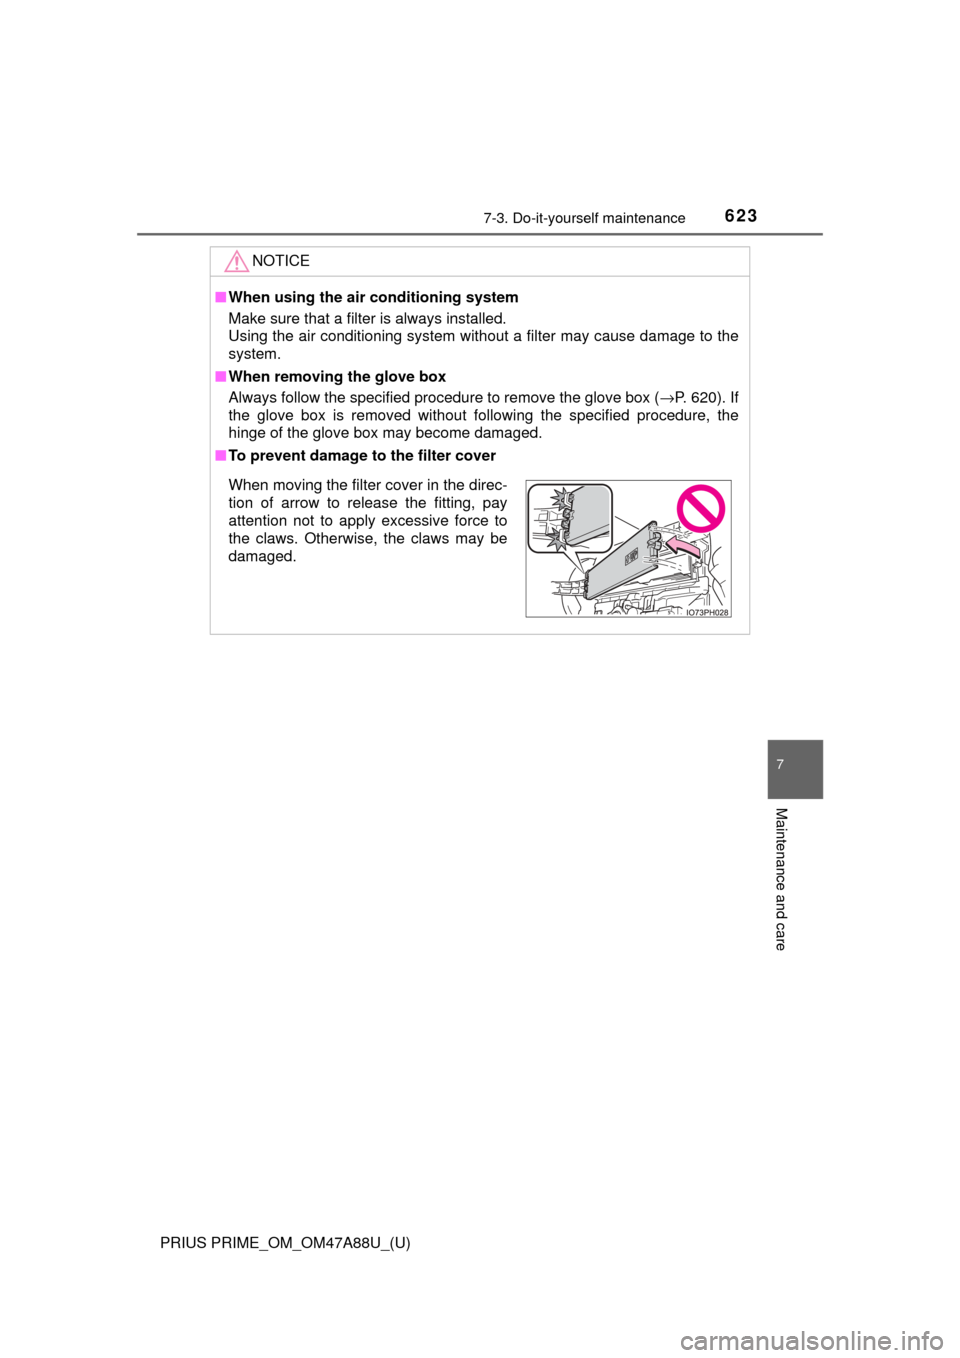
■ To prevent damage to the filter cover
When moving the filter cover in the direc-
tion of arrow to release the fitting, pay
attention not to apply excessive force to
the claws. Otherwise, the claws may be
damaged.
Page 630 of 784

630
PRIUS PRIME_OM_OM47A88U_(U)
7-3. Do-it-yourself maintenance
Checking and replacing fuses
Turn the power switch off.
Confirm that the charging connector is not connected. Also, do not use the
Remote Air Conditioning System during the procedure.
Open the fuse box cover.
Engine compartment type A fuse box
While pushing the 2 claws, lift
up the cover.
When closing the cover, make
sure to attach the 2 claws.
Engine compartment type B fuse box
While pushing the 3 claws, lift
up the cover.
When closing the cover, make
sure to attach the 3 claws.
Left side instrument panel
Remove the lid.
Make sure to press the claw
during removal or installation.
If any of the electrical components do not operate, a fuse may
have blown. If this happens, check and replace the fuses as nec-
essary.
1
2
Page 654 of 784

6548-2. Steps to take in an emergency
PRIUS PRIME_OM_OM47A88U_(U)
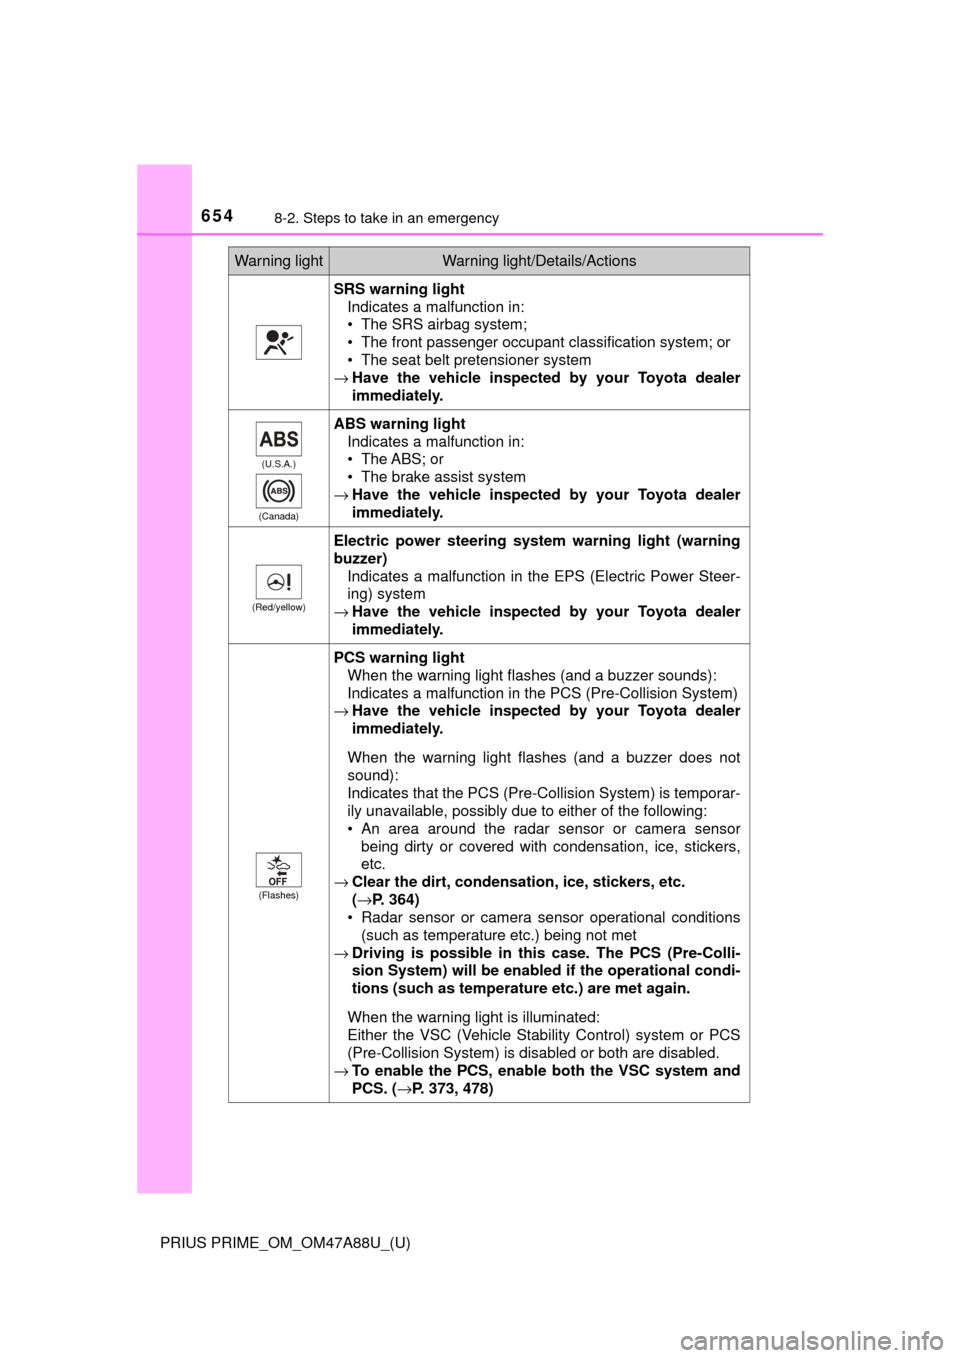
SRS warning lightIndicates a malfunction in:
• The SRS airbag system;
• The front passenger occupant classification system; or
• The seat belt pretensioner system
→ Have the vehicle inspected by your Toyota dealer
immediately.
(U.S.A.)
(Canada)
ABS warning light Indicates a malfunction in:
• The ABS; or
• The brake assist system
→ Have the vehicle inspected by your Toyota dealer
immediately.
(Red/yellow)
Electric power steering system warning light (warning
buzzer)
Indicates a malfunction in the EPS (Electric Power Steer-
ing) system
→ Have the vehicle inspected by your Toyota dealer
immediately.
(Flashes)
PCS warning light
When the warning light flashes (and a buzzer sounds):
Indicates a malfunction in the PCS (Pre-Collision System)
→ Have the vehicle inspected by your Toyota dealer
immediately.
When the warning light flashes (and a buzzer does not
sound):
Indicates that the PCS (Pre-Collision System) is temporar-
ily unavailable, possibly due to either of the following:
• An area around the radar sensor or camera sensor being dirty or covered with condensation, ice, stickers,
etc.
→ Clear the dirt, condensation, ice, stickers, etc.
(→P. 364)
• Radar sensor or camera sensor operational conditions (such as temperature etc.) being not met
→ Driving is possible in th is case. The PCS (Pre-Colli-
sion System) will be enabled if the operational condi-
tions (such as temperature etc.) are met again.
When the warning light is illuminated:
Either the VSC (Vehicle Stability Control) system or PCS
(Pre-Collision System) is disabled or both are disabled.
→ To enable the PCS, enable both the VSC system and
PCS. ( →P. 373, 478)
Warning lightWarning light/Details/Actions
Page 659 of 784

6598-2. Steps to take in an emergency
PRIUS PRIME_OM_OM47A88U_(U)
8
When trouble arises
■SRS warning light
This warning light system monitors the airbag sensor assembly, front impact
sensors, side impact sensors (front), side impact sensors (front door\
), side
impact sensors (rear), driver’s seat belt buckle switch, front passenger occu-
pant classification system (ECU and sens ors), “AIR BAG ON” indicator light,
“AIR BAG OFF” indicator light, front passenger’s seat belt buckle switch, seat
belt pretensioner assemblies, airbags, interconnecting wiring and power
sources. ( →P. 36)
■ Front passenger detection sensor, seat belt reminder and warning
buzzer
● If luggage is placed on the front passenger seat, the front passenger de\
tec-
tion sensor may cause the warning light to flash and the warning buzzer to
sound even if a passenger is not sitting in the seat.
● If a cushion is placed on the seat, the sensor may not detect a passenger,
and the warning light may not operate properly.
■ Electric power steering system warning light (warning buzzer)
When the 12-volt battery charge becomes insufficient or the voltage tempo-
rarily drops, the electric power steer ing system warning light may come on
and the warning buzzer may sound.
■ If the malfunction indicator la mp comes on while driving
First check the following:
● Is the fuel tank empty?
If it is, fill the fuel tank immediately.
● Is the fuel tank cap loose?
If it is, tighten it securely.
The malfunction indicator lamp will go off after several driving trips.
If the malfunction indicator lamp does not go off even after several trips, con-
tact your Toyota dealer as soon as possible.
■
When the tire pressure warning light comes on
Inspect the appearance of the tire to check that the tire is not punctured.
If the tire is punctured: → P. 671
If the tire is not punctured:
Check the tire inflation pressure and adjust to the appropriate level. Initial-
izing the tire pressure warning syst em will not turn off the tire pressure
warning light.
■The tire pressure warning light may come on due to natural causes
The tire pressure warning light may come on due to natural causes such
as natural air leaks and tire inflat ion pressure changes caused by tem-
perature. In this case, adjusting the ti re inflation pressure will turn off the
warning light (afte r a few minutes).
■Conditions that the tire pressure warning system may not function
properly
→ P. 5 9 9
Page 667 of 784

6678-2. Steps to take in an emergency
PRIUS PRIME_OM_OM47A88U_(U)
8
When trouble arises
■If “Shift System Malfunction See Owner’s Manual” is shown
Indicates a malfunction in the shift control system. Immediately have the sys-
tem inspected by your Toyota dealer.
The system may not operate properly.
■ If “Low 12-Volt Battery Apply Parking Brake Securely While Parking See
Owner’s Manual” is shown
Indicates that the 12-volt battery charge is insufficient. Charge or replace the
12-volt battery.
● When the message is shown, the hybrid system may not start or the shift
position may not be changed normally. (Coping method: →P. 669)
● After charging the 12-volt battery, the message may not go off until the shift
position is changed from P.
■ If “Shifting Unavailable Low 12-Volt Battery See Owner’s Manual” is
shown
Indicates that the shift position cannot be changed because the voltage of the
12-volt battery drops. Charge or replace the 12-volt battery.
(Coping method in the case the 12-volt battery is discharged: →P. 694)
■ If “Hybrid System Overheated. Re duced Output Power.” is shown
The message may be shown when driving under severe operating conditions.
(For example, when driving up a long steep hill or driving up a steep hill in
reverse.)
Coping method: →P. 700
■ If “Maintenance required for Traction battery cooling parts See owner’s
manual” is shown
There is a possibility that the filter may be clogged, the air intake vent may be
blocked or there may be a gap in the duct.
● When the air intake vents or filters are dirty, clean them by the procedures
on P. 562.
● When the air intake vents or filters are not dirty and the warning message is
shown, have the vehicle inspected at your Toyota dealer.
■ If “Hybrid Battery Low. Shift Ou t of to Recharge.” is shown
Message is displayed when the remaining charge for the hybrid battery (trac-
tion battery) is low.
As the hybrid battery (traction battery) can not be charged when the shift
position is in N, when stopped for long periods of time shift the shift position to
P.
■ If “Hybrid Battery Low Hybrid Syst em Stopped Shift to and Restart”
is shown
Message is displayed when the remaining charge for the hybrid battery (trac-
tion battery) is low, because vehicle has been shifted to N for a long period of
time.
When operating the vehicle, shift to P and restart the hybrid system.
Page 686 of 784

6868-2. Steps to take in an emergency
PRIUS PRIME_OM_OM47A88U_(U)
WARNING
■Driving to spread the liquid sealant evenly
Observe the following precautions to reduce the risk of accidents.
Failing to do so may result in a loss of vehicle control and cause death
or serious injury.
●Drive the vehicle carefully at a low speed. Be especially careful when
turning and cornering.
●If the vehicle does not drive strai ght or you feel a pull through the
steering wheel, stop the vehicle and check the following.
• Tire condition. The tire may have separated from the wheel.
• Tire inflation pressure. If the tire inflation pressure is 19 psi (130 kPa, 1.3 kgf/cm
2 or bar) or less, the tire may be severely dam-
aged.
NOTICE
■When performing an emergency repair
●A tire should only be repaired with the emergency tire puncture repair
kit if the damage is caused by a sharp object such as nail or screw
passing through the tire tread.
Do not remove the sharp object from the tire. Removing the object may
widen the opening and disenable emergency repair with the repair kit.
●The repair kit is not waterproof. Ma ke sure that the repair kit is not
exposed to water, such as when it is being used in the rain.
●Do not put the repair kit directly onto dusty ground such as sand at the
side of the road. If the repair kit vacuums up dust etc., a malfunction
may occur.
■Precautions for the emergency tire puncture repair kit
●The repair kit power source should be 12 V DC suitable for vehicle
use. Do not connect the repair kit to any other source.
●If fuel splatters on the repair kit, the repa ir kit may deteriorate. Take
care not to allow fuel to contact it.
●Place the repair kit in a storage to prevent it from being exposed to dirt
or water.
●Store the repair kit in the luggage compartment out of reach of chil-
dren.
●Do not disassemble or modify the repair kit. Do not subject parts such
as the air pressure indicator to im pacts. This may cause a malfunction.