2017 TOYOTA LAND CRUISER engine oil
[x] Cancel search: engine oilPage 15 of 608

15Pictorial index
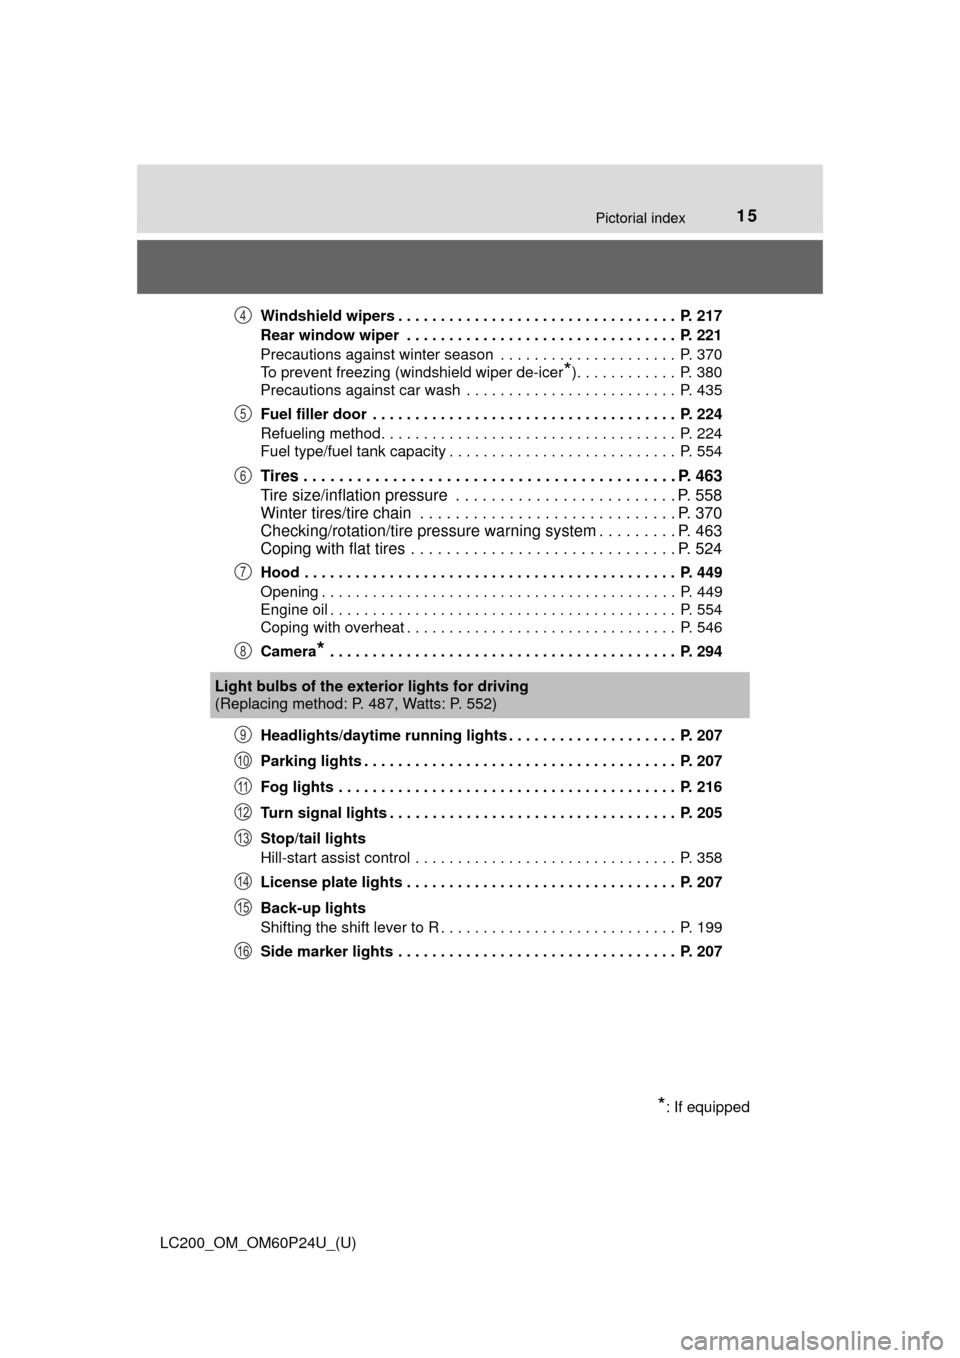
LC200_OM_OM60P24U_(U)Windshield wipers . . . . . . . . . . . . . . . . . . . . . . . . . . . . . . . . . P. 217
Rear window wiper . . . . . . . . . . . . . . . . . . . . . . . . . . . . . . . . P. 221
Precautions against winter season . . . . . . . . . . . . . . . . . . . . . P. 370
To prevent freezing (windshield wiper de-icer
*). . . . . . . . . . . . P. 380
Precautions against car wash . . . . . . . . . . . . . . . . . . . . . . . . . P. 435
Fuel filler door . . . . . . . . . . . . . . . . . . . . . . . . . . . . . . . . . . . . P. 224
Refueling method . . . . . . . . . . . . . . . . . . . . . . . . . . . . . . . . . . . P. 224
Fuel type/fuel tank capacity . . . . . . . . . . . . . . . . . . . . . . . . . . . P. 554
Tires . . . . . . . . . . . . . . . . . . . . . . . . . . . . . . . . . . . . . . . . . . P. 463
Tire size/inflation pressure . . . . . . . . . . . . . . . . . . . . . . . . . P. 558
Winter tires/tire chain . . . . . . . . . . . . . . . . . . . . . . . . . . . . . P. 370
Checking/rotation/tire pressure warning system . . . . . . . . . P. 463
Coping with flat tires . . . . . . . . . . . . . . . . . . . . . . . . . . . . . . P. 524
Hood . . . . . . . . . . . . . . . . . . . . . . . . . . . . . . . . . . . . . . . . . . . . P. 449
Opening . . . . . . . . . . . . . . . . . . . . . . . . . . . . . . . . . . . . . . . . . . P. 449
Engine oil . . . . . . . . . . . . . . . . . . . . . . . . . . . . . . . . . . . . . . . . . P. 554
Coping with overheat . . . . . . . . . . . . . . . . . . . . . . . . . . . . . . . . P. 546
Camera
* . . . . . . . . . . . . . . . . . . . . . . . . . . . . . . . . . . . . . . . . . P. 294
Headlights/daytime running lights . . . . . . . . . . . . . . . . . . . . P. 207
Parking lights . . . . . . . . . . . . . . . . . . . . . . . . . . . . . . . . . . . . . P. 207
Fog lights . . . . . . . . . . . . . . . . . . . . . . . . . . . . . . . . . . . . . . . . P. 216
Turn signal lights . . . . . . . . . . . . . . . . . . . . . . . . . . . . . . . . . . P. 205
Stop/tail lights
Hill-start assist control . . . . . . . . . . . . . . . . . . . . . . . . . . . . . . . P. 358
License plate lights . . . . . . . . . . . . . . . . . . . . . . . . . . . . . . . . P. 207
Back-up lights
Shifting the shift lever to R . . . . . . . . . . . . . . . . . . . . . . . . . . . . P. 199
Side marker lights . . . . . . . . . . . . . . . . . . . . . . . . . . . . . . . . . P. 207
4
5
6
7
8
Light bulbs of the exter ior lights for driving
(Replacing method: P. 487, Watts: P. 552)
*: If equipped
9
10
11
12
13
14
15
16
Page 85 of 608

85
LC200_OM_OM60P24U_(U)
2. Instrument cluster
2
Instrument cluster
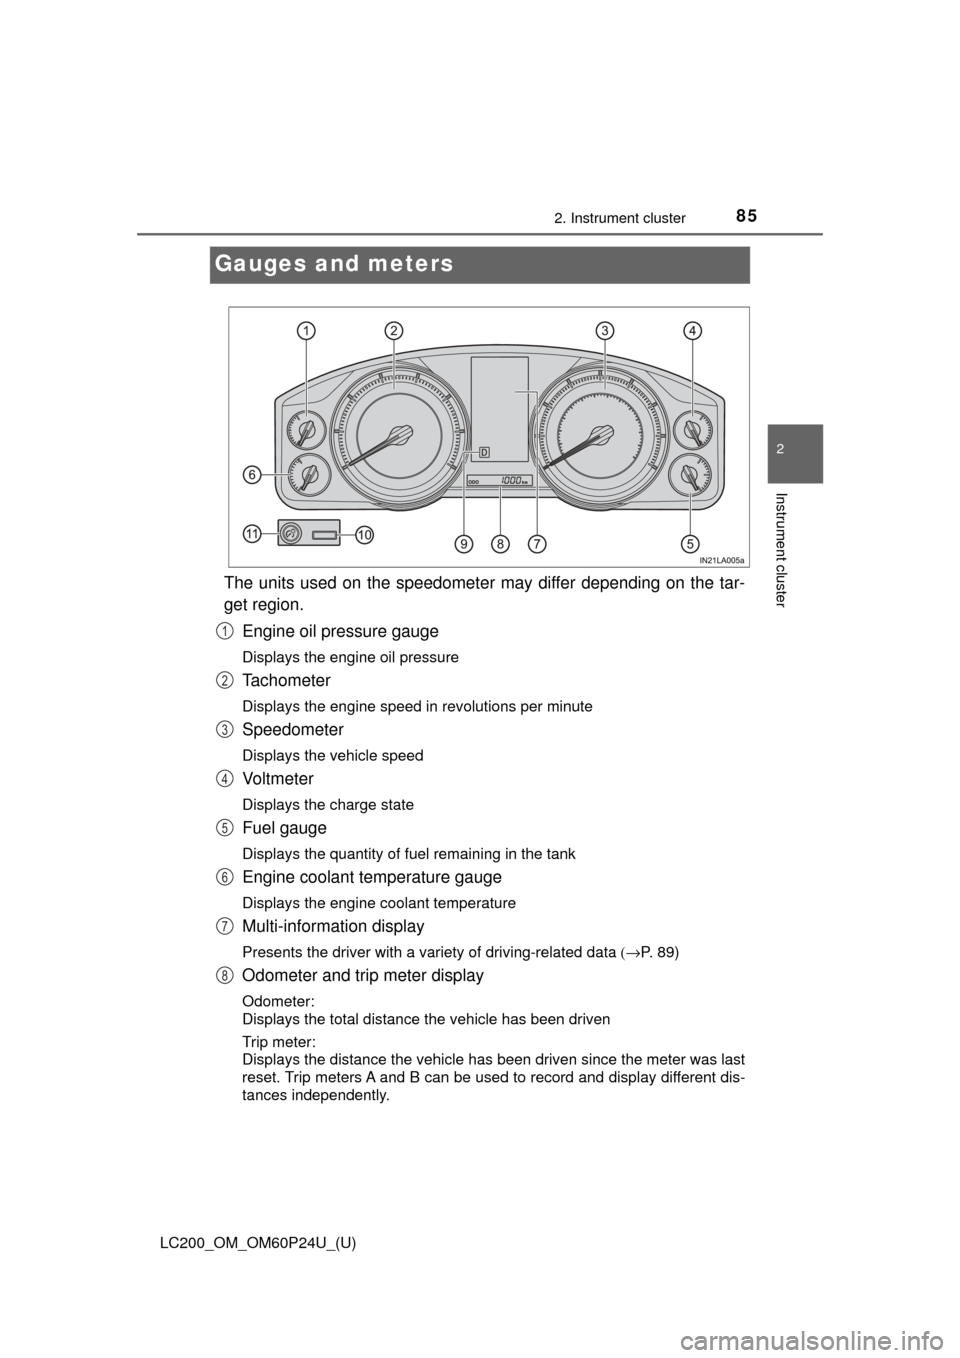
Gauges and meters
The units used on the speedometer may differ depending on the tar-
get region.Engine oil pressure gauge
Displays the engine oil pressure
Tachometer
Displays the engine speed in revolutions per minute
Speedometer
Displays the vehicle speed
Vo l t m e t e r
Displays the charge state
Fuel gauge
Displays the quantity of fuel remaining in the tank
Engine coolant temperature gauge
Displays the engine coolant temperature
Multi-information display
Presents the driver with a variety of driving-related data (→P. 89)
Odometer and trip meter display
Odometer:
Displays the total distance the vehicle has been driven
Trip meter:
Displays the distance the vehicle has been driven since the meter was last
reset. Trip meters A and B can be used to record and display different dis-
tances independently.
1
2
3
4
5
6
7
8
Page 88 of 608

88
LC200_OM_OM60P24U_(U)
2. Instrument cluster
NOTICE
■To prevent damage to the engine and its components
● Do not let the indicator needle of the tachometer enter the red zone, which
indicates the maximum engine speed.
● The engine may be overheating if the engine coolant temperature gauge is
in the red zone (H). In this case, immediately stop the vehicle in a safe
place, and check the engine after it has cooled completely. (→ P. 546)
■ Voltmeter
When the voltmeter indicates 19 V or higher or 9 V or lower while the engine
is running, there may be a battery or charging system malfunction. Have the
vehicle inspected at your Toyota dealer.
■ Engine oil pressure gauge
When the value of the engine oil pressure gauge drops while the engine is
running, stop the vehicle in a safe place immediately and check the amount
of engine oil. ( →P. 452)
When the oil pressure drops even though the engine oil amount has not
decreased, or if the oil pressure does not increase when engine oil is
added, contact your Toyota dealer, as there may be a problem with the lubri-
cation system.
Page 95 of 608

LC200_OM_OM60P24U_(U)
952. Instrument cluster
2
Instrument cluster
■Setting items
● LDA (Lane Departure Alert)
*
Select to set up LDA. ( →P. 574)
• Alert sensitivity
• Sway warning
• Sway sensitivity
● BSM (Blind Spot Monitor)
*
Select to activate/deactivate BSM. ( →P. 574)
• BSM on/off
• RCTA (Rear Cross Traffic Alert) on/off
● Scheduled maintenance
Select to reset the message indicating maintenance is required.
● Oil maintenance
Select to reset the engine oil maintenance information
● Meter settings
Select to set the following items.
• Language Select to change the language on the display.
•Units Select to change the unit for measure.
• Eco Driving Indicator Light Select to activate/deactivate th e Eco Driving Indicator Light.
(
→P. 8 4 )
• switch settings You can register 1 screen as t he top screen. To register, press
and hold while the desired screen is displayed.
• Drive information 1 and 2 Select to select up to 2 items th at will be displayed on a drive
information screen, up to 2 dr ive information screens can be
set.
• Pop-up display Select to set the pop-up displays (→ P. 96), which may appear
in some situations, on/off.
Page 122 of 608

122
LC200_OM_OM60P24U_(U)
3-2. Opening, closing and locking the doors
■Battery-saving function
The battery-saving function will be activated in order to prevent the electronic
key battery and the battery from being discharged while the vehicle is not in
operation for a long time.
●In the following situations, the smart key system may take some time to
unlock the doors.
• The electronic key has been left in an area of approximately 6 ft. (2 m) of
the outside of the vehicle for 10 minutes or longer.
• The smart key system has not been used for 5 days or longer.
● If the smart key system has not been used for 14 days or longer, the doors
cannot be unlocked at any doors except the driver’s door. In this case, take
hold of the driver’s door handle, or use the wireless remote control or the
mechanical key, to unlock the doors.
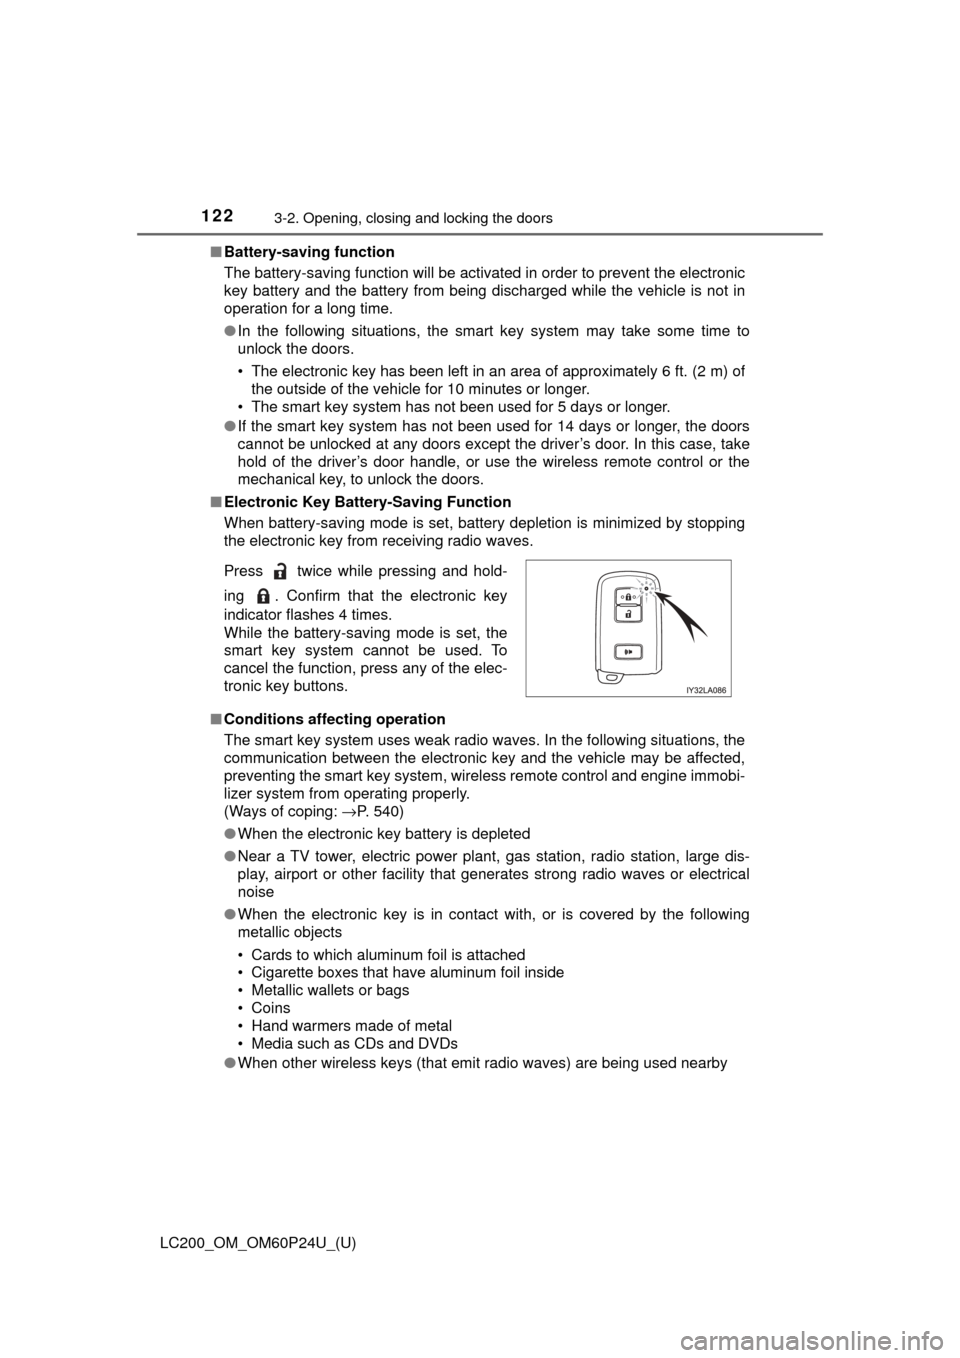
■ Electronic Key Battery-Saving Function
When battery-saving mode is set, battery depletion is minimized by stopping
the electronic key from receiving radio waves.
■ Conditions affecting operation
The smart key system uses weak radio waves. In the following situations, the
communication between the electronic key and the vehicle may be affected,
preventing the smart key system, wireless remote control and engine immobi-
lizer system from operating properly.
(Ways of coping: →P. 540)
● When the electronic key battery is depleted
● Near a TV tower, electric power plant, gas station, radio station, large dis-
play, airport or other facility that generates strong radio waves or electrical
noise
● When the electronic key is in contact with, or is covered by the following
metallic objects
• Cards to which aluminum foil is attached
• Cigarette boxes that have aluminum foil inside
• Metallic wallets or bags
• Coins
• Hand warmers made of metal
• Media such as CDs and DVDs
● When other wireless keys (that emit radio waves) are being used nearby
Press twice while pressing and hold-
ing . Confirm that the electronic key
indicator flashes 4 times.
While the battery-saving mode is set, the
smart key system cannot be used. To
cancel the function, press any of the elec-
tronic key buttons.
Page 168 of 608

168
LC200_OM_OM60P24U_(U)
4-1. Before driving
NOTICE
■When encounterin g flooded roads
Do not drive on a road that has flooded after heavy rain etc. Doing so may
cause the following serious damage to the vehicle:
● Engine stalling
● Short in electrical components
● Engine damage caused by water immersion
In the event that you drive on a flooded road and the vehicle is flooded, be
sure to have your Toyota dealer check the following:
● Brake function
● Changes in quantity and quality of oil and fluid used for the engine, trans-
mission, transfer, differentials, etc.
● Lubricant condition for the propeller shaft, bearings and suspension joints
(where possible), and the function of all joints, bearings, etc.
Page 369 of 608

LC200_OM_OM60P24U_(U)
3694-6. Driving tips
4
Driving
NOTICE
■To prevent the water damage
Take all necessary safety measures to ensure that water damage to the
engine or other components does not occur.
● Water entering the engine air intake will cause severe engine damage.
● Water entering the automatic transmission will cause deterioration in shift
quality, locking up of your transmission accompanied by vibration, and ulti-
mately damage.
● Water can wash the grease from wheel bearings, causing rusting and pre-
mature failure, and may also enter the differentials, transmission and
transfer case, reducing the gear oil’s lubricating qualities.
■ When you drive through water
If driving through water, such as when crossing shallow streams, first check
the depth of the water and the bottom of the riverbed for firmness. Drive
slowly and avoid deep water.
■ Inspection after off-road driving
● Sand and mud that has accumulated in brake drums and around brake
discs may affect braking efficiency and may damage brake system compo-
nents.
● Always perform a maintenance inspection after each day of off-road driv-
ing that has taken you through rough terrain, sand, mud, or water. For
scheduled maintenance information, refer to the “Scheduled Maintenance
Guide” or “Owner’s Manual Supplement”.
Page 370 of 608

370
LC200_OM_OM60P24U_(U)
4-6. Driving tips
Winter driving tips
●Use fluids that are appropriate to the prevailing outside tempera-
tures. • Engine oil
• Engine coolant
• Washer fluid
● Have a service technician ins pect the condition of the battery.
● Have the vehicle fitted with four snow tires or purchase a set of tire
chains for the rear tires.
Ensure that all tires are the same size and brand, and that chains match
the size of the tires.
Perform the following accordin g to the driving conditions:
● Do not try to forcibly open a window or move a wiper that is frozen.
Pour warm water over the frozen area to melt the ice. Wipe away
the water immediately to prevent it from freezing.
● To ensure proper operation of the climate control system fan,
remove any snow that has accumulated on the air inlet vents in
front of the windshield.
● Check for and remove any excess ice or snow that may have accu-
mulated on the exterior lights, vehicle’s roof, chassis, around the
tires or on the brakes.
● Remove any snow or mud from the bottom of your shoes before
getting in the vehicle.
Accelerate the vehicle slowly, keep a safe distance between you and
the vehicle ahead, and drive at a reduced speed suitable to road con-
ditions.
Carry out the necessary preparations and inspections before
driving the vehicle in winter. Al ways drive the vehicle in a man-
ner appropriate to the prevailing weather conditions.
Pre-winter preparations
Before driving the vehicle
When driving the vehicle