2017 TOYOTA LAND CRUISER buttons
[x] Cancel search: buttonsPage 122 of 608
122
LC200_OM_OM60P24U_(U)
3-2. Opening, closing and locking the doors
■Battery-saving function
The battery-saving function will be activated in order to prevent the electronic
key battery and the battery from being discharged while the vehicle is not in
operation for a long time.
●In the following situations, the smart key system may take some time to
unlock the doors.
• The electronic key has been left in an area of approximately 6 ft. (2 m) of
the outside of the vehicle for 10 minutes or longer.
• The smart key system has not been used for 5 days or longer.
● If the smart key system has not been used for 14 days or longer, the doors
cannot be unlocked at any doors except the driver’s door. In this case, take
hold of the driver’s door handle, or use the wireless remote control or the
mechanical key, to unlock the doors.
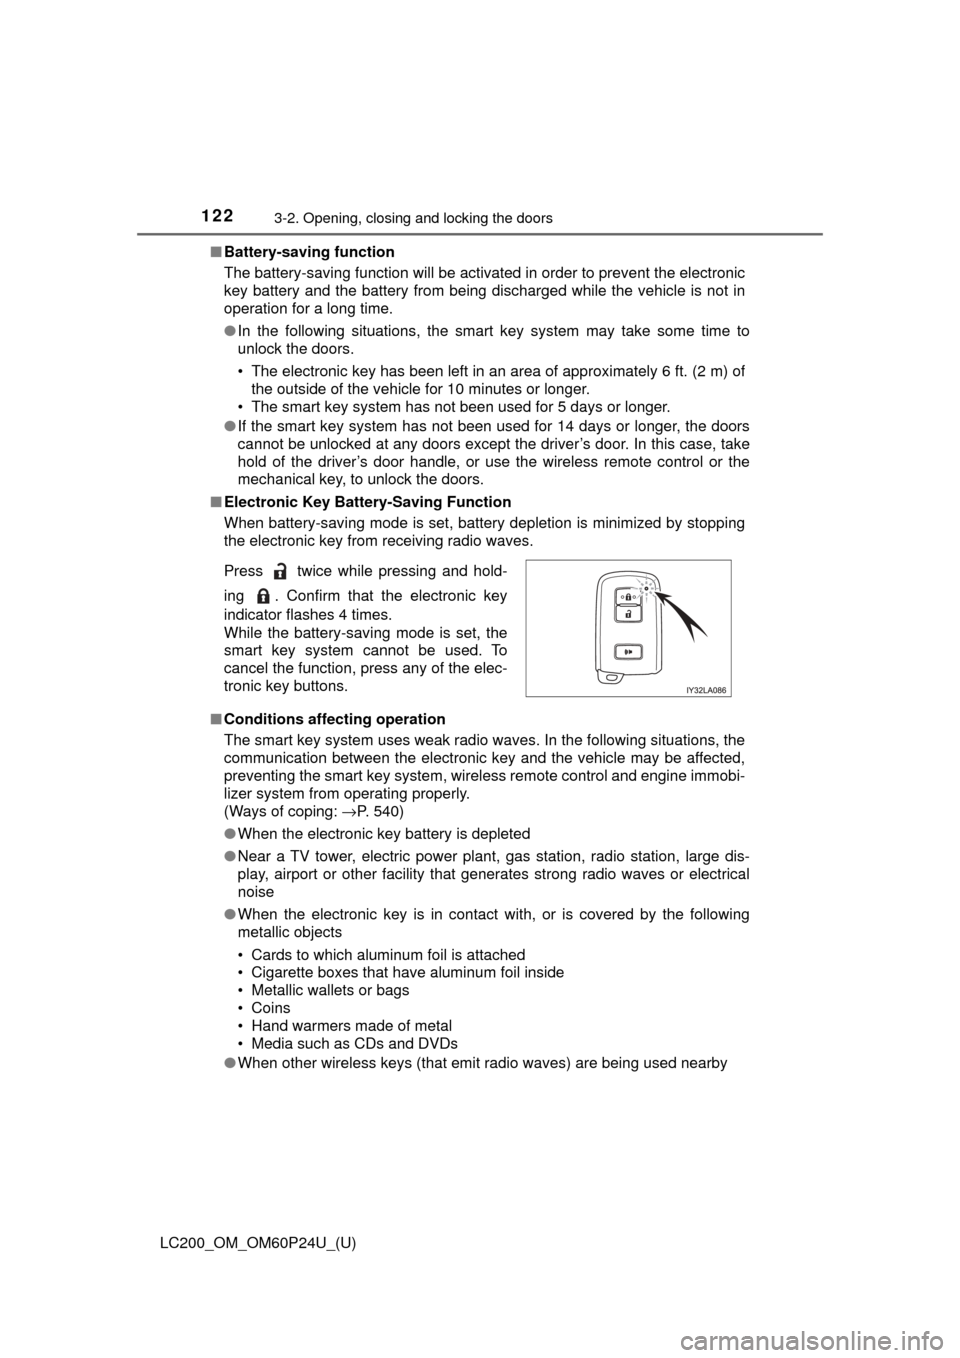
■ Electronic Key Battery-Saving Function
When battery-saving mode is set, battery depletion is minimized by stopping
the electronic key from receiving radio waves.
■ Conditions affecting operation
The smart key system uses weak radio waves. In the following situations, the
communication between the electronic key and the vehicle may be affected,
preventing the smart key system, wireless remote control and engine immobi-
lizer system from operating properly.
(Ways of coping: →P. 540)
● When the electronic key battery is depleted
● Near a TV tower, electric power plant, gas station, radio station, large dis-
play, airport or other facility that generates strong radio waves or electrical
noise
● When the electronic key is in contact with, or is covered by the following
metallic objects
• Cards to which aluminum foil is attached
• Cigarette boxes that have aluminum foil inside
• Metallic wallets or bags
• Coins
• Hand warmers made of metal
• Media such as CDs and DVDs
● When other wireless keys (that emit radio waves) are being used nearby
Press twice while pressing and hold-
ing . Confirm that the electronic key
indicator flashes 4 times.
While the battery-saving mode is set, the
smart key system cannot be used. To
cancel the function, press any of the elec-
tronic key buttons.
Page 137 of 608
LC200_OM_OM60P24U_(U)
1373-3. Adjusting the seats
3
Operation of each component
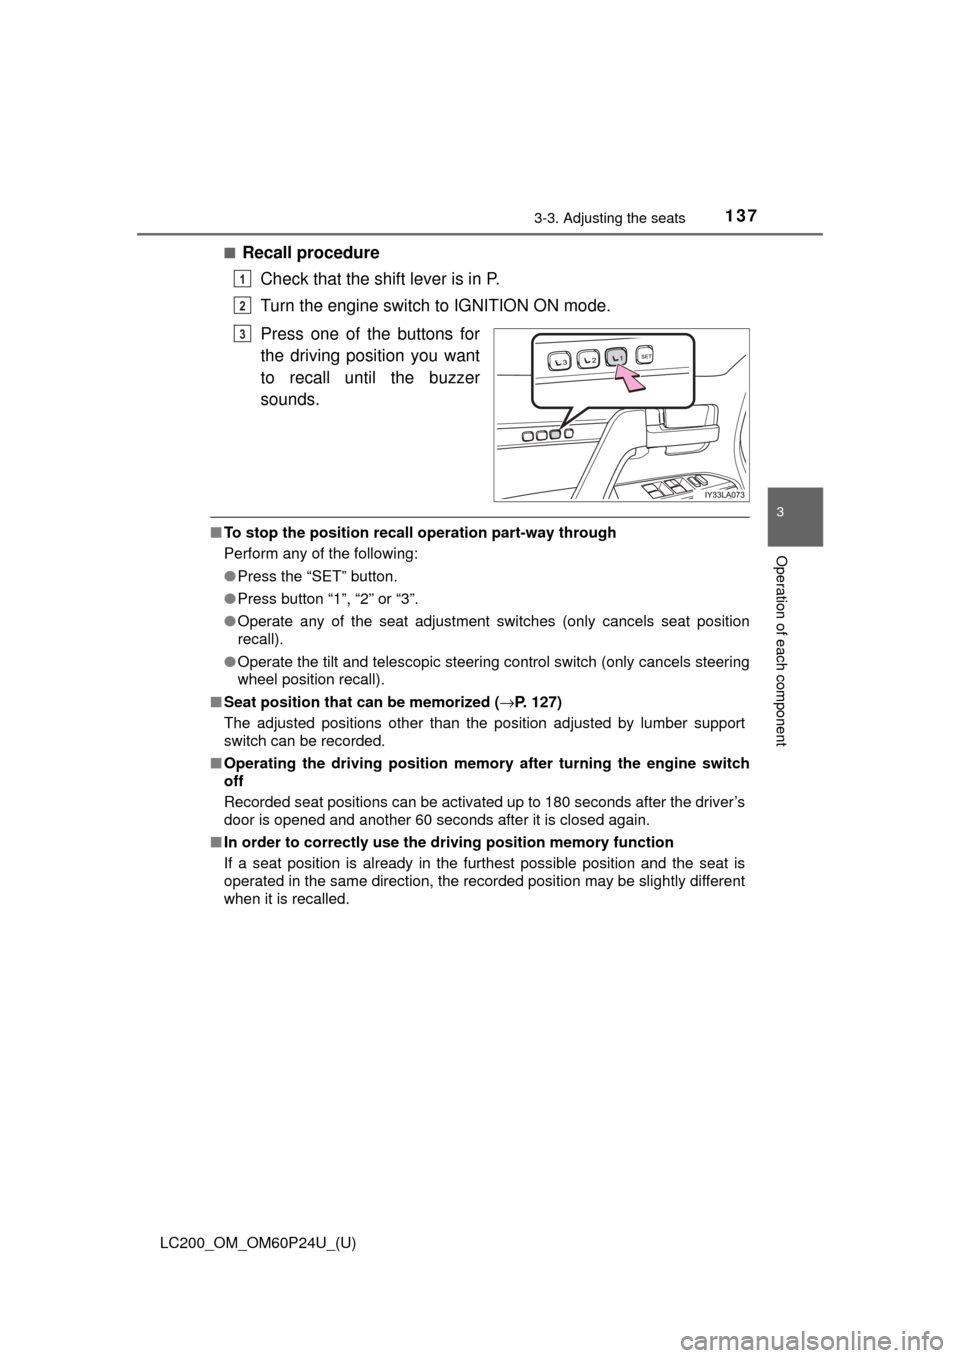
■Recall procedureCheck that the shift lever is in P.
Turn the engine switch to IGNITION ON mode.
Press one of the buttons for
the driving position you want
to recall until the buzzer
sounds.
■To stop the position recall operation part-way through
Perform any of the following:
● Press the “SET” button.
● Press button “1”, “2” or “3”.
● Operate any of the seat adjustment switches (only cancels seat position
recall).
● Operate the tilt and telescopic steering control switch (only cancels steering
wheel position recall).
■ Seat position that can be memorized ( →P. 127)
The adjusted positions other than the position adjusted by lumber support
switch can be recorded.
■ Operating the driving position memo ry after turning the engine switch
off
Recorded seat positions can be activated up to 180 seconds after the driver’s
door is opened and another 60 seconds after it is closed again.
■ In order to correctly use the dr iving position memory function
If a seat position is already in the furthest possible position and the seat is
operated in the same direction, the recorded position may be slightly different
when it is recalled.
1
2
3
Page 422 of 608
422
LC200_OM_OM60P24U_(U)
5-4. Using the other interior features
Garage door opener
The garage door opener (HomeLink Universal Transceiver) is manufac-
tured under license from HomeLink.
The HomeLink compatible transceiver in your vehicle has 3 buttons
which can be programmed to operate 3 different devices. Refer to the
programming method below appropriate for the device.
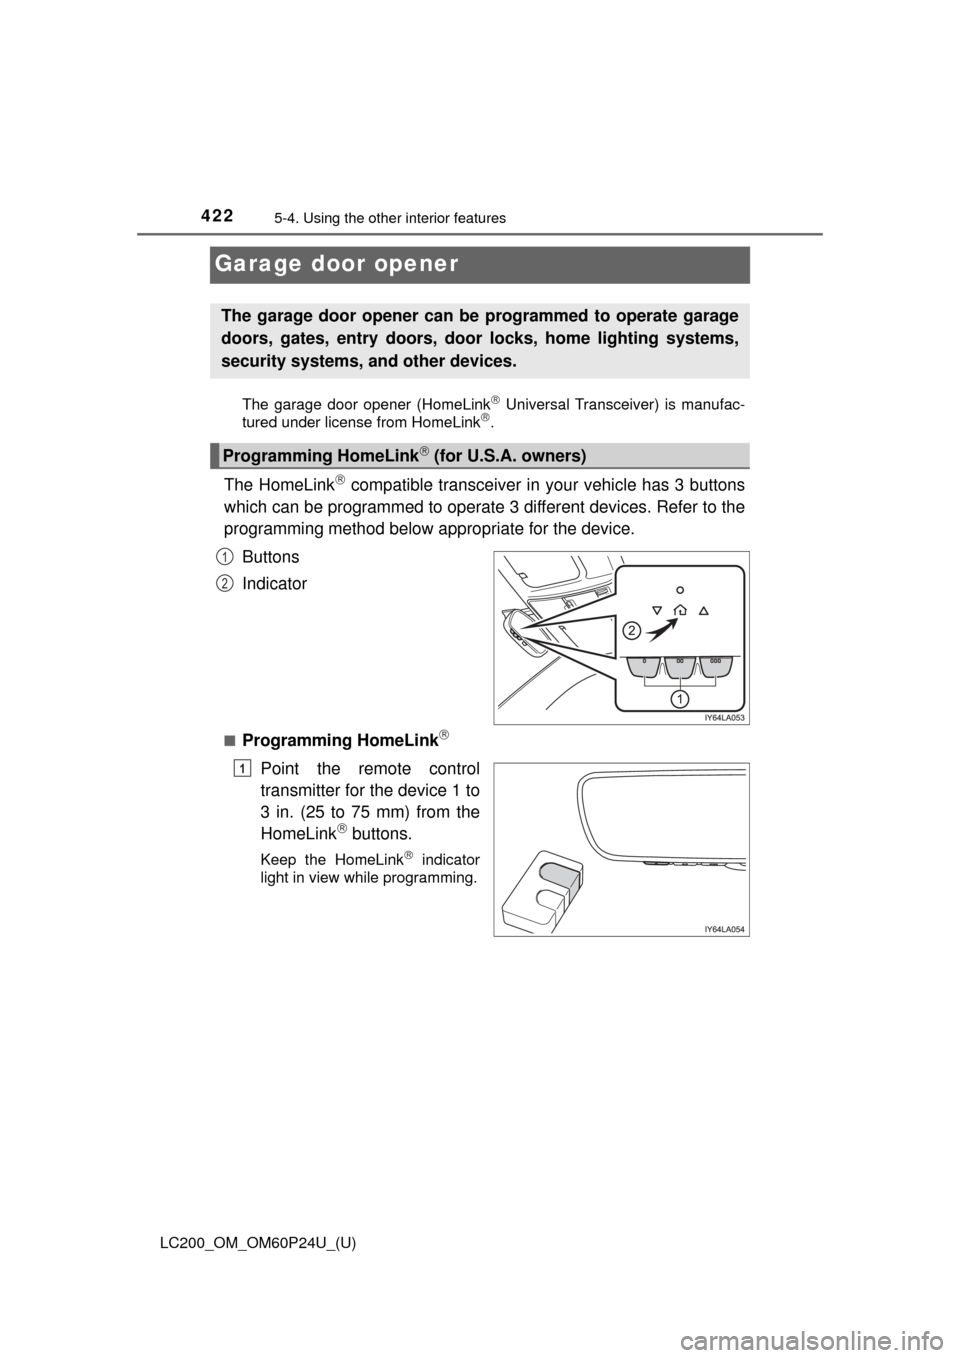
Buttons
Indicator
■Programming HomeLink
Point the remote control
transmitter for the device 1 to
3 in. (25 to 75 mm) from the
HomeLink
buttons.
Keep the HomeLink indicator
light in view while programming.
The garage door opener can be programmed to operate garage
doors, gates, entry doors, door locks, home lighting systems,
security systems, and other devices.
Programming HomeLink (for U.S.A. owners)
1
2
1
Page 423 of 608
LC200_OM_OM60P24U_(U)
4235-4. Using the other interior features
5
Interior features
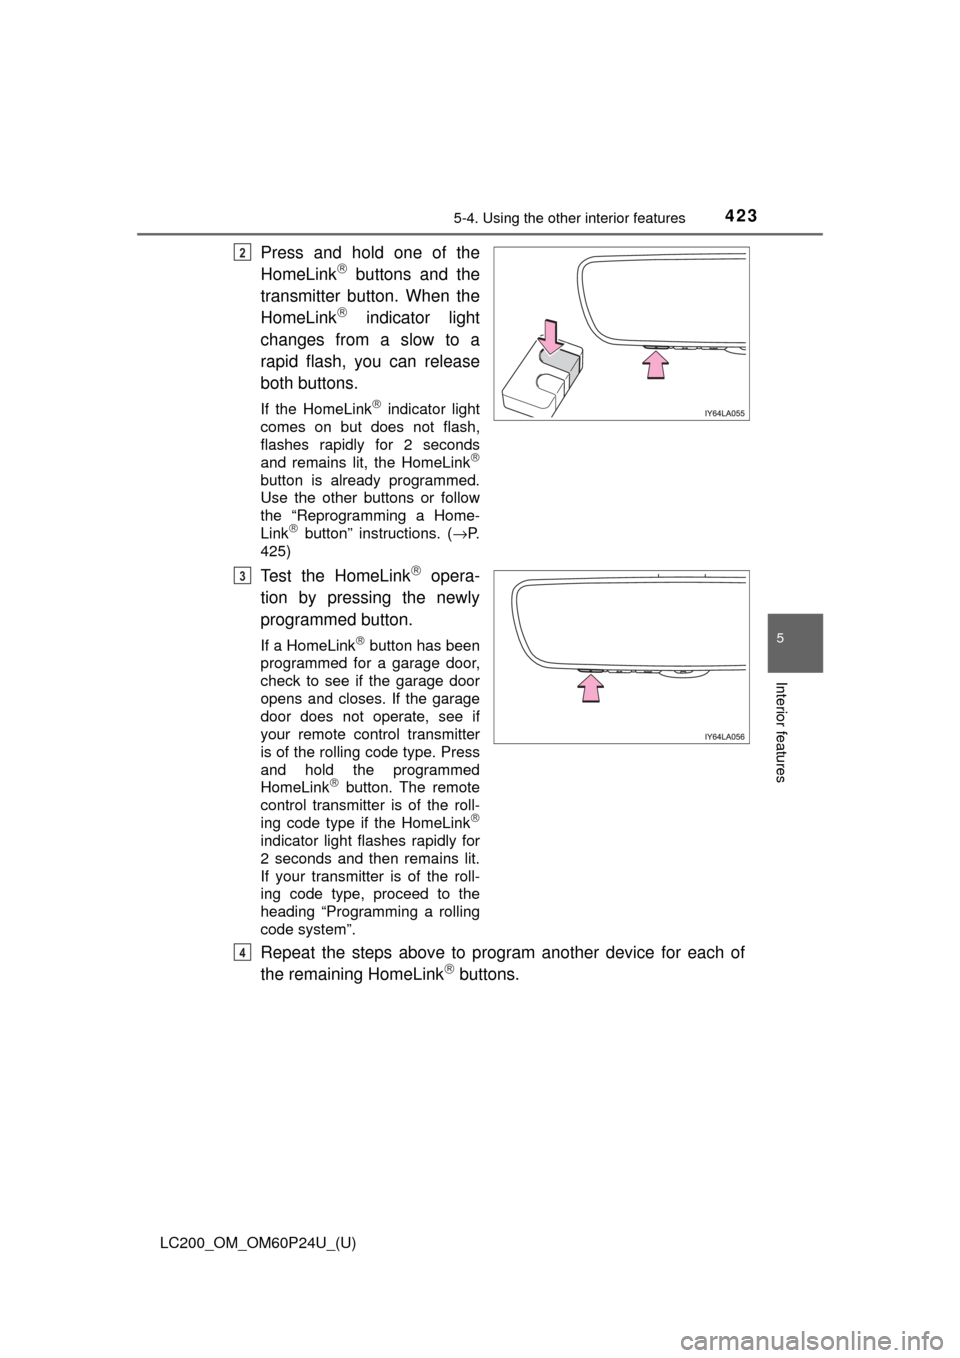
Press and hold one of the
HomeLink buttons and the
transmitter button. When the
HomeLink
indicator light
changes from a slow to a
rapid flash, you can release
both buttons.
If the HomeLink indicator light
comes on but does not flash,
flashes rapidly for 2 seconds
and remains lit, the HomeLink
button is already programmed.
Use the other buttons or follow
the “Reprogramming a Home-
Link
button” instructions. ( →P.
425)
Test the HomeLink opera-
tion by pressing the newly
programmed button.
If a HomeLink button has been
programmed for a garage door,
check to see if the garage door
opens and closes. If the garage
door does not operate, see if
your remote control transmitter
is of the rolling code type. Press
and hold the programmed
HomeLink
button. The remote
control transmitter is of the roll-
ing code type if the HomeLink
indicator light flashes rapidly for
2 seconds and then remains lit.
If your transmitter is of the roll-
ing code type, proceed to the
heading “Programming a rolling
code system”.
Repeat the steps above to program another device for each of
the remaining HomeLink buttons.
2
3
4
Page 424 of 608
424
LC200_OM_OM60P24U_(U)
5-4. Using the other interior features
■Programming a rolling code system
If your device is rolling code eq uipped, follow the steps under the
heading “Programming HomeLink
” before proceeding with the
steps listed below.
Locate the learn button on the ceiling mounted garage door
opener motor. The exact location and color of the button may
vary by brand of garage door opener motor.
Refer to the operation manual supplied with the garage door opener
motor for the location of the learn button.
Press the learn button.
Following this step, you have 30 seconds in which to initiate below.
Press and hold the vehicle’s programmed HomeLink button for
2 seconds and release it. Repea t this step once again. The
garage door may open.
If the garage door opens, the programming process is complete. If the
door does not open, press and release the button a third time. This third
press and release will complete the programming process by opening
the garage door.
The ceiling mounted garage door opener motor should now recognize
the HomeLink
signal and operate the garage door.
Repeat the steps above to program another rolling code system
for any of the remaining HomeLink buttons.
■Programming an entry gate (for U.S.A. owners)/Programming
all devices in the Canadian market
Place your transmitter 1 to 3 in. (25 to 75 mm) away from the sur-
face of the HomeLink
.
Keep the HomeLink indicator light in view while programming.
Press and hold the selected HomeLink button.
Repeatedly press and release (cyc le) the device’s remote control
button for 2 seconds each until is completed.
When the indicator light on the HomeLink
compatible trans-
ceiver starts to flash rapidly, release the buttons.
Test the operation of the HomeLink
by pressing the newly pro-
grammed button. Check to see if the gate/device operates cor-
rectly.
Repeat the steps above to program another device for each of
the remaining HomeLink
buttons.
1
2
3
3
4
1
2
3
4
4
5
6
Page 425 of 608
LC200_OM_OM60P24U_(U)
4255-4. Using the other interior features
5
Interior features
■Programming other devices
To program other devices such as home security systems, home
door locks or lighting, contact your Toyota dealer for assistance.
■Reprogramming a button
The individual HomeLink
buttons cannot be erased but can be
reprogrammed. To reprogram a button, follow the “Reprogramming
a HomeLink
button” instructions.
Press the appropriate HomeLink
button. The HomeLink indicator
light should come on.
The HomeLink compatible transceiver in your vehicle continues to send a
signal for up to 20 seconds as long as the button is pressed.
Press and hold the desired HomeLink button. After 20 seconds, the
HomeLink indicator light will start flas hing slowly. Next, while still
pressing and holding the HomeLink button, press and hold the but-
ton on the transmitter until the HomeLink indicator light changes
from a slow to a rapid flash.
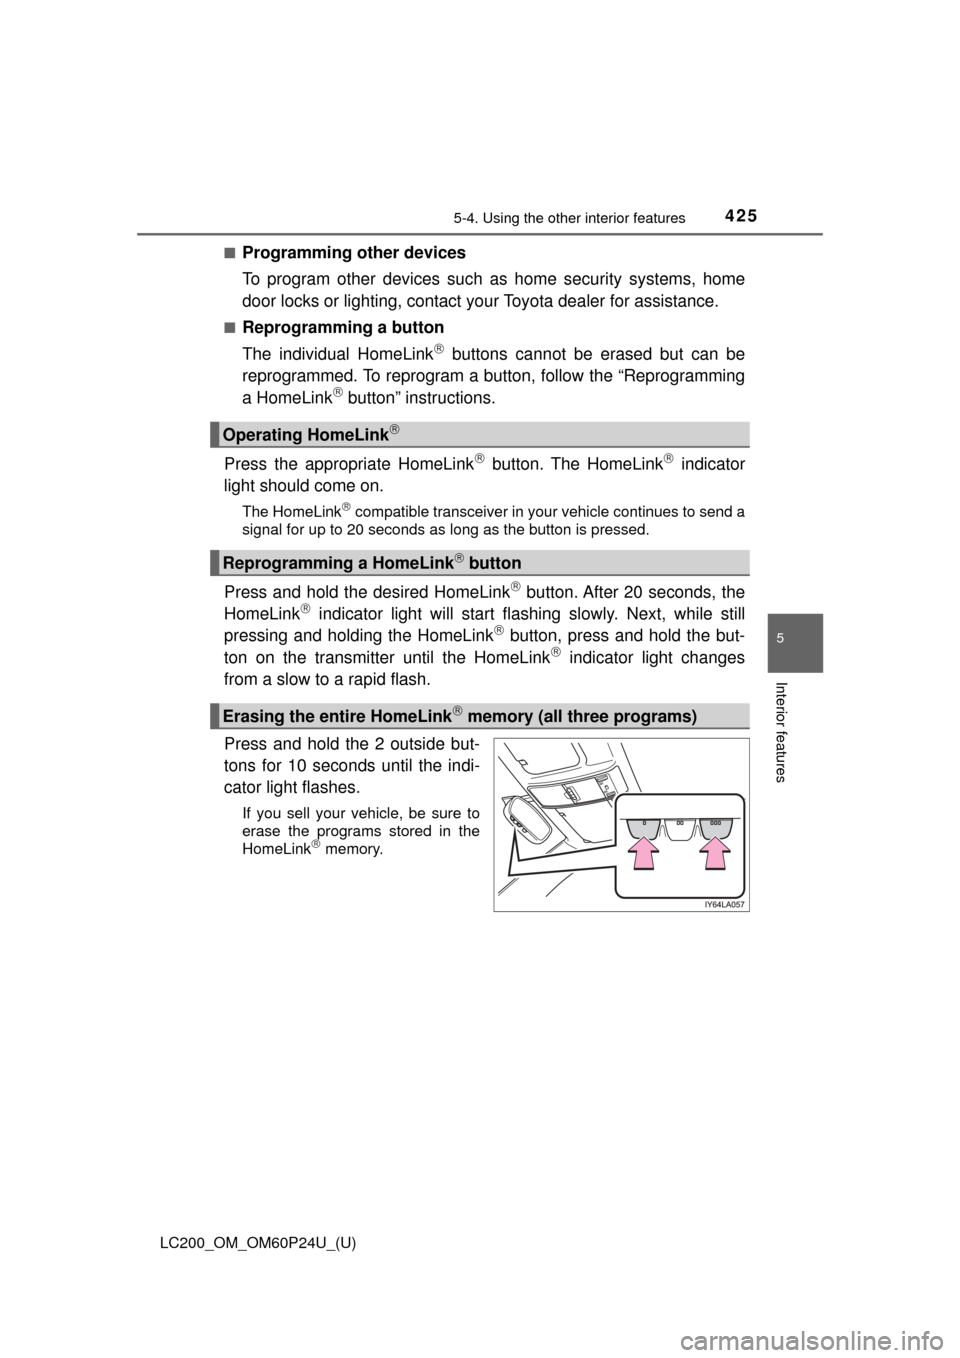
Press and hold the 2 outside but-
tons for 10 seconds until the indi-
cator light flashes.
If you sell your vehicle, be sure to
erase the programs stored in the
HomeLink
memory.
Operating HomeLink
Reprogramming a HomeLink button
Erasing the entire HomeLink memory (all three programs)
Page 604 of 608

604Alphabetical index
LC200_OM_OM60P24U_(U)
Shift leverAutomatic transmission......... 199
If the shift lever cannot be
shifted from P ..................... 203
Shift lock system ..................... 203
Side airbags ............................... 38
Side doors ................................ 106
Side marker lights ................... 207
Light switch ........................... 207
Replacing light bulbs..... 489, 497
Wattage ................................ 559
Side mirrors ............................. 147 Adjusting and folding ............ 147
Blind Spot Monitor ................ 344
Heaters ................................. 380
Mirror position memory ......... 136
Smart key system .................... 120
Antenna location ................... 120
Entry functions .............. 106, 114
Starting the engine................ 193
Snow tires ................................ 370
“SOS” button ........................... 427
Spare tire Inflation pressure .................. 558
Storage location .................... 525
Spark plug ................................ 556
Specifications .......................... 552
Speedometer .............................. 85
SRS airbags ............................... 38
Steering Column lock release ............. 196
Fluid ...................................... 558
Steering wheel ......................... 143
Adjustment ............................ 143
Audio switches
*
Heated steering wheel .......... 390
Meter control switches ............ 91
Telephone switches
*
Stop/tail lightsReplacing light bulbs ............ 497
Storage feature ........................ 396
Stuck If the vehicle becomes
stuck ................................... 549
Sun visors ................................ 408
Sunshade Roof ...................................... 155
Switch Audio remote control
switches
*
Automatic High Beam switch ................................. 211
Center differential lock/unlock switch .............. 282
Clock adjustment buttons ..... 409
Cruise control switch .... 270, 258
Door lock switch ................... 108
Driving position memory
switches ............................. 136
Emergency flashers switch ................................. 500
Engine switch ....................... 193
Fog light switch ..................... 216
Four-wheel drive control switch ................................. 281
Garage door opener switches ............................. 422
Headlight cleaner switch....... 223
Heated steering wheel .......... 389
Interior light switch ................ 394
Intuitive parking assist .......... 273
Ignition switch ....................... 193
LDA (Lane Departure Alert)................................... 252
Light switches ....................... 207