Page 4 of 505

TABLE OF CONTENTSIndex
86_EE (OM18071E)
4
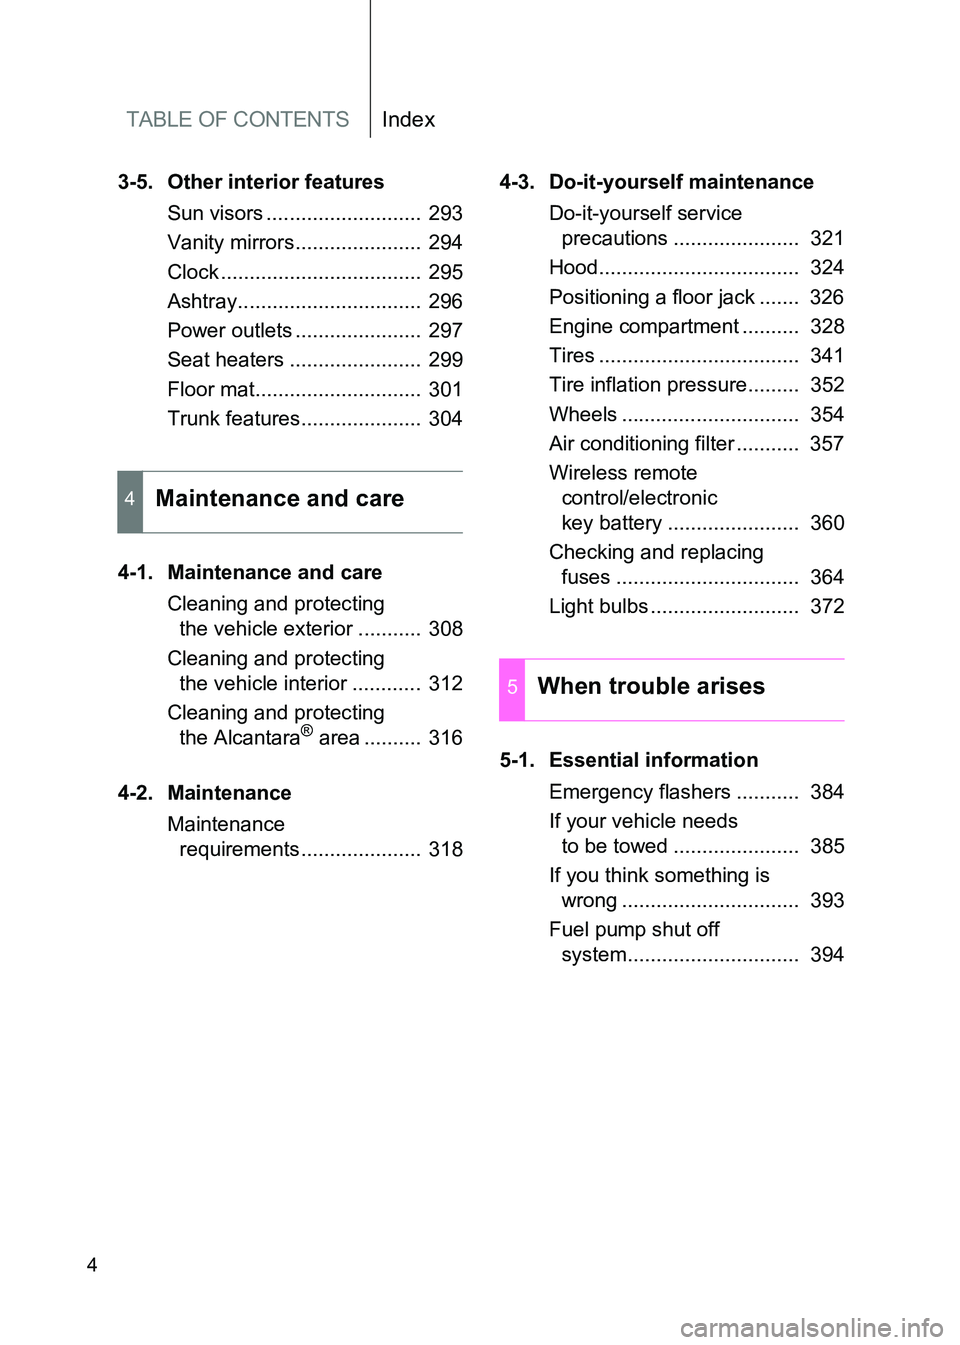
3-5. Other interior featuresSun visors ........................... 293
Vanity mirrors...................... 294
Clock ................................... 295
Ashtray................................ 296
Power outlets ...................... 297
Seat heaters ....................... 299
Floor mat............................. 301
Trunk features..................... 304
4-1. Maintenance and care Cleaning and protecting the vehicle exterior ........... 308
Cleaning and protecting the vehicle interior ............ 312
Cleaning and protecting the Alcantara
® area .......... 316
4-2. Maintenance Maintenance requirements..................... 318 4-3. Do-it-yourself maintenance
Do-it-yourself service precautions ...................... 321
Hood................................... 324
Positioning a floor jack ....... 326
Engine compartment .......... 328
Tires ................................... 341
Tire inflation pressure......... 352
Wheels ............................... 354
Air conditioning filter ........... 357
Wireless remote control/electronic
key battery ....................... 360
Checking and replacing fuses ................................ 364
Light bulbs .......................... 372
5-1. Essential information Emergency flashers ........... 384
If your vehicle needs to be towed ...................... 385
If you think something is wrong ............................... 393
Fuel pump shut off system.............................. 394
4Maintenance and care
5When trouble arises
Page 197 of 505
197
2-1. Driving procedures
2
When driving
86_EE (OM18071E)
Tur n signal lever
■Turn signals can be operated when
Vehicles without a smart entry & start system
The engine switch is in the “ON” position.
Vehicles with a smart entry & start system
The “ENGINE START STOP” switch is in IGNITION ON mode.
■ If the indicators flash faster than usual
Check that a light bulb in the turn signal lights has not burned out. The turn signal lever can be used to show the following intentions of
the driver:
Right turn
Left turn
Lane change to the right
(push and hold the lever
partway)
The right hand signals will
flash until you release the
lever.
Lane change to the left
(push and hold the lever
partway)
The left hand signals will flash
until you release the lever.
Page 307 of 505
4Maintenance and care
307
86_EE (OM18071E)
4-1. Maintenance and careCleaning and protecting the vehicle exterior ......... 308
Cleaning and protecting the vehicle interior .......... 312
Cleaning and protecting the Alcantara
® area ........ 316
4-2. Maintenance Maintenance requirements................... 318
4-3. Do-it-yourself maintenance
Do-it-yourself service precautions ..................... 321
Hood ................................. 324
Positioning a floor jack ...... 326
Engine compartment......... 328
Tires .................................. 341
Tire inflation pressure ....... 352
Wheels .............................. 354
Air conditioning filter ......... 357
Wireless remote control/ electronic key battery...... 360
Checking and replacing fuses ............................... 364
Light bulbs ........................ 372
Page 321 of 505

321
4
Maintenance and care
86_EE (OM18071E)
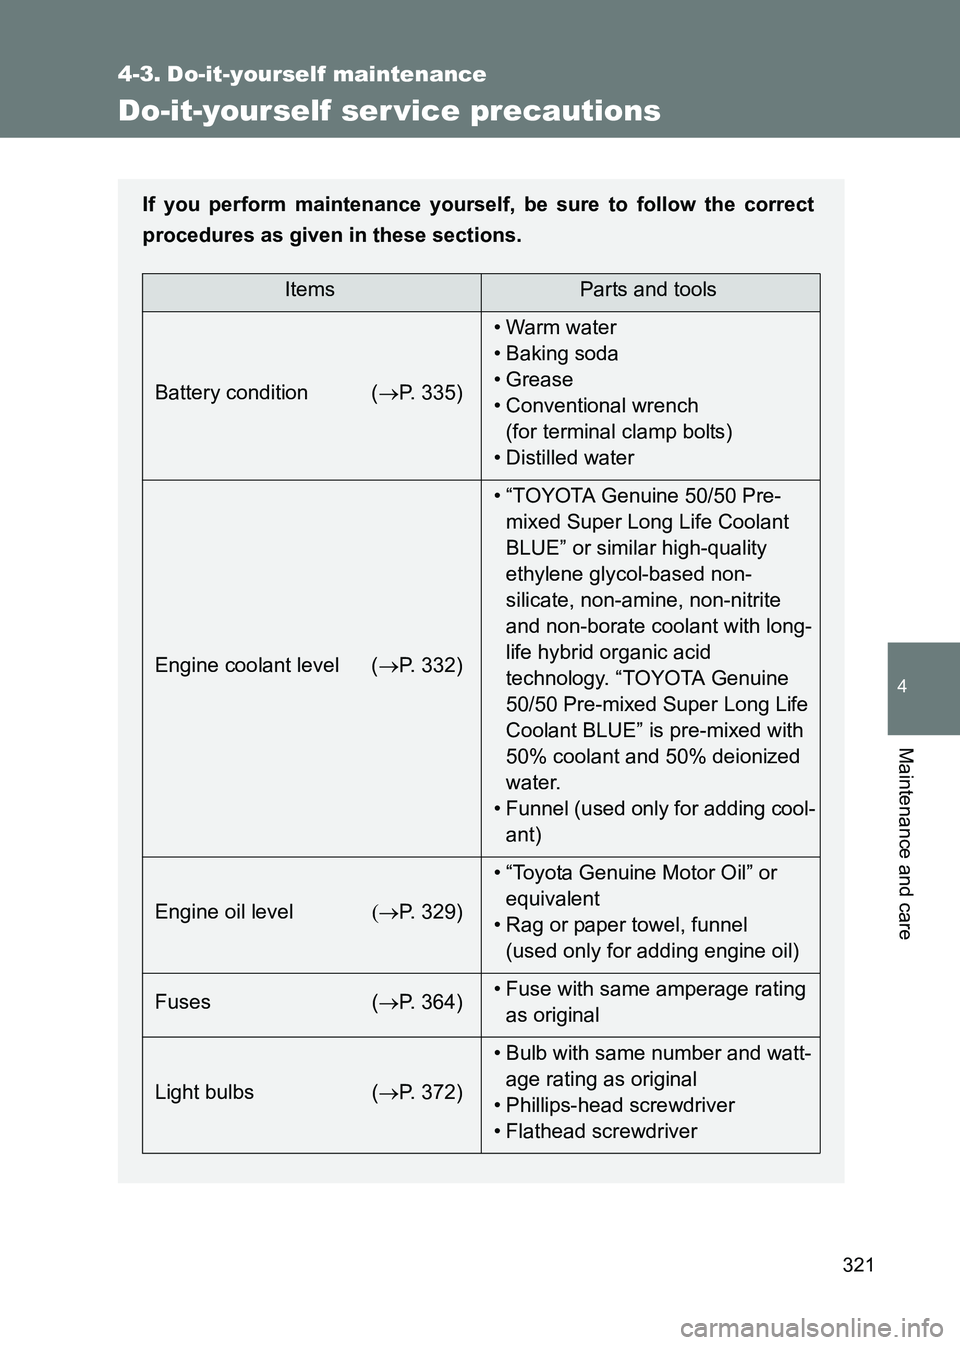
4-3. Do-it-yourself maintenance
Do-it-yourself ser vice precautions
If you perform maintenance yourself, be sure to follow the correct
procedures as given in these sections.
ItemsParts and tools
Battery condition ( →P. 335) •Warm water
• Baking soda
• Grease
• Conventional wrench
(for terminal clamp bolts)
• Distilled water
Engine coolant level ( →P. 332) • “TOYOTA Genuine 50/50 Pre-
mixed Super Long Life Coolant
BLUE” or similar high-quality
ethylene glycol-based non-
silicate, non-amine, non-nitrite
and non-borate coolant with long-
life hybrid organic acid
technology. “TOYOTA Genuine
50/50 Pre-mixed Super Long Life
Coolant BLUE” is pre-mixed with
50% coolant and 50% deionized
water.
• Funnel (used only for adding cool- ant)
Engine oil level (→P. 329) • “Toyota Genuine Motor Oil” or
equivalent
• Rag or paper towel, funnel (used only for adding engine oil)
Fuses ( →P. 364) • Fuse with same amperage rating
as original
Light bulbs ( →P. 372) • Bulb with same number and watt-
age rating as original
• Phillips-head screwdriver
• Flathead screwdriver
Page 371 of 505

371
4-3. Do-it-yourself maintenance
4
Maintenance and care
86_EE (OM18071E)
■
After a fuse is replaced
●If the lights do not turn on even after the fuse has been replaced, a bulb
may need replacement. ( →P. 372)
● If the replaced fuse blows again, have the vehicle inspected by any
authorized Toyota dealer or repairer, or another duly qualified and
equipped professional.
■ If there is an overload in the circuits
The fuses are designed to blow, protecting the wiring harness from damage.
WARNING
■To prevent system breakdowns and vehicle fire
Observe the following precautions.
Failing to do so may cause damage to the vehicle, and possibly a fire or
injury.
●Never use a fuse of a higher amperage rating than indicated, or use any
other object in place of a fuse.
● Always use a genuine Toyota fuse or equivalent.
● Do not modify the fuse or the fuse box.
NOTICE
■Before replacing fuses
Have the cause of electrical overload determined and repaired by any autho-
rized Toyota dealer or repairer, or another duly qualified and equipped pro-
fessional.
Page 372 of 505
372
4-3. Do-it-yourself maintenance
86_EE (OM18071E)
Light bulbs
You may replace the following bulbs by yourself. The difficulty level
of replacement varies depending on the bulb. As there is a danger
that components may be damaged, we recommend that replacement
is carried out by any authorized Toyota dealer or repairer, or another
duly qualified and equipped professional.
■Preparing a replacement light bulb
Check the wattage of the light bulb being replaced. ( →P. 484)
■ Front bulb locations
Side turn
signal lights
Page 373 of 505
373
4-3. Do-it-yourself maintenance
4
Maintenance and care
86_EE (OM18071E)
■
Rear bulb locations
Back-up lights License
plate
lights
Rear fog
light
Page 374 of 505
374
4-3. Do-it-yourself maintenance
86_EE (OM18071E)
Replacing light bulbs
■ Side turn signal lights
Turn the steering wheel in the
opposite direction of the light to
be replaced.
Turn the steering wheel to a point
that allows your hand to easily fit
between the tire and fender liner.
Remove the clip and partly
remove the fender liner.
To prevent damage to the vehicle,
cover the tip of the screwdriver
with a rag.
Release the light’s claw.
Insert the screwdriver into the
hole. While firmly pushing the
screwdriver forward, move it
towards the inside of the vehicle.
To prevent damage to the vehicle,
wrap the tip of the screwdriver
with a tape.
STEP 1
STEP 2
STEP 3