2017 TOYOTA AVALON AUX
[x] Cancel search: AUXPage 9 of 304

9
AVA L O N _ N a v i _ U
1
2
3
4
5
6
7
9
8
3. MEDIA OPERATION ....................... 96
CD ......................................................... 96
USB MEMORY ...................................... 99
iPod ..................................................... 103
Bluetooth
® AUDIO ............................... 107
AUX ..................................................... 113
4. AUDIO REMOTE CONTROLS ...... 115
STEERING SWITCHES ...................... 115
5. SETUP ........................................... 118
AUDIO SETTINGS .............................. 118
6. TIPS FOR OPERATING THE AUDIO SYSTEM .................. 120
OPERATING INFORMATION ............. 120
1. VOICE COMMAND SYSTEM
OPERATION ................................ 130
VOICE COMMAND SYSTEM .............. 130
CASUAL SPEECH
RECOGNIZATION ............................ 136
COMMAND LIST ................................. 137
2. MOBILE ASSISTANT OPERATION ................................ 139
MOBILE ASSISTANT .......................... 139
1. USEFUL INFORMATION............... 142
RECEIVING WEATHER
INFORMATION ................................. 142
RECEIVING TRAFFIC MAP INFORMATION ................................. 144
DATA SERVICES SETTINGS ............. 145
1. REAR VIEW MONITOR SYSTEM ....... ............................ ... 148
REAR VIEW MONITOR SYSTEM ....... 148
REAR VIEW MONITOR SYSTEM
PRECAUTIONS ................................ 150
THINGS YOU SHOULD KNOW .......... 155
2. TOYOTA PARKING ASSIST MONITOR .................................... 156
TOYOTA PARKING ASSIST
MONITOR ......................................... 156
ESTIMATED COURSE LINE DISPLAY MODE ............................... 161
PARKING ASSIST GUIDE LINE DISPLAY MODE ............................... 163
TOYOTA PARKING ASSIST MONITOR PRECAUTIONS............... 165
THINGS YOU SHOULD KNOW .......... 170
1. PHONE OPERATION (HANDS-FREE SYSTEM FOR
CELLULAR PHONES) ................ 174
QUICK REFERENCE .......................... 174
SOME BASICS .................................... 175
CALLING ON THE Bluetooth
®
PHONE .............................................. 179
RECEIVING ON THE Bluetooth
®
PHONE .............................................. 185
TALKING ON THE Bluetooth
®
PHONE .............................................. 186
Bluetooth
® PHONE MESSAGE
FUNCTION ........................................ 189
2. SETUP........................................... 194
PHONE/MESSAGE SETTINGS .......... 194
3. WHAT TO DO IF... ....................... 206
TROUBLESHOOTING ......................... 206
4VOICE COMMAND SYSTEM
5INFORMATION
6PERIPHERAL MONITORING
SYSTEM
7PHONE
Page 48 of 304

48
2. Bluetooth® SETTINGS
AVA L O N _ N a v i _ U
U.S.A.
Canada
CERTIFICATION
FCC ID: ACJ932YEAP01A727
This device complies with part 15 of the
FCC Rules. Operation is subject to the
following two conditions: (1) This device
may not cause harmful interference,
and (2) this device must accept any
interference received, including
interference that may cause undesired
operation.
CAUTION:
FCC WARNING:
Changes or modifications not expressly
approved by the party responsible for
compliance could void the user’s
authority to operate the equipment.
Radio frequency radiation exposure
information:
This equipment complies with FCC radi-
ation exposure limits set forth for an
uncontrolled environment. This equip-
ment should be installed and operated
with minimum distance of 20cm
between the radiator and your body.
This transmitter must not be co-located
or operated in conjunction with any
other antenna or transmitter.
NOTE:
This device complies with Industry Can-
ada licence-exempt RSS standard(s).
Operation is subject to the following two
conditions: (1) this device may not
cause interference, and (2) this device
must accept any interference, including
interference that may cause undesired
operation of the device.
Le present appareil est conforme aux
CNR d'Industrie Canada applicables
aux appareils radio exempts de licence.
L'exploitation est autorisee aux deux
conditions suivantes: (1) l'appareil ne
doit pas produire de brouillage, et (2)
l'utilisateur de l'appareil doit accepter
tout brouillage radioelectrique subi,
meme si le brouillage est susceptible
d'en compromettre le fonctionnement.
This radio transmitter (identify the
device by certification number, or model
number if Category II) has been
approved by Industry Canada to oper-
ate with the antenna types listed below
with the maximum permissible gain and
required antenna impedance for each
antenna type indicated. Antenna types
not included in this list, having a gain
greater than the maximum gain indi-
cated for that type, are strictly prohibited
for use with this device.
Le present emetteur radio (identifier le
dispositif par son numero de certifica-
tion ou son numero de modele s'il fait
partie du materiel de categorie II) a ete
approuve par Industrie Canada pour
fonctionner avec les types d'antenne
enumeres ci-dessous et ayant un gain
admissible maximal et l'impedance req-
uise pour chaque type d'antenne. Les
types d'antenne non inclus dans cette
liste, ou dont le gain est superieur au
gain maximal indique, sont strictement
interdits pour l'exploitation de l'emetteur.
Page 61 of 304

61
3. OTHER SETTINGS
AVA L O N _ N a v i _ U
BASIC FUNCTION
2
■SETTINGS THE SCREEN OFF IM-
AGES
1Display the “General Settings” screen.
(→P.57)
2Select “Customize Screen Off Im-
age” .
3Select the desired image.
4Select “OK”.
■DELETING TRANSFERRED IMAG-
ES
1Display the “General Settings” screen.
(→P.57)
2Select “Customize Screen Off Im-
age” .
3Select “Delete All”.
4Select “Yes”.
NOTICE
●Depending on the size and shape of the
device that is connected to the system,
the auxiliary box may not close fully. In
this case, do not forcibly close the auxil-
iary box as this may damage the device
or the terminal, etc.
INFORMATION
●When saving the images to a USB,
name the folder that the screen off
image is saved to “DisplayOffImage”. If
these folder names are not used, the
system cannot download the images.
(The folder names are case sensitive.)
● The compatible file extensions are JPG
and JPEG.
● Image files of 5 MB or less can be trans-
ferred.
● Up to 3 images can be downloaded.
● Files with non-ASCII filenames can not
be downloaded.
Page 70 of 304

70
AVA L O N _ N a v i _ U
1. QUICK REFERENCE ..................... 72
2. SOME BASICS............................... 73
TURNING THE SYSTEM ON AND OFF ...................................... 74
SELECTING AN AUDIO SOURCE ........ 74
DISC SLOT ............................................ 75
USB/AUX PORT .................................... 76
SOUND SETTINGS ............................... 76
VOICE COMMAND SYSTEM ................ 78
1. AM/FM RADIO ............................... 79
OVERVIEW ............................................ 79
PRESETTING A STATION .................... 82
SELECTING A STATION FROM THE LIST ............................................. 82
CACHING A RADIO PROGRAM ........... 83
RADIO BROADCAST DATA SYSTEM .............................................. 84
TRAFFIC ANNOUNCEMENT (FM RADIO) ......................................... 85
USING HD Radio™ TECHNOLOGY...... 85
AVAILABLE HD Radio™ TECHNOLOGY.................................... 86
TROUBLESHOOTING GUIDE ............... 88
2. XM Satellite Radio ........................ 89
OVERVIEW ............................................ 89
HOW TO SUBSCRIBE TO AN XM Satellite Radio ......................... 91
DISPLAYING THE RADIO ID................. 93
PRESETTING A CHANNEL ................... 93
SELECTING A CHANNEL FROM THE LIST ............................................. 93
IF THE SATELLITE RADIO TUNER MALFUNCTIONS ................................ 94
3. INTERNET RADIO......................... 95
LISTENING TO INTERNET RADIO ....... 95
1BASIC OPERATION2RADIO OPERATION
3
AUDIO SYSTEM
Page 71 of 304

3
71
AVA L O N _ N a v i _ U
4
5
6
7
8
9
1
2
3
1. CD .................................................. 96
OVERVIEW ........................................... 96
PLAYING AN AUDIO CD ...................... 98
PLAYING AN MP3/WMA/AAC DISC.................................................... 98
2. USB MEMORY ............................... 99
OVERVIEW ........................................... 99
PLAYING A USB AUDIO ..................... 102
3. iPod .............................................. 103
OVERVIEW ......................................... 103
iPod AUDIO ......................................... 106
4. Bluetooth® AUDIO ...................... 107
OVERVIEW ......................................... 107
CONNECTING A Bluetooth®
DEVICE ............................................. 112
LISTENING TO Bluetooth
® AUDIO ..... 112
5. AUX .............................................. 113
OVERVIEW ......................................... 113
1. STEERING SWITCHES............... 115
1. AUDIO SETTINGS ...................... 118
AUDIO SETTINGS SCREEN............... 118
1. OPERATING INFORMATION ..... 120
RADIO.................................................. 120
CD PLAYER AND DISC ...................... 121
iPod ...................................................... 123
FILE INFORMATION ........................... 124
TERMS ................................................ 127
ERROR MESSAGES ........................... 128
3MEDIA OPERATION4AUDIO REMOTE CONTROLS
5SETUP
6TIPS FOR OPERATING
THE AUDIO SYSTEM
AUDIO SYSTEM
Page 72 of 304

72
AVA L O N _ N a v i _ U
1. BASIC OPERATION
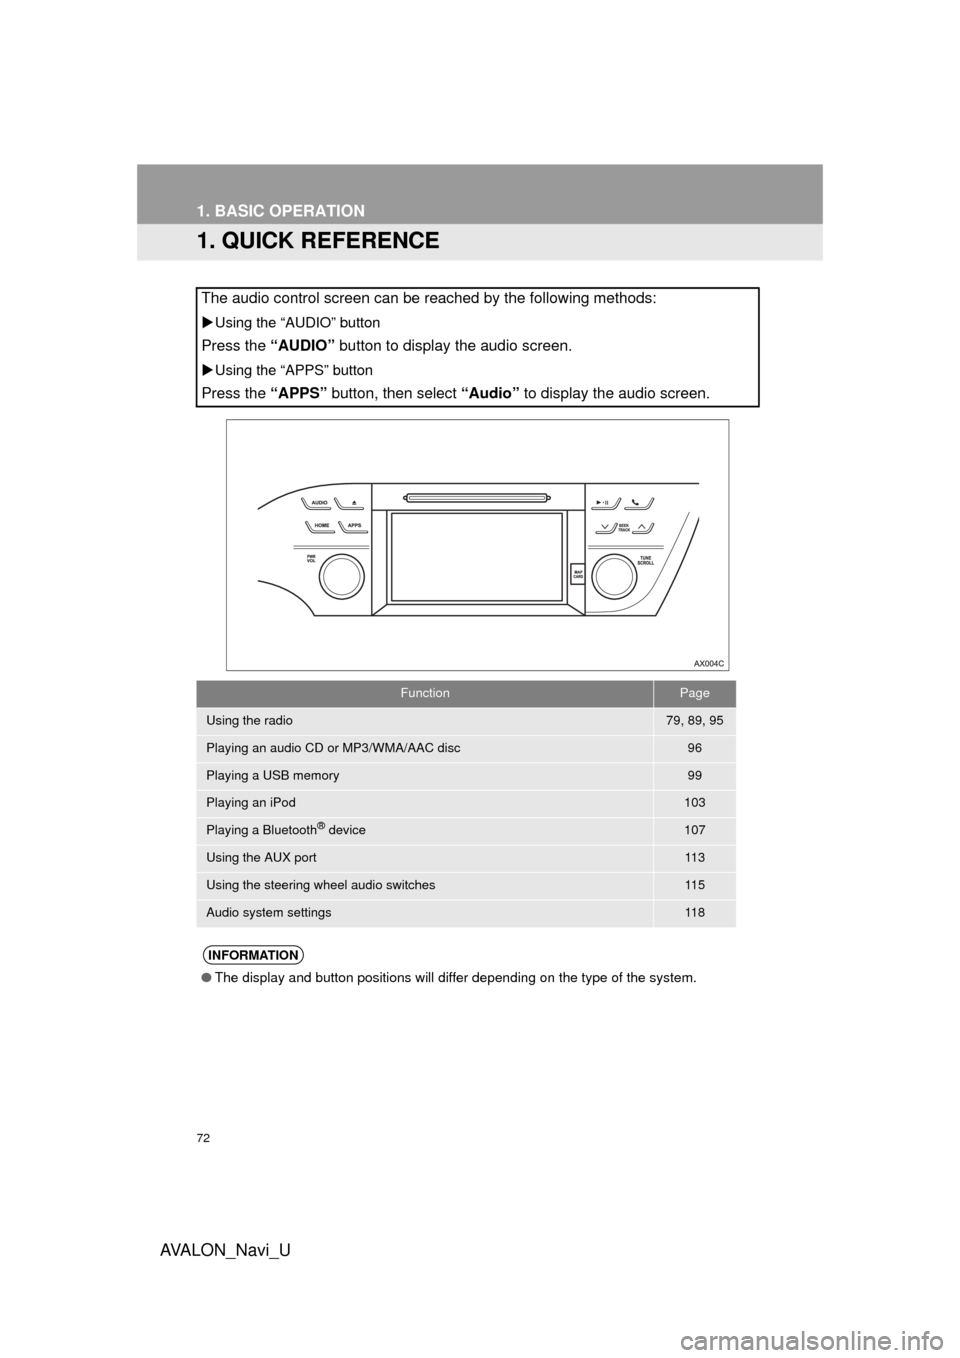
1. QUICK REFERENCE
The audio control screen can be reached by the following methods:
Using the “AUDIO” button
Press the “AUDIO” button to display the audio screen.
Using the “APPS” button
Press the “APPS” button, then select “Audio” to display the audio screen.
FunctionPage
Using the radio79, 89, 95
Playing an audio CD or MP3/WMA/AAC disc96
Playing a USB memory99
Playing an iPod103
Playing a Bluetooth® device107
Using the AUX port11 3
Using the steering wheel audio switches11 5
Audio system settings11 8
INFORMATION
●The display and button positions will differ depending on the type of the system.
Page 76 of 304

76
1. BASIC OPERATION
AVA L O N _ N a v i _ U
1Push the tray forward until it locks.
2Open the cover and connect a device.
Turn on the power of the device if it is not
turned on.
1Display the “Audio Settings” screen.
(→ P.118)
Type A
2Select “Automatic Sound Levelizer” .
3Select “High”, “Mid” , “Low” , or
“Off” .
Type B
2Select “Auto Sound Levelizer” .
1Display the “Audio Settings” screen.
(→P.118)
2Select “Surround” .
USB/AUX PORT
NOTICE
●Depending on the size and shape of the
device that is connected to the system,
the auxiliary box may not close fully. In
this case, do not forcibly close the auxil-
iary box as this may damage the device
or the terminal, etc.
INFORMATION
●If a USB hub is plugged-in, two devices
can be connected at a time.
● Even if a USB hub is used to connect
more than two USB devices, only the
first two connected devices will be rec-
ognized.
SOUND SETTINGS
AUTOMATIC SOUND
LEVELIZER (ASL)
The system adjusts to the optimum vol-
ume and tone quality according to ve-
hicle speed to compensate for
increased vehicle noise.
SURROUND*
*: If equipped
Page 101 of 304

101
3. MEDIA OPERATION
AVA L O N _ N a v i _ U
AUDIO SYSTEM
3
WA R N I N G
●Do not operate the player’s controls or connect the USB memory while driving.
NOTICE
●Depending on the size and shape of the USB memory that is connected to the system,
the auxiliary box may not close fully. In this case, do not forcibly close the auxiliary box as
this may damage the USB memory or the terminal, etc.
● Do not leave your portable player in the car. In particular, high temperatures inside the
vehicle may damage the portable player.
● Do not push down on or apply unnecessary pressure to the portable player while it is con-
nected as this may damage the portable player or its terminal.
● Do not insert foreign objects into the port as this may damage the portable player or its
terminal.
INFORMATION
●If tag information exists, the file names will be changed to track names.