Page 357 of 528

3576-3. Do-it-yourself maintenance
6
Maintenance and care
4RUNNER (U)_(OM35B37U)■
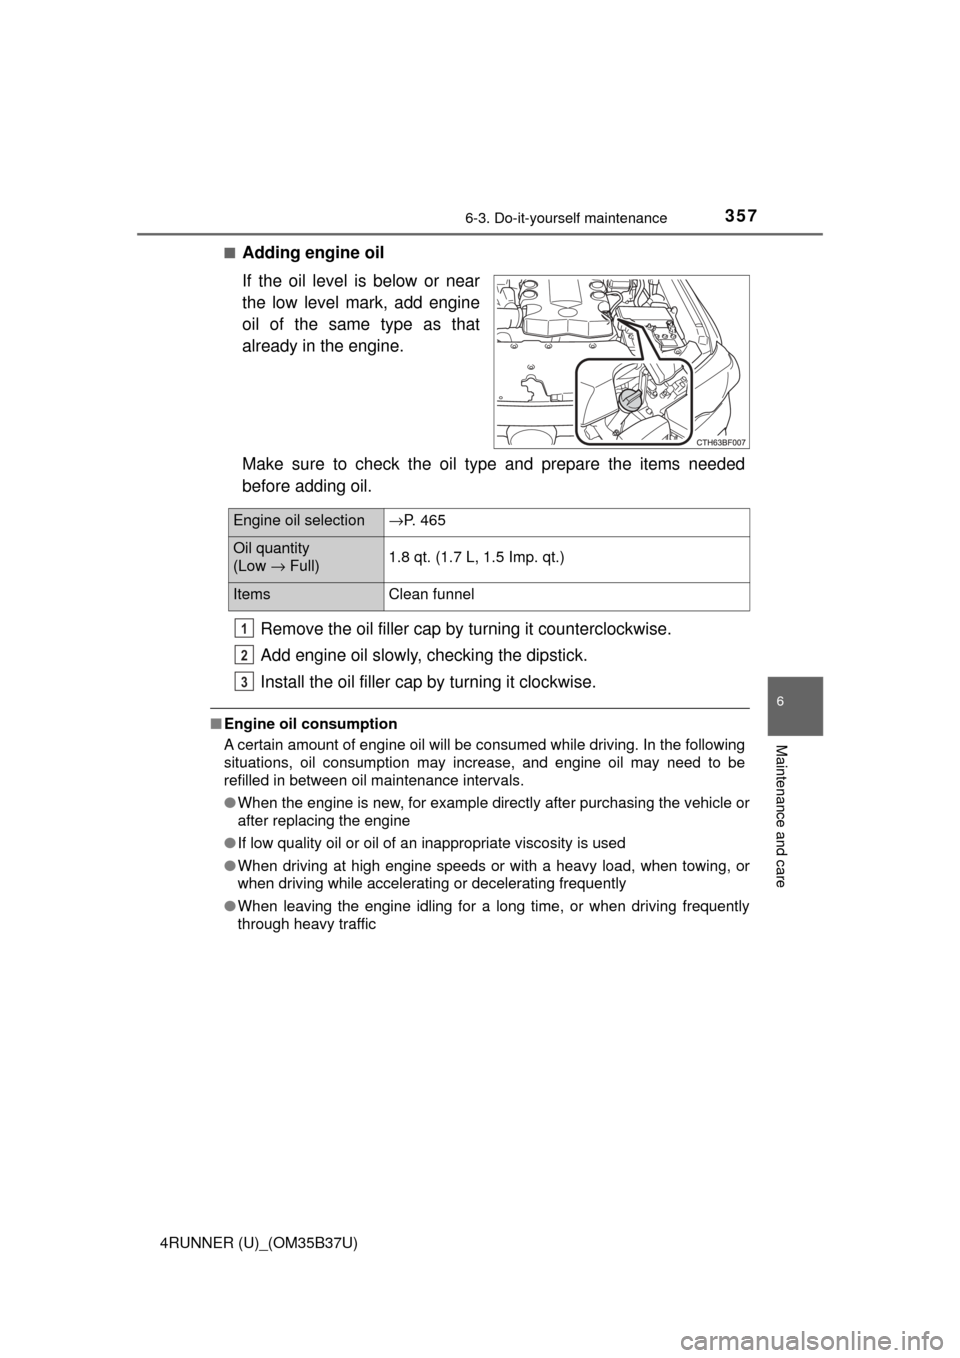
Adding engine oil
If the oil level is below or near
the low level mark, add engine
oil of the same type as that
already in the engine.
Make sure to check the oil type and prepare the items needed
before adding oil.
Remove the oil filler cap by turning it counterclockwise.
Add engine oil slowly, c hecking the dipstick.
Install the oil filler cap by turning it clockwise.
■Engine oil consumption
A certain amount of engine oil will be consumed while driving. In the following
situations, oil consumption may increase, and engine oil may need to be
refilled in between oil maintenance intervals.
●When the engine is new, for example directly after purchasing the vehicle or
after replacing the engine
● If low quality oil or oil of an inappropriate viscosity is used
● When driving at high engine speeds or with a heavy load, when towing, or
when driving while accelerating or decelerating frequently
● When leaving the engine idling for a long time, or when driving frequently
through heavy traffic
Engine oil selection →P. 465
Oil quantity
(Low → Full) 1.8 qt. (1.7 L, 1.5 Imp. qt.)
Items
Clean funnel
1
2
3
Page 363 of 528
3636-3. Do-it-yourself maintenance
6
Maintenance and care
4RUNNER (U)_(OM35B37U)■
Fluid level
The fluid level should be within the appropriate range.
Full (when cold)
Add fluid (when cold)
Full (when hot)
Add fluid (when hot)
Hot: Vehicle has been driven around 50 mph (80 km/h) for 20 min- utes, or slightly longer in frigid temperatures. (Fluid tempera-
ture, 140°F - 175°F [60°C - 80°C]).
Cold: Engine has not been run fo r about 5 hours. (Room tempera-
ture, 50°F - 85°F [10°C - 30°C]).
■Checking the fluid level
Make sure to check the fluid type and prepare the necessary items.
Clean all dirt off the reservoir.
Remove the cap by turn ing it counterclockwise.
Wipe the dipstick clean.
Reinstall the cap and remove it again.
Check the fluid level.
Power steering fluid
1
2
3
4
Fluid typeAutomatic transmission fluid DEXRON® II or III
ItemsRag or paper, clean funnel (only for adding fluid)
1
2
3
4
5
Page 391 of 528
3916-3. Do-it-yourself maintenance
6
Maintenance and care
4RUNNER (U)_(OM35B37U)■
Headlight low beams
Turn the cover counterclock-
wise and remove it.
Turn the bulb base counter-
clockwise.
Unplug the connector while
pulling the lock release.
Replacing light bulbs
1
2
3
Page 393 of 528
3936-3. Do-it-yourself maintenance
6
Maintenance and care
4RUNNER (U)_(OM35B37U)■
Headlight high beam/daytime running lights
Turn the bulb base counter-
clockwise.
Pull the bulb out while press-
ing the lock release of the
connector.
Replace the light bulb, and
install the bulb base.
Align the 3 tabs on the light bulb
with the mounting and insert.
Turn and secure the bulb
base.
Shake the bulb base gently to
check that it is not loose, turn
the headlights on once and visu-
ally confirm that no light is leak-
ing through the mounting.
1
2
3
4
Page 395 of 528
3956-3. Do-it-yourself maintenance
6
Maintenance and care
4RUNNER (U)_(OM35B37U)
Turn the bulb base counter-
clockwise.
Remove the light bulb.
When installing, reverse the steps listed.4
5
6
Page 397 of 528
3976-3. Do-it-yourself maintenance
6
Maintenance and care
4RUNNER (U)_(OM35B37U)
Turn the bulb base counter-
clockwise.
Remove the light bulb.
When installing, reverse the steps listed.4
5
6
Page 399 of 528
3996-3. Do-it-yourself maintenance
6
Maintenance and care
4RUNNER (U)_(OM35B37U)
Turn the bulb base counter-
clockwise.
Install a new light bulb.
Align the 3 tabs on the light bulb
with the mounting and insert.
Turn clockwise and secure
the bulb base.
Install the connector.
Shake the connector gently to
check that it is not loose, turn
the front fog lights on once and
visually confirm that no light is
leaking through the mounting.
When installing the fender liner, install by conducting and with the
directions reversed.
5
6
7
8
9
Page 400 of 528
4006-3. Do-it-yourself maintenance
4RUNNER (U)_(OM35B37U)■
Rear turn signal lights
Open the back door and
remove the cover.
To prevent damage to the vehi-
cle, cover the tip of the screw-
driver with a rag.
Turn the bulb base counter-
clockwise.
Remove the light bulb.
When installing, reve rse the steps listed.
1
2
3
4