Page 107 of 202
6. Climate controls (see Climate Controls on page 115).
7. Volume control
Touch the up and down arrows to increase or decrease the volume of the speakers. You can
also adjust the volume using the scroll wheel on the left side of the steering wheel.
8. Reverse the position of the two currently displayed apps.Warning: Paying attention to road and traffic conditions must always be the driver
Page 109 of 202

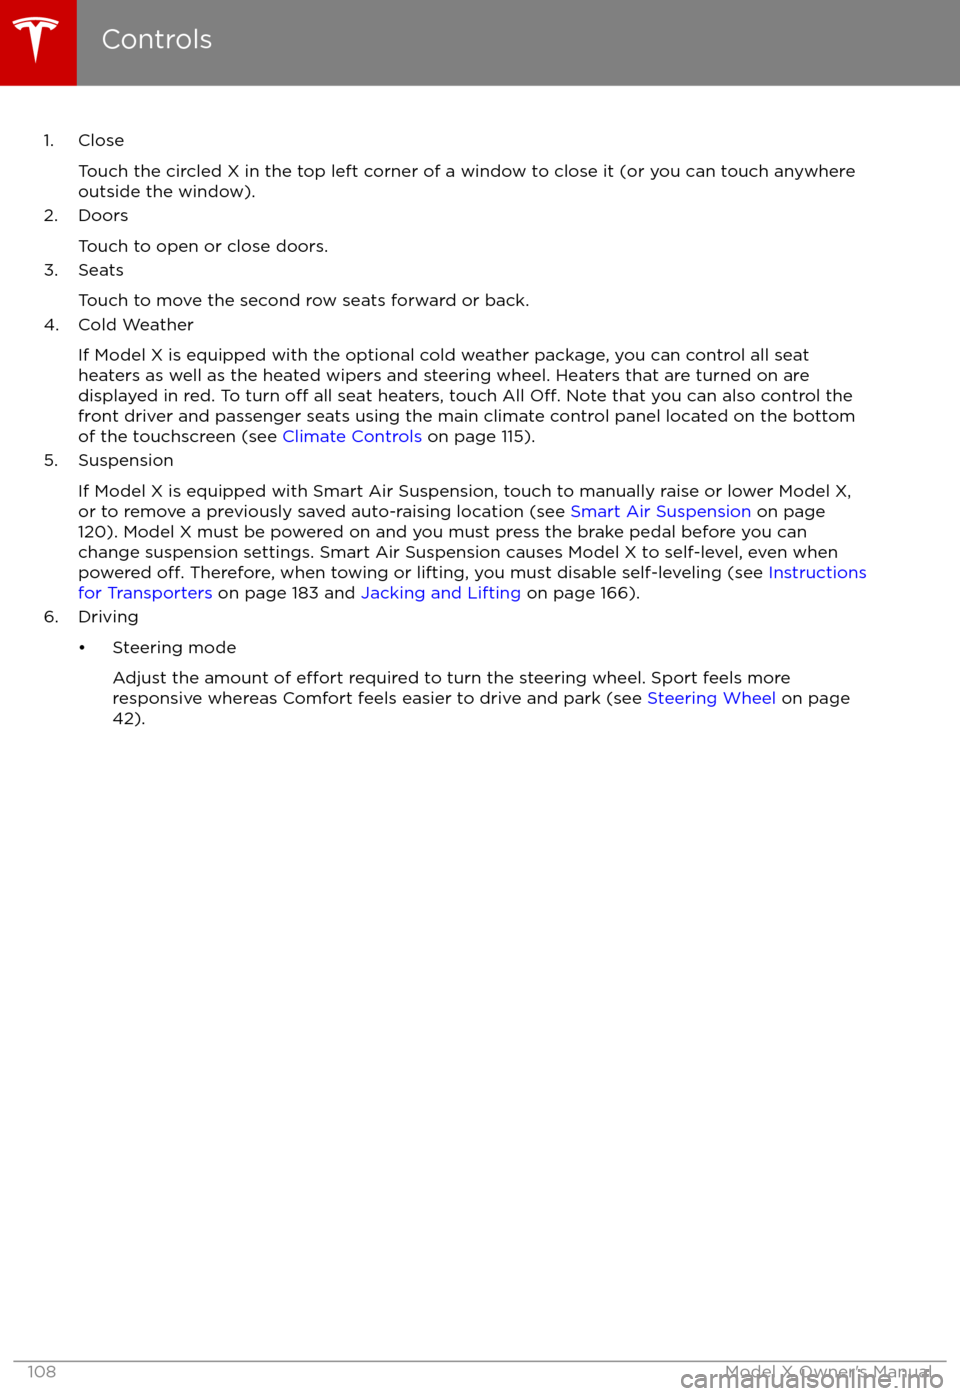
1. CloseTouch the circled X in the top left corner of a window to close it (or you can touch anywhere
outside the window).
2. Doors
Touch to open or close doors.
3. Seats
Touch to move the second row seats forward or back.
4. Cold Weather
If Model X is equipped with the optional cold weather package, you can control all seatheaters as well as the heated wipers and steering wheel. Heaters that are turned on are displayed in red. To turn
off all seat heaters, touch All Off. Note that you can also control the
front driver and passenger seats using the main climate control panel located on the bottom
of the touchscreen (see Climate Controls on page 115).
5. Suspension
If Model X is equipped with Smart Air Suspension, touch to manually raise or lower Model X,or to remove a previously saved auto-raising location (see Smart Air Suspension on page
120). Model X must be powered on and you must press the brake pedal before you can
change suspension settings. Smart Air Suspension causes Model X to self-level, even when powered
off. Therefore, when towing or lifting, you must disable self-leveling (see Instructions
for Transporters on page 183 and Jacking and Lifting on page 166).
6. Driving
Page 116 of 202

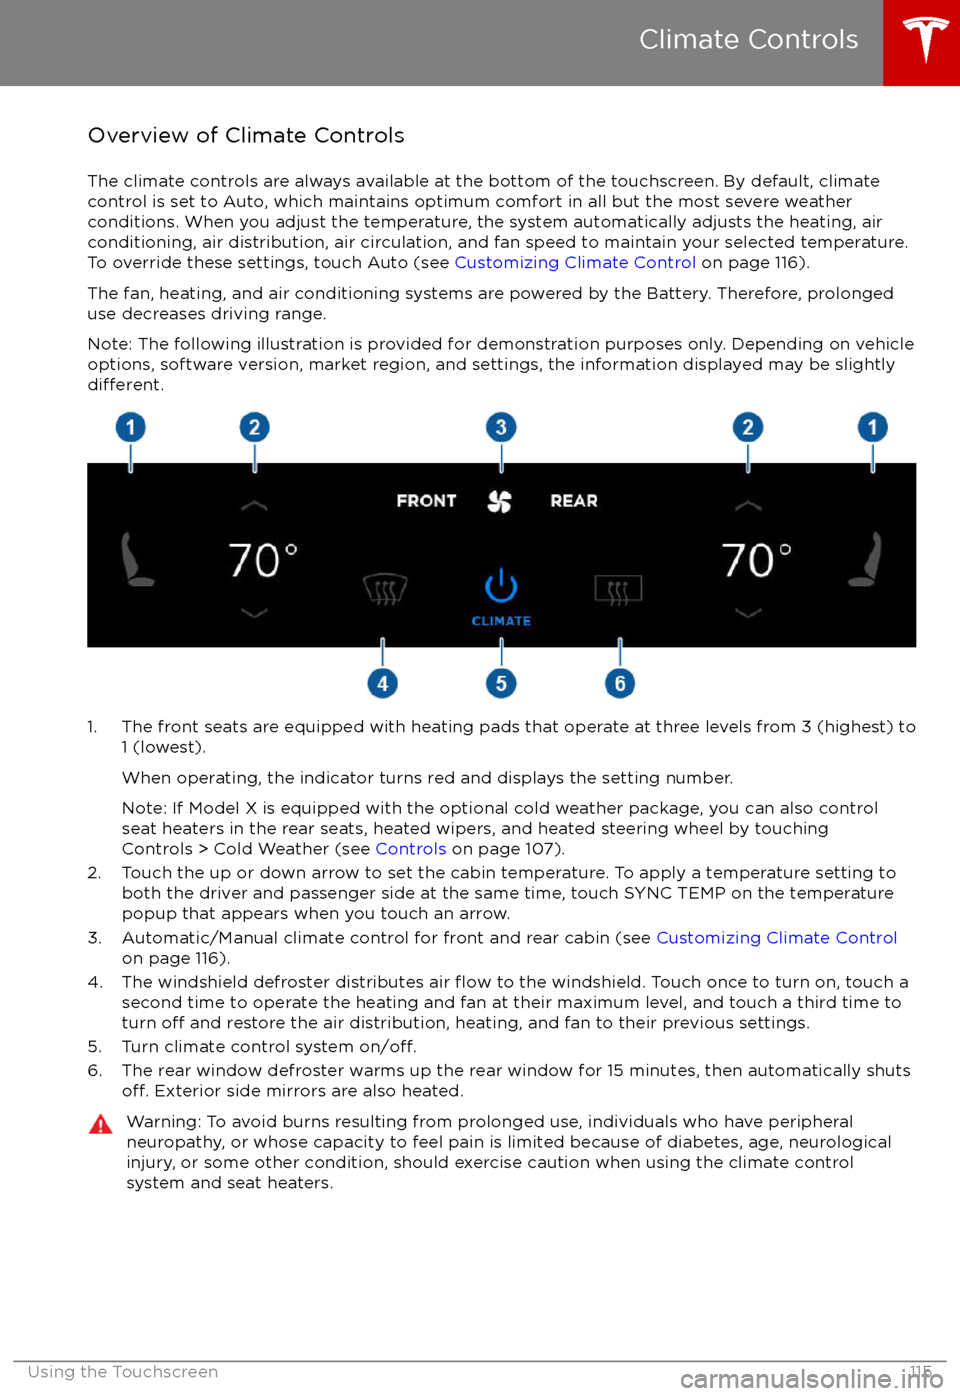
Overview of Climate Controls
The climate controls are always available at the bottom of the touchscreen. By default, climate control is set to Auto, which maintains optimum comfort in all but the most severe weather conditions. When you adjust the temperature, the system automatically adjusts the heating, air
conditioning, air distribution, air circulation, and fan speed to maintain your selected temperature. To override these settings, touch Auto (see Customizing Climate Control on page 116).
The fan, heating, and air conditioning systems are powered by the Battery. Therefore, prolonged
use decreases driving range.
Note: The following illustration is provided for demonstration purposes only. Depending on vehicle
options, software version, market region, and settings, the information displayed may be slightly
different.
1. The front seats are equipped with heating pads that operate at three levels from 3 (highest) to 1 (lowest).
When operating, the indicator turns red and displays the setting number.
Note: If Model X is equipped with the optional cold weather package, you can also control seat heaters in the rear seats, heated wipers, and heated steering wheel by touchingControls > Cold Weather (see Controls on page 107).
2. Touch the up or down arrow to set the cabin temperature. To apply a temperature setting to both the driver and passenger side at the same time, touch SYNC TEMP on the temperaturepopup that appears when you touch an arrow.
3. Automatic/Manual climate control for front and rear cabin (see Customizing Climate Control
on page 116).
4. The windshield defroster distributes air
flow to the windshield. Touch once to turn on, touch a
second time to operate the heating and fan at their maximum level, and touch a third time to
turn
off and restore the air distribution, heating, and fan to their previous settings.
5. Turn climate control system on/off.6. The rear window defroster warms up the rear window for 15 minutes, then automatically shutsoff. Exterior side mirrors are also heated.
Warning: To avoid burns resulting from prolonged use, individuals who have peripheral neuropathy, or whose capacity to feel pain is limited because of diabetes, age, neurologicalinjury, or some other condition, should exercise caution when using the climate control
system and seat heaters.
Climate Controls
Using the Touchscreen115
Page 126 of 202
To play the next song in a selected playlist or
album, touch the previous or next arrows on
the Now Playing view, or use the buttons on
the left side of the steering wheel (see Using
Left Steering Wheel Buttons on page 42). You
can also
shu
Page 153 of 202

Inspecting and Maintaining TiresRegularly inspect the tread and side walls for
any sign of distortion (bulges), cuts or wear.Warning: Do not drive Model X if a tire is
damaged, excessively worn, or inflated to
an incorrect pressure. Check tires
regularly for wear, and ensure there are
no cuts, bulges or exposure of the ply/
cord structure.
Tire Wear
Adequate tread depth is important for proper
tire performance. Tires with a tread depth less
than 3 mm are more likely to hydroplane in
wet conditions and should not be used. Tires
with a tread depth less than 4 mm do not
perform well in snow and slush and should not
be used when driving in winter conditions.
Model X is originally
fitted with tires that have
wear indicators molded into the tread pattern. When the tread has been worn down to 3 mm,
the indicators start to appear at the surface of
the tread pattern, producing the
effect of a
continuous band of rubber across the width of
the tire. For optimal performance and safety,
Tesla recommends replacing tires before the
wear indicators are visible.
Tire Rotation, Balance, and Wheel Alignment
Model X tires cannot be rotated, as tires are
asymmetrical and front tires are a
differentsize from rear tires.
Unbalanced wheels (sometimes noticeable as
vibration through the steering wheel)
affectvehicle handling and tire life. Even with regular
use, wheels can get out of balance. Therefore,
they should be balanced as required.
If tire wear is uneven (on one side of the tire
only) or becomes abnormally excessive, check
the alignment of wheels.
Note: When replacing only two tires, always
install the new tires on the rear.
Punctured Tires
A puncture eventually causes the tire to lose pressure, which is why it is important to check
tire pressures frequently. Permanently repair
or replace punctured or damaged tires as
soon as possible.
Your tubeless tires may not leak when
penetrated, provided the object remains in the tire. If, however, you feel a sudden vibration or
ride disturbance while driving, or you suspect a tire is damaged, immediately reduce yourspeed. Drive slowly, while avoiding heavy
braking or sharp steering and, when safe to do so, stop the vehicle. Arrange to have Model X
transported to a Tesla service center, or to a
nearby tire repair center.
Note: In some cases, you can temporarily
repair small tire punctures (under 6 mm) using an optional tire repair kit available from Tesla.
This allows you to slowly drive Model X to Tesla or to a nearby tire repair facility.Warning: Do not drive with a punctured
tire, even if the puncture has not causedthe tire to
deflate. A punctured tire candeflate suddenly at any time.
Flat Spots
If Model X is stationary for a long period in
high temperatures, tires can form
flat spots.
When Model X is driven, these flat spots cause
a vibration which gradually disappears as the
tires warm up and regain their original shape.
To minimize
flat spots during storage, inflatetires to the maximum pressure indicated on the tire wall. Then, before driving, release airto adjust tire pressure to the recommended
levels.
Improving Tire Mileage
To improve the mileage you get from your
tires, maintain tires at the recommended tire
pressures, observe speed limits and advisory
speeds, and avoid:
Page 154 of 202

Replacing Tires and Wheels
Tires degrade over time due to the
effects of
ultraviolet light, extreme temperatures, high
loads, and environmental conditions. It is
recommended that tires are replaced every six
years, or sooner if required.
Wheel rims and tires are matched to suit the
handling characteristics of the vehicle.
Replacement tires must comply with the
original
specification. If tires other than thosespecified are used, ensure that the load and
speed ratings marked on the tire equal or
exceed those of the original
specification.
Ideally, you should replace all four tires at the same time. If this is not possible, replace the
tires in pairs (both front or both rear). When
replacing tires, always re-balance and check
the alignment of wheels.
Warning: For your safety, use only tires
and wheels that match the original
specification (see Wheels and Tires on
page 177). Tires that do not match the
original
specification can affect the
operation of the Tire Pressure Monitoring System (TPMS).
Warning: Never exceed the speed rating
of your vehicle
Page 156 of 202

TPMS Malfunction
Model X has also been equipped with a TPMS
malfunction indicator to indicate when the
system is not operating properly.The TPMS malfunction indicator is
combined with the tire pressure
indicator light. When the system
detects a malfunction, the indicator
flashes for approximately one minute
after Model X powers on, and then
remains continuously lit. This
sequence continues upon
subsequent vehicle start-ups as long
as the malfunction exists. When the
TPMS malfunction indicator is on, the
system might not be able to detect
or signal under- and
over-inflatedtires as intended.
TPMS malfunctions can occur for a variety of
reasons, including installing replacement or
alternate tires or wheels that prevent the
TPMS from functioning properly. Always check
the TPMS malfunction indicator light after replacing one or more tires or wheels on yourvehicle to ensure that the replacement tires or
wheels allow the TPMS to continue to function
properly.
Note: If a tire has been replaced or repaired
using a
different tire sealant than the one
available from Tesla, and a low tire pressure is
detected, it is possible that the tire sensor has
been damaged. Contact Tesla to have the fault repaired as soon as possible.
Tire Care and Maintenance
Maintenance155
Page 158 of 202
Inflating with Sealant and Air
If you have a Tesla tire repair kit, follow these
steps to temporarily repair a small tire
puncture (less than 6 mm).
1. Stop Model X in a safe place away from
traffic and ask passengers to wait in a safe
area.
2. Turn on the hazard warning
flashers to
alert other road users.
3. If possible, position the wheel with the puncture at the bottom.
4. Detach the power supply connector from the back of the compressor and plug it
into the 12V power socket located on the
front of center console.
5. Release the clear plastic hose from the tire
compressor.
6. Remove the red cap and screw the end of the hose onto the tire