2017 TESLA MODEL S trunk
[x] Cancel search: trunkPage 39 of 188

3. PreviousSame as described above for Next, except
it skips to the previous song or station. If
you have more than one favorite
defined,press and hold to cycle through favorites.
Note: Regardless of how you customize the
left side of the instrument panel, it
automatically changes to display navigation
instructions (if applicable), or to let you know
if a door or trunk is open when Model S is in a driving gear.
Using Right Steering Wheel Buttons Use the buttons on the right side of the
steering wheel to access call options while on
a phone call, to choose what displays on the
right side of the instrument panel, to adjust
Model S features, and to use voice commands.
Note: Whenever you receive or make a phone call, the right side of the instrument panelautomatically displays call options to help you
easily handle phone calls on your Bluetooth-
connected phone.
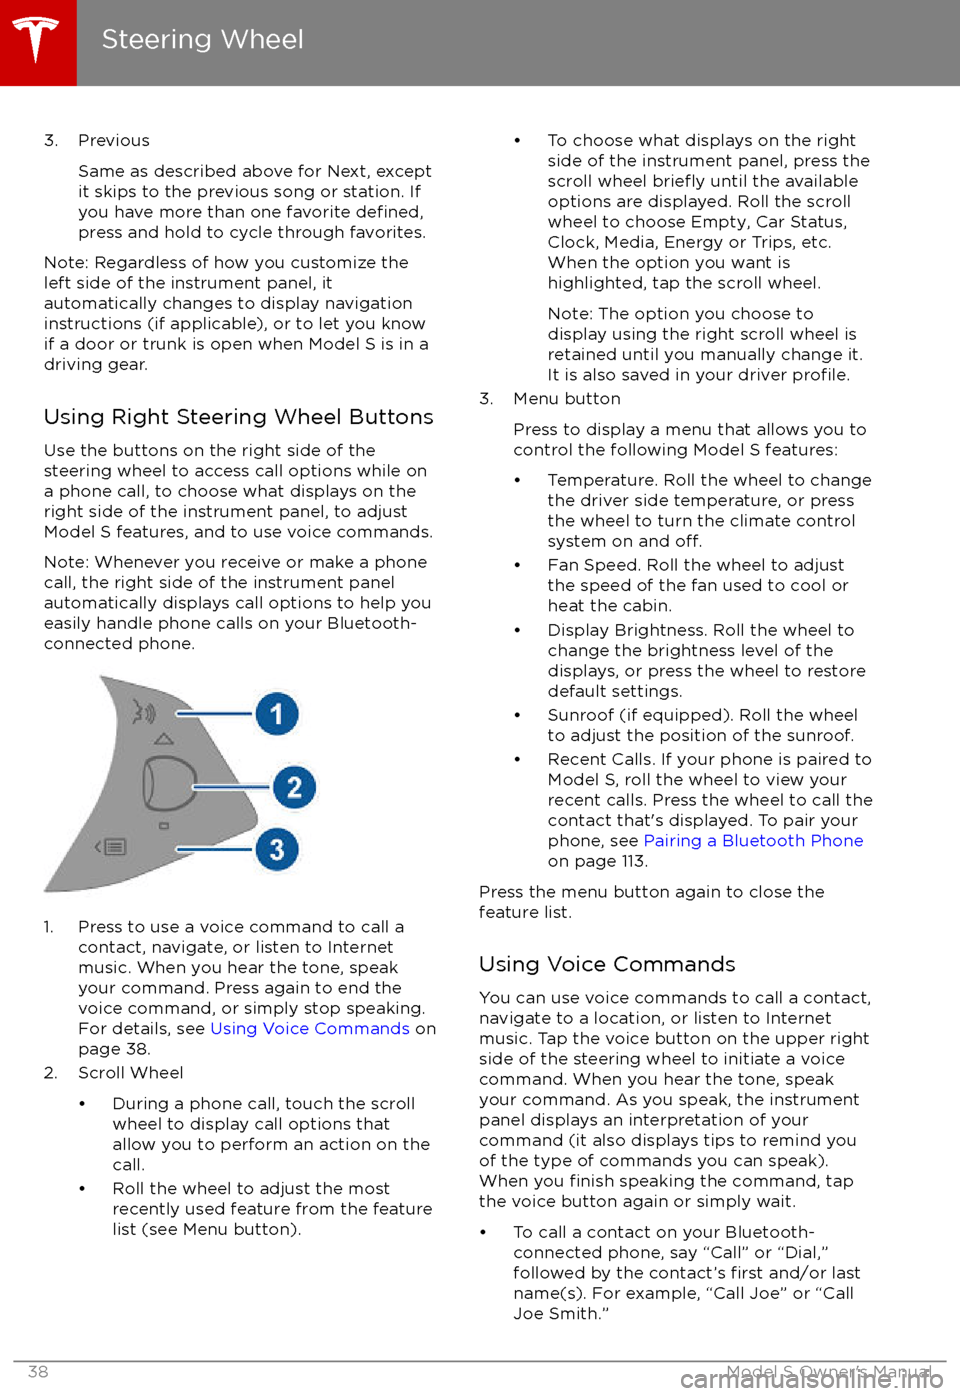
1. Press to use a voice command to call a
contact, navigate, or listen to Internetmusic. When you hear the tone, speak
your command. Press again to end the
voice command, or simply stop speaking.
For details, see Using Voice Commands on
page 38.
2. Scroll Wheel
Page 83 of 188

1. With Model S in Park, stand within 10 feet (3 meters) and press and hold the top center buttonon the key (Lock/Unlock All button) until the hazard lights blink continuously.
Note: The hazard lights
flash once as Model S locks, then within five seconds, Model S powers
on and the hazard lights flash continuously. Do not proceed to the next step until the hazard
lights are flashing. If, after five seconds, the hazard lights are not flashing, release the button
on the key, move closer to Model S, and try again. If Summon receives no further input within ten seconds, Summon cancels.
2. Press the Front Trunk (Frunk) button on the key to move Model S forward into the parking space, or press the Rear Trunk button to reverse Model S into the parking space.
Initiate Automatic Parking Before Exiting the Vehicle (U.S. and Mexico Only)
If Require Continuous Press is set to NO, you can initiate the parking maneuver from inside
Model S before exiting:
1. While sitting in Model S with the vehicle powered on, double press the Park gear. The instrument panel displays a message indicating that Summon is engaged, and the
touchscreen displays a popup window.
2. On the touchscreen, choose the direction of travel.
3. Exit Model S and close the door.
Note: All doors and trunks must be closed.
Note: To cancel the parking maneuver before exiting the vehicle, touch Cancel on the popup window.
Summon now drives Model S into the parking space according to the direction you
specified on
the touchscreen.
Stopping or Canceling Summon
You can stop Model S at any time while Summon is active by pressing any button on the key or using the mobile app. Summon also cancels when:
Page 123 of 188

About the Security System
If Model S does not detect a key nearby and a
locked door or trunk is opened, an alarm sounds and headlights and turn signals
flash.To deactivate the alarm, press any button on the key.
To manually enable or disable the alarm
system, touch Controls > Settings > Safety &
Security > Alarm. When set to on, Model S
activates its alarm one minute after the doors
lock and a recognized key is no longer
detected nearby.
Security Settings
122Model S Owner
Page 154 of 188

Removing the Maintenance Panel
To check
fluid levels, remove the maintenance
panel:
1. Pull the rear edge of the maintenance panel upward to release the
five clips that
hold the panel in place.
2. Maneuver the maintenance panel toward the windshield to remove.
Caution: The maintenance panel protects
the front trunk from water. When re-
attaching, make sure it is fully seated.
Checking Battery Coolant
If the quantity of
fluid in the cooling system
drops below the recommended level, the
instrument panel displays a warning message.
Stop Model S as soon as safety permits and
contact Tesla.
Fluid Level Check
Tesla checks the Battery coolant level at the
regularly scheduled maintenance intervals. On a single motor Model S, you can check it
yourself. To do so, park Model S on level
ground. When Model S is cool, remove the
maintenance panel (see Removing the
Maintenance Panel on page 153).
Check the fluid level visually by looking at the
outside marks on the side of the reservoir. DO
NOT REMOVE THE FILLER CAP AND DO NOT
ADD FLUID. Doing so can result in damage
not covered by the warranty.
The
fluid level should be between the MIN and
the MAX marks. If you notice that the fluidlevel has dropped significantly, contact Tesla
before using Model S.
Topping Up the Battery Coolant
Under no circumstances should you add
coolant. If the instrument panel warns you that
the
fluid level is low, contact Tesla
immediately.
To maximize the performance and life of the Battery, the cooling system uses a
specifictype of G-48 ethylene-glycol coolant (HOAT).
Contact Tesla for more specific information
about the coolant.
Fluid Reservoirs
Maintenance153
Page 156 of 188

Topping Up Washer Fluid
The only reservoir into which you can add
fluidis the washer fluid reservoir located under the
front trunk. When the level is low, a message
displays on the instrument panel.
Do not use formulated washer
fluids that
contain water repellent or bug wash. These
fluids can cause streaking, smearing, and
squeaking or other noises.
Operate the washers periodically to check that
the nozzles are clear and properly directed.
To top up washer
fluid:
1. Clean the filler cap before opening to
prevent dirt from entering the reservoir.
2. Open the
filler cap.
3. Fill the reservoir until the fluid level is
visible just below the filler neck.
4. Replace the filler cap.
Note: Some national or local regulations
restrict the use of Volatile Organic
Compounds (VOCs). VOCs are commonly
used as antifreeze in washer
fluid. Use a
washer fluid with limited VOC content only if it
provides adequate freeze resistance for all climates in which you drive Model S.
Caution: Under no circumstances do you
need to inspect or top up other fluidreservoirs. Two additional fluid reservoirs
are located next to the washer fluid, but
underneath the maintenance panel. In the
unlikely event that you see a message on the instrument panel that one of these
fluid levels is low, stop Model S as soon as
safe to do so, and contact Tesla.
Caution: Do not spill washer fluid on body
panels. Doing so can cause damage. Wipe
up spills immediately and wash the
affected area with water.
Warning: In temperatures below
40
Page 160 of 188

Load Capacity LabelingIt is important to understand how much
weight your Model S can safely carry. This weight is called the vehicle capacity weight
and includes the weight of all occupants,
cargo and any additional equipment added to your Model S since it was manufactured.
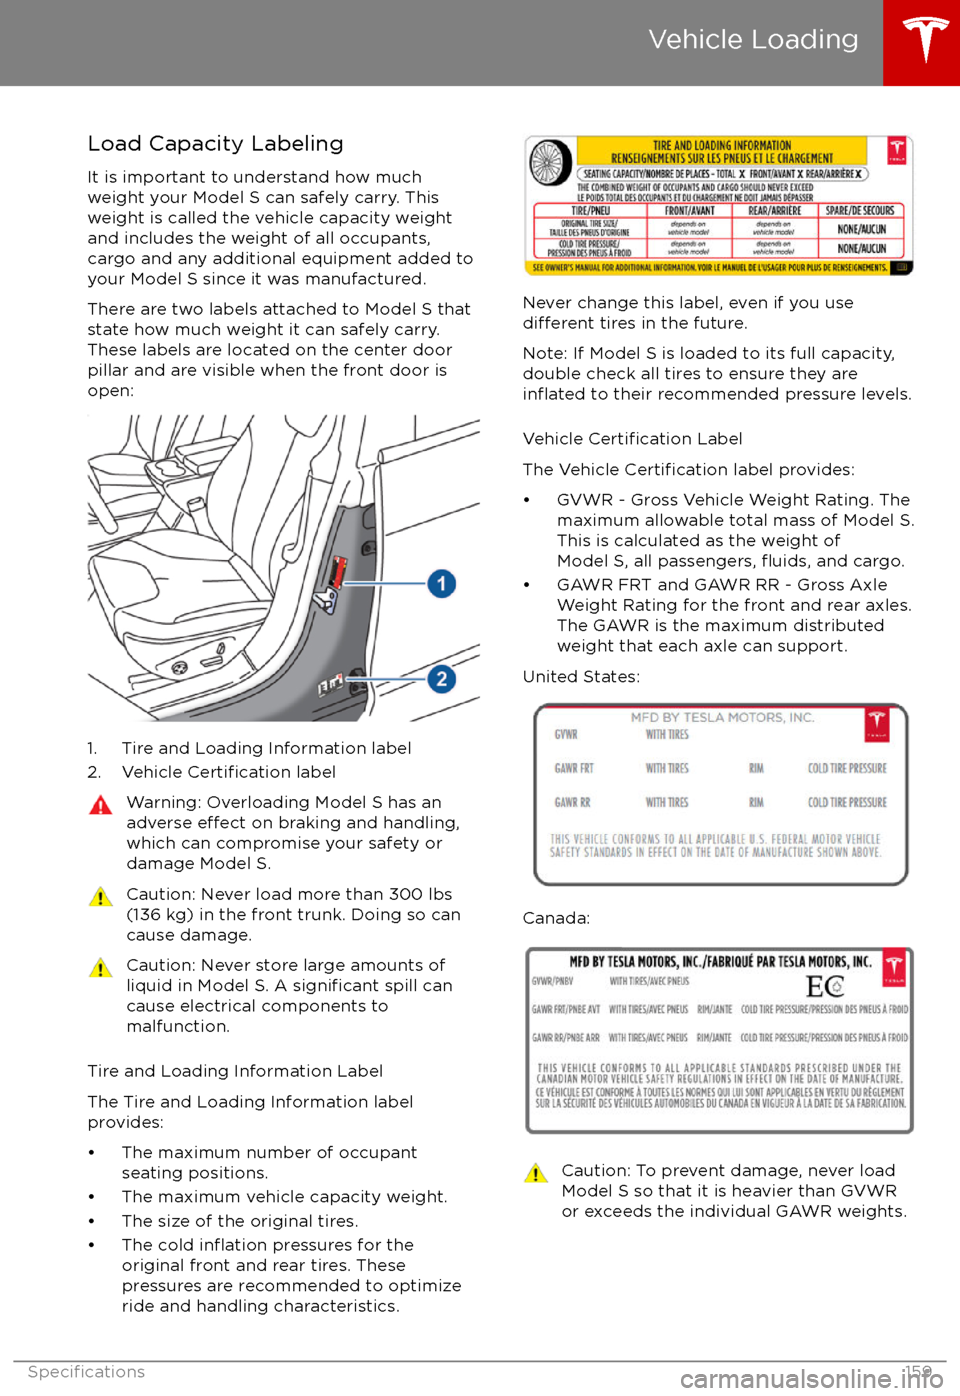
There are two labels attached to Model S that
state how much weight it can safely carry.
These labels are located on the center door
pillar and are visible when the front door is
open:
1. Tire and Loading Information label
2. Vehicle Certification label
Warning: Overloading Model S has an
adverse effect on braking and handling,
which can compromise your safety or damage Model S.Caution: Never load more than 300 lbs(136 kg) in the front trunk. Doing so can
cause damage.Caution: Never store large amounts of
liquid in Model S. A significant spill can
cause electrical components to
malfunction.
Tire and Loading Information Label
The Tire and Loading Information label
provides:
Page 174 of 188

Connect the Towing EyeThe method used to connect the winch cabledepends on whether Model S is equipped with
a towing eye (located in the front trunk).
If not equipped with a towing eye:
1. Attach the tow straps to the large hole on each of the rearmost lower suspension
arms underneath the front of the vehicle.
2. To protect the underbody from any damage that could be caused by the tow
straps, place a 2" x 4" piece of wood
between the tow straps and the
underbody.
Caution: Before pulling, position the wood
between the tow strap and the
underbody to ensure the underbody is
protected from any damage that could be caused by the tow strap.If equipped with a towing eye:
1. Locate the towing eye in the front trunk.
2. Remove the tow hook cover by inserting a small
flat screwdriver into the slot located
along the top of the cover, then prying gently to release the cover from the topsnap.
3. Insert the towing eye.
Fully insert the towing eye into the
opening on the right side, then turn it
counter-clockwise until securely fastened.
4. Attach the winch cable to the towing eye.
Caution: Before pulling, make sure the
towing eye is securely tightened.
Instructions for Transporters
Roadside Assistance173
Page 183 of 188

data recording 177
day mode 98
declarations of conformity 179
delivery mileage 177devicesBluetooth, playing audio files 111
connecting 111
playing audio
files from 110
dimensions 161
display brightness 98
dome (map) lights 48
door handles 6
door labels 159
Door Unlock Mode 6
doors 4
doors, opening 4
Drive gear 42
drive-away locking 7
driverprofiles 35
seat adjustment 17driver assistanceAuto Lane Change 76
automatic emergency braking 85
Autopark 78
Autosteer 73
blind spot warning 83
collision avoidance assist 85
forward collision warning 85
overtake acceleration 67
overview 65
settings for 98
side collision avoidance 83
side collision warning 83
staying inside lane markings 83
Traffic-Aware Cruise Control 67
drivingseating position 17
starting 41
tips to maximize range 62
E
electric parking brake 55
emergency
flashers 52
emergency rear door opening 8
emission label 158
energygained from regenerative braking 55
range information 43
energy & charging setting 98
Energy app 62
energy saving mode 62
Erase & Reset 101
event data recording 177
exteriorcar cover 150
cleaning 148exterior (continued)dimensions 161
lights 48
overview 3
polishing, touch up, & repair 150
F
factory defaults, restoring 101
factory reset 101
fan speed, interior 103
favorite destinations 118
Favorites 115
Favorites (Media Player) 110
FCC
certifications 179
features, downloading new 126
ferries, avoiding 117
firmware (software) updates 126flash drives, playing audio files from 110flashers, warning 52flat tire repair 144floor mats 150
fluidsreplacement intervals 137
reservoirs, checking 153
fog lights 48
forward collision warning 85
front passenger detection 33
front trunk 12
G
garage doors, opening 123
gates, opening 123
GAWR 159
gears 42
glove box 14
Gross Axle Weight Rating 159
Gross Vehicle Weight Rating 159
ground clearance 161
GVWR 159
H hazard warning
flashers 52
head supports 18
headlightsadaptive 51
after exit 51
high beams 51
heated wipers 53
heating 102
height adjustments (suspension)auto-raising 106
automatic and manual settings 107
disabling (Jack mode) 107
Index
182Model S Owner