2017 SUBARU LEGACY high beam
[x] Cancel search: high beamPage 205 of 610
Instruments and controls/Light control switch
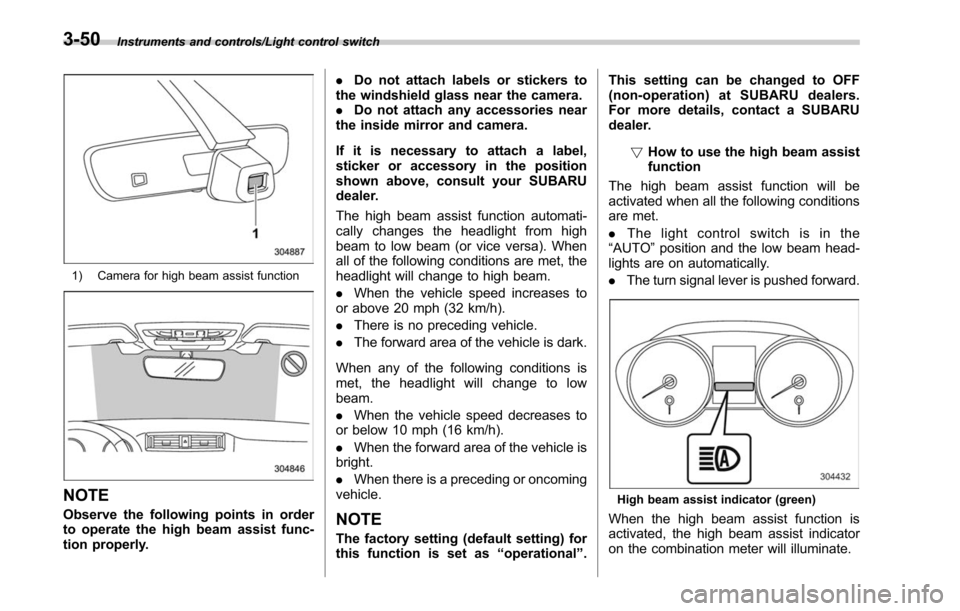
1) Camera for high beam assist function
NOTE
Observe the following points in order
to operate the high beam assist func-
tion properly..
Do not attach labels or stickers to
the windshield glass near the camera.
. Do not attach any accessories near
the inside mirror and camera.
If it is necessary to attach a label,
sticker or accessory in the position
shown above, consult your SUBARU
dealer.
The high beam assist function automati-
cally changes the headlight from high
beam to low beam (or vice versa). When
all of the following conditions are met, the
headlight will change to high beam.
. When the vehicle speed increases to
or above 20 mph (32 km/h).
. There is no preceding vehicle.
. The forward area of the vehicle is dark.
When any of the following conditions is
met, the headlight will change to low
beam.
. When the vehicle speed decreases to
or below 10 mph (16 km/h).
. When the forward area of the vehicle is
bright.
. When there is a preceding or oncoming
vehicle.NOTE
The factory setting (default setting) for
this function is set as “operational ”. This setting can be changed to OFF
(non-operation) at SUBARU dealers.
For more details, contact a SUBARU
dealer.
!How to use the high beam assist
function
The high beam assist function will be
activated when all the following conditions
are met.
. The light control switch is in the
“AUTO ”position and the low beam head-
lights are on automatically.
. The turn signal lever is pushed forward.
High beam assist indicator (green)
When the high beam assist function is
activated, the high beam assist indicator
on the combination meter will illuminate.
3-50
Page 206 of 610

Malfunction of the high beam assist
function:
High beam assist warning indicator (yel-
low)
When the high beam assist function
malfunctions, the high beam assist warn-
ing indicator on the combination meter will
appear. In this case, have your vehicle
inspected by your SUBARU dealer.
Temporary stop of high beam assist
function:
If the high beam assist function stops
temporarily due to poor visibility or abnor-
mal temperature, the message appears
on the combination meter. When the
condition is canceled, the system will be
restored.
NOTE
Even when the operation conditions of
the high beam assist function are met,
there may be a case in which the high
beam assist indicator does not illumi-
nate and an abnormal condition warn-
ing is given. In this case, turn the
ignition switch to the“LOCK ”/“ OFF ”
position and then the “ON ”position
again. Check if the high beam assist
indicator illuminates. If the indicator
does not illuminate, have the vehicle
inspected at a SUBARU dealer.
! How to temporarily lower the
sensitivity of the high beam
assist function
The sensitivity of the high beam assist
function can be lowered by using the
following operations.
1. Turn the ignition switch to the “ON”
position.
1) Automatic dimming on/off button
2. Press and hold the automatic dimming
on/off button for 15 to 20 seconds.
When the sensitivity of the high beam
assist function is lowered, the LED in-
dicator on the automatic dimming on/off
button will flash.
NOTE
. The sensitivity of the high beam
assist function cannot be lowered
while driving.
. You can resume the sensitivity of
the high beam assist function by using
either of the following operations.
–Turn the ignition switch to the
“ LOCK ”/“ OFF ”position and then
start the engine.
Instruments and controls/Light control switch
–CONTINUED –3-51
Page 207 of 610
Instruments and controls/Light control switch
–Press and hold the automatic
dimming on/off button for 15 to 20
seconds again.
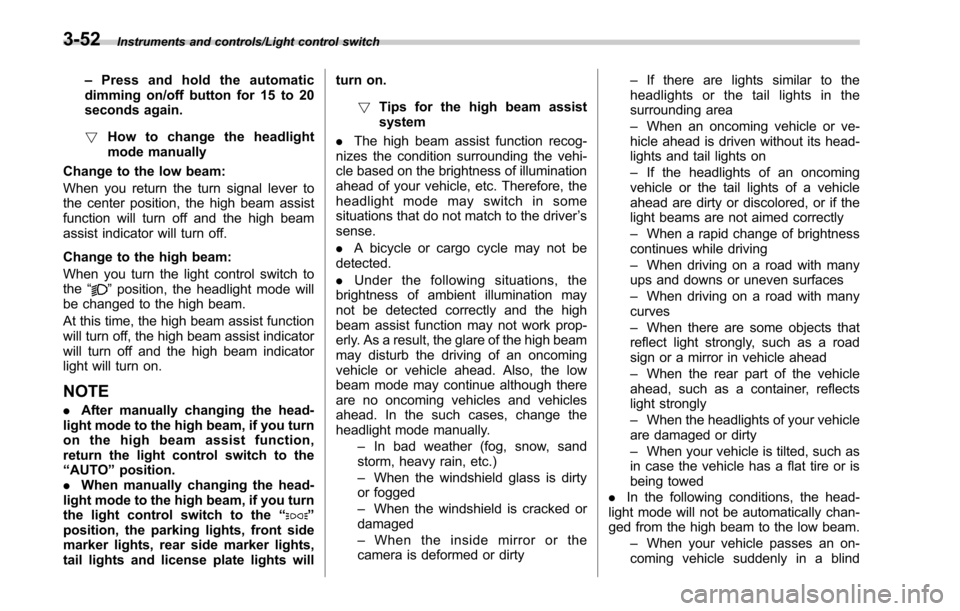
! How to change the headlight
mode manually
Change to the low beam:
When you return the turn signal lever to
the center position, the high beam assist
function will turn off and the high beam
assist indicator will turn off.
Change to the high beam:
When you turn the light control switch to
the “
”position, the headlight mode will
be changed to the high beam.
At this time, the high beam assist function
will turn off, the high beam assist indicator
will turn off and the high beam indicator
light will turn on.
NOTE
. After manually changing the head-
light mode to the high beam, if you turn
on the high beam assist function,
return the light control switch to the
“ AUTO ”position.
. When manually changing the head-
light mode to the high beam, if you turn
the light control switch to the “
”
position, the parking lights, front side
marker lights, rear side marker lights,
tail lights and license plate lights will turn on.
! Tips for the high beam assist
system
. The high beam assist function recog-
nizes the condition surrounding the vehi-
cle based on the brightness of illumination
ahead of your vehicle, etc. Therefore, the
headlight mode may switch in some
situations that do not match to the driver ’s
sense.
. A bicycle or cargo cycle may not be
detected.
. Under the fo llowing situations, the
brightness of ambient illumination may
not be detected correctly and the high
beam assist function may not work prop-
erly. As a result, the glare of the high beam
may disturb the driving of an oncoming
vehicle or vehicle ahead. Also, the low
beam mode may continue although there
are no oncoming vehicles and vehicles
ahead. In the such cases, change the
headlight mode manually.
–In bad weather (fog, snow, sand
storm, heavy rain, etc.)
– When the windshield glass is dirty
or fogged
– When the windshield is cracked or
damaged
– Whentheinsidemirrororthe
camera is deformed or dirty –
If there are lights similar to the
headlights or the tail lights in the
surrounding area
– When an oncoming vehicle or ve-
hicle ahead is driven without its head-
lights and tail lights on
– If the headlights of an oncoming
vehicle or the tail lights of a vehicle
ahead are dirty or discolored, or if the
light beams are not aimed correctly
– When a rapid change of brightness
continues while driving
– When driving on a road with many
ups and downs or uneven surfaces
– When driving on a road with many
curves
– When there are some objects that
reflect light strongly, such as a road
sign or a mirror in vehicle ahead
– When the rear part of the vehicle
ahead, such as a container, reflects
light strongly
– When the headlights of your vehicle
are damaged or dirty
– When your vehicle is tilted, such as
in case the vehicle has a flat tire or is
being towed
. In the following conditions, the head-
light mode will not be automatically chan-
ged from the high beam to the low beam.
–When your vehicle passes an on-
coming vehicle suddenly in a blind
3-52
Page 208 of 610
curve
–When another vehicle passes in
front of your vehicle
– When an oncoming vehicle or ve-
hicle ahead comes in and out of view
because of continuous curves, median
strips, roadside trees, etc.
. If the camera detects the light of the
front fog lights of an oncoming vehicle, the
headlight mode may change from the high
beam to the low beam automatically.
. The headlight mode may change from
the high beam to the low beam, or the low
beam mode may continue, when affected
by a street light, traffic signal, illumination
of an advertisement board, or a reflective
object such as a road sign and signboard.
. The timing of the change of headlight
mode may differ due to the following
factors.
–the vehicle condition (e.g., number
of passengers or weight of loaded
cargo)
– surrounding situation (e.g., move-
ment and direction of an oncoming
vehicle or vehicle ahead)
– detection limitations of the camera
angle& Headlight flasher
CAUTION
Do not hold the lever in the flashing
position for more than just a few
seconds.
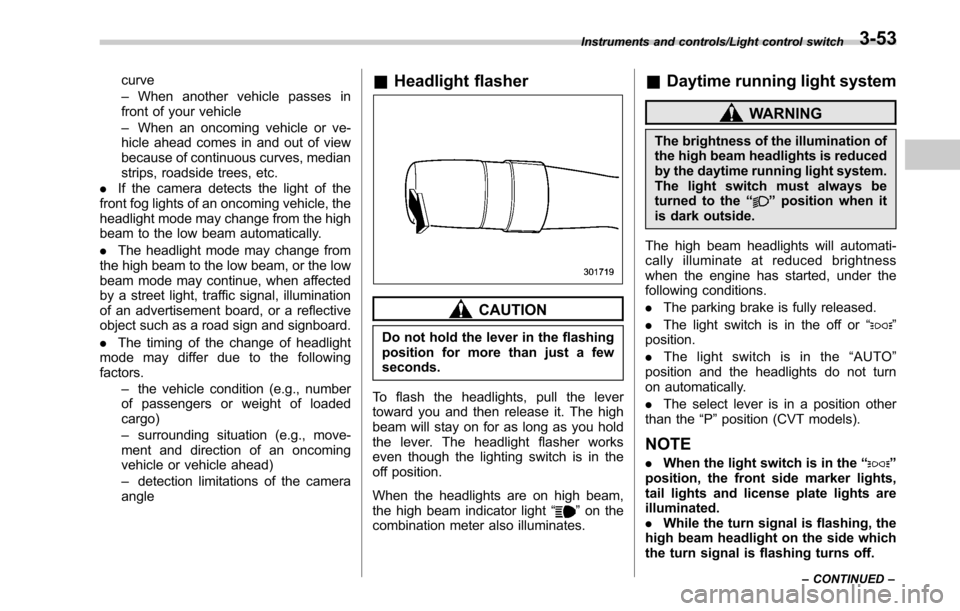
To flash the headlights, pull the lever
toward you and then release it. The high
beam will stay on for as long as you hold
the lever. The headlight flasher works
even though the lighting switch is in the
off position.
When the headlights are on high beam,
the high beam indicator light “
”on the
combination meter also illuminates.
& Daytime running light system
WARNING
The brightness of the illumination of
the high beam headlights is reduced
by the daytime running light system.
The light switch must always be
turned to the “
”position when it
is dark outside.
The high beam headlights will automati-
cally illuminate at reduced brightness
when the engine has started, under the
following conditions.
. The parking brake is fully released.
. The light switch is in the off or “
”
position.
. The light switch is in the “AUTO ”
position and the headlights do not turn
on automatically.
. The select lever is in a position other
than the “P”position (CVT models).
NOTE
. When the light switch is in the “”
position, the front side marker lights,
tail lights and license plate lights are
illuminated.
. While the turn signal is flashing, the
high beam headlight on the side which
the turn signal is flashing turns off.
Instruments and controls/Light control switch
–CONTINUED –3-53
Page 209 of 610
Instruments and controls/Headlight beam leveler (models with HID headlights)
.While the hazard warning flasher is
on, the high beam headlights turn off.Headlight beam leveler
(models with HID headlights)
The HID headlights generate more light
than conventional halogen headlights.
Therefore a driver of an oncoming vehicle
may experience too much glare when your
headlight beam height adjustment is high
due to the vehicle carrying heavy load.
The automatic headlight beam leveler
adjusts the headlight beam height auto-
matically and optimally according to the
load being carried by the vehicle.
Turn signal lever
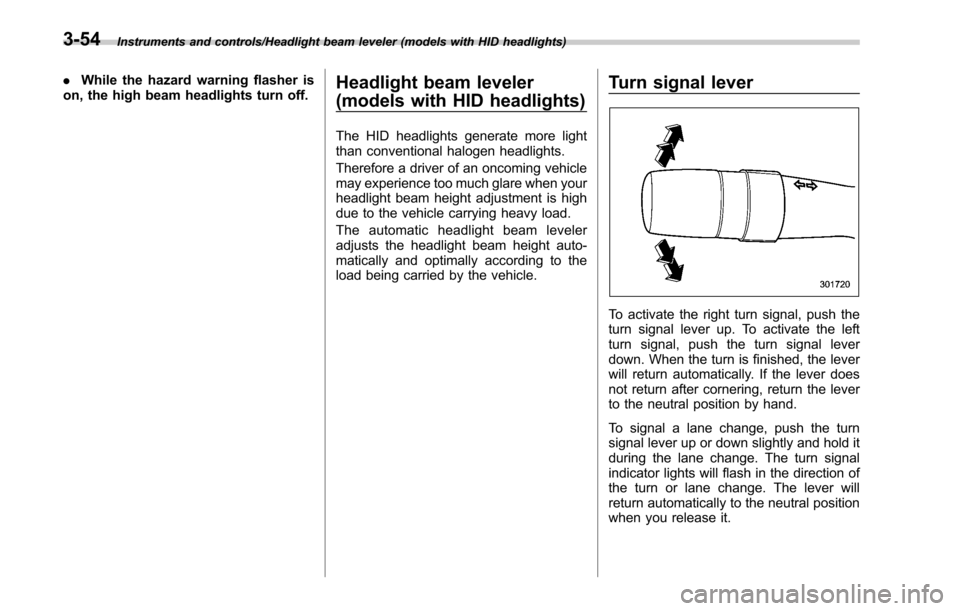
To activate the right turn signal, push the
turn signal lever up. To activate the left
turn signal, push the turn signal lever
down. When the turn is finished, the lever
will return automatically. If the lever does
not return after cornering, return the lever
to the neutral position by hand.
To signal a lane change, push the turn
signal lever up or down slightly and hold it
during the lane change. The turn signal
indicator lights will flash in the direction of
the turn or lane change. The lever will
return automatically to the neutral position
when you release it.
3-54
Page 259 of 610
Audio/Audio set
!CD player and disc
. This CD player is intended for use with
4.7 in. (12 cm) discs only.
. Extremely high temperatures can keep
the CD player from working. On hot days,
use the air conditioning system to cool the
inside of the vehicle before using the
player.
. Bumpy roads or other vibrations may
make the CD player skip.
. If moisture gets into the CD player, the
discs may not be able to be played.
Remove the discs from the player and
wait until it dries.
WARNING
CD players use an invisible laser
beam which could cause hazardous
radiation exposure if directed out-
side the unit. Be sure to operate the
player correctly.
Audio CDs
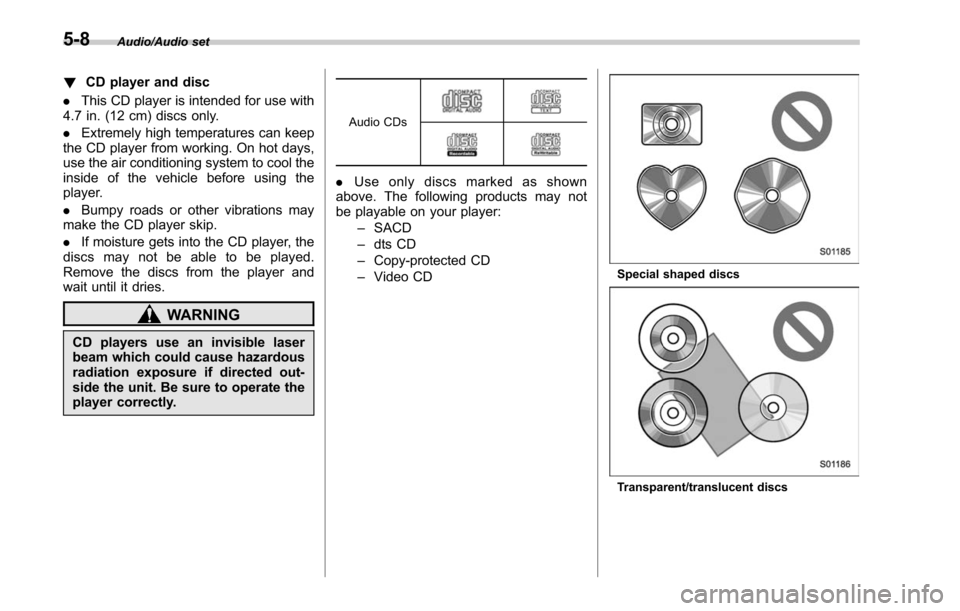
. Use only discs marked as shown
above. The following products may not
be playable on your player:
–SACD
– dts CD
– Copy-protected CD
– Video CD
Special shaped discs
Transparent/translucent discs
5-8
Page 429 of 610

Starting and operating/BSD/RCTA
tected.
The indicator light will
flash to warn the
driver of dangers under the following
conditions.
. While the indicator light is illuminating,
if the turn signal lever is operated toward
the side in which this light turned on
. When reversing the vehicle while the
system detects a vehicle approaching
from either side
! BSD/RCTA approach indicator
light dimming function
When the headlights are turned on, the
brightness of the BSD/RCTA approach
indicator light will be reduced.
NOTE
. You may have difficulty seeing the
BSD/RCTA approach indicator light
under the following conditions.
–When sunlight shines directly on
it
– When the headlight beams from a
vehicle traveling behind shines di-
rectly on it
. While the illumination brightness
control dial is in the fully upward
position, even if the headlights are
turned on, the brightness of the BSD/
RCTA approach indicator light will not
be reduced. For details about the illumination brightness control dial,
refer to
“Illumination brightness con-
trol” F3-55.
! BSD/RCTA approach warning buz-
zer (only when reversing)
A warning buzzer sounds along with
flashing of the BSD/RCTA approach in-
dicator light to warn the driver of dangers.
The setting of the warning buzzer volume
can be changed by operating the multi
information display of the combination
meter. For details, refer to “BSD/RCTA”
F 3-45.
! Safety tips regarding the BSD/RCTA
approach indicator light/warning
buzzer
. In the following cases, operation of the
BSD/RCTA approach indicator light and
the warning buzzer may be delayed or the
system may fail to issue these warnings.
–Whenavehiclemovestothe
neighboring lane from a lane next to
the neighboring lane
– When driving on a steep incline or
on repeated sharp uphill and downhill
grades
– When going beyond a pass
– When both your vehicle and a
vehicle driving on a neighboring lane
are driving on the far side of each lane. –
When several narrowly-spaced ve-
hicles are approaching in a row
– In low radius bends (tight bends or
when making turns at an intersection)
– When there is a difference in height
between your lane and the neighbor-
ing lane
– Immediately after the BSD/RCTA is
activated by pressing the BSD/RCTA
OFF switch
– Immediately after the shift lever/
select lever is shifted to the “R ”
position
– When extremely heavy cargo is
loaded in the trunk or cargo area
. During reversing, operation of the BSD/
RCTA approach indicator light and the
warning buzzer may be delayed or the
system may fail to issue these warnings
under the following conditions.
–When backing out of an angled
parking space
– When a large-sized vehicle is
parked next to your vehicle (That
vehicle prevents the propagation of
radar waves.)
– When reversing on sloped roads
– When reversing at a high speed
7-58
Page 543 of 610
Maintenance and service/Installation of accessories
Contact your SUBARU dealer for repairs.Installation of accessories
Always consult your SUBARU dealer
before installing fog lights or any other
electrical equipment in your vehicle. Such
accessories may cause the electronic
system to malfunction if they are incor-
rectly installed or if they are not suited for
the vehicle. We recommend that you
install only genuine SUBARU accessories
on your vehicle.
Replacing bulbs
WARNING
Bulbs may become very hot while
illuminated. Before replacing bulbs,
turn off the lights and wait until the
bulbs cool down, Otherwise, there is
the risk of sustaining a burn injury.
CAUTION
Replace any bulb only with a new
bulb of the specified wattage. Using
a bulb of different wattage could
result in a fire. For the specified
wattage of each bulb, refer to“Bulb
chart ”F12-14. For replacement,
contact your SUBARU dealer.
& HID headlights (if equipped)
WARNING
High-intensity-discharge (HID) bulbs
are used for the low beams of the
headlights. These HID bulbs use an
extremely high voltage. To avoid the
risk of an electric shock that could
result in serious injury, observe the
11-40