2017 SUBARU FORESTER headlights
[x] Cancel search: headlightsPage 249 of 634
Instruments and controls/Light control switch
.The timing of the change of headlight
mode may differ due to the following
factors.
–Color or brightness of the head-
lights of an oncoming vehicle or the tail
lights of a vehicle ahead
– The headlights of the oncoming
vehicle or the tail lights of the vehicle
ahead are covered with mud, snow,
etc.
– Movement and direction of an on-
coming vehicle or a vehicle ahead
– When the headlights of an oncom-
ing vehicle or the tail lights of a vehicle
ahead illuminate on only one side
– When the oncoming vehicle or
vehicle ahead is a motorcycle
– Conditions of a road (slope, curve,
road surface, etc.)
– Number of passengers and weight
of loaded cargo
– Limitation of the detection ability of
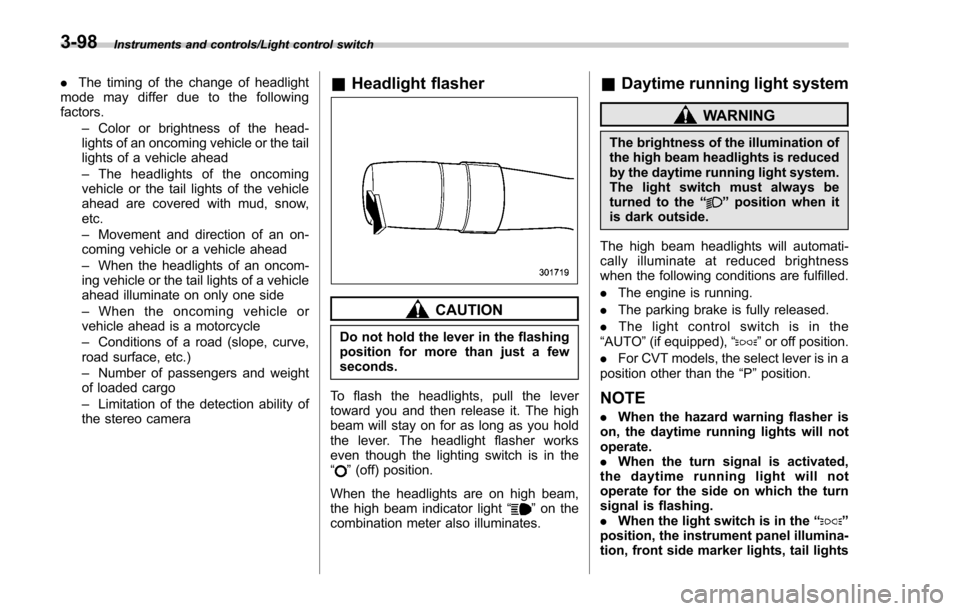
the stereo camera& Headlight flasher
CAUTION
Do not hold the lever in the flashing
position for more than just a few
seconds.
To flash the headlights, pull the lever
toward you and then release it. The high
beam will stay on for as long as you hold
the lever. The headlight flasher works
even though the lighting switch is in the
“
” (off) position.
When the headlights are on high beam,
the high beam indicator light “
”on the
combination meter also illuminates.
& Daytime running light system
WARNING
The brightness of the illumination of
the high beam headlights is reduced
by the daytime running light system.
The light switch must always be
turned to the “
”position when it
is dark outside.
The high beam headlights will automati-
cally illuminate at reduced brightness
when the following conditions are fulfilled.
. The engine is running.
. The parking brake is fully released.
. The light control switch is in the
“AUTO ”(if equipped), “
”or off position.
. For CVT models, the select lever is in a
position other than the “P”position.
NOTE
. When the hazard warning flasher is
on, the daytime running lights will not
operate.
. When the turn signal is activated,
the daytime running light will not
operate for the side on which the turn
signal is flashing.
. When the light switch is in the “
”
position, the instrument panel illumina-
tion, front side marker lights, tail lights
3-98
Page 250 of 634
and license plate lights are also illumi-
nated.
.For models with the auto on/off
headlights, while the light control
switch is in the “AUTO”position and
the system is activated to the auto-on
mode depending on the ambient light
level, the high beam headlights that
have illuminated at reduced brightness
turn off, and the low beam headlights
turn on alternatively. At this time, the
instrument panel illumination, front
side marker lights, tail lights and
license plate lights are also illuminated.
! Models with LED headlights
For models with LED headlights, the
parking lights are illuminated by the day-
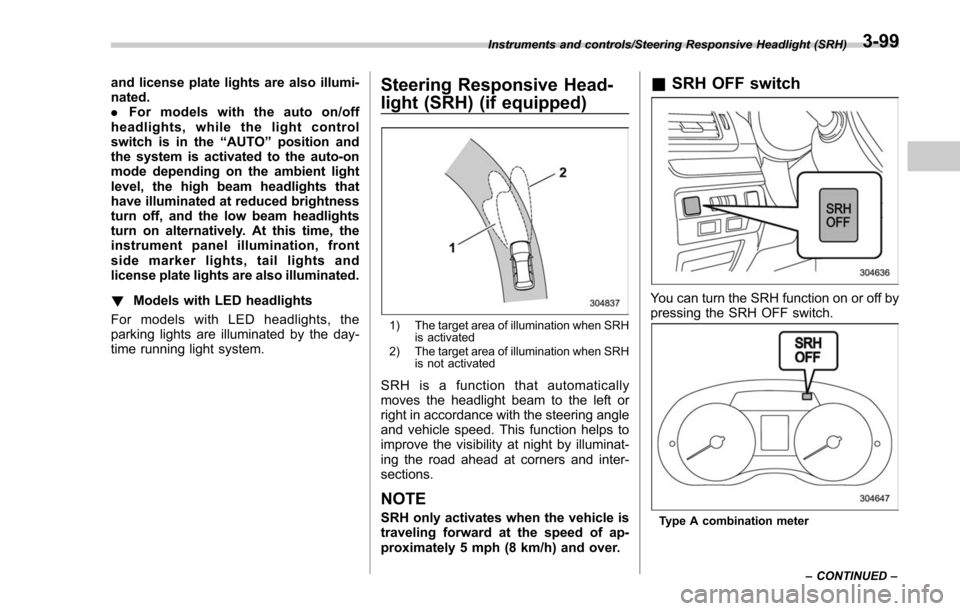
time running light system.Steering Responsive Head-
light (SRH) (if equipped)
1) The target area of illumination when SRH is activated
2) The target area of illumination when SRH is not activated
SRH is a function that automatically
moves the headlight beam to the left or
right in accordance with the steering angle
and vehicle speed. This function helps to
improve the visibility at night by illuminat-
ing the road ahead at corners and inter-
sections.
NOTE
SRH only activates when the vehicle is
traveling forward at the speed of ap-
proximately 5 mph (8 km/h) and over.
&SRH OFF switch
You can turn the SRH function on or off by
pressing the SRH OFF switch.
Type A combination meter
Instruments and controls/Steering Responsive Headlight (SRH)
–CONTINUED –
3-99
Page 252 of 634
&One-touch lane changer
To flash the turn signal and turn signal
indicator light three times, push the turn
signal lever up or down slightly and
immediately release it.
The operational/non-operational setting of
the one-touch lane changer can be
changed by a SUBARU dealer. Contact
your nearest SUBARU dealer for details.
Illumination brightness con-
trol
The illumination brightness of the instru-
ment panel dims under the following
conditions.
. when the light switch is in the “
”or
“” position
. when the light control switch is in the
“AUTO ”position and the headlights illumi-
nate automatically (models with auto on/
off headlights: Refer to “Headlights”F 3-
93.)
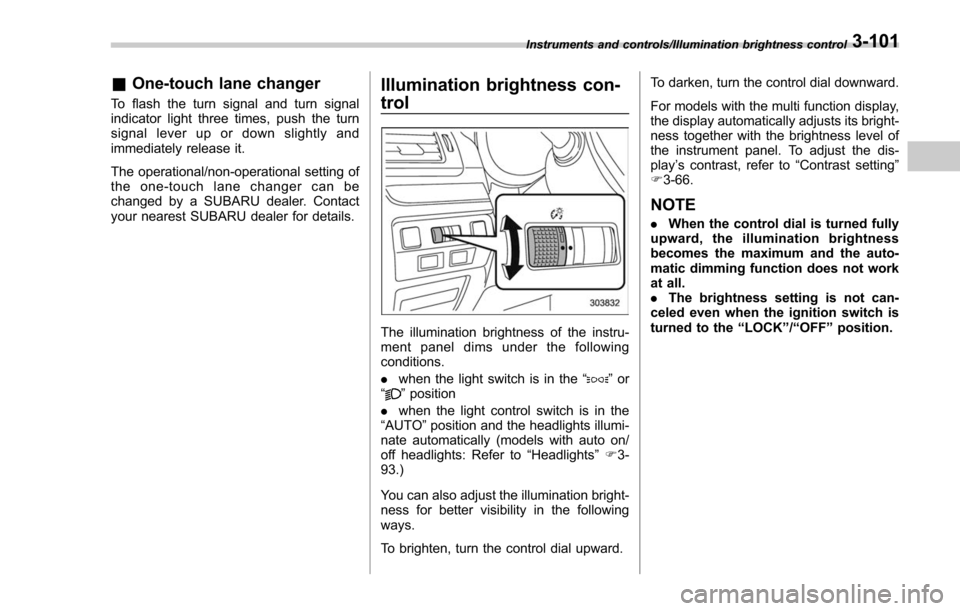
You can also adjust the illumination bright-
ness for better visibility in the following
ways.
To brighten, turn the control dial upward. To darken, turn the control dial downward.
For models with the multi function display,
the display automatically adjusts its bright-
ness together with the brightness level of
the instrument panel. To adjust the dis-
play
’s contrast, refer to “Contrast setting”
F 3-66.
NOTE
. When the control dial is turned fully
upward, the illumination brightness
becomes the maximum and the auto-
matic dimming function does not work
at all.
. The brightness setting is not can-
celed even when the ignition switch is
turned to the “LOCK ”/“ OFF ”position.
Instruments and controls/Illumination brightness control3-101
Page 253 of 634

Instruments and controls/Headlight beam leveler
Headlight beam leveler (if
equipped)
&Automatic headlight beam
leveler (models with LED
headlights)
The LED headlights generate more light
than conventional halogen headlights.
Therefore a driver of an oncoming vehicle
may experience too much glare if your
headlight beam height adjustment is high
when the vehicle is carrying a heavy load.
The automatic headlight beam leveler
adjusts the headlight beam height auto-
matically and optimally according to the
load being carried by the vehicle.
Fog light switch (if equipped)
1) Headlight switch
2) Fog light switch
The front fog lights will turn on when the
fog light switch is placed in the “”
position while the headlights are in the
following condition.
. while the headlight switch is in the “
”
position
. for models with the auto on/off head-
lights, while the headlight switch is in the
“AUTO ”position and the headlights turn
on automatically
To turn off the front fog lights, turn the
switch back down to the “
”position.
Front fog light indicator (type A)
Front fog light indicator (type B)
The indicator light on the combination
meter will illuminate when the front fog
lights are illuminated.
3-102
Page 254 of 634
&Steering responsive fog
lights system (if equipped)
The steering responsive fog lights system
automatically turns the front fog light on
and off based on the steering angle and
vehicle speed when entering a curve or
driving on curved roads. The system is
intended to help prevent accidents by
enabling better visibility of curves ahead
and early recognition of any disabled
vehicles or other obstacles.
The front fog light on the inside of a curve
will turn on if all of the following conditions
are met.
. The light control switch is in the “
”
position, or the light control switch is in the
“AUTO ”position and the low beam head-
lights are turned on automatically
. The fog light switch is in the “
”
position
. The low beam mode is selected
. The select lever is in the “D”position or
the manual mode is selected
. The steering responsive fog lights
system has not been deactivated
. The operating conditions such as the
steering angle and vehicle speed are met
The front fog lights on both sides will turn
on as usual if all of the following conditions
are met. .
The light control switch is in either of
the following positions.
–in the “
”position
– in the “AUTO ”position and the low
beam headlights turn on automatically
. The fog light switch is in the “
”
position
. The low beam mode is selected
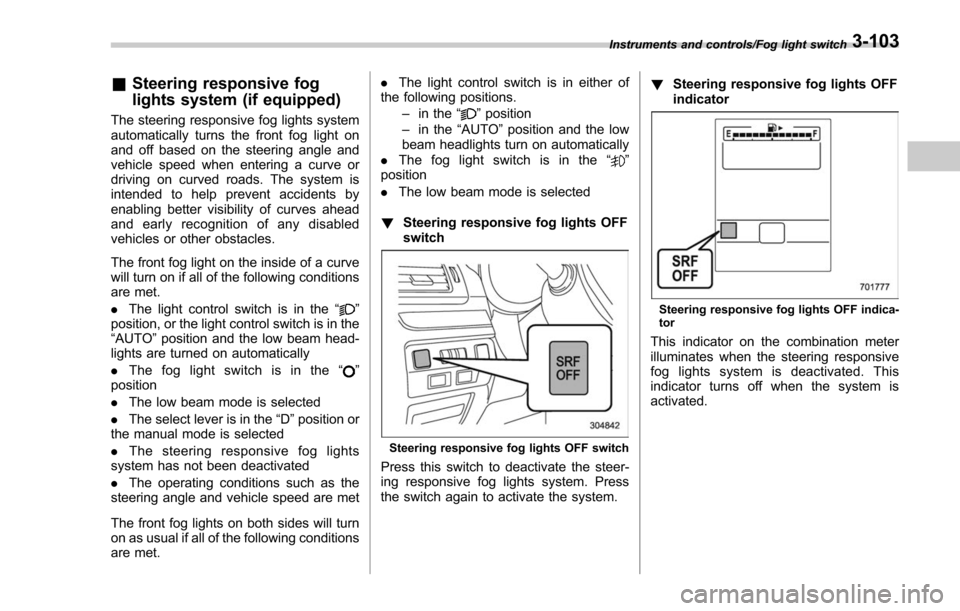
! Steering responsive fog lights OFF
switch
Steering responsive fog lights OFF switch
Press this switch to deactivate the steer-
ing responsive fog lights system. Press
the switch again to activate the system. !
Steering responsive fog lights OFF
indicator
Steering responsive fog lights OFF indica-
tor
This indicator on the combination meter
illuminates when the steering responsive
fog lights system is deactivated. This
indicator turns off when the system is
activated.
Instruments and controls/Fog light switch3-103
Page 259 of 634
Instruments and controls/Mirrors
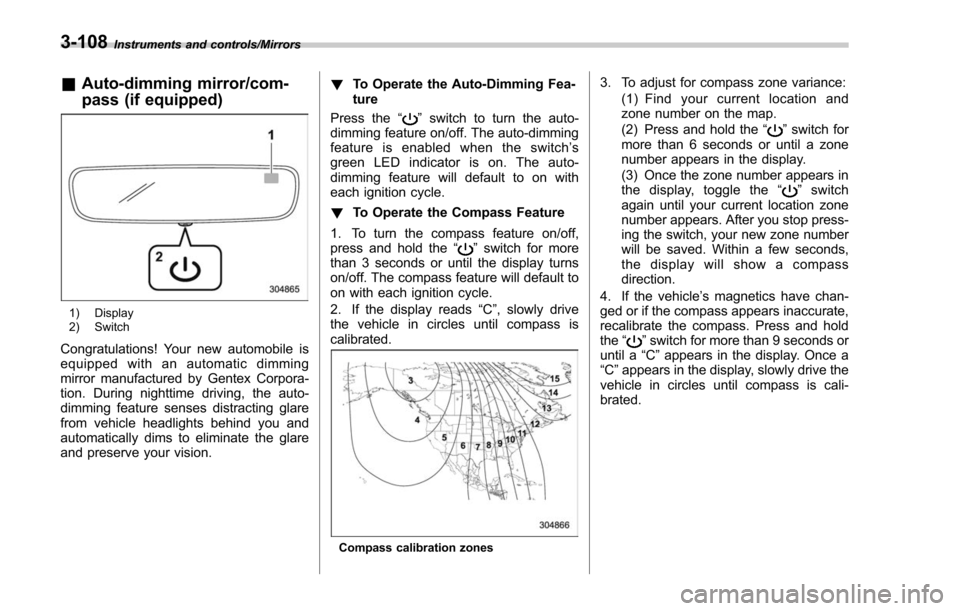
&Auto-dimming mirror/com-
pass (if equipped)
1) Display
2) Switch
Congratulations! Your new automobile is
equipped with an automatic dimming
mirror manufactured by Gentex Corpora-
tion. During nighttime driving, the auto-
dimming feature senses distracting glare
from vehicle headlights behind you and
automatically dims to eliminate the glare
and preserve your vision. !
To Operate the Auto-Dimming Fea-
ture
Press the “
”switch to turn the auto-
dimming feature on/off. The auto-dimming
feature is enabled when the switch’ s
green LED indicator is on. The auto-
dimming feature will default to on with
each ignition cycle.
! To Operate the Compass Feature
1. To turn the compass feature on/off,
press and hold the “
”switch for more
than 3 seconds or until the display turns
on/off. The compass feature will default to
on with each ignition cycle.
2. If the display reads “C”, slowly drive
the vehicle in circles until compass is
calibrated.
Compass calibration zones
3. To adjust for compass zone variance:
(1) Find your current location and
zone number on the map.
(2) Press and hold the “
”switch for
more than 6 seconds or until a zone
number appears in the display.
(3) Once the zone number appears in
thedisplay,togglethe “
”switch
again until your current location zone
number appears. After you stop press-
ing the switch, your new zone number
will be saved. Within a few seconds,
the display will show a compass
direction.
4. If the vehicle’ s magnetics have chan-
ged or if the compass appears inaccurate,
recalibrate the compass. Press and hold
the “
”switch for more than 9 seconds or
until a “C”appears in the display. Once a
“C ”appears in the display, slowly drive the
vehicle in circles until compass is cali-
brated.
3-108
Page 260 of 634
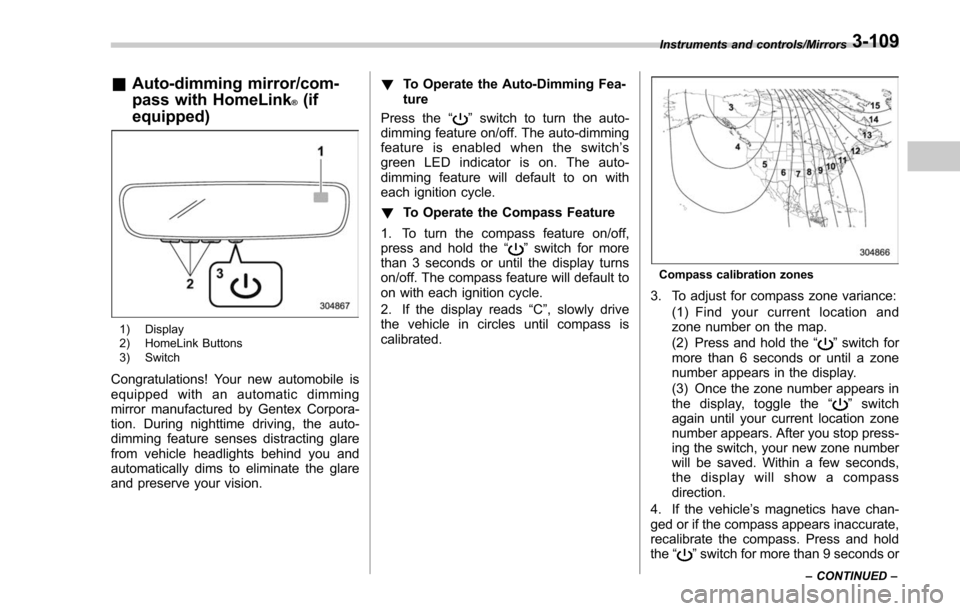
&Auto-dimming mirror/com-
pass with HomeLink
®(if
equipped)
1) Display
2) HomeLink Buttons
3) Switch
Congratulations! Your new automobile is
equipped with an automatic dimming
mirror manufactured by Gentex Corpora-
tion. During nighttime driving, the auto-
dimming feature senses distracting glare
from vehicle headlights behind you and
automatically dims to eliminate the glare
and preserve your vision. !
To Operate the Auto-Dimming Fea-
ture
Press the “
”switch to turn the auto-
dimming feature on/off. The auto-dimming
feature is enabled when the switch’ s
green LED indicator is on. The auto-
dimming feature will default to on with
each ignition cycle.
! To Operate the Compass Feature
1. To turn the compass feature on/off,
press and hold the “
”switch for more
than 3 seconds or until the display turns
on/off. The compass feature will default to
on with each ignition cycle.
2. If the display reads “C”, slowly drive
the vehicle in circles until compass is
calibrated.
Compass calibration zones
3. To adjust for compass zone variance:
(1) Find your current location and
zone number on the map.
(2) Press and hold the “
”switch for
more than 6 seconds or until a zone
number appears in the display.
(3) Once the zone number appears in
thedisplay,togglethe “
”switch
again until your current location zone
number appears. After you stop press-
ing the switch, your new zone number
will be saved. Within a few seconds,
the display will show a compass
direction.
4. If the vehicle’ s magnetics have chan-
ged or if the compass appears inaccurate,
recalibrate the compass. Press and hold
the “
”switch for more than 9 seconds or
Instruments and controls/Mirrors
–CONTINUED –3-109
Page 413 of 634

Starting and operating/Starting and stopping the engine (models without push–button start system)
. When starting the engine, be sure
to sit in the driver ’s seat (except
when using the remote engine
start system).
NOTE
. Avoid rapid racing and rapid accel-
eration immediately after the engine
has started.
. For a short time after the engine has
started, the engine speed is kept high.
When the warm-up is completed, the
engine speed lowers automatically.
. On rare occasions, it may be difficult
to start the engine depending on the
fuel and the usage condition (repeated
driving of a distance in which the
engine has not warmed up sufficiently).
In such a case, it is recommended that
you change to a different brand of fuel.
. On rare occasions, transient knock-
ing may be heard from the engine when
the accelerator is operated rapidly
such as a rapid start-up and a rapid
acceleration. This is not a malfunction.
. The engine starts more easily when
the headlights, air conditioner and rear
window defogger are turned off.
. After the engine starts, the engine
speed will be kept high until the engine
has warmed up sufficiently. !
MT models
1. Apply the parking brake.
2. Turn off unnecessary lights and ac-
cessories.
3. Depress the clutch pedal to the floor
and shift the shift lever into neutral. Hold
the clutch pedal to the floor while starting
the engine.
The starter motor will only operate when
the clutch pedal is depressed fully to the
floor.
4. Turn the ignition switch to the “ON”
position and check the operation of the
warning and indicator lights. Refer to
“Warning and indicator lights ”F 3-13.
5. Turn the ignition switch to the “START”
position without depressing the accelera-
tor pedal. Release the key immediately
after the engine has started.
If the engine does not start, try the
following procedure.
(1) Turn the ignition switch to the
“OFF ”position and wait for at least
10 seconds. After checking that the
parking brake is firmly set, turn the
ignition switch to the “START”position
while depressing the accelerator pedal
slightly (approximately a quarter of the
full stroke). Release the accelerator
pedal as soon as the engine starts.
(2) If this fails to start the engine, turn the ignition switch back to the
“OFF”
position and wait for at least 10
seconds. Then fully depress the accel-
erator pedal and turn the ignition
switch to the “START”position. If the
engine starts, quickly release the
accelerator pedal.
(3) If this fails to start the engine, turn
the ignition switch again to the “OFF”
position. After waiting for 10 seconds
or longer, turn the ignition switch to the
“START ”position without depressing
the accelerator pedal.
(4) If the engine still does not start,
contact your nearest SUBARU dealer
for assistance.
6. Confirm that all warning and indicator
lights have turned off after the engine has
started. The fuel injection system auto-
matically lowers the idle speed as the
engine warms up.
! CVT models
1. Apply the parking brake.
2. Turn off unnecessary lights and ac-
cessories.
3. Shift the select lever to the “P”or “N
”
position (preferably the “P”position).
The
starter motor will only operate when
the select lever is at the “P”or “N”position.
4. Turn the ignition switch to the “ON”
7-10