2017 Seat Toledo stop start
[x] Cancel search: stop startPage 64 of 108
NavigationRoute criteria: Meaning
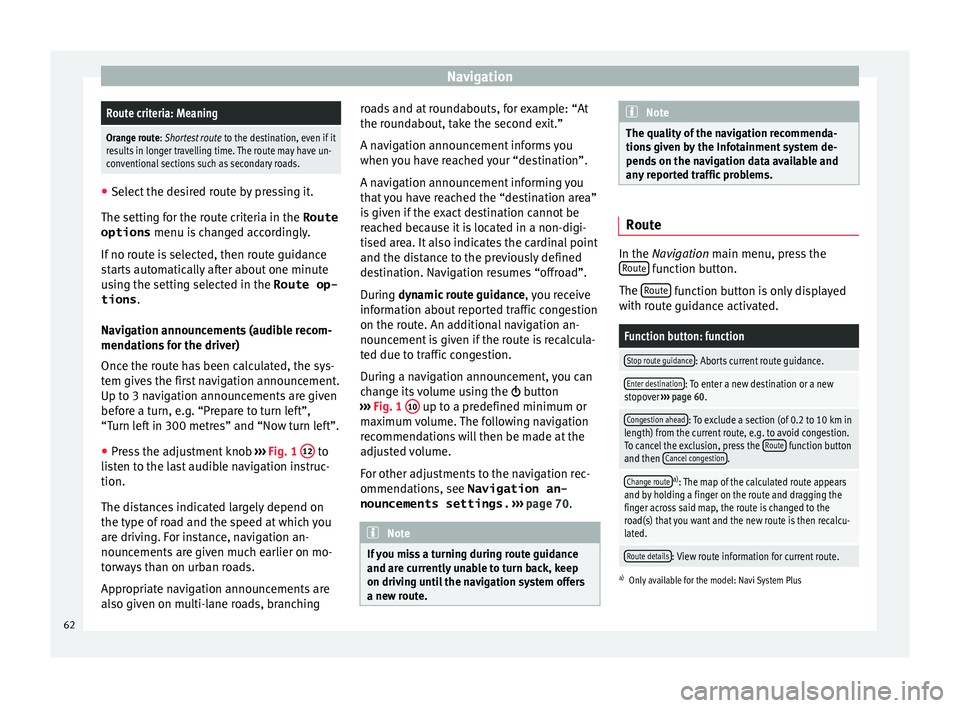
Orange route: Shortest route
to the destination, even if it
results in longer travelling time. The route may have un-
conventional sections such as secondary roads. ●
Select the desired route by pressing it.
The setting f or the r
oute criteria in the Route
options menu is changed accordingly.
If no route is selected, then route guidance
starts automatically after about one minute
using the setting selected in the Route op- tions .
Navigation announcements (audible recom-
mendations for the driver)
Once the route has been calculated, the sys-
tem gives the first navigation announcement.
Up to 3 navigation announcements are given
before a turn, e.g. “Prepare to turn left”,
“Turn left in 300 metres” and “Now turn left”.
● Press the adjustment knob ››
›
Fig. 1 12 to
li s
t
en to the last audible navigation instruc-
tion.
The distances indicated largely depend on
the type of road and the speed at which you
are driving. For instance, navigation an-
nouncements are given much earlier on mo-
torways than on urban roads.
Appropriate navigation announcements are
also given on multi-lane roads, branching roads and at roundabouts, for example: “At
the round
about, take the second exit.”
A navigation announcement informs you
when you have reached your “destination”.
A navigation announcement informing you
that you have reached the “destination area”
is given if the exact destination cannot be
reached because it is located in a non-digi-
tised area. It also indicates the cardinal point
and the distance to the previously defined
destination. Navigation resumes “offroad”.
During dynamic route guidance , you receive
information about reported traffic congestion
on the route. An additional navigation an-
nouncement is given if the route is recalcula-
ted due to traffic congestion.
During a navigation announcement, you can
change its volume using the button
››› Fig. 1 10 up to a predefined minimum or
m ax
imum
volume. The following navigation
recommendations will then be made at the
adjusted volume.
For other adjustments to the navigation rec-
ommendations, see Navigation an-
nouncements settings. ››› page 70. Note
If you miss a turning during route guidance
and are c urr
ently unable to turn back, keep
on driving until the navigation system offers
a new route. Note
The quality of the navigation recommenda-
tions giv
en by the Infotainment system de-
pends on the navigation data available and
any reported traffic problems. Route
In the Navigation main menu, press the
R out
e function button.
The Rout
e function button is only displayed
w ith r
out
e guidance activated.
Function button: function
Stop route guidance: Aborts current route guidance.
Enter destination: To enter a new destination or a new
stopover ››› page 60.
Congestion ahead: To exclude a section (of 0.2 to 10 km in
length) from the current route, e.g. to avoid congestion.
To cancel the exclusion, press the Route
function button
and then Cancel congestion.
Change routea)
: The map of the calculated route appears
and by holding a finger on the route and dragging the
finger across said map, the route is changed to the
road(s) that you want and the new route is then recalcu-
lated.
Route details: View route information for current route.
a) Only available for the model: Navi System Plus
62
Page 65 of 108
Navigation
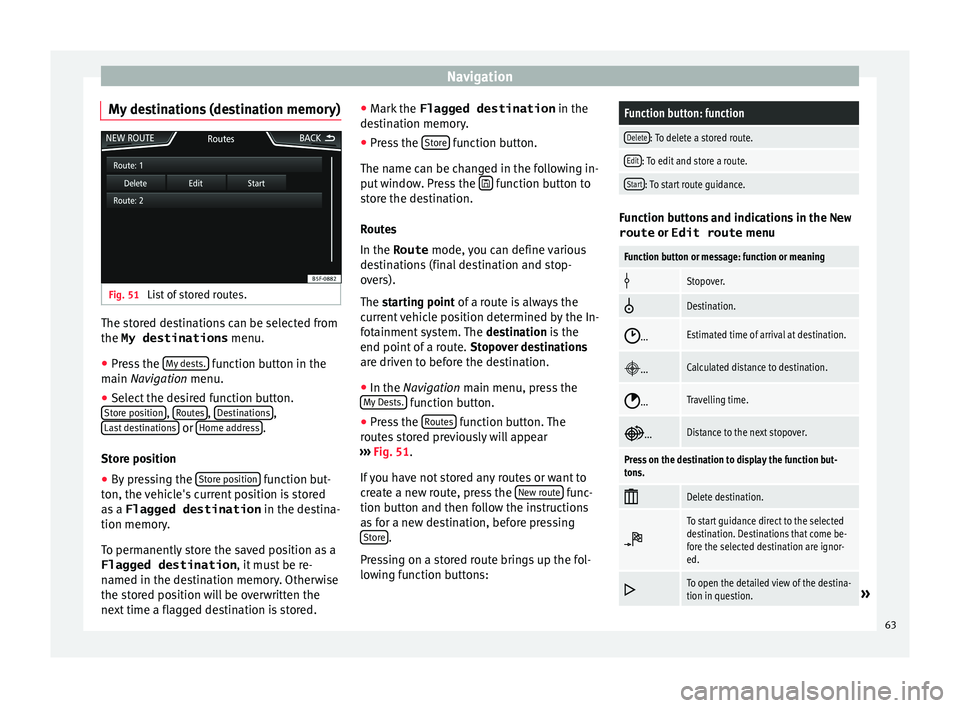
My destinations (destination memory) Fig. 51
List of stored routes. The stored destinations can be selected from
the My destinations
menu.
● Press the M
y
de sts. function button in the
m ain
Na
vigation menu.
● Select the desired function button.
Store po
sition ,
R
out
e s ,
D
e
s tinations ,
La s
t
destinations or
Home a
d
dr ess .
St or
e po
sition
● By pressing the Store po
sition function but-
t on, the
v
ehicle's current position is stored
as a Flagged destination in the destina-
tion memory.
To permanently store the saved position as a
Flagged destination , it must be re-
named in the destination memory. Otherwise
the stored position will be overwritten the
next time a flagged destination is stored. ●
Mark the Flagged destination in the
de
stination memory.
● Press the Store function button.
The n ame c
an be c
hanged in the following in-
put window. Press the function button to
s t
or
e the destination.
Routes
In the Route mode, you can define various
destinations (final destination and stop-
overs).
The starting point of a route is always the
current vehicle position determined by the In-
fotainment system. The destination is the
end point of a route. Stopover destinations
are driven to before the destination.
● In the Navigation main menu, press the
My
Dests. function button.
● Press the R
out
e
s function button. The
r out
e
s stored previously will appear
››› Fig. 51.
If you have not stored any routes or want to
create a new route, press the New route func-
tion b utt
on and then f
ollow the instructions
as for a new destination, before pressing Store .
Pr e
s
sing on a stored route brings up the fol-
lowing function buttons:
Function button: function
Delete: To delete a stored route.
Edit: To edit and store a route.
Start: To start route guidance. Function buttons and indications in the
New
route or Edit route menu
Function button or message: function or meaning
Stopover.
Destination.
...Estimated time of arrival at destination.
...Calculated distance to destination.
...Travelling time.
...Distance to the next stopover.
Press on the destination to display the function but-
tons.
Delete destination.
To start guidance direct to the selected
destination. Destinations that come be-
fore the selected destination are ignor-
ed.
To open the detailed view of the destina-
tion in question.»
63
Page 66 of 108
NavigationAvailable function buttons.
New dest.To add a new destination to the tour.
Destina-
tionsTo add a new destination from My des-
tinations
to the tour.
StoringTo store the created tour in the tour
memory.
StartTo start route guidance.
CalculateTo update calculated distance and esti-
mated arrival time. a)
StopTo stop route guidance to the active des-
tination.b)
To move a stopover or a destination to
another position on the list. Press and
drag to move the destination.
a)
This function button is only displayed with route guidance ac-
tivated and when a destination has been added to the tour.
b) This function button is only displayed with route guidance ac-
tivated.
Last destinations
View of destinations for which a route has al-
ready been started.
My destinations
● Press the Options function button and se-
lect the de
sired function button.
Function button: function
Destination memory: View of destinations stored manually
and from imported vCards ››› page 68, Importing
vCards (electronic business cards) .
Favourites: View of destinations stored as favourites.
Contacts: View of entries in the phonebook that have a
stored address (postal address). Home address
Only
one a
ddress or position can be stored
as the home address at any one time. The
stored home address can be edited or over-
written.
If a home address has already been stored,
route guidance will be started to the stored
home address.
If a home address has not yet been stored,
an address can be assigned as the home ad-
dress.
Assigning the home address for the first time:
Position: Press to store the vehicle's current position as
the home address.
Address: Press to enter the home address manually.
Editing the home address:
The home address can be edited in the Navigation
settings menu ››› page 70.
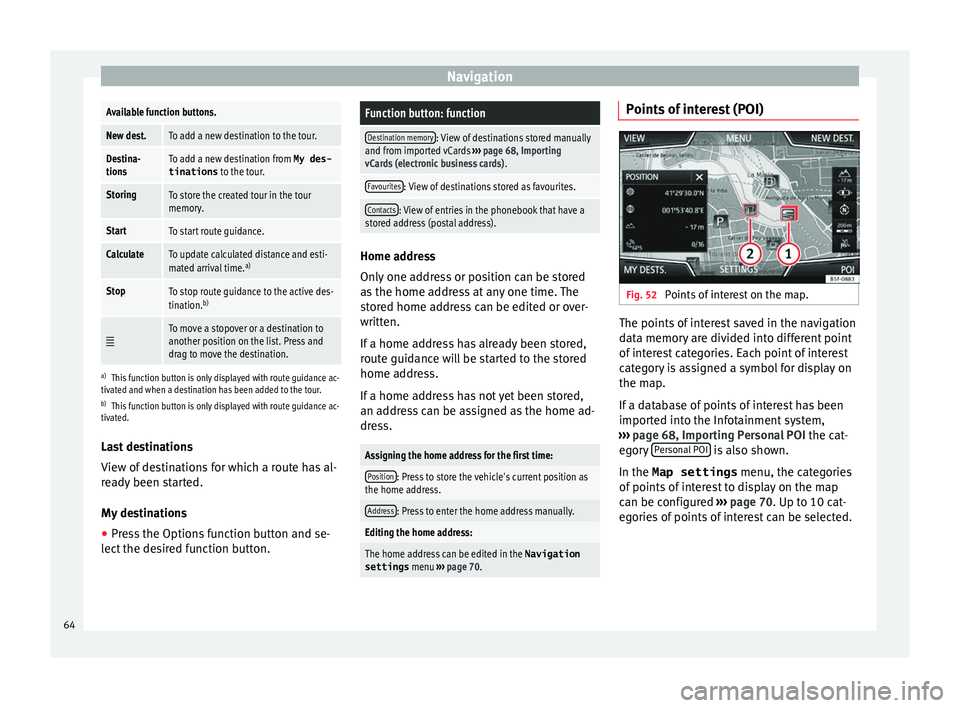
Points of interest (POI) Fig. 52
Points of interest on the map. The points of interest saved in the navigation
d
at
a memor
y are divided into different point
of interest categories. Each point of interest
category is assigned a symbol for display on
the map.
If a database of points of interest has been
imported into the Infotainment system,
››› page 68, Importing Personal POI the cat-
egory Personal POI is also shown.
In the Map settings menu, the cat
e
gories
of points of interest to display on the map
can be configured ››› page 70. Up to 10 cat-
egories of points of interest can be selected.
64
Page 68 of 108
NavigationFunction button: function
Position: current vehicle position in coordinates and GPS
status (satellite reception).
a) This function button is only shown when route guidance is
not active or when predictive route guidance is active.
Press the function button to close the split
sc r
een.
At any moment during navigation, pressing
inside the map will make a pop-up menu ap-
pear with the following functions:
Function button: function
Street name or coordinates: shows the details of the point
selected on the map.
Only when you press on an icon on the map:
POI: name of the point of interest (when only one
appears on the map).
Group of POIs: more points of interest (when you
press on the map on various POIs grouped togeth-
er).
Favourite: name of the favourite.
Home: Home address.
Start route guidance: starts guidance directly.
Add stopover destination: only when you have an active
route.
Search nearby: enters in the search menu, but only for the
area around the point selected on the map.
Function button: function
Demo mode start (only when demo mode is active) Map display
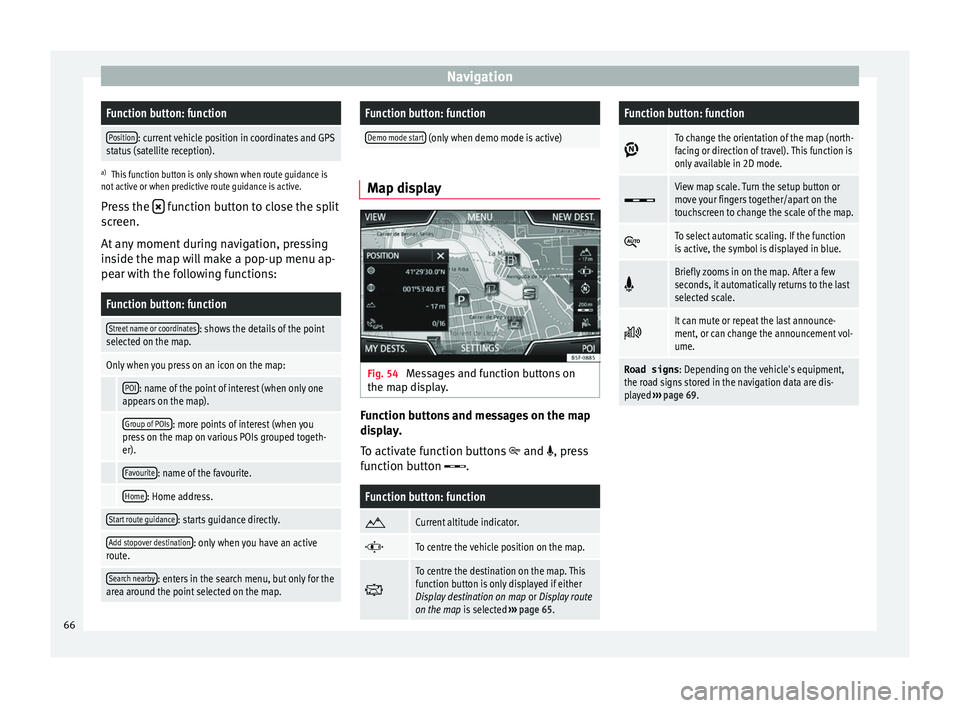
Fig. 54
Messages and function buttons on
the m ap di
s
play. Function buttons and messages on the map
di
s
p
lay.
To activate function buttons
and , press
function button .
Function button: function
Current altitude indicator.
To centre the vehicle position on the map.
To centre the destination on the map. This
function button is only displayed if either
Display destination on map
or Display route
on the map is selected ››› page 65.
Function button: function
To change the orientation of the map (north-
facing or direction of travel). This function is
only available in 2D mode.
View map scale. Turn the setup button or
move your fingers together/apart on the
touchscreen to change the scale of the map.
To select automatic scaling. If the function
is active, the symbol is displayed in blue.
Briefly zooms in on the map. After a few
seconds, it automatically returns to the last
selected scale.
It can mute or repeat the last announce-
ment, or can change the announcement vol-
ume.
Road signs
: Depending on the vehicle's equipment,
the road signs stored in the navigation data are dis-
played ››› page 69. 66
Page 73 of 108
NavigationFunction button: function
Select preferred fuel station: The selected petrol station
mark will be shown before other points of interest in
the search.
Fuel warning: The warning to refuel is active.
If the fuel level reaches the reserve level, the corre-
sponding warning is generated which permits the
search for petrol stations.
Version information: Information on the stored navigation
data.
Maximum speeds: Shows the speed limits, depending on
the road, for the current country.
Advanced settings: To make advanced adjustments to the
navigation.
Time display: displayed during route guidance.
Estimated time of arrival: The estimated time of arrival
at the final destination is displayed.
Duration: The estimated travelling time to the final
destination is displayed.
Status line: displayed during route guidance.
Destination: The distance calculated to final desti-
nation is displayed.
Next stopover: The calculated distance until next
stopover is displayed.
Note: National border crossed: Displays the speed lim-
its of the country in question when crossing the bor-
der.
Demo mode: When Demo mode is activated and
route guidance is started, virtual guidance to the en-
tered destination can be initiated ››› page 69.
Function button: function
Define demo mode starting point: if demo mode is acti-
vated, a fictitious starting point for virtual route
guidance can be defined when the vehicle is sta-
tionary.
Waypoint modeb) : To start Offroad navigation.
a) This function depends on the country.
b) Only available for the model: “Navi System Plus”.
Navigation in Offroad mode*
Introduction 3 Only
available for the model: Navi System Plus
O
ffroad* navigation is a function for offroad
driving that provides directions in “non-digi-
tised areas” at low speeds.
Non-digitised areas are areas about which
the system does not have information for the
streets or terrain. It does not detect streets,
buildings or natural limits such as mountains
or rivers, although they may be shown on the
map.
Offroad* navigation is not suitable for driving
on conventional roads as it does not detect
one-way streets, motorway entries or similar. Offroad Navigation Menu 3 Only available for the model: Navi System Plus
Fig. 58
Offroad Navigation Menu start Press the
SETTINGS function button in the
m ain Nav
igation menu.
● In the menu, press the Way
point mode
function button.
● The Offroad Navigation menu opens
›››
Fig. 58.
Function buttons in the Offroad Navigation
menu
Function button: function
RECORD: Initiates the plotting of an Offroad tour.
MEMORY: Opens a list allowing the selection of a stored
Offroad tour.
EXIT: Ends Offroad navigation. 71
Page 74 of 108

Navigation
Recording an Offroad tour 3 Only available for the model: Navi System Plus
Fig. 59
Recording an Offroad tour An Offroad tour is formed by a series of stor-
ed wa
ypoin
t
s.
Starting recording
● In the Offroad Navigation menu, in the pop-
up window pr
ess the RECORD pop-up button.
● In the pop-up window, the user is able to
p lot
the t
our with a given destination or start
plotting the route without giving a final desti-
nation.
● Starts plotting the route.
The offroa
d markers can be recorded by indi-
cating a manual waypoint.
● In the Offroad Navigation menu, press the
ADD WA
YPOINT function button. The tour way- points defined manually are shown on the
m
ap b
y
a marker.
Ending recording ● Press the STOP RE
CORDING function button in
the m ain O
ffr
oad Navigation menu.
Managing stored Offroad tours 3 Only available for the model: Navi System Plus
Fig. 60
Offroad Navigation menu, stored
t our s ●
Press the MEMORY function button in the
O ffr
o
ad Navigation menu.
● A list of stored Offroad tours opens, if there
are any
.
When a tour is selected, the following icons
will appear ››› Fig. 60:
Export the tour to an SD card.
Edit the name of the tour.
Delet
e the tour.
Load tour
Function button: function
IMPORT: allows the import of an Offroad route in “.GPX”
format. Loading an Offroad tour
When the Offr
o
ad tour is selected, press Play
and the selected tour will be loaded onto
the Navigation system.
Creating an Offroad tour 3 Only
available for the model: Navi System Plus Fig. 61
Offroad route guidance mode Start route guidance
● Loads the stored Offroad tour.
72
Page 75 of 108

Navigation
● St ar
tin
g off in a stored route is not detected
by the system automatically.
Setup
Function button: function
Invert: Reverses the direction of the stored Offroad tour.
Next point: Starts the Offroad tour from the nearest point.
Start: Starts the complete Offroad tour. When route guidance starts, the system
swit
c
hes to the map view.
Stopping route guidance ● Press the Options button on the screen and
then pr e
s
s Stop .
End w a
y
point navigation
● Press the EXIT function button in the Off-
r o
a
d Navigation menu. WARNING
Terrain features are disregarded during route
guidanc e Driv
e slowly and following the in-
structions in order to perform the manoeuvre
as far as possible!
● The general direction of travel is indicated
straight
ahead by direction arrows in the In-
fotainment System pop-up window ››› Fig. 61
A . Note
If an Offroad tour is being recorded, this is
autom atic
ally stored if Offroad navigation is
discontinued. 73
Page 77 of 108

CAR menu
A new lap timer recording is started by
pr e
s
sing on the surface of the digital lap
timer + .
Stop lap timer/Partial time.
The analogue lap timer stops for 5 sec-
onds. After 5 seconds, the analogue lap
timer goes back to showing the real time.
Statistics/delete last lap timer recording.
Offroad* Fig. 64
CAR Menu Offroad. ●
Press the CAR button on the Infotainment
sy s
t
em.
● Press the VIEW function button and then
sel ect
OFFROAD .
2 3
4
5 If the corresponding equipment is available,
the inf
orm
ation th
at appears is the following:
Compass.
Altimeter: altitude above sea level.
Turning angle of steered wheels.
Coolant temperature.
Lubricating oil temperature
Only the altimeter and 2 more of these items
of information can be displayed at the same
time, but the user chooses which to display,
and in what order, by moving their finger ver-
tically over the dials.
Consumers Fig. 65
Convenience consumers. 1.
2.
3.
4.
5.
By pressing the
C
ONSUMERS button, informa-
tion on the s t
at
us of the vehicle's main con-
sumption devices is obtained. It is shown via
a consumption indicator bar in l/h (gal/h) 1)
.
Driving data Fig. 66
Driving data. The onboard computer is equipped with 3
memorie
s
th
at work automatically. In these
memories you can see the distance travelled,
average speed, time passed, average con-
sumption and autonomy of the vehicle.
1. Since start
Indicates and stores the values of the journey
completed and the consumption from when »1)
In the case of Gas (CNG) vehicles, the units are in
kg/h. 75