2017 Seat Leon SC tow
[x] Cancel search: towPage 19 of 104

Connectivity
Connectivity Dat a tr
an
sferThis communication can allow data to be
re
a
d and/or written.
From the SETTINGS menu > Data transfer for
SEAT apps, there is a checkbox to acti-
vate/deactivate the function and a dropdown
menu called Operation via apps which con-
trols the level of interaction between the
apps and the system ››› table on page 90.
Related video Fig. 11
Connectivity Full Link*
Fu
l
l Link technology description The Full Link system provides a way of bring-
in
g t
og
ether technologies that allow commu-
nication between the Infotainment System
and mobile devices: ●
MirrorLink ®
● Android Aut
o™
● Apple CarPlay™
Interf
aces
To access the Full Link system, press the Full
Link button ››› Fig. 1 2 or press the infotain-
ment MENU button
›››
Fig. 1
1 and then se-
l ect
the F
ull Link context.
The connection to Full Link is made through a
USB interface. WARNING
If a mobile terminal is not secured or is incor-
rectly sec
ured in the vehicle, it could move
around the passenger compartment in the
event of a sudden driving manoeuvre, emer-
gency stop or accident, resulting in injury.
● While driving, mobile terminals must be se-
curely
fastened in position, outside the air-
bag deployment zones, or safely stowed
away. WARNING
Any applications that are not suitable or exe-
cut e inc
orrectly may cause damage to the ve-
hicle, accidents and serious injuries.
● SEAT recommends the use of the Apps that
SEAT pr
ovides for this vehicle. ●
To m ak
e full use of SEAT Apps, you must ac-
tivate the option Setup , “Data transfer for
SEAT apps” ››› page 90.
● The interaction level of the Apps on the
syst
em must be: ALLOW.
● Protect the mobile terminal with its appli-
cations
from improper use.
● Never make modifications to the applica-
tions.
● Con
sult the instruction manual for the mo-
bil
e terminal. WARNING
The use of applications while driving can dis-
tract
your attention from the traffic. Distract-
ing the driver in any way can lead to an acci-
dent and cause injuries.
● Always drive carefully and responsibly. CAUTION
● In are a
s where special regulations apply or
the use of mobile terminals is forbidden, the
mobile terminal must be switched off at all
times. The radiation produced by the mobile
terminal when switched on may interfere with
sensitive technical and medical equipment,
possibly resulting in malfunction or damage
to the equipment.
● SEAT cannot be held liable for any damage
caused t
o the vehicle as a result of the use of
applications that are of poor quality or are
defective, the inadequate programming of » 17
Page 60 of 104

Navigation
Navigation main menu Fig. 42
Navigation main menu The navigation functions are only enabled
when n
av
ig
ation data for the current area are
available on the Infotainment system.
The Navigation main menu allows you to se-
lect a new destination, call up a previously
used or stored destination and search for
points of interest.
Opening the main Navigation menu
● Press the NAV button on the Infotainment
sy s
t
em to open the last menu that was open
in navigation.
● If the main Navigation menu i
s not dis-
played, press the NAV Infotainment button
ag ain u
nti
l the main Navigation menu ap-
pears. ●
OR: Pres
s the function button to return,
menu b y
menu, t
o the main Navigation
menu.
Function buttons and messages on the main
Navigation menu
Function button: function
AThe split screen is displayed ››› page 63.
BMessages and function buttons on the map dis-
play ››› page 64.
NEW DESTINATION: To enter a new destination
››› page 58.
ROUTE: During route guidance ››› page 60.
MY DESTS.: To activate or manage stored destinations
››› page 60.
POI: Search for points of interest (car parks, fuel sta-
tions and restaurants) within a particular search area
››› page 62.
VIEW: To modify or activate or deactivate the split
screen and show POI ››› Fig. 42 A
››› page 63.
SETTINGS: Open the Navigation Settings menu
››› page 67. New destination (enter destination)
Fig. 43
Search screen. ●
In the Na vigation main menu, press the
New de s
tination function button.
● Press the Option
s function button and se-
l ect
the r
equired type of destination
(Search , Address , POI on the route or
On map ).
● Using voice control*, if you say Town, street
and number, without
pauses, and then the
instruction “Start Route Guidance” a route to
the given destination will start.
Search
Search for addresses and Points of Interest
using the keypad to enter them ›››
Fig. 43.
For cities, post codes and points of interest,
the full details must be entered. You can also
58
Page 61 of 104

Navigation
search for points of interest by names or cat-
e g
orie
s. When necessary, enter the name of
the city to refine the search.
››› Fig. 43
APress to open the cursor buttons (, ), which
allow you to move within the text. Address
Aft
er ent
ering a country and a town, you can
start navigating towards the centre of the se-
lected town.
When narrowing down the destination ad-
dress, please note that every entry restricts
the available range of subsequent selections.
For instance, if the street you are looking for
is not in the postcode area you have selected
in a previous window, you will not be able to
find the street at the street selection stage.
Function button: function
Country: To select the desired country.
City: To enter the desired city or postcode.
Street: To enter the desired street name.
House number: To enter the desired house number.
Junction: To select the desired intersection.
Last destinations: Open the My destinations menu
››› page 60.
Start: Start route guidance to the selected address. Using the
● Select the destination on the map or enter
it u
s
ing GPS coordinates and confirm with
OK .
Function button: function
Save: To save the selected point of interest in the desti-
nation memory ››› page 60.
Edit: To edit a destination or to enter another destina-
tion.
Route options: To adjust route options, see Navigation
Setup ››› page 67.
Start: Starts guided navigation to the selected point of
interest. After starting route guidance
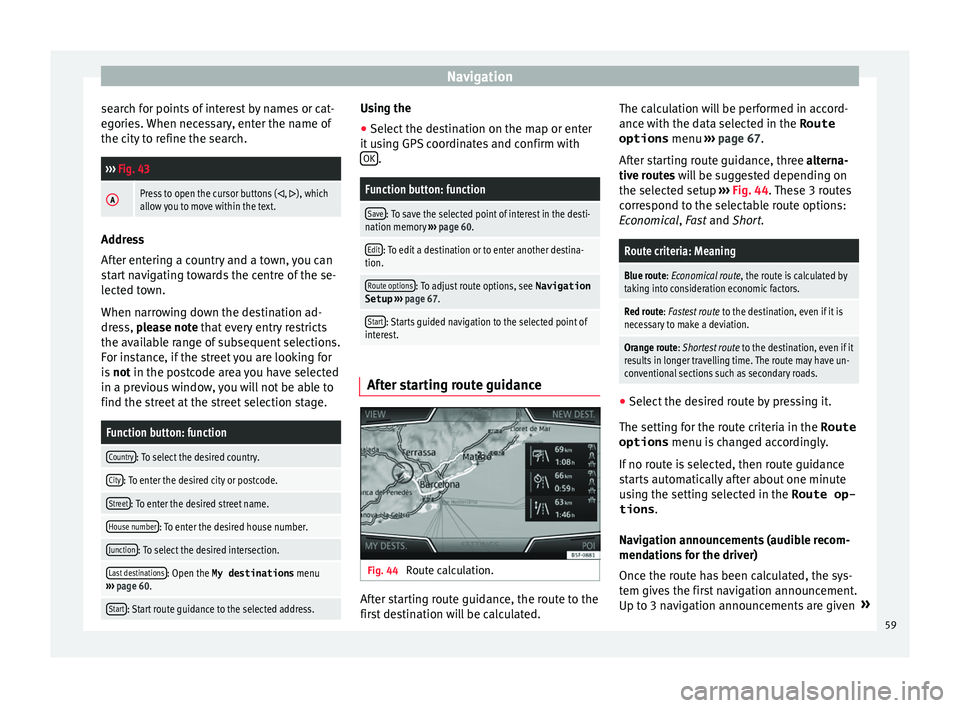
Fig. 44
Route calculation. After starting route guidance, the route to the
fir
s
t
destination will be calculated. The calculation will be performed in accord-
ance with the d
ata selected in the Route
options menu ››› page 67.
After starting route guidance, three alterna-
tive routes will be suggested depending on
the selected setup ››› Fig. 44. These 3 routes
correspond to the selectable route options:
Economical, Fast and Short.
Route criteria: Meaning
Blue route: Economical route, the route is calculated by taking into consideration economic factors.
Red route: Fastest route to the destination, even if it is
necessary to make a deviation.
Orange route: Shortest route to the destination, even if it
results in longer travelling time. The route may have un-
conventional sections such as secondary roads. ●
Select the desired route by pressing it.
The settin g f
or the r
oute criteria in the Route
options menu is changed accordingly.
If no route is selected, then route guidance
starts automatically after about one minute
using the setting selected in the Route op- tions .
Navigation announcements (audible recom-
mendations for the driver)
Once the route has been calculated, the sys-
tem gives the first navigation announcement.
Up to 3 navigation announcements are given »
59