2017 SEAT IBIZA ST park assist
[x] Cancel search: park assistPage 148 of 248
Operation
It lights up yellow
The 12-volt battery
was disconnected
and has been recon-
nected.Take the vehicle for a short run
at 15-20 km/h (9-12 mph).
It flashes yellow
The steering column
is tight.Turn the wheel a little to both
sides.
The steering column
does not unlock or
lock.Remove the key from the ignition
and switch the ignition back on.
If necessary, check the messag-
es displayed on the instrument
panel display.
Do not drive on if
the steering
column remains locked after the
ignition has been switched on.
Seek specialist assistance. WARNING
If the warning lamps and the corresponding
mes s
ages are ignored when they light up, the
vehicle may stall in traffic and cause acci-
dents and severe injuries.
● Never ignore the warning lamps or messag-
es.
● Stop the
vehicle at the next opportunity
and in a safe p
lace. Note
Failure to heed the control lamps and corre-
spondin g t
ext messages when they light up
may result in damage to the vehicle. Information relating to different vehi-
cl
e pr
ocesses. In order to make the vehicle more difficult to
st
e
al, you should always lock the steering be-
fore leaving the vehicle.
Mechanical steering lock
The steering column is locked when the key
is removed from the ignition lock and the ve-
hicle is stationary.
Activating the steering lock
● Park the vehicle ››
›
page 149.
● Remove the ignition key.
● Turn the steering wheel slightly until the
steerin
g lock has engaged.
Deactivating the steering lock
● Turn the steering wheel slightly to release
the lock.
● Inser
t the key in the ignition lock.
● Hold the steering wheel in this position
and switc
h on the ignition. Electromechanical steering
In vehic
les with electromechanical steering,
the assisted steering function automatically
adjusts according to vehicle speed, steering
wheel torque and wheel orientation. The
power steering only works when the engine
is running.
You should take into account that you will
need considerably more power than normal
to steer the vehicle if the power steering is
not working correctly or at all.
Power-assisted steering
Power-assisted steering helps the driver in
critical situations. In counter-steering, it as-
sists by applying additional torque ››› .
WARNING
Power-assisted steering, together with the
ESC, help s
the driver to control vehicle steer-
ing in critical situations. However, the driver
is ultimately responsible for steering the ve-
hicle at all times. Power-assisted steering
does not remove this responsibility. 146
Page 151 of 248
Driving
Glow plug system for the diesel engine
T o av
oid u
nnecessary discharging of the bat-
tery, do not use any other major electrical
equipment while the glow plugs are pre-heat-
ing.
Start the engine as soon as the glow plug
warning lamp goes out.
Starting a diesel engine after the fuel tank
has been completely run dry
If the fuel tank has been completely run dry,
it may take longer than normal (up to one mi-
nute) to start a diesel engine after refuelling.
This is because the fuel system must elimi-
nate air first. WARNING
Observe the safety warnings ›››
in Starting
petro l
engines on page 148. CAUTION
● When the engine i s
cold, you should avoid
high engine speeds, driving at full throttle
and over-loading the engine. Risk of engine
damage.
● The vehicle should not be pushed or towed
more than 50 metr
es to start the engine. Un-
burnt fuel could enter the catalytic converter
and damage it.
● Before attempting to push-start or tow a ve-
hicle in or
der to start it, you should first try to
start it using the battery of another vehicle. Please observe and follow the notes on the
›› ›
page 52, How to jump start. For the sake of the environment
Do not warm-up the engine by running the
en gine w ith the
vehicle stationary. You
should drive off as soon as you start the en-
gine. This helps the engine reach operating
temperature faster and reduces emissions. Switching off the engine
–
Stop the vehicle.
– Turn the ignition key to position ››
›
Fig. 156
1 .
Af t
er sw
itching the engine off, the radiator
fan may run on for up to 10 minutes. It is also
possible that the fan turns itself on once
more if the coolant temperature increases
due to the heat accumulated in the engine
compartment or due to its prolonged expo-
sure to solar radiation. WARNING
● Never sw it
ch the engine off until the vehi-
cle is completely stationary.
● The brake servo works only when the en-
gine is ru
nning. With the engine switched off,
more strength is needed to brake. As normal brake operation cannot be performed, risk of
acc
ident
s and serious injury may exist.
● The steering lock can be immediately
block
ed once the key is removed from the ig-
nition. The vehicle cannot be steered. Risk of
accident.
● Power-assisted steering does not work
when the engine is
off, and more strength is
needed to turn the wheel.
● If the key is removed from the ignition lock
the steerin
g lock could be engaged and vehi-
cle steering would not work. CAUTION
When the engine has been running under a
heavy lo
ad for a long period, heat can accu-
mulate in the engine compartment and cause
engine damage. For this reason, idle the en-
gine for approximately 2 minutes before
switching it off. Braking and parking
Br ak
in
g capacity and braking distance The efficiency of the brakes depends directly
on the br
ak
e p
ad wear. This wear depends to
a great extent on the conditions under which
the vehicle is operated and the way the vehi-
cle is driven. If you often drive in town, drive
short distances or have a sporty driving style,
we recommend that you have the thickness »
149
Technical data
Advice
Operation
Emergencies
Safety
Page 152 of 248
Operation
of your brake pads checked by technical serv-
ic e
s
more frequently than recommended in
the Maintenance Programme.
If you drive with wet brakes, for example, af-
ter crossing areas of water, on days of heavy
rainfall or even after washing the car, the ef-
fect of the brakes is reduced as the brake
discs are wet or even frozen (in winter): in
this case, the brakes should be “dried” by
pressing the brake pedal several times. WARNING
Longer braking distances and faults in the
brak e sy
stem increase the risk of accidents.
● New brake pads must be run in and do not
have the c
orrect friction during the first
200 km. This reduced braking capacity may
be compensated for by pressing on the brake
pedal a little harder, which also applies when
the brake pads have to be changed further
on.
● If brakes are wet or frozen, or if you are
driving on r
oads which have been salted,
braking power may be lower than normal.
● On steep slopes, if brakes are excessively
used, they w
ill overheat. Before driving down
a long steep slope, it is advisable to reduce
speed and change down into a lower gear or
range (depending on the type of transmis-
sion). Thus, make use of engine braking and
relieve the brakes.
● Never let the brakes “drag” by applying
light pre
ssure. Continuous braking will cause the brakes to overheat and the braking dis-
tanc
e w
ill increase. Apply and then release
the brakes alternately.
● Never let the vehicle run with the engine
switc
hed off. The braking distance is in-
creased considerably when the brake servo is
not active.
● If the brake fluid loses its viscosity and is
subj
ected to heavy use, vapour bubbles can
form in the brake system. This reduces the ef-
ficiency of the brakes.
● Non-standard or damaged front spoilers
coul
d restrict the airflow to the brakes and
cause them to overheat. Before purchasing
accessories please observe the relevant in-
structions ››› page 187, Modifications.
● If a brake system circuit fails, the braking
dist
ance will be increased considerably. Con-
tact a specialised workshop immediately and
avoid unnecessary journeys. Control lamp
Situations in which the warning lamp lights
up *
●
the brake fluid level is too low
› ›
›
page 206.
● there is a fault in the brake system.
This w
arning lamp can light up together with
the ABS system warning lamp. WARNING
● If the br ak
e warning lamp does not go out
or if it lights up when driving, the brake fluid
level in the reservoir is too low so there is a
risk of an accident ››› page 206, Brake fluid.
Stop the vehicle and do not drive on. Obtain
technical assistance.
● If the brake warning lamp lights up to-
gether w
ith the ABS lamp this could be
due to an ABS fault. This could cause the rear
wheels to lock quickly when you brake. This
could cause the rear to break away. Risk of
skidding. Stop the vehicle and seek technical
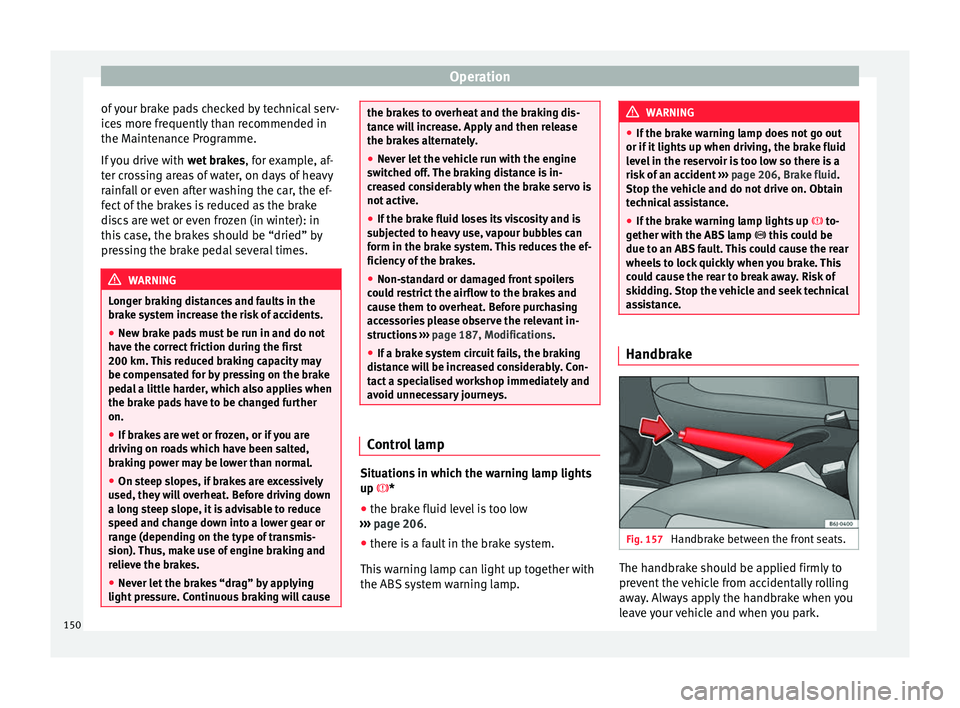
assistance. Handbrake
Fig. 157
Handbrake between the front seats. The handbrake should be applied firmly to
pr
ev
ent
the vehicle from accidentally rolling
away. Always apply the handbrake when you
leave your vehicle and when you park.
150
Page 153 of 248
Driving
Applying the handbrake
– Pull the handbrake lever up firmly
› ›
›
Fig. 157.
Releasing the handbrake
– Pull the lever up slightly and press the re-
lea
se knob in the direction of the arrow
››› Fig. 157 and guide the handbrake lever
down fully ››› .
A lw
a
ys pull the handbrake all the way up, so
there is less risk of driving off with it still en-
gaged ››› .
The h andbr
ak
e warning lamp lights up
when the handbrake is applied and the igni-
tion switched on. The warning lamp turns off
when the handbrake is released. WARNING
● Never u se the h
andbrake to stop the vehi-
cle when it is in motion. The braking distance
is considerably longer, because braking is
only applied to the rear wheels. Risk of acci-
dent!
● If the handbrake is only partially released,
this w
ill cause the rear brakes to overheat,
which can impair the function of the brake
system and could lead to an accident. This al-
so causes premature wear on the rear brake
pads. CAUTION
Always apply the handbrake before you leave
the v ehic
le. Put it in 1st gear as well. In vehi-
cles with an automatic gearbox, place the
gear lever in position P. Parking
The handbrake should always be firmly ap-
plied when the
v
ehicle is parked.
Always note the following points when park-
ing the vehicle: – Use the brake pedal to stop the vehicle.
– Apply the handbrake.
– Put it in 1st gear.
– Switch the engine off and remove the key
from the ignition. T
urn the steering wheel
slightly to engage the steering lock.
– Always take you keys with you when you
leav
e the vehicle ››› .
Ad dition
a
l notes on parking the vehicle on
gradients:
Turn the steering wheel so that the vehicle
rolls against the kerb if it started to roll.
● If the vehicle is parked facing downhil
l,
turn the front wheels so that they point to-
wards the kerb . ●
If the v
ehicle is parked facing uphill, turn
the front wheels so that they point away from
the kerb.
● Secure the vehicle as usual by applying the
handbrak
e firmly and putting it in 1st gear. WARNING
● Tak e me
asures to reduce the risk of injury
when you leave your vehicle unattended.
● Never park where the hot exhaust system
coul
d ignite inflammable materials, such as
dry grass, low bushes, spilt fuel etc.
● Never allow vehicle occupants to remain in
the vehic
le when it is locked. They would be
unable to open the vehicle from the inside,
and could become trapped in the vehicle in
an emergency. In the event of an emergency,
locked doors will delay assistance to vehicle
occupants.
● Never leave children alone in the vehicle.
They cou
ld set the vehicle in motion, for ex-
ample, by releasing the handbrake or the
gearbox lever.
● Depending on weather conditions, it may
become extr
emely hot or cold inside the vehi-
cle. This can be fatal. 151
Technical data
Advice
Operation
Emergencies
Safety
Page 175 of 248

Driver assistance systems
Parking aid Gener a
l
informationVarious systems are available to help you
when park
in
g or manoeuvring in tight
spaces, depending on the equipment fitted
on your vehicle.
The rear parking aid is an audible assistant
that warns about obstacles located behind
the vehicle ››› page 174.
During parking, Parking System Plus assists
the driver by visually and audibly warning
them about obstacles detected in front and
behind the vehicle ››› page 174. WARNING
● Alw a
ys pay attention, also when looking
straight ahead, to traffic and the vehicle sur-
roundings. The assistance systems are not a
replacement for driver awareness. When in-
serting or removing the vehicle from a park-
ing space, or when performing similar ma-
noeuvres the driver always assumes the re-
sponsibility.
● Adapt your speed and driving style at all
times t
o suit visibility, weather, road and traf-
fic conditions.
● The ultrasound sensors have blind spots in
which ob
stacles and people are not regis-
tered. Pay special attention to children and
animals. ●
Alw a
ys keep visual control of the vehicle
surroundings: use the mirrors for additional
help. CAUTION
Parking Aid functions may be negatively af-
f ect ed b
y different factors that may lead to
damage to the vehicle or its immediate sur-
rounds:
● Under certain circumstances, the system
does not
detect or display certain objects:
– Objects such as chains, trailer draw bars,
fences, posts and thin trees.
– Objects that are located above the sen-
sors, such as protrusions in a wall.
– Objects with certain surfaces or struc-
tures, such as wire mesh fences or pow-
der snow.
● Certain surfaces of objects and garments
do not refl
ect the ultrasound sensors' sig-
nals. The system cannot detect, at least cor-
rectly, these objects or people wearing such
clothes.
● Ultrasound sensor signals may be affected
by e
xternal sound sources. In certain circum-
stances this may prevent them from detect-
ing people or objects.
● Please note that low obstacles detected by
the syst
em may no longer be registered by
the sensors as the car moves closer, so the
system will not give any further warning. In
certain circumstances, objects such as high kerbs that could damage the bottom of the
vehic
l
e are not detected either.
● If the first warning from the ParkPilot is ig-
nored, the v
ehicle could suffer considerable
damage.
● The knocks or damage on the radiator
grill
e, bumper, wheel arch and vehicle under-
body can adjust the orientation of the sen-
sors. This can affect the parking aid function.
Have the function checked by a specialised
workshop. Note
● In cer t
ain situations, the system can give a
warning even though there is no obstacle in
the detected area, e.g:
–with rough or cobbled floors or ground
with long grass;
– with external ultrasound sources, such as
cleaning vehicles or other vehicles;
– In downpours, intense snow or dense ex-
haust gases;
– if the registration plate (front or rear) is
not properly affixed to the bumper sur-
face;
– or in locations such as the brow of a hill.
● In order to guarantee good system opera-
tion, keep the ultr
asound sensors clean, free
of snow or ice, and do not cover them with
adhesives or other objects.
● If you use high-pressure or vapour equip-
ment to c
lean the ultrasound sensors, apply » 173
Technical data
Advice
Operation
Emergencies
Safety
Page 176 of 248
Operation
it directly only very briefly and always from a
dis
t
ance of more than 10 cm.
● Retrofitting of accessories to the vehicle,
such a
s a bicycle rack, may interfere with the
operation of the Parking Aid.
● In order to familiarise yourself with the sys-
tem, it i
s advised that you practice parking in
an area or car park that is free from traffic.
There must be good weather and light condi-
tions.
● The volume and tone of the warnings can
be modified, in addition t
o the indications
››› page 177.
● In vehicles without a driv
er information
system, these parameters can be modified in
a SEAT Official Service or in a specialised
workshop.
● Please observe information on towing a
trail
er ››› page 177.
● The display on the Easy Connect screen
shows
a slight time delay. Rear parking aid*
The rear Parking Aid assists the driver in
p
ark
in
g by means of audible warning
sounds.
Description
There are sensors integrated in the rear
bumper. When the sensors detect an obsta-
cle, you are alerted by audible warnings. Make particularly sure that the sensors are
not co
vered by adhesives, residues and the
like, as this could affect the system's opera-
tion. Cleaning instructions ››› page 191.
The approximate measurement range of the
rear sensors is:
side area0.60 m
central area1.60 m As you approach the obstacle, the time inter-
val
betw
een the audible warnings will be re-
duced. When you reach around 0.30 m the
warning will be constant: Do not continue to
move forward (or backward) ››› in General
inf orm
ation on p
age 173, ››› in General in-
f orm
ation on p
age 173 !
If you maintain separation from the obstacle,
the volume of the warning begins to reduce
after four seconds (does not affect the tone
of the constant warning).
Activating/Deactivating
When engaging reverse gear, the parking aid
is automatically switched on. This is con-
firmed with a short warning.
On disengaging reverse gear, the Parking Aid
system is disconnected immediately. Parking system plus*
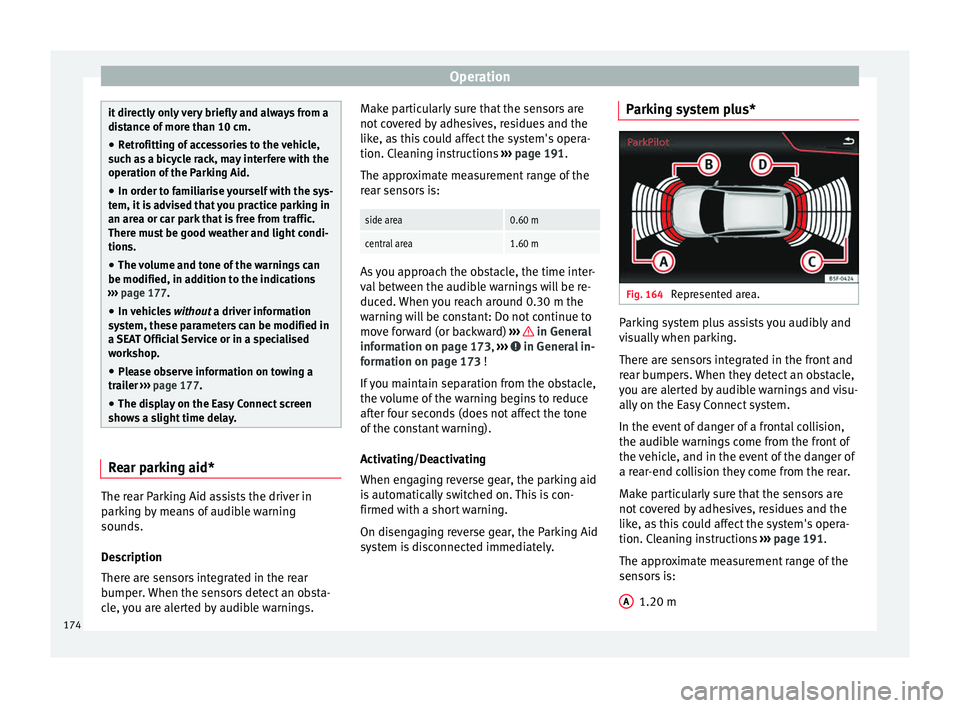
Fig. 164
Represented area. Parking system plus assists you audibly and
v
i
s
ually when parking.
There are sensors integrated in the front and
rear bumpers. When they detect an obstacle,
you are alerted by audible warnings and visu-
ally on the Easy Connect system.
In the event of danger of a frontal collision,
the audible warnings come from the front of
the vehicle, and in the event of the danger of
a rear-end collision they come from the rear.
Make particularly sure that the sensors are
not covered by adhesives, residues and the
like, as this could affect the system's opera-
tion. Cleaning instructions ››› page 191.
The approximate measurement range of the
sensors is:
1.20 m
A 174
Page 177 of 248
Driver assistance systems
0.60 m
1.60 m
0.60 m
As
y
ou approach the obstacle, the time inter-
val between the audible warnings will be re-
duced. When you reach around 0.30 m the
warning will be constant: do not continue to
move forward (or backward)!
If you maintain separation from the obstacle,
the volume of the warning begins to reduce
after four seconds (does not affect the tone
of the constant warning).
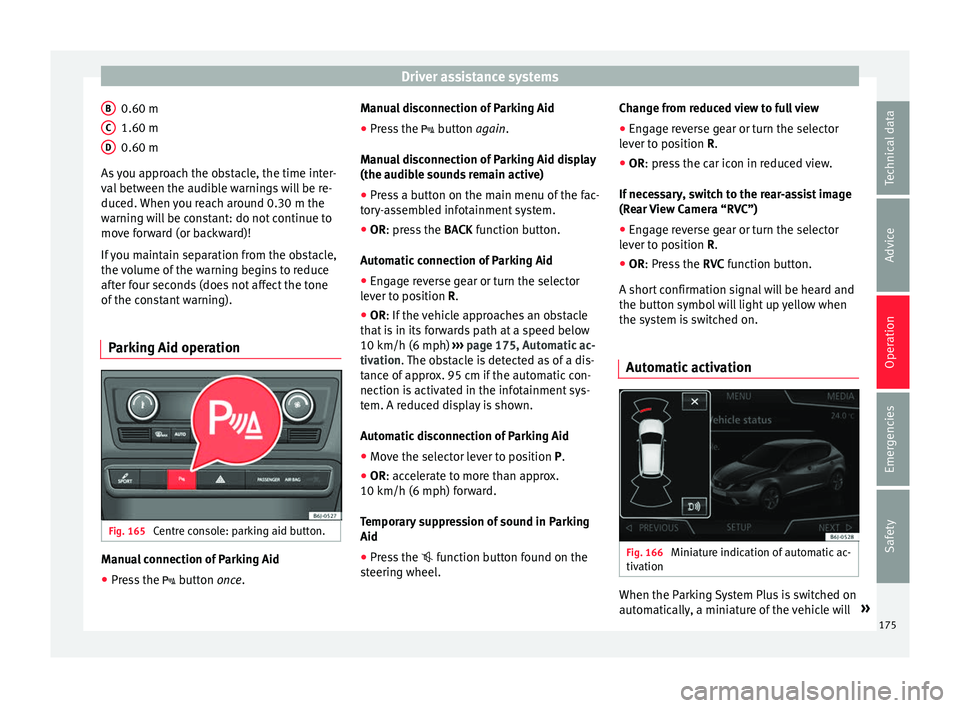
Parking Aid operation Fig. 165
Centre console: parking aid button. Manual connection of Parking Aid
● Press the butt
on
once.
B C
D Manual disconnection of Parking Aid
●
Press the butt
on
again.
Manual disconnection of Parking Aid display
(the audible sounds remain active)
● Press a button on the main menu of the fac-
tory
-assembled infotainment system.
● OR: press the BACK fu
nction button.
Automatic connection of Parking Aid ● Engage reverse gear or turn the selector
lever t
o position R.
● OR: If the vehicle approaches an obstacle
that
is in its forwards path at a speed below
10 km/h (6 mph) ››› page 175, Automatic ac-
tivation. The obstacle is detected as of a dis-
tance of approx. 95 cm if the automatic con-
nection is activated in the infotainment sys-
tem. A reduced display is shown.
Automatic disconnection of Parking Aid
● Move the selector lever to position P.
● OR: accelerate to more than approx.
10 km/h (6 mph) for
ward.
Temporary suppression of sound in Parking
Aid
● Press the function b
utton found on the
steering wheel. Change from reduced view to full view
●
Engage reverse gear or turn the selector
lever t
o position R.
● OR: press the car icon in reduced view.
If nec
essary, switch to the rear-assist image
(Rear View Camera “RVC”)
● Engage reverse gear or turn the selector
lever t
o position R.
● OR: Press the RVC fu
nction button.
A short confirmation signal will be heard and
the button symbol will light up yellow when
the system is switched on.
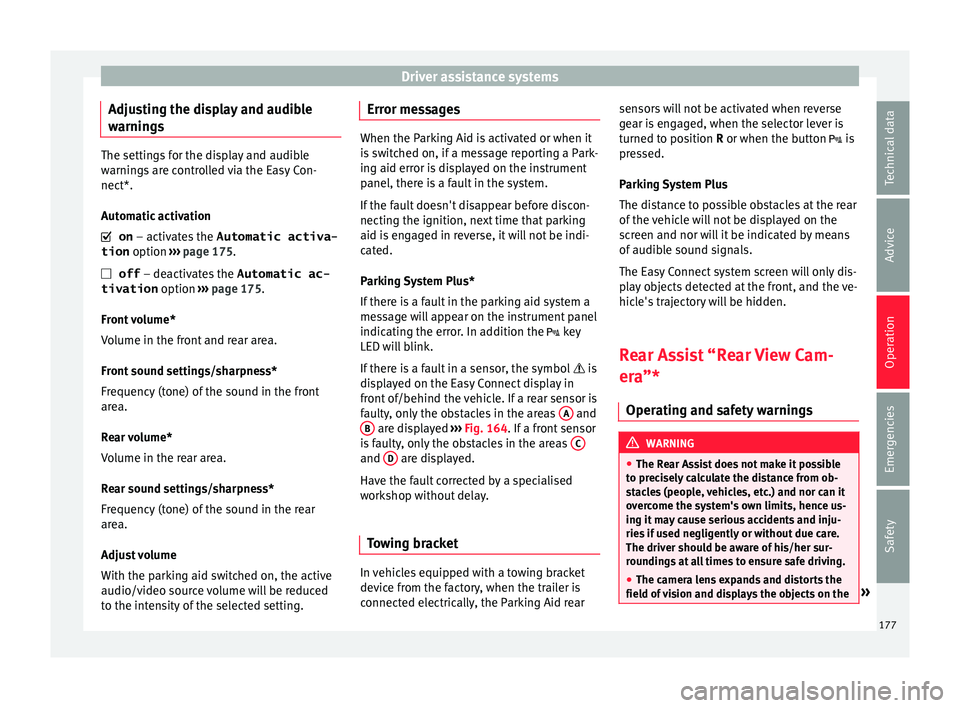
Automatic activation Fig. 166
Miniature indication of automatic ac-
tiv ation When the Parking System Plus is switched on
aut
om
atic
ally, a miniature of the vehicle will »
175
Technical data
Advice
Operation
Emergencies
Safety
Page 179 of 248
Driver assistance systems
Adjusting the display and audible
w arnin
g
s The settings for the display and audible
warnin
g
s are controlled via the Easy Con-
nect*.
Automatic activation
on – activates the Automatic activa-
tion option ››› page 175.
off – deactivates the Automatic ac-
tivation option ››› page 175.
Front volume*
Volume in the front and rear area.
Front sound settings/sharpness*
Frequency (tone) of the sound in the front
area.
Rear volume*
Volume in the rear area.
Rear sound settings/sharpness*
Frequency (tone) of the sound in the rear
area.
Adjust volume
With the parking aid switched on, the active
audio/video source volume will be reduced
to the intensity of the selected setting. Error messages When the Parking Aid is activated or when it
is
sw
itched on, if a message reporting a Park-
ing aid error is displayed on the instrument
panel, there is a fault in the system.
If the fault doesn't disappear before discon-
necting the ignition, next time that parking
aid is engaged in reverse, it will not be indi-
cated.
Parking System Plus*
If there is a fault in the parking aid system a
message will appear on the instrument panel
indicating the error. In addition the key
LED will blink.
If there is a fault in a sensor, the symbol is
displayed on the Easy Connect display in
front of/behind the vehicle. If a rear sensor is
faulty, only the obstacles in the areas A and
B are displayed
››
›
Fig. 164. If a front sensor
is faulty, only the obstacles in the areas C and
D are displayed.
Hav e the f
au
lt corrected by a specialised
workshop without delay.
Towing bracket In vehicles equipped with a towing bracket
dev
ic
e fr
om the factory, when the trailer is
connected electrically, the Parking Aid rear sensors will not be activated when reverse
gear i
s engaged, when the selector lever is
turned to position R or when the button is
pressed.
Parking System Plus
The distance to possible obstacles at the rear
of the vehicle will not be displayed on the
screen and nor will it be indicated by means
of audible sound signals.
The Easy Connect system screen will only dis-
play objects detected at the front, and the ve-
hicle's trajectory will be hidden.
Rear Assist “Rear View Cam-
era”*
Operatin
g and safety warnings WARNING
● The Re ar As
sist does not make it possible
to precisely calculate the distance from ob-
stacles (people, vehicles, etc.) and nor can it
overcome the system's own limits, hence us-
ing it may cause serious accidents and inju-
ries if used negligently or without due care.
The driver should be aware of his/her sur-
roundings at all times to ensure safe driving.
● The camera lens expands and distorts the
field of
vision and displays the objects on the » 177
Technical data
Advice
Operation
Emergencies
Safety