Page 61 of 130
3.7
“Graphic service”
This menu is used to see the web-
site provided by the current station
when you have a connection.
“Slideshow”
This menu is used to see images
provided by the station in slide-
show.
Storing a station
From “Channels” mode or “Stations”
mode, press 13 then “Save as preset”.
You can also give a long press on one
of the preset buttons until you hear a
beep.
You can store up to 12 stations per
band.
“Update list”
Select this menu to update the list of
radio stations.
LISTENING TO THE RADIO (6/8)
13
Channels Stations Presets
BandDR
You can also access this menu by
pressing
15.
Note: The slideshow 15 is dis-
played when Timeshift function
(direct control) is deactivated.
“Change source”
This function allows you to change the
audio source (Radio, USB, AUX, etc.).
Channels Stations Presets
BandDR
15
Channels Stations Presets
Band
13
Page 62 of 130

3.8
LISTENING TO THE RADIO (7/8)
“Settings”
From modes Channels, Stations or
Presets, press 13 then Settings to
access the digital radio settings. From
the settings, you can activate or deacti-
vate the following elements:
– “Radio text”;
– “Simulcast/Handover”;
– “Time shift”;
– “TA / I-Traffic”;
– “I-Announcement”.
“Radio text”
(text information)
Some digital radio stations broadcast
text information relating to their pro-
grammes (e.g.: song titles).
Note: This information is only available
for certain radio stations.
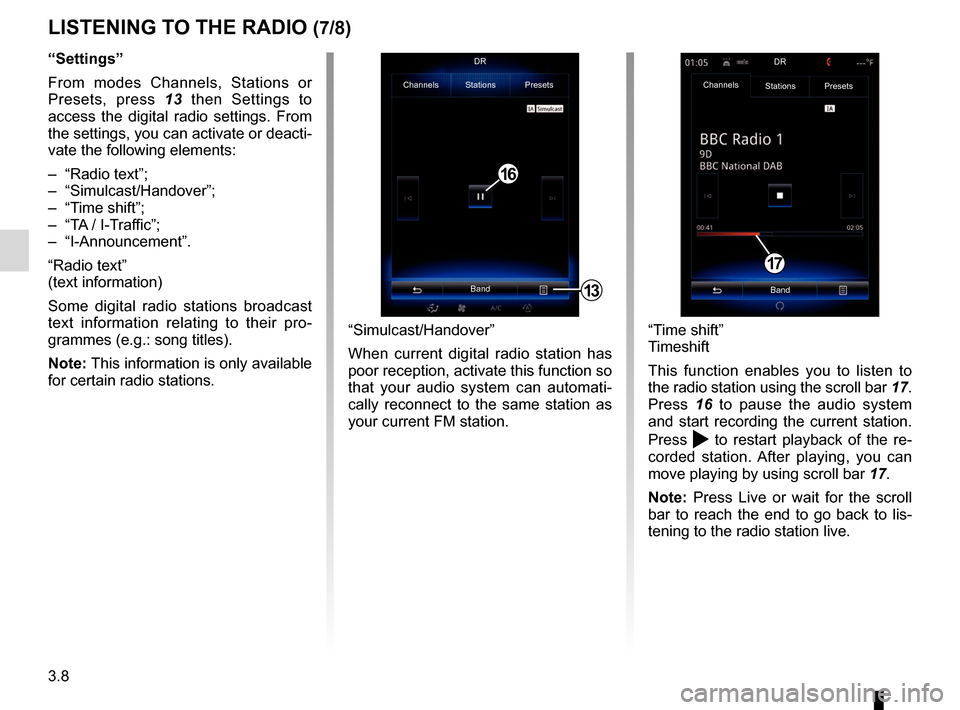
“Time shift”
Timeshift
This function enables you to listen to
the radio station using the scroll bar 17.
Press 16 to pause the audio system
and start recording the current station.
Press
to restart playback of the re-
corded station. After playing, you can
move playing by using scroll bar 17.
Note: Press Live or wait for the scroll
bar to reach the end to go back to lis-
tening to the radio station live.
17
“Simulcast/Handover”
When current digital radio station has
poor reception, activate this function so
that your audio system can automati-
cally reconnect to the same station as
your current FM station.
13
Channels Stations Presets
BandDR
16
Channels
Stations Presets
BandDR
Page 63 of 130
3.9
“TA / I-Traffic”
(traffic information)
Depending on the country, your audio
system makes it possible to automati-
cally receive traffic bulletins when they
are broadcast on certain digital radio
stations.
LISTENING TO THE RADIO (8/8)
“I-Announcement”
Press “I-Announcement” then activate
or deactivate below announcements.
For each activated announcement,
your audio system makes it possible to
automatically receive information when
it is broadcast on certain digital radio
stations:
– “Transport news”;
– “Warning”;
– “Information”;
– “Weather”;
– “Event”;
– “Special Event”;
– “Radio Info”;
– “Sport”;
– “Finance”.
Page 64 of 130

3.10
MEDIA (1/2)
From the main folder, you can access:
– the audio files;
– the folders, music, genres, artists, albums and playlists;
– the folders and/or audio files.
Note: Only available sources can be
selected. Unavailable sources won’t be
shown on the screen.
“Player”You can choose between playing all the
tracks or playing a single track.
2
Player Current list
345
1
Navigate toUSB
“Multimedia”
menu
From the main menu, press
“Multimedia”, then “Media”.
“Media”
This menu enables you to listen to
music from an auxiliary source (audio
CD, USB, SD card, etc.).
Select an input source connected to
the system to access the audio files
from the following list:
– “USB-1" (USB port);
– “USB-2" (USB port);
– “SD” (SD card);
– “CD" (audio CD or MP3);
– “AUX-1" (Jack socket);
– “AUX-2" (Jack socket).
Note: the input sources described
above may vary.
Note: depending on the audio source
selected, certain functions cannot be
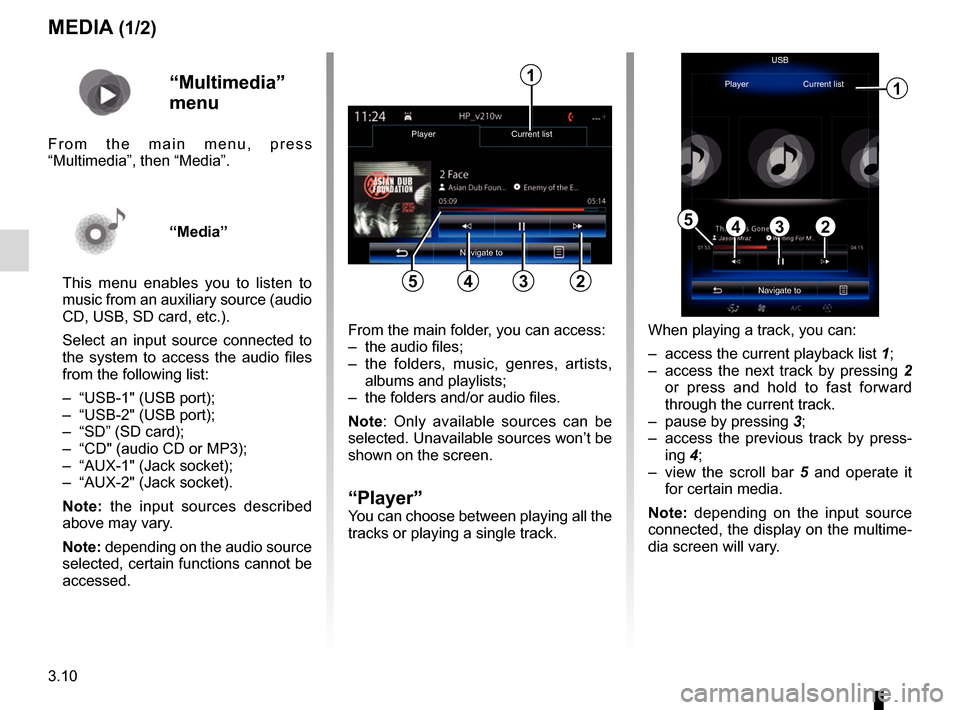
accessed. When playing a track, you can:
– access the current playback list
1;
– access the next track by pressing 2 or press and hold to fast forward
through the current track.
– pause by pressing 3;
– access the previous track by press- ing 4;
– view the scroll bar 5 and operate it
for certain media.
Note: depending on the input source
connected, the display on the multime-
dia screen will vary.
Navigate to
Player Current list
1
2345
Page 70 of 130
3.16
MULTIMEDIA SETTINGS (1/3)
“Settings”
menu
From the “Multimedia” menu, press
“Settings”, then select the element you
wish to modify:
– “Radio”;
– “Media”;
– “Photo”;
– “Video”;
– “Sound”.
“Radio”
This menu enables you to adjust the
following settings:
– activate/deactivate “AM ” band;
– activate/deactivate “Radio text”;
– activate/deactivate “Region”;
– activate/deactivate “TA/I-Traffic ”;
“Media”
This menu enables you to adjust:
– the main audio volume;
– the sensitivity of the auxiliary socket (Low, Average or High);
– the Bluetooth® audio source.
“Photo”
This menu also enable the following
photo settings to be adjusted:
– change the display time for each photo in the slideshow;
– active/deactivate animation effect between each photo in the slide-
show.
For safety reasons, carry
out these operations when
the vehicle is stationary.
“Video”
This menu enables you to adjust the
type of video display (Fit or Fullscreen
View).
Page 71 of 130

3.17
“Sound”
This menu allows you to configure
the different sound settings.
“Sound ambiance”
This function enables you to select a
musical environment from the follow-
ing presets:
– “Neutral”;
– “Live”;
– “Club”;
– “Lounge”.
Note: You can launch a demonstra-
tion mode that allows you to hear the
sound without Arkamys sound en-
hancement treatment.
“Bass Boost”
This function increases the bass.
Balance / Fader
centered Front Manual
1
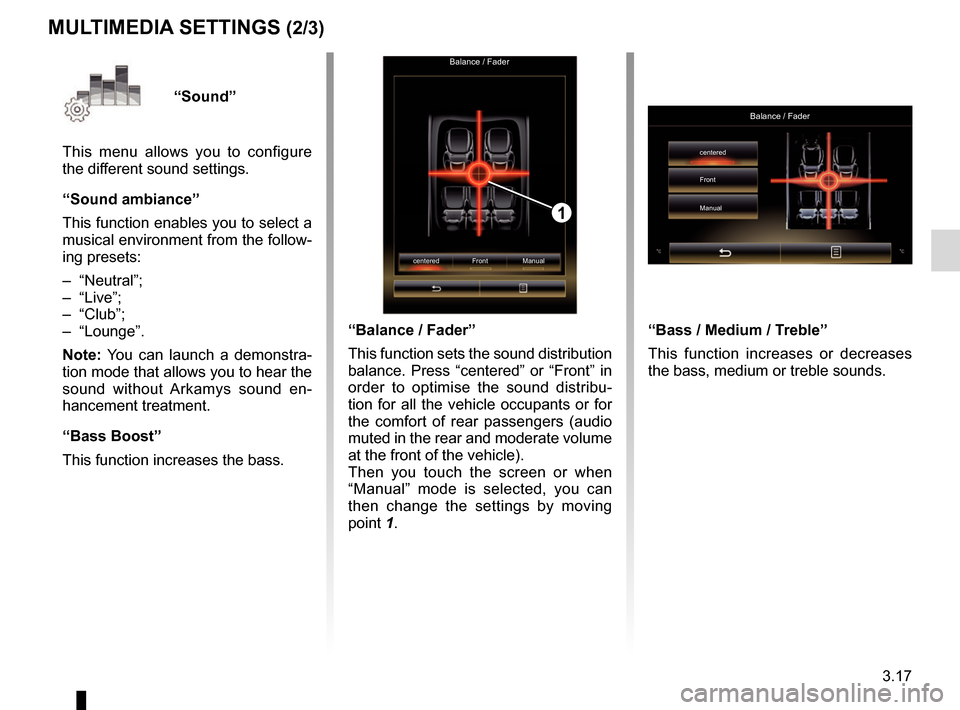
“Balance / Fader”
This function sets the sound distribution
balance. Press “centered” or “Front” in
order to optimise the sound distribu-
tion for all the vehicle occupants or for
the comfort of rear passengers (audio
muted in the rear and moderate volume
at the front of the vehicle).
Then you touch the screen or when
“Manual” mode is selected, you can
then change the settings by moving
point 1.
MULTIMEDIA SETTINGS (2/3)
“Bass / Medium / Treble”
This function increases or decreases
the bass, medium or treble sounds.
Balance / Fader
centered
Front
Manual
Page 72 of 130
3.18
MULTIMEDIA SETTINGS (3/3)
“Volume proportional to speed”
When this function is activated, the
volume of the audio system varies ac-
cording to the vehicle speed.
Press “Volume proportional to speed”
then select “On” or “OFF” to activate or
deactivate this function.
Set the intensity by increasing/decreas-
ing the value using the + and - buttons.
Note: the volume of the audio system
with Bose equipment varies automati-
cally according to the vehicle speed.“Loudness”
You can activate/deactivate bass ampli-
fication by pressing “On” or “OFF”.
“Frequency stabiliser”
This function amplifies low and high
frequencies when the volume is turned
down.
You can activate/deactivate loudness
by selecting “On” or “OFF”.
“Volume stabiliser”
You can activate/deactivate loudness
by selecting “On” or “OFF”.
Note: to reset the default settings for
each function, press the pop-up menu,
then “Reset”.
Sound settings
Bass Boost
Balance / Fader
Bass / Medium / Treble On OFF
Page 104 of 130

6.8
DRIVING AIDS (1/2)
“Lane departure warning setting”
Press this menu to adjust the audio
volume and the lane departure warning
sensitivity.
– “Volume”: press “+" or "– " to adjust
the volume level (five levels).
– “Sensitivity”: select “Low”, “Middle” or “High” to adjust the warning sen-
sitivity.
Note: if “Lane departure warning” is
switched “OFF”, the “Lane departure
warning setting” function is greyed out. “Distance warning”
This system notifies the driver when
they are too close to other vehicles.
Please refer to the driver�s handbook
for further information. Select “On” to
activate the system.
For safety reasons, carry
out these operations when
the vehicle is stationary.
“Driving
assistance”
menu
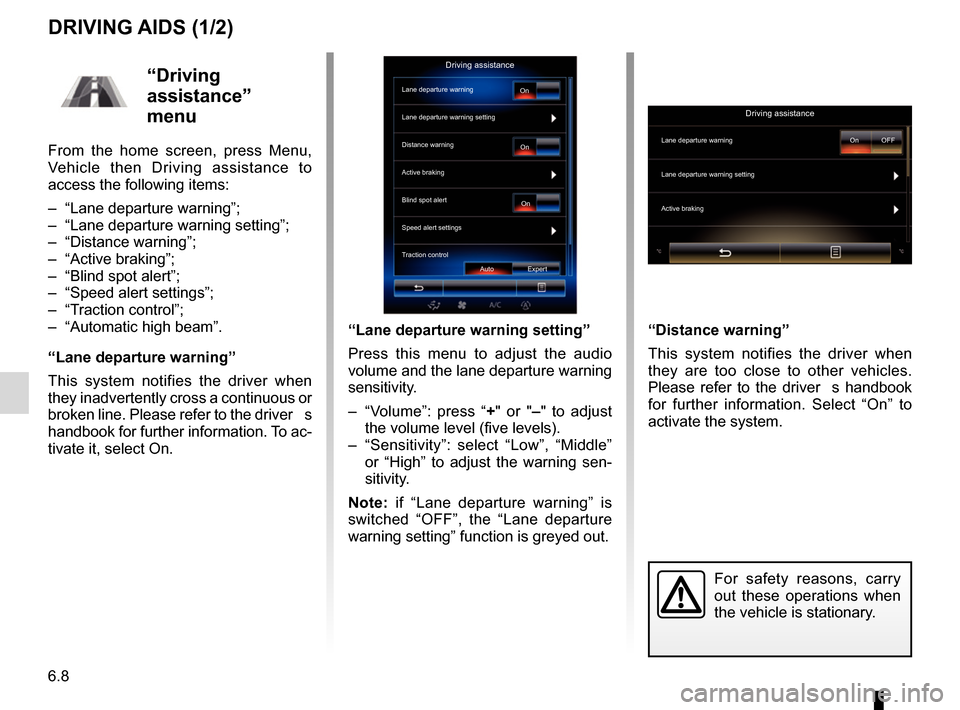
From the home screen, press Menu,
Vehicle then Driving assistance to
access the following items:
– “Lane departure warning”;
– “Lane departure warning setting”;
– “Distance warning”;
– “Active braking”;
– “Blind spot alert”;
– “Speed alert settings”;
– “Traction control”;
– “Automatic high beam”.
“Lane departure warning”
This system notifies the driver when
they inadvertently cross a continuous or
broken line. Please refer to the driver�s
handbook for further information. To ac-
tivate it, select On.
Driving assistance
Lane departure warning
Lane departure warning setting
On
On On
Auto Expert
Distance warning
Active braking
Blind spot alert
Speed alert settings
Traction control
Driving assistance
Lane departure warning
Lane departure warning setting
Active braking
On OFF