2017 RENAULT KADJAR washer
[x] Cancel search: washerPage 7 of 300

1.1
Section 1: Getting to know your vehicle
Key, radio frequency remote control: general information, use, deadlocking . . . . . . . . . . . . . . . . . . 1.2
RENAULT card: General information, use, deadlocking . . . . . . . . . . . . . . . . . . . . . . . . . . . . . . . . . . 1.6
Locking, unlocking the opening elements . . . . . . . . . . . . . . . . . . . . . . . . . . . . . . . . . . . .\
. . . . . . . . . 1.13
Opening and closing the doors . . . . . . . . . . . . . . . . . . . . . . . . . . . . . . . . . . . .\
. . . . . . . . . . . . . . . . . 1.16
Automatic locking when driving . . . . . . . . . . . . . . . . . . . . . . . . . . . . . . . . . . . . \
. . . . . . . . . . . . . . . . . 1.18
Headrests - Seats . . . . . . . . . . . . . . . . . . . . . . . . . . . . . . . . . . . .\
. . . . . . . . . . . . . . . . . . . . . . . . . . . 1.19
Seat belts. . . . . . . . . . . . . . . . . . . . . . . . . . . . . . . . . . . . \
. . . . . . . . . . . . . . . . . . . . . . . . . . . . . . . . . . 1.23
Additional methods of restraint . . . . . . . . . . . . . . . . . . . . . . . . . . . . . . . . . . . .\
. . . . . . . . . . . . . . . . . 1.27in addition to the front seat belts . . . . . . . . . . . . . . . . . . . . . . . . . . . . . . . . . . . .\
. . . . . . . . . . 1.27
to the rear seat belts . . . . . . . . . . . . . . . . . . . . . . . . . . . . . . . . . . . .\
. . . . . . . . . . . . . . . . . . . 1.31
side . . . . . . . . . . . . . . . . . . . . . . . . . . . . . . . . . . . . \
. . . . . . . . . . . . . . . . . . . . . . . . . . . . . . . . . 1.32
Child safety: General information . . . . . . . . . . . . . . . . . . . . . . . . . . . . . . . . . . . .\
. . . . . . . . . . . . . . . 1.34 Choosing a child seat mounting . . . . . . . . . . . . . . . . . . . . . . . . . . . . . . . . . . . . \
. . . . . . . . . . . 1.37
Fitting a child seat, general information . . . . . . . . . . . . . . . . . . . . . . . . . . . . . . . . . . . . \
. . . . . 1.39
Child seats: attachment by seat belt or by Isofix system . . . . . . . . . . . . . . . . . . . . . . . . . . . . . . . . . . 1.41 Deactivating/activating the front passenger airbag . . . . . . . . . . . . . . . . . . . . . . . . . . . . . . . . 1.47
Driving position . . . . . . . . . . . . . . . . . . . . . . . . . . . . . . . . . . . .\
. . . . . . . . . . . . . . . . . . . . . . . . . . . . . 1.50
Instrument panel . . . . . . . . . . . . . . . . . . . . . . . . . . . . . . . . . . . .\
. . . . . . . . . . . . . . . . . . . . . . . . . . . . 1.54 Trip computer and warning system . . . . . . . . . . . . . . . . . . . . . . . . . . . . . . . . . . . .\
. . . . . . . . 1.62
vehicle settings customisation menu . . . . . . . . . . . . . . . . . . . . . . . . . . . . . . . . . . . .\
. . . . . . . 1.72
Steering wheel/Power-assisted steering . . . . . . . . . . . . . . . . . . . . . . . . . . . . . . . . . . . . \
. . . . . . . . . . 1.74
Clock and outdoor temperature . . . . . . . . . . . . . . . . . . . . . . . . . . . . . . . . . . . . \
. . . . . . . . . . . . . . . . . 1.75
Rear view mirrors . . . . . . . . . . . . . . . . . . . . . . . . . . . . . . . . . . . .\
. . . . . . . . . . . . . . . . . . . . . . . . . . . 1.76
Exterior lighting and signals. . . . . . . . . . . . . . . . . . . . . . . . . . . . . . . . . . . . \
. . . . . . . . . . . . . . . . . . . . 1.79
Audible and visual signals . . . . . . . . . . . . . . . . . . . . . . . . . . . . . . . . . . . . \
. . . . . . . . . . . . . . . . . . . . . 1.85
Headlight beam adjustment . . . . . . . . . . . . . . . . . . . . . . . . . . . . . . . . . . . . \
. . . . . . . . . . . . . . . . . . . . 1.86
Washers, wipers . . . . . . . . . . . . . . . . . . . . . . . . . . . . . . . . . . . .\
. . . . . . . . . . . . . . . . . . . . . . . . . . . . 1.88
Fuel tank (filling with fuel) . . . . . . . . . . . . . . . . . . . . . . . . . . . . . . . . . . . .\
. . . . . . . . . . . . . . . . . . . . . 1.96
Page 98 of 300

1.92
Note:
In temperatures below zero, the washer
liquid risks freezing to the windscreen,
thereby reducing visibility. Heat the
windscreen using the demister control
before cleaning.
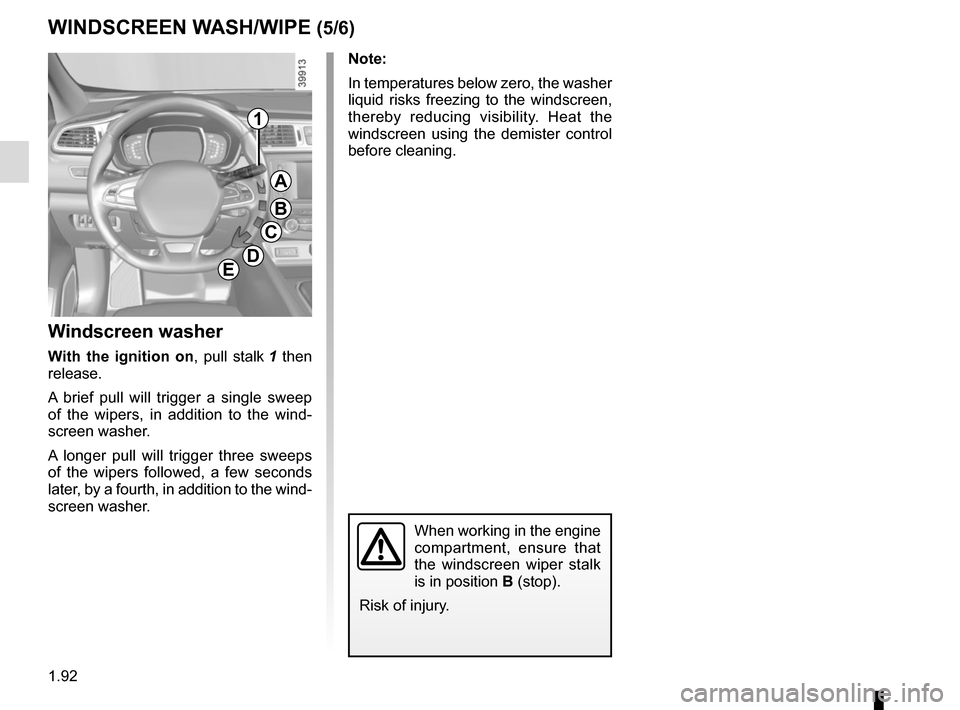
Windscreen washer
With the ignition on, pull stalk 1 then
release.
A brief pull will trigger a single sweep
of the wipers, in addition to the wind-
screen washer.
A longer pull will trigger three sweeps
of the wipers followed, a few seconds
later, by a fourth, in addition to the wind-
screen washer.
When working in the engine
compartment, ensure that
the windscreen wiper stalk
is in position B (stop).
Risk of injury.
WINDSCREEN WASH/WIPE (5/6)
1
A
B
C
DE
Page 99 of 300

1.93
Note:
To ensure the headlight washers op-
erate correctly in winter, remove snow
from the jet trims and de-ice the jet
trims using an aerosol de-icer.
You are recommended to regularly
remove dirt encrusted on the headlight
glass.
When the minimum windscreen washer
fluid level is reached, the headlight
washer system may be deprimed.
Fill the windscreen washer fluid and
then activate the windscreen washer,
with the engine running, to reprime
the system.
1
A
B
C
DE
WINDSCREEN WASH/WIPE (6/6)
Headlight washers
Headlights on
On equipped vehicles, hold stalk 1
pulled towards you for about 2 seconds
- the headlight washers and winds-
creen washers will be activated at the
same time.
The headlight washers are also activa-
ted after three prolonged movements
on the front windscreen washer control.
When working in the engine
compartment, ensure that
the windscreen wiper stalk
is in position B (stop).
Risk of injury.
Page 101 of 300

1.95
Activation/deactivation of the rear
screen wiper
(depending on the vehicle)
Engaging reverse gear triggers inter-
mittent wiping (if the front wipers are in
operation). If your vehicle is fitted with
a vehicle settings customisation menu,
you can opt to activate or deactivate
this function. To do this, refer to the in-
formation on the “Vehicle settings cus-
tomisation menu” in Section 1; “Rear
wiping in reverse gear”.
REAR SCREEN WASH/WIPE (2/2)
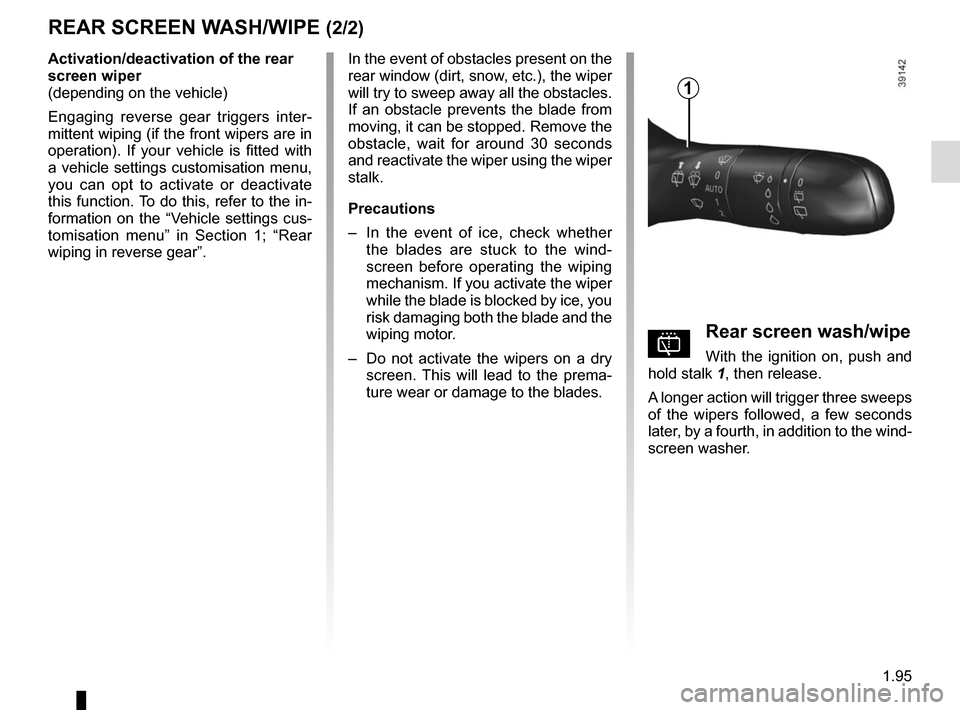
pRear screen wash/wipe
With the ignition on, push and
hold stalk 1, then release.
A longer action will trigger three sweeps
of the wipers followed, a few seconds
later, by a fourth, in addition to the wind-
screen washer.
In the event of obstacles present on the
rear window (dirt, snow, etc.), the wiper
will try to sweep away all the obstacles.
If an obstacle prevents the blade from
moving, it can be stopped. Remove the
obstacle, wait for around 30 seconds
and reactivate the wiper using the wiper
stalk.
Precautions
–
In the event of ice, check whether
the blades are stuck to the wind-
screen before operating the wiping
mechanism. If you activate the wiper
while the blade is blocked by ice, you
risk damaging both the blade and the
wiping motor.
– Do not activate the wipers on a dry
screen. This will lead to the prema-
ture wear or damage to the blades.
1
Page 103 of 300

1.97
FUEL TANK (2/3)Filling with fuel
With the ignition off, insert the nozzle
and insert it fully before turning it on to fill the fuel tank (risk of splashing).
Keep the nozzle in this position through-
out the entire filling operation.
When the pump cuts out automatically
at the end of the filling procedure, a
maximum of two further filling attempts
may be made, as there must be suffi-
cient space in the fuel tank to allow for
expansion.
Make sure that no water enters the fuel
tank during filling. The cover A and its
surround must remain clean.
Petrol versions
Using leaded petrol will damage the
antipollution system and may lead to a
loss of warranty.
To ensure that the fuel tank is not filled
with leaded petrol, the fuel tank filler
neck consists of a restrictor fitted with
a safety system which only allows
a nozzle for unleaded petrol to be
used (at the pump).
Vehicle fitted with the Stop and
Start function
To fill up with fuel, the engine must
be stopped (and not on standby):
stop the engine (please refer to the
information on “Starting and stop-
ping the engine” in Section 2).
Fuel filler cap: this is spe-
cific.
If you have to replace it,
make sure it is identical
to the original cap. Contact an ap-
proved Dealer.
Never place the cap near a source
of heat or flame.
Do not wash the filler area with a
high-pressure washer.
Page 217 of 300

4.1
Section 4: Maintenance
Bonnet . . . . . . . . . . . . . . . . . . . . . . . . . . . . . . . . . . . . \
. . . . . . . . . . . . . . . . . . . . . . . . . . . . . . . . . . . . 4.2
Engine oil level: general information . . . . . . . . . . . . . . . . . . . . . . . . . . . . . . . . . . . .\
. . . . . . . . . . . . . 4.4
Engine oil level: topping up/filling . . . . . . . . . . . . . . . . . . . . . . . . . . . . . . . . . . . .\
. . . . . . . . . . . . . . . 4.5
Oil change . . . . . . . . . . . . . . . . . . . . . . . . . . . . . . . . . . . . \
. . . . . . . . . . . . . . . . . . . . . . . . . . . . . . . . . 4.7
Levels . . . . . . . . . . . . . . . . . . . . . . . . . . . . . . . . . . . .\
. . . . . . . . . . . . . . . . . . . . . . . . . . . . . . . . . . . . 4.8engine coolant . . . . . . . . . . . . . . . . . . . . . . . . . . . . . . . . . . . .\
. . . . . . . . . . . . . . . . . . . . . . . . 4.8
Brake fluid . . . . . . . . . . . . . . . . . . . . . . . . . . . . . . . . . . . .\
. . . . . . . . . . . . . . . . . . . . . . . . . . . 4.9
windscreen washer reservoir . . . . . . . . . . . . . . . . . . . . . . . . . . . . . . . . . . . . \
. . . . . . . . . . . . . 4.10
Filters . . . . . . . . . . . . . . . . . . . . . . . . . . . . . . . . . . . . \
. . . . . . . . . . . . . . . . . . . . . . . . . . . . . . . . . . . . . 4.10
Tyre pressure. . . . . . . . . . . . . . . . . . . . . . . . . . . . . . . . . . . . \
. . . . . . . . . . . . . . . . . . . . . . . . . . . . . . . 4.11
Battery . . . . . . . . . . . . . . . . . . . . . . . . . . . . . . . . . . . . \
. . . . . . . . . . . . . . . . . . . . . . . . . . . . . . . . . . . . 4.13
Bodywork maintenance . . . . . . . . . . . . . . . . . . . . . . . . . . . . . . . . . . . . \
. . . . . . . . . . . . . . . . . . . . . . . 4.15
Interior trim maintenance . . . . . . . . . . . . . . . . . . . . . . . . . . . . . . . . . . . . \
. . . . . . . . . . . . . . . . . . . . . . 4.17
Page 226 of 300

4.10
Checking the level
Use the “dropper cap”. To do this, plug
the hole 4 with your finger, remove the
cap then read the gauge attached to
the cap.
Note: Regularly check the reservoir
level by topping up the liquid before
taking a trip.
Jets
To adjust the windscreen washer jets,
please consult an authorised dealer.
Filters
The replacement of filter components
(air filter, cabin filter, diesel filter, etc.)
is scheduled in the maintenance opera-
tions for your vehicle.
Replacement intervals for filter el-
ements: refer to the Maintenance
Document for your vehicle.
Windscreen washer reservoir
Topping up
With the engine switched off, open the
cap 3. Fill until you can see the fluid,
then replace the cap.
Liquid
Screen wash product (product with
antifreeze in winter).
LEVELS (3/3)/FILTERS
3
When working in the engine
compartment, ensure that
the windscreen wiper stalk
is in the park position.
Risk of injury.The engine may be hot
when carrying out opera-
tions in close proximity. In
addition, the engine cooling
fan can come on at any moment.
Risk of injury.
Before performing any
action in the engine com-
partment, the ignition must
be switched off by pressing
the engine stop button (please see
the information on “Starting, stop-
ping the engine” in Section 2).
4
Page 232 of 300

4.16
Respect local regulations about wash-
ing vehicles (e.g. do not wash your ve-
hicle on a public highway).
Observe the vehicle stopping distances
when driving on gravelled surfaces to
prevent paint damage.
Repair, or have repaired quickly, areas
where the paint has been damaged, to
prevent corrosion spreading.
Remember to visit the body shop pe-
riodically in order to maintain your
anti-corrosion warranty. Refer to the
Maintenance Document.
If it is necessary to clean mechani-
cal components, hinges, etc., spray
them with products approved by our
Technical Department to protect them
after they have been cleaned.
BODYWORK MAINTENANCE (2/2)
We have selected special products
to care for your vehicle and you can
obtain these from the manufactur-
er’s accessory outlets.
Using a roller type car wash
Return the windscreen wiper stalk to
the Park position (refer to the informa-
tion on the “Windscreen washer, wiper”
in Section 1). Check the mounting of
external accessories, additional lights
and mirrors, and ensure that the wiper
blades are secured with adhesive tape.
Remove the radio aerial mast if your
vehicle is fitted with this equipment.
Remember to remove the tape and refit
the antenna after washing.
Cleaning the headlights
As the headlights are made of plastic
“glass”, use a soft cloth or cotton wool
to clean them. If this does not clean
them properly, moisten the cloth with
soapy water, then wipe clean with a soft
damp cloth or cotton wool.
Finally, carefully dry off with a soft dry
cloth.
Cleaning products containing alco-
hol must not be used.
Vehicles with a matte paint
finish
This type of paint requires certain pre-
cautions.
Do not do the following
– use wax-based products (polishing);
– rub hard;
– wash the vehicle in a roller-type car
wash;
– wash the vehicle using a high-pres-
sure device;
– attach stickers to the paintwork (risk
of leaving marks).
You should do the following
Wash the vehicle by hand using plenty
of water, using a soft cloth or a gentle
sponge.