2017 RENAULT CAPTUR reset
[x] Cancel search: resetPage 55 of 96
GB.53
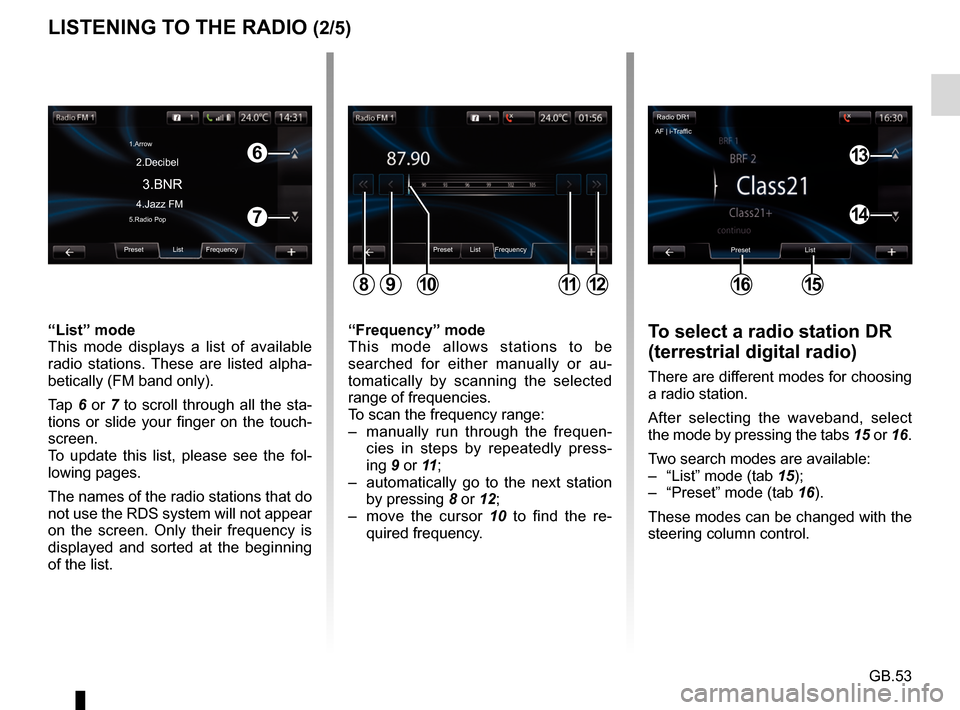
LISTENING TO THE RADIO (2/5)To select a radio station DR
(terrestrial digital radio)
There are different modes for choosing
a radio station.
After selecting the waveband, select
the mode by pressing the tabs 15 or 16.
Two search modes are available:
– “List” mode (tab 15);
– “Preset” mode (tab 16).
These modes can be changed with the
steering column control.
“Frequency” mode
This mode allows stations to be
searched for either manually or au-
tomatically by scanning the selected
range of frequencies.
To scan the frequency range:
– manually run through the frequen-
cies in steps by repeatedly press-
ing 9 or 11 ;
– automatically go to the next station by pressing 8 or 12;
– move the cursor 10 to find the re- quired frequency.
“List” mode
This mode displays a list of available
radio stations. These are listed alpha-
betically (FM band only).
Tap 6 or 7 to scroll through all the sta-
tions or slide your finger on the touch-
screen.
To update this list, please see the fol-
lowing pages.
The names of the radio stations that do
not use the RDS system will not appear
on the screen. Only their frequency is
displayed and sorted at the beginning
of the list.
Preset List Frequency
811912
6
7
Preset List Frequency
3.BNR
1.Arrow
4.Jazz FM 2.Decibel5.Radio Pop
10
Radio DR1
Preset List
1615
13
14
AF | i-Traffic
Page 56 of 96
GB.54
LISTENING TO THE RADIO (3/5)
Pop-up menu “+”.
FM or AM
From one of the three modes, press “+”
to:
– change the source (Radio, USB, SD, etc.);
– add a station to your favourites;
– save a station;
– get text information;
– access the radio settings.
Storing a station
From “Frequency” mode or “List” mode,
press “+” then “Save as preset”.
You can also press one of the preset
buttons until you hear a beep.
You can store up to 6 stations per band.
“List” mode
This mode displays a list of available
radio stations.
Tap
13 or 14 to scroll through all the sta-
tions or slide your finger on the touch-
screen.
To update this list, please see the fol-
lowing pages.
“Preset” mode
This operation mode allows you to
recall on demand those stations which
you have already stored (refer to infor-
mation on “Storing a station” in this sec-
tion).
Press the buttons (numbered 1 to 6) to
select your stored stations.
You can also change a saved station
using the steering column control. Text information (Radio text)
Some FM radio stations broadcast
text information relating to their pro-
grammes (e.g. song titles).
Note: this information is only available
for certain radio stations.
DR (terrestrial digital radio)
From one of the two modes, press “+”
to:
– change the source (Radio, USB, SD,
etc.);
– Save as preset;
– display radio text;
– digital radio services;
– settings.
Storing a station
From “List” mode, press “+”, then “Save
as preset”.
You can also press one of the preset
buttons until you hear a beep.
You can store up to six radio stations.
Page 73 of 96

GB.71
DRIVING ECO²
Eco-coaching
This menu monitors your driving style,
and provides you with advice to best
reduce your fuel consumption, as nec-
essary.
To access this menu, press “Eco-
coaching” and carefully read the
advice, scroll through the pages by
pressing the scroll arrows.Access the Driving
Eco² menu
From the main menu, press “Vehicle”,
then “Driving Eco²”.
The “Driving Eco²” menu grants
access to the following information:
– Trip report;
– My prefered trips;
– Eco-coaching.
Trip report
This menu shows you the data saved
from your last journey:
– average fuel consumption;
– average speed;
– total consumption;
– recovered energy or mileage com- pleted;
– average environmental driving per- formance;
– braking anticipation;
– ability to manage vehicle speed. To save your data, press “Save”, then
select the type of journey taken from
the following list:
– “Home-work”;
– “Holidays”;
– “Weekends”;
– “Ride”;
– “Personal”.
To reset your data, press “Reset”. A
message will ask you to confirm the
data reset. Press “Yes” to confirm or
“No” to cancel.
My prefered trips
Once you have saved a specific journey
(see information on “Journey record”),
this menu will show you the changes in
your driving style from amongst the fol-
lowing categories:
– “Last journey”;
– “Home-work”;
– “Weekends”;
– “Ride”;
– “Personal”.
Page 74 of 96
GB.72
PARKING DISTANCE CONTROL, REVERSING CAMERA (1/2)
Parking aidsDone
Front parking distance control
Side parking distance control Rear park assist
Easy park assist
12
Rear camera view settings
Image settings
Static guidelines
Dynamic guidelines
Done
Volume
Parking aids
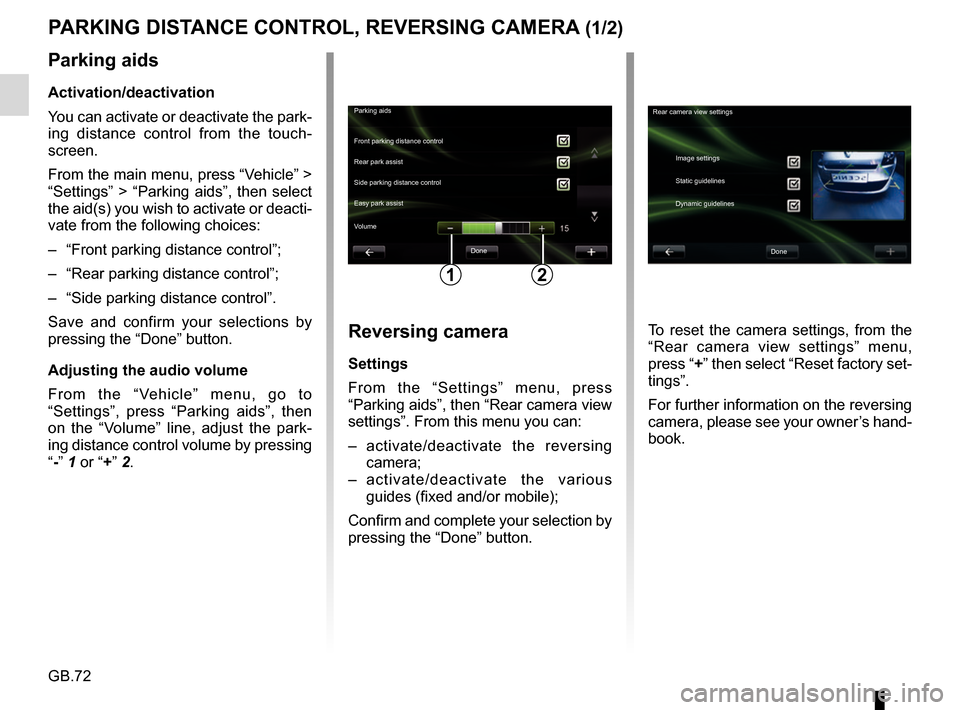
Activation/deactivation
You can activate or deactivate the park-
ing distance control from the touch-
screen.
From the main menu, press “Vehicle” >
“Settings” > “Parking aids”, then select
the aid(s) you wish to activate or deacti-
vate from the following choices:
– “Front parking distance control”;
– “Rear parking distance control”;
– “Side parking distance control”.
Save and confirm your selections by
pressing the “Done” button.
Adjusting the audio volume
From the “Vehicle” menu, go to
“Settings”, press “Parking aids”, then
on the “Volume” line, adjust the park-
ing distance control volume by pressing
“-” 1 or “+” 2.
Reversing camera
Settings
From the “Settings” menu, press
“Parking aids”, then “Rear camera view
settings”. From this menu you can:
– activate/deactivate the reversing
camera;
– activate/deactivate the various guides (fixed and/or mobile);
Confirm and complete your selection by
pressing the “Done” button. To reset the camera settings, from the
“Rear camera view settings” menu,
press “+” then select “Reset factory set-
tings”.
For further information on the reversing
camera, please see your owner’s hand-
book.
Page 75 of 96

GB.73
PARKING DISTANCE CONTROL, REVERSING CAMERA (2/2)
Display settings
From the “Vehicle” menu, go to
“Settings”, press “Image settings”, then
adjust the following settings:
– brightness;
– saturation;
– contrast.
Confirm your choice by selecting “Done
”.
To reset the video settings, from the
“Image settings” menu, press “+” then
select “Reset factory settings”.
“Easy park assist”
This menu allows you to set the default
parking manoeuvre from amongst the
following choices:
– “Parallel”;
– “Perpendicular”;
– “Angle”.
For further information on the “Easy
park assist” function, please refer to
your driver’s handbook.
Easy park assist
Parallel
Perpendicular
Angle Done
Page 80 of 96
GB.78
Onboard computer
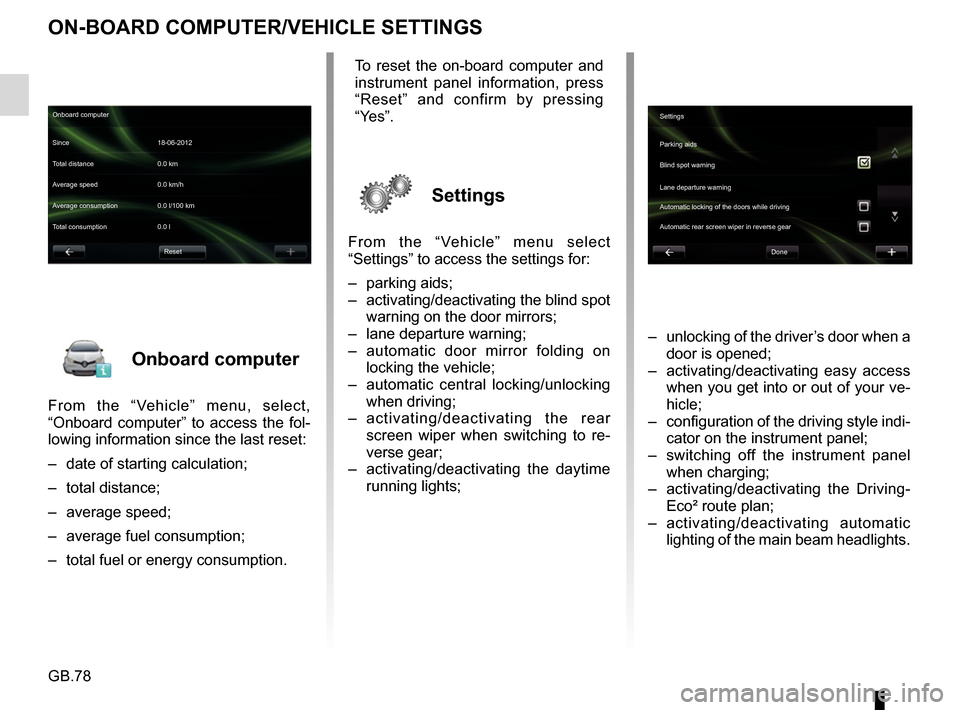
From the “Vehicle” menu, select,
“Onboard computer” to access the fol-
lowing information since the last reset:
– date of starting calculation;
– total distance;
– average speed;
– average fuel consumption;
– total fuel or energy consumption.
ON-BOARD COMPUTER/VEHICLE SETTINGS
– unlocking of the driver’s door when a door is opened;
– activating/deactivating easy access when you get into or out of your ve-
hicle;
– configuration of the driving style indi- cator on the instrument panel;
– switching off the instrument panel when charging;
– activating/deactivating the Driving- Eco² route plan;
– activating/deactivating automatic lighting of the main beam headlights.
Onboard computer
Since 18-06-2012
Average speed 0.0 km/h Total distance 0.0 km
Average consumption 0.0 l/100 km
Total consumption 0.0 l
Reset
To reset the on-board computer and
instrument panel information, press
“Reset” and confirm by pressing
“Yes”.
Settings
From the “Vehicle” menu select
“Settings” to access the settings for:
– parking aids;
– activating/deactivating the blind spot warning on the door mirrors;
– lane departure warning;
– automatic door mirror folding on locking the vehicle;
– automatic central locking/unlocking when driving;
– activating/deactivating the rear
screen wiper when switching to re-
verse gear;
– activating/deactivating the daytime running lights;
Settings
Parking aids
Blind spot warning
Lane departure warning
Automatic locking of the doors while driving
Done
Automatic rear screen wiper in reverse gear
Page 85 of 96

GB.83
DOWNLOADING AND INSTALLING APPLICATIONS (4/4)
Managing personal data
The system stores e-mail addresses
and card details in the memory.
Deleting an e-mail address
When you purchase on R-Link Store,
when you enter an e-mail address,
press the button at the far right of the “E-
mail” line. The list of e-mail addresses
saved in the system is displayed.
Press 1 opposite the address you wish
to delete. The address is immediately
deleted. Deleting credit or debit card data
When you make a purchase with a
credit or debit card, press “Pay with a
card already saved in the memory” on
the purchase confirmation form. The
list of credit or debit cards saved in the
system is displayed.
Press
2 opposite the card data to be
deleted. The credit or debit card data is
immediately deleted.
Note: the vehicle must be connected to
a mobile network to be able to delete
card data.
1
1
2
2
2
R-Link Store R-Link Store
[email protected] 4970XXXXXXXXXX16
4970XXXXXXXXXX32
4970XXXXXXXXXX64
[email protected]
Anne
Martin
Christophe 08/
2017
04/
2013
11/
2015
123
Restore factory settings
From the main menu, press “System”,
then “System settings”.
This menu lets you reset all the system
settings and/or delete all personal data.
Data sharing
You can authorise or reject data sharing
from the moment the system is started.
Please refer to the “Starting, Stopping”
section.
Refusing to share data stops the con-
nections of applications and services.
Page 89 of 96
GB.87
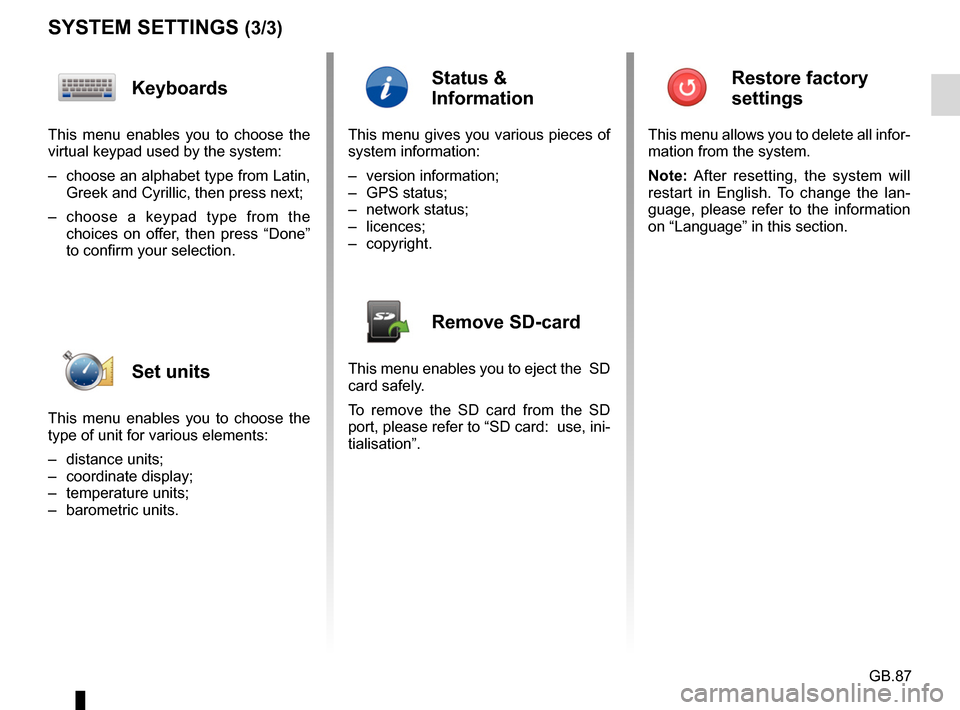
SYSTEM SETTINGS (3/3)
Keyboards
This menu enables you to choose the
virtual keypad used by the system:
– choose an alphabet type from Latin, Greek and Cyrillic, then press next;
– choose a keypad type from the choices on offer, then press “Done”
to confirm your selection.
Set units
This menu enables you to choose the
type of unit for various elements:
– distance units;
– coordinate display;
– temperature units;
– barometric units.
Status &
Information
This menu gives you various pieces of
system information:
– version information;
– GPS status;
– network status;
– licences;
– copyright.
Remove SD-card
This menu enables you to eject the SD
card safely.
To remove the SD card from the SD
port, please refer to “SD card: use, ini-
tialisation”.
Restore factory
settings
This menu allows you to delete all infor-
mation from the system.
Note: After resetting, the system will
restart in English. To change the lan-
guage, please refer to the information
on “Language” in this section.