Page 58 of 96
GB.56
Note: not all radio stations offer this
possibility.
Poor reception can sometimes cause
erratic and annoying changes in fre-
quency. In this case you should deac-
tivate the automatic frequency retuning.
To activate/deactivate this function,
refer to the section on “Audio settings”.
Traffic information (i Traffic)
When this function is activated, the
source is interrupted automatically to
receive the traffic bulletins broadcast
by some FM radio stations.
Programme type search (PTY)
When this function is activated, your
audio system allows you to display the
type of programme (news, sport etc.)
currently being broadcast.
Update radio list
Select this menu to update the list of
radio stations.
LISTENING TO THE RADIO (5/5)
DR (terrestrial digital radio)
From one of the two modes, press “+”
to access the radio settings. From the
radio settings, you can set the follow-
ing elements:
– “AF” (Alternative Frequency)
– “i-Traffic” (traffic programme)
– “PTY” (programme type)
– “Simulcast”
– “i-Announcement”
– “Update the list” (DR).
Following a radio station DR (AF)
A DR radio station can change accord-
ing to the geographical area. In order to
keep listening to the same radio station
when driving, activate the AF function
so the audio system can retune the fre-
quency automatically.
Note: not all radio stations offer this
possibility.
Poor reception can sometimes cause
erratic and annoying changes. In this
case you should deactivate the auto-
matic frequency retuning. Traffic information (i Traffic)
With this function activated, the source
is interrupted automatically to receive
the traffic bulletins broadcast by some
DR radio stations.
Programme type search (PTY)
With this function activated, the audio
system lets you display the type of pro-
gramme (news, sport etc.) currently
broadcast.
Simulcast
This function lets you switch from one
DR station to the same FM station on
signal loss.
i-Announcement
This function lets you display informa-
tion (weather, etc.).
Updating the list (DR)
This feature allows you to perform an
update of all stations in your area.
Page 59 of 96
GB.57
MEDIA
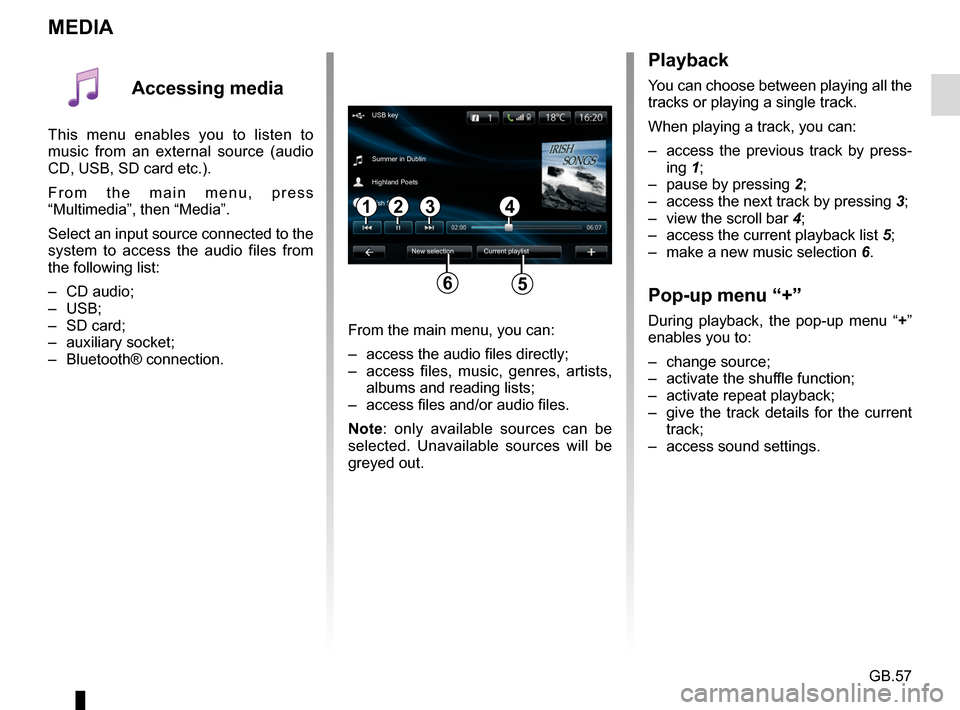
Playback
You can choose between playing all the
tracks or playing a single track.
When playing a track, you can:
– access the previous track by press-ing 1;
– pause by pressing 2;
– access the next track by pressing 3;
– view the scroll bar 4;
– access the current playback list 5;
– make a new music selection 6.
Pop-up menu “+”
During playback, the pop-up menu “ +”
enables you to:
– change source;
– activate the shuffle function;
– activate repeat playback;
– give the track details for the current track;
– access sound settings.From the main menu, you can:
– access the audio files directly;
– access files, music, genres, artists, albums and reading lists;
– access files and/or audio files.
Note: only available sources can be
selected. Unavailable sources will be
greyed out.
34
New selection
USB key
Summer in Dublin
Highland Poets
Current playlist
Irish Songs
21
56
Accessing media
This menu enables you to listen to
music from an external source (audio
CD, USB, SD card etc.).
From the main menu, press
“Multimedia”, then “Media”.
Select an input source connected to the
system to access the audio files from
the following list:
– CD audio;
– USB;
– SD card;
– auxiliary socket;
– Bluetooth® connection.
Page 60 of 96
GB.58
Accessing photos
From the “Multimedia” menu, press
“Pictures” then select the connected
source (Card SD, USB, etc.) to access
the photos. The system offers you two
options:
– “read all photos”;
– “Read a photo”.
Note: Some formats may not be rea-
dable by the system.
Options from folders
From the list of folders/photos, press
“+” to:
– change the source;
– display full screen;
– display the slideshow;
– access zoom in;
– access photo settings.
Note: For more information on compa-
tible photo formats, please consult an
Authorised Dealer.
PHOTO READER
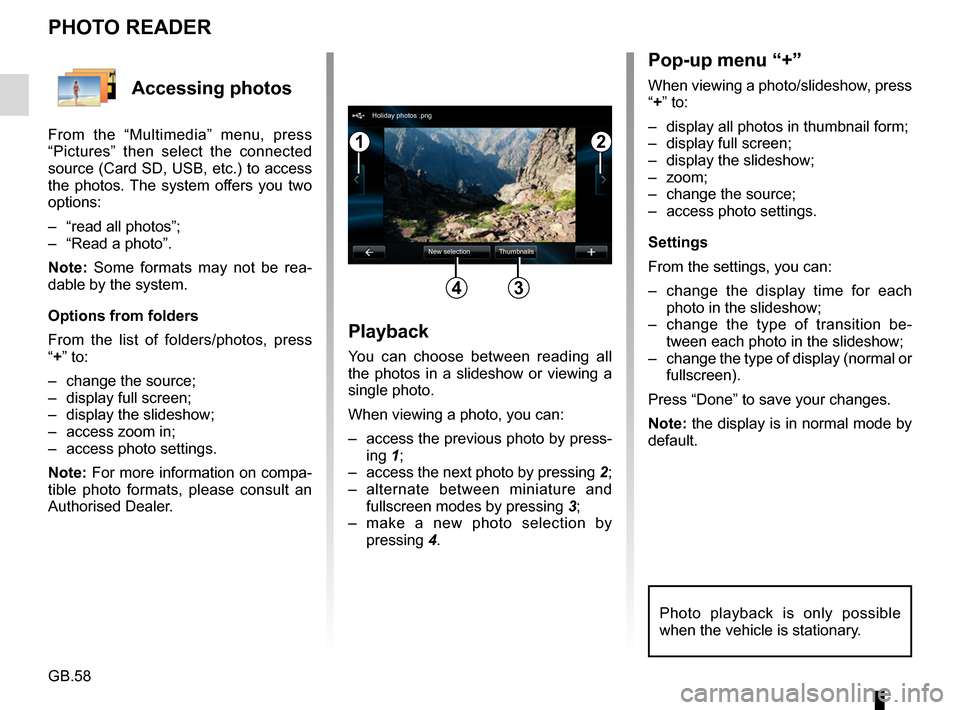
Playback
You can choose between reading all
the photos in a slideshow or viewing a
single photo.
When viewing a photo, you can:
– access the previous photo by press-ing 1;
– access the next photo by pressing 2;
– alternate between miniature and fullscreen modes by pressing 3;
– make a new photo selection by pressing 4.
Pop-up menu “+”
When viewing a photo/slideshow, press
“+” to:
– display all photos in thumbnail form;
– display full screen;
– display the slideshow;
– zoom;
– change the source;
– access photo settings.
Settings
From the settings, you can:
– change the display time for each
photo in the slideshow;
– change the type of transition be- tween each photo in the slideshow;
– change the type of display (normal or fullscreen).
Press “Done” to save your changes.
Note: the display is in normal mode by
default.
12
34
Holiday photos .png
New selection Thumbnails
Photo playback is only possible
when the vehicle is stationary.
Page 61 of 96
GB.59
Accessing videos
From the “Multimedia” menu, press
“Video” then select the source con-
nected (SD card, USB, etc.) to access
videos. The system offers you two op-
tions:
– “play all videos”;
– “play a video”.
Note: Some formats may not be read-
able by the system.
Options from folders
From the list of folders/videos, press “+”
to:
– change the source;
– access the settings.
Note: For more information on compat-
ible video formats, please consult an
Authorised Dealer.
VIDEO PLAYBACK
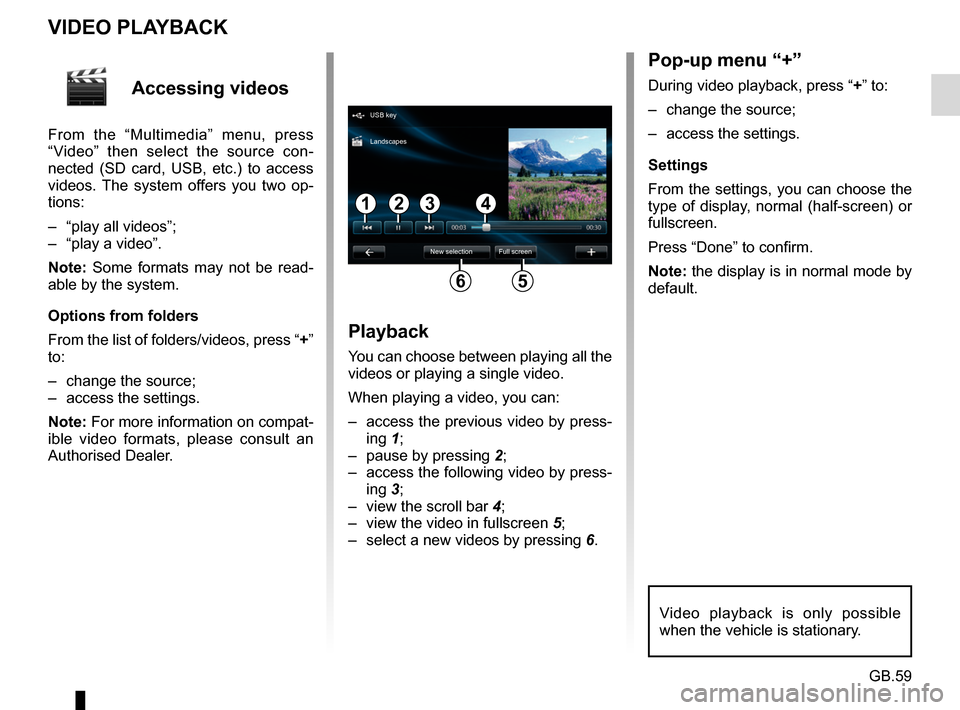
Playback
You can choose between playing all the
videos or playing a single video.
When playing a video, you can:
– access the previous video by press-ing 1;
– pause by pressing 2;
– access the following video by press- ing 3;
– view the scroll bar 4;
– view the video in fullscreen 5;
– select a new videos by pressing 6.
Pop-up menu “+”
During video playback, press “+” to:
– change the source;
– access the settings.
Settings
From the settings, you can choose the
type of display, normal (half-screen) or
fullscreen.
Press “Done” to confirm.
Note: the display is in normal mode by
default.
Video playback is only possible
when the vehicle is stationary.
1324
56
USB key
New selection Full screen
Landscapes
Page 77 of 96
GB.75
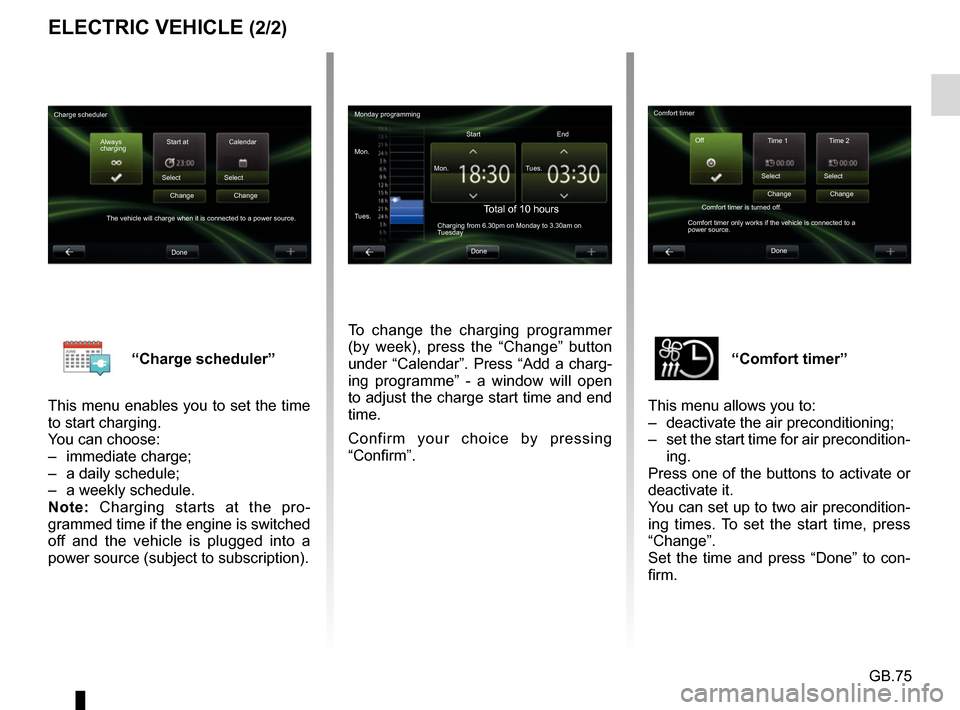
“Comfort timer”
This menu allows you to:
– deactivate the air preconditioning;
– set the start time for air precondition- ing.
Press one of the buttons to activate or
deactivate it.
You can set up to two air precondition-
ing times. To set the start time, press
“Change”.
Set the time and press “Done” to con-
firm.“Charge scheduler”
This menu enables you to set the time
to start charging.
You can choose:
– immediate charge;
– a daily schedule;
– a weekly schedule.
Note: Charging starts at the pro-
grammed time if the engine is switched
off and the vehicle is plugged into a
power source (subject to subscription).
ELECTRIC VEHICLE (2/2)
To change the charging programmer
(by week), press the “Change” button
under “Calendar”. Press “Add a charg-
ing programme” - a window will open
to adjust the charge start time and end
time.
Confirm your choice by pressing
“Confirm”.
Monday programming
Mon. Mon.Start
Total of 10 hoursCharging from 6.30pm on Monday to 3.30am on
Tuesday
Tues. Tues.
End
Done
Charge scheduler Always
charging Start at
Select
The vehicle will charge when it is connected to a power source. Change
Done Calendar
Select Change Comfort timer
Time 1 Time 2
Select
Comfort timer is turned off.
Comfort timer only works if the vehicle is connected to a
power source. Change
Done Select
Change
Off
Page 88 of 96
GB.86
SYSTEM SETTINGS (2/3)
Speed sensitive volume
Allows automatic volume increase
with speed.
Computer voice
Enables the type of information
given by a synthetic voice to be ad-
justed.
Voice
Enables the system voice to be
chosen. Please refer to the “Volume
and voice” section for further infor-
mation.
Clock
This menu is used to set the system
clock and the time display format. It is
recommended to keep the automatic
setting.
Safety warnings
This menu enables the alerts provided
by the system to be activated or deac-
tivated. Tick the alert boxes you wish
to activate.
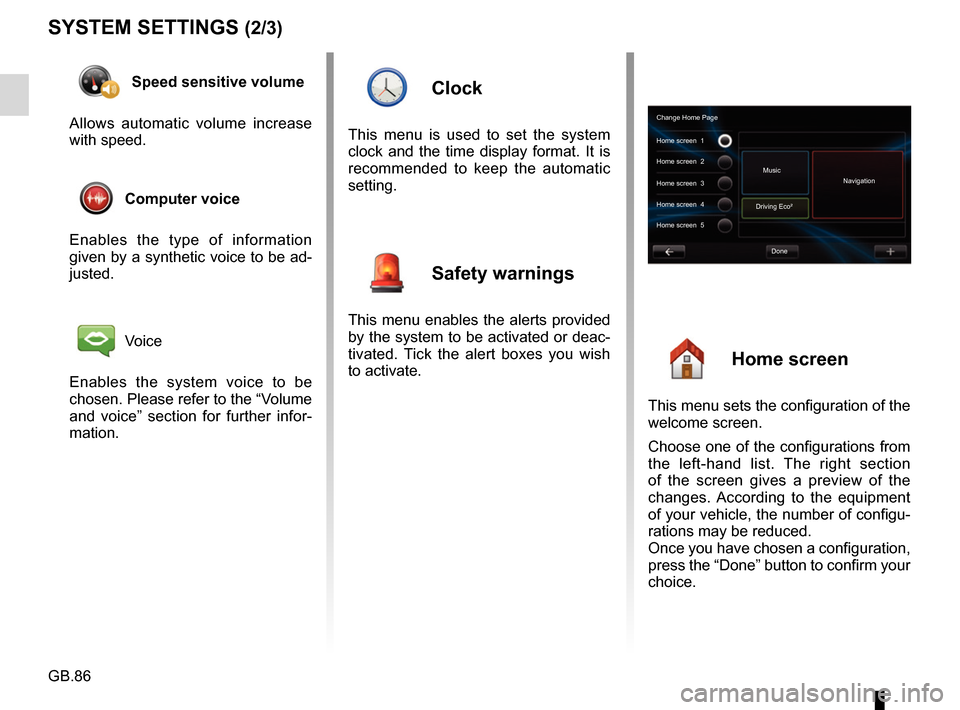
Home screen
This menu sets the configuration of the
welcome screen.
Choose one of the configurations from
the left-hand list. The right section
of the screen gives a preview of the
changes. According to the equipment
of your vehicle, the number of configu-
rations may be reduced.
Once you have chosen a configuration,
press the “Done” button to confirm your
choice.
Change Home Page
Home screen 1
Home screen 3
Driving Eco²
Done
Home screen 2
Music
Navigation
Home screen 4
Home screen 5