2017 RENAULT ALASKAN warning
[x] Cancel search: warningPage 55 of 340

•
Tampering with the supplemental air bag sys-
tems may result in serious personal injury.
Tampering includes changes to the steering
wheel and the instrument panel by placing
materials over the steering wheel pad and
above, around or on the instrument panel or
by installing additional trim materials around
the supplemental air bag systems.
• Work on and around the supplemental air bag
systems should be done by an approved
dealer or qualified workshop. The SRS wiring
should not be modified or disconnected. Un-
authorised electrical test equipment and
probing devices should not be used on the
supplemental air bag systems.
• The SRS wiring harness connectors are yel-
low for easy identification.
• Never install
arear-facing child restraint sys-
tem on the front passenger seat without first
deactivating the passenger air bag with the
front passenger air bag switch. In afrontal
collision, supplemental front-impact air bags
inflate with great force. An inflating supple-
mental front-impact air bag could seriously
injure or kill your child.
When the air bags inflate, afairly loud noise may be
heard, followed by the release of smoke. This smoke
is not harmful and does not indicate afire. Care
should be taken not to inhale it, as it may cause irri-
tation and choking. Those with ahistory of abreath-
ing condition should get fresh air promptly. Supplemental front-impact air bag
system
The driver’s supplemental front-impact air bag is
located at the centre of the steering wheel. The pas-
senger’s supplemental front-impact air bag is lo-
cated at the instrument panel above the glove box.
The supplemental front-impact air bag system is de-
signed to inflate in higher severity frontal collisions,
although it may inflate if the forces in another type of
collision are similar to those of
ahigher severity fron-
tal impact. It may not inflate in certain frontal colli-
sions. Vehicle damage (or lack of it) is not always an
indication of proper supplemental front-impact air
bag system operation. WARNING
Never install
arear-facing child restraint system
on the front passenger seat without first deacti-
vating the passenger air bag with the front pas-
senger air bag switch (where fitted), see “Front
passenger air bag switch (where fitted)” later in
this section. In afrontal collision, supplemental
front-impact air bags inflate with great force. An
inflating supplemental front-impact air bag could
seriously injure or kill your child. Front passenger air bag status light (where fit-
ted):
WARNING
• Since your vehicle is equipped with
af
ront
passenger air bag, it is not permitted to install
ar earward facing child restraint on the front
passenger seat unless the front passenger air
bag has been deactivated first. NP A1531
JVR0264XZ
Safety —seats, seat belts and supplemental restraint system
1-37
Page 56 of 340

•
Do not fit
arearward facing child seat on the
front passenger seat if the air bag activation/
deactivation system (where fitted) is malfunc-
tioning. Your vehicle must immediately be
taken to an approved dealer or qualified work-
shop in such asituation.
The front passenger air bag status lights and
are located on the instrument panel between
the centre vents.
When the ignition switch is placed in the ON posi-
tion, the front passenger air bag status ON and
OFF lights illuminate and then turn off or remain on
depending on the front passenger air bag status.
• When the ignition switch is placed in the ON
position and the front passenger air bag is ac-
tive, both the front passenger air bag status OFF
light ,a
nd the Supplemental Restraint Sys-
tem (SRS) air bag warning light in the com-
bination meter ➀will turn off after about
7sec-
onds.
The front passenger air bag status ON light will illuminate and then turn off after
aperiod of
time when the front passenger air bag switch is
in the ON position.
• When the ignition switch is placed in the ON
position and the front passenger air bag is inac-
tive, both the front passenger air bag status ON
light ,a
nd the Supplemental Restraint Sys-
tem (SRS) air bag warning light in the com-
bination meter ➀will turn off after about
7sec-
onds. The front passenger air bag status OFF light will illuminate and remain on as long as the
front passenger air bag switch is in the OFF
position.
If the front passenger air bag status light operates in
aw ay other than described above, the front passen-
ger air bag may not function properly. Have the sys-
tem checked, and if necessary repaired, by an ap-
proved dealer or qualified workshop promptly.
Front passenger air bag switch (where fitted):
The front passenger air bag can be turned off with
the front passenger air bag switch j
Al ocated in-
side the glove box.
j A Air bag switch (where fitted)
j B Left Hand Drive models
j C Right Hand Drive models
To turn off the front passenger air bag:
1. Place the ignition switch in the OFFposition. 2. Open the glove box and insert the key into the
front passenger air bag switch. For Remote Con-
trol Key equipped models, see “Keys” in the
“3. Pre-driving checks and adjustments” section
for mechanical key usage.
3. Push and turn the key to the
4. Place the ignition switch in the ONposition. The
front passenger air bag status OFF light will illuminate and remain on.
To turn on the front passenger air bag:
1. Place the ignition switch in the OFFposition.
2. Open the glove box and insert the key into the front passenger air bag switch.
3. Push and turn the key to the
4. Place the ignition switch in the ONposition. The
front passenger air bag status ON light will
illuminate, and after
aperiod of time, will then
turn off.
Supplemental driver’s knee air bag
system (where fitted)
The supplemental driver’s knee air bag is located
under the steering column.
The supplemental driver’s knee air bag system is
designed to inflate in higher severity frontal colli-
sions, although it may inflate if the forces in another
type of collision are similar to those of ahigher se-
verity impact. It may not inflate in certain collisions. NP A1296
1-38 Safety —seats, seat belts and supplemental restraint system
Page 57 of 340

Vehicle damage (or lack of it) is not always an indi-
cation of proper supplemental driver’s knee air bag
system operation.
Supplemental side-impact air bag
system (where fitted)
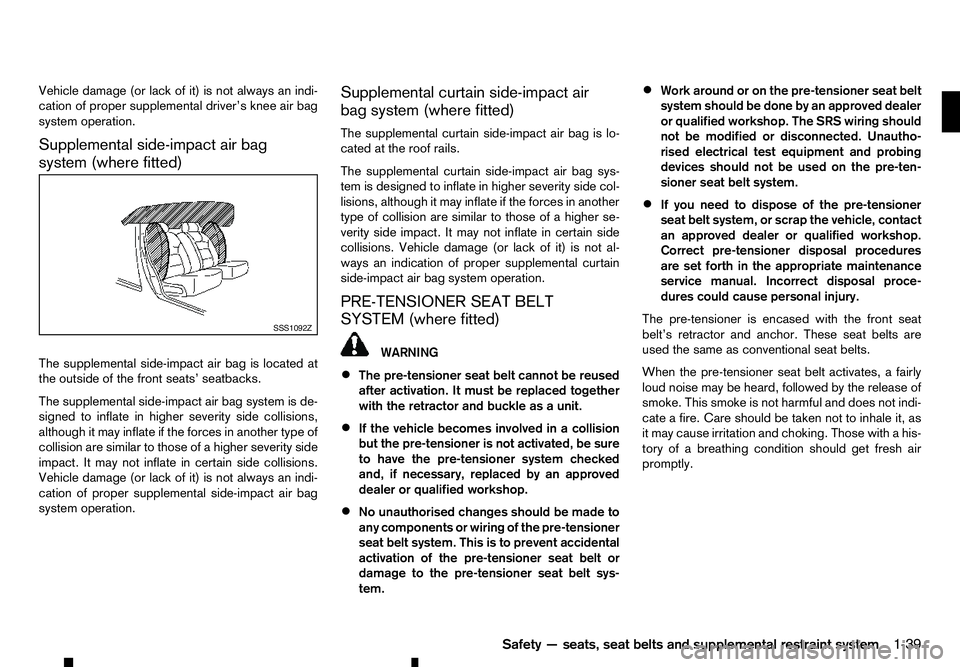
The supplemental side-impact air bag is located at
the outside of the front seats’ seatbacks.
The supplemental side-impact air bag system is de-
signed to inflate in higher severity side collisions,
although it may inflate if the forces in another type of
collision are similar to those of ahigher severity side
impact. It may not inflate in certain side collisions.
Vehicle damage (or lack of it) is not always an indi-
cation of proper supplemental side-impact air bag
system operation. Supplemental curtain side-impact air
bag system (where fitted)
The supplemental curtain side-impact air bag is lo-
cated at the roof rails.
The supplemental curtain side-impact air bag sys-
tem is designed to inflate in higher severity side col-
lisions, although it may inflate if the forces in another
type of collision are similar to those of ahigher se-
verity side impact. It may not inflate in certain side
collisions. Vehicle damage (or lack of it) is not al-
ways an indication of proper supplemental curtain
side-impact air bag system operation.
PRE-TENSIONER SEAT BELT
SYSTEM (where fitted) WARNING
• The pre-tensioner seat belt cannot be reused
after activation. It must be replaced together
with the retractor and buckle as aunit.
• If the vehicle becomes involved in
acollision
but the pre-tensioner is not activated, be sure
to have the pre-tensioner system checked
and, if necessary, replaced by an approved
dealer or qualified workshop.
• No unauthorised changes should be made to
any components or wiring of the pre-tensioner
seat belt system. This is to prevent accidental
activation of the pre-tensioner seat belt or
damage to the pre-tensioner seat belt sys-
tem. •
Work around or on the pre-tensioner seat belt
system should be done by an approved dealer
or qualified workshop. The SRS wiring should
not be modified or disconnected. Unautho-
rised electrical test equipment and probing
devices should not be used on the pre-ten-
sioner seat belt system.
• If you need to dispose of the pre-tensioner
seat belt system, or scrap the vehicle, contact
an approved dealer or qualified workshop.
Correct pre-tensioner disposal procedures are set forth in the appropriate maintenance
service manual. Incorrect disposal proce-
dures could cause personal injury.
The pre-tensioner is encased with the front seat
belt’s retractor and anchor. These seat belts are
used the same as conventional seat belts.
When the pre-tensioner seat belt activates, afairly
loud noise may be heard, followed by the release of
smoke. This smoke is not harmful and does not indi-
cate afire. Care should be taken not to inhale it, as
it may cause irritation and choking. Those with ahis-
tory of abreathing condition should get fresh air
promptly. SSS1092Z
Safety—seats, seat belts and supplemental restraint system
1-39
Page 58 of 340

REPAIR AND REPLACEMENT
PROCEDURE WARNING
• Once the supplemental front-impact air bags
have been inflated, the air bag modules will
not function and must be replaced. The air
bag modules must be replaced by an ap- proved dealer or qualified workshop. The in-
flated air bag modules cannot be repaired.
• The air bag systems should be inspected by
an approved dealer or qualified workshop if
there is any damage to the vehicle.
• If you need to dispose of the SRS or scrap the
vehicle, contact an approved dealer or quali-
fied workshop. Correct disposal procedures
are set forth in the appropriate maintenance
service manual. Incorrect disposal proce-
dures could cause personal injury.
The supplemental front-impact air bags and pre-
tensioner seat belts (where fitted) are designed to
activate on aone-time-only basis. As areminder,
unless the SRS air bag warning light is damaged,
the SRS air bag warning light remains illuminated
after inflation has occurred. The repair and replace-
ment of the SRS should be done only by an ap-
proved dealer or qualified workshop. When maintenance work is required on the vehicle,
information about the air bags, pre-tensioner seat
belts and related parts should be pointed out to the
person performing the maintenance. The ignition
switch should always be in the “LOCK” position
when working under the bonnet or inside the ve-
hicle.
1-40 Safety —seats, seat belts and supplemental restraint system
Page 59 of 340

2
Instruments and controls
Instruments and controls
Meters and gauges .................................................. 2-2 Speedometer and Fuel gauge ............................. 2-2
Tachometer and Engine coolant temperature
gauge ................................................................. 2-3
Instrument brightness control .............................. 2-4
Warning lights, indicator lights and audible
reminders ................................................................ 2-5 Checking lights................................................... 2-6
Warning lights .................................................... 2-6
Indicator lights .................................................... 2-12
Audible reminders............................................... 2-14
Vehicle information display ....................................... 2-14
How to use the Vehicle Information Display ......... 2-15
Settings .............................................................. 2-15
Trip computer ..................................................... 2-21
Indicators for operation ....................................... 2-25
Oil control system (where fitted for diesel
engine model) ..................................................... 2-29
Clock and outside air temperature (where
fitted).................................................................. 2-30
Headlight and turn signal switch............................... 2-31 Headlight switch ................................................. 2-31
Headlight aiming control (where fitted) ................ 2-32
Battery saver system (where fitted) ..................... 2-32
Turn signal switch ............................................... 2-32
Fog light switch (where fitted) .................................. 2-33
Front fog lights (where fitted) .............................. 2-33
Rear fog light (where fitted)................................. 2-33
Wiper and washer switch ........................................ 2-34 Windscreen wiper and washer switch ................. 2-34
Defogger switch (where fitted) ................................. 2-34
Headlight cleaner (where fitted) ............................... 2-35 Headlight cleaner switch (where fitted) ............... 2-35
Horn ........................................................................V
2-36
Windows ................................................................. 2-36 Manual windows (where fitted) ........................... 2-36
Power windows (where fitted)............................. 2-36
Power outlets .......................................................... 2-38
Storage ................................................................... 2-39 Glove box ........................................................... 2-39
Console box ....................................................... 2-40
Sunglasses holder .............................................. 2-40
Console side pockets ......................................... 2-40
Cup holders (where fitted) .................................. 2-40
Roof rail (where fitted) ........................................ 2-41
Card holder (where fitted)................................... 2-41
Sun visors ............................................................... 2-41
Sunroof (where fitted) .............................................. 2-42 Automatic sunroof............................................... 2-42
Interior lights ............................................................ 2-43 Interior light switch (where fitted) ........................ 2-43
Console light (where fitted) ................................. 2-43
Map lights........................................................... 2-43
Map light control switch (where fitted)................. 2-44
Room light (where fitted)..................................... 2-44
Rear personal light (where fitted) ........................ 2-45
Vanity mirror lights (where fitted) ......................... 2-45
Battery saver system........................................... 2-45
Page 60 of 340

NOTE
For an overview see “Meters and gauges” in the
“0. Illustrated table of contents” section and see
“Instrument panel” in the “0. Illustrated table of
contents” section.
The needle indicators may move slightly after the
ignition switch is placed in the OFF position. This
is not amalfunction.
SPEEDOMETER AND FUEL GAUGE
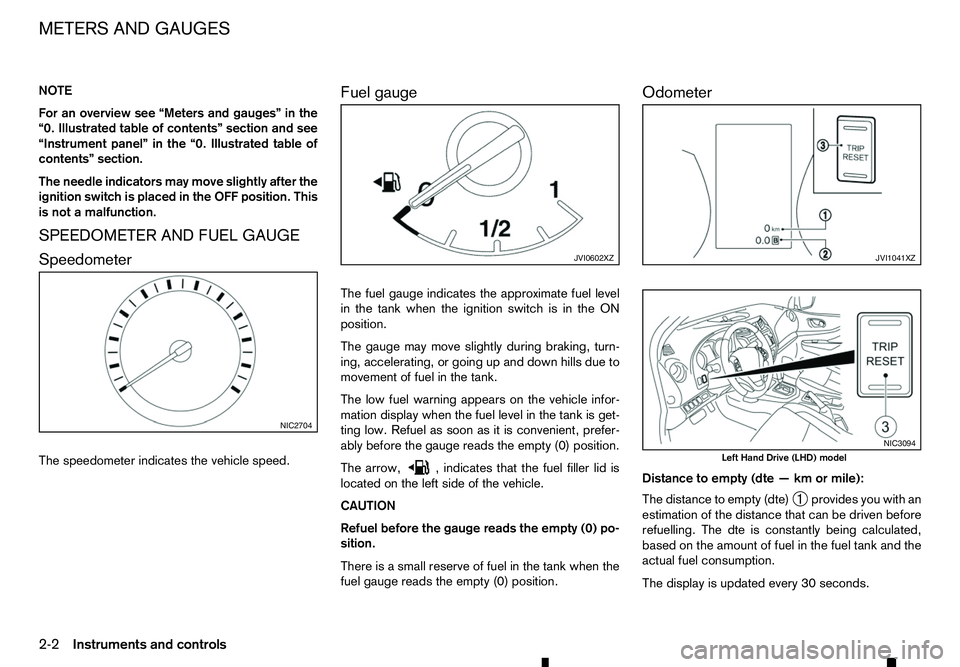
Speedometer
The speedometer indicates the vehicle speed. Fuel gauge
The fuel gauge indicates the approximate fuel level
in the tank when the ignition switch is in the ON
position.
The gauge may move slightly during braking, turn-
ing, accelerating, or going up and down hills due to
movement of fuel in the tank.
The low fuel warning appears on the vehicle infor-
mation display when the fuel level in the tank is get-
ting low. Refuel as soon as it is convenient, prefer-
ably before the gauge reads the empty (0) position.
The arrow, ,i
ndicates that the fuel filler lid is
located on the left side of the vehicle.
CAUTION
Refuel before the gauge reads the empty (0) po-
sition.
There is asmall reserve of fuel in the tank when the
fuel gauge reads the empty (0) position. Odometer
Distance to empty (dte
—kmormile):
The distance to empty (dte) ➀provides you with an
estimation of the distance that can be driven before
refuelling. The dte is constantly being calculated,
based on the amount of fuel in the fuel tank and the
actual fuel consumption.
The display is updated every 30 seconds. NIC2704 JVI0602XZ JVI1041XZ
NIC3094
Left Hand Drive (LHD) model
METERS AND GAUGES
2-2
Instruments and controls
Page 61 of 340

The dte mode includes
alow range warning feature.
If the fuel level is low, the warning is displayed on
the screen.
When the fuel level drops even lower, the dte dis-
play will change to “———”.
• If the amount of fuel added is small, the distance
to empty shown just before the ignition switch is
placed in the “OFF” position may continue to be
displayed.
• When driving uphill or rounding curves, the fuel
in the tank shifts, which may momentarily change
the display.
Odometer/Twin trip odometer:
The odometer/twin trip odometer is displayed in the
vehicle information display when the ignition switch
is in the ON position.
The odometer ➀displays the total distance the
vehicle has been driven.
The twin trip odometer ➁displays the distance of
individual trips.
Changing twin trip odometer display:
Push the
instrument panel) to change the display as follows:
TRIP A →TRIP B →ODOMETER →TRIP A
Resetting twin trip odometer:
Push and hold the
more than 1second to reset the trip odometer to
zero. Odometer (models without colour
display)
Odometer/twin trip odometer:
The odometer/twin trip odometer is displayed when
the ignition switch is in the ON position.
The odometer
➀displays the total distance the
vehicle has been driven.
The twin trip odometer ➁displays the distance of
individual trips.
Changing trip odometer display:
Push the trip odometer reset switch ➂to change
the display as follows:
TRIP A →TRIP B →Trip computer mode →TRIP A
For trip computer information, see “Trip computer”
later in this section.
Resetting trip odometer:
While TRIP AorTRIPBisd isplayed push and hold
the trip odometer reset switch ➂for approximately
1s econd to reset the trip odometer to zero.
For further information, see “Trip computer” later in
this section. TACHOMETER AND ENGINE
COOLANT TEMPERATURE GAUGE
The tachometer indicates the engine speed in revo-
lutions per minute (rpm).
Do not rev the engine
into the red zone j
A.
The red zone varies with models.
Engine coolant temperature gauge
The engine coolant temperature gauge indicates the
engine coolant temperature.
The engine coolant temperature is normal when the
gauge needle points within the zone ➀shown in
the illustration.
The engine coolant temperature will vary with the
outside air temperature and driving conditions. NIC2705
Instruments and controls
2-3
Page 63 of 340

Anti-lock Braking System (ABS) warn-
ing light* Four-Wheel Drive (4WD) warning light
(4WD model) Front fog lights indicator light*
Automatic Transmission (AT) check
warning light (AT model) Low fuel warning light
Front passenger air bag status light
Automatic Transmission (AT) oil
temperature warning light (AT model) Low tyre pressure warning light*
Automatic Transmission (AT) park
warning light (AT model) Low washer fluid warning light*
Glow plug indicator light*
Brake warning light
Malfunction warning light (red)*
High beam indicator light
Charge warning light
Master warning light*
Hill descent control system on indicator
light* Diesel Particulate Filter (DPF) warning
light* Seat belt warning light*
Malfunction Indicator Light (MIL)
Door open warning light
Supplemental Restraint System (SRS)
air bag warning light* Rear fog light indicator light*
Electronic Stability Programme (ESP)
warning light* Water-in-fuel-filter warning light*
Security indicator light*
Engine oil pressure warning light
Differential lock indicator light*
Small light indicator light*
Engine temperature warning light (Blue
or Red)* Dipped beam indicator light
Trailer direction indicator light*
Active Emergency Braking system
warning light* Electronic Stability Programme (ESP)
off indicator light* Turn signal indicator/hazard warning
lights
*: where fitted WARNING LIGHTS, INDICATOR LIGHTS AND AUDIBLE REMINDERS
Instruments and controls2-5