Page 134 of 348

DISP Button:Switches between display modes, clock
display.
RND Button: Enables/Disables shuffle play.
SRC Button: Switches the audio source to TUNER.
Switches the audio source to USB.
Fast Track Buttons (F-Trk): Fast forward/reverse track
(used with the ROTARY knob).
Audio Button: Activates audio setting functions.
Preset Buttons (1 To 6): Store station in memory, access
preset stations.
Buttons 1 And 2: Forward/reverse folder.
Band/AS Button: Select tuned frequency band, preset best
stations.
Menu Button: Access setup menu.
General Functions And Settings
Turn The Radio On Or Off
To turn the radio on or off, push the ROTARY knob (push
once to turn on and hold for about three seconds to turn
off), not dependent on the ignition position. The default radio configuration is “Auto Switch ON
�(see
SETUP MENU section). In this configuration, the radio will
follow two parameters: ignition and previous state. If the
ignition is turned off with the radio on, the radio will be
turned off, but will come on again when the ignition is
turned on. If the ignition is turned off with the radio off, the
radio continues to be turned off when the ignition is turned
on again.
If you prefer, you can set �Auto Switch OFF�(see SETUP
MENU section). The radio will only consider the ignition
switch position when it executes the 60 min function: when
the ignition is turned off, the radio will display the message
�60 MIN� for three seconds and switch off automatically
after 60 minutes if no buttons are pushed.
When it is turned on, the radio will display a greeting
message. When it is turned off, the radio will display the
message �GOOD BYE� before it switches off.
Audio
You can use the AUDIO button to access the available
audio settings (described in the sections below).
Equalizer
Pushing the AUDIO button for more than two seconds
activates the audio equalizer functions in the following
132 UNDERSTANDING YOUR INSTRUMENT PANEL
Page 136 of 348

Loudness
The display will show�LOUD 00�to indicate that you can
set the loudness (enhanced sound) function. Turn the
ROTARY knob clockwise to enable the loudness function at
level 1; the display will show �LOUD 01�and the LOUD
flag will be enabled. The radio supports three loudness
levels.
Volume
Turn the ROTARY knob clockwise to increase the volume.
Turning it counterclockwise will lower the volume. The
volume can be set between 0 and 30.
Tuner Mode (AM/FM Radio)
When you enter TUNER mode, the radio tunes to the most
recently selected station and will remain on the most
recently selected frequency band. In this mode of operation the display will show one of the
following 5 codes:
CH (Channel)
When this is on, it indicates that the current radio station
preset is stored in memory. The code is only shown when
the tuned frequency is showing on the display.
ST (Stereo)
When this is on, it indicates the radio station is transmit-
ting.
Searching for Stations In Automatic Mode
When you push
orfor less than two seconds, the
radio will search for the next valid station. While the
radio is searching for the new station, the display will
show �SEEKING�. When the search is complete, the
display will show the tuned frequency band and station
in the format �F1 106.9�or, if the station was previously
stored in memory, the display will show the channel
where it is stored and the tuned station.
134 UNDERSTANDING YOUR INSTRUMENT PANEL
Page 139 of 348

Presetting stations with a strong signal: when the
BAND/AS button is pushed for more than two seconds,
the radio will search for the 6 best stations and automati-
cally store them in the 6 memory positions of the current
band. During the search, the display will indicate�FM AST�
or �AM AST�, depending on the band selected. To record
the stations that are found, these are sorted in ascending
order of frequency and the first one is stored in memory
position 1, and so on, until positions 1-6 are all in use. If
fewer than 6 stations are found, the unused channels will
be allocated to the 107.9 MHz frequency for FM and AM
1710 KHz for the AM band. At the end of the search
process, the radio tunes in to the first preset position and
the display will indicate the associated preset number (1)
and the station frequency for three seconds. The display
will then return to the previous view.Setup Menu
You can use the Setup menu to change the various factory
settings to suit your own preferences.
Push MENU to activate the Maximum Volume function.
Repeatedly pushing this button will activate the other
functions in the following sequence: Maximum Volume
(MVOL)
Auto Switch (AUTO)Beep (BEEP)Set
Clock
Maximum Volume (MVOL). If this button or
the button for adjusting the selected function is not
pushed for five seconds or if the ROTARY knob is
pushed, the display returns to the previous view and
the changes will be saved.
Maximum Volume
This function allows you to set the maximum permissible
volume. Turn the ROTARY knob to set the volume. The
display will show a message in the format �MVOL 26�
indicating the maximum volume selected. When the maxi-
mum volume selected is the maximum radio volume, the
display will show �MVOL OFF�.
4
UNDERSTANDING YOUR INSTRUMENT PANEL 137
Page 156 of 348

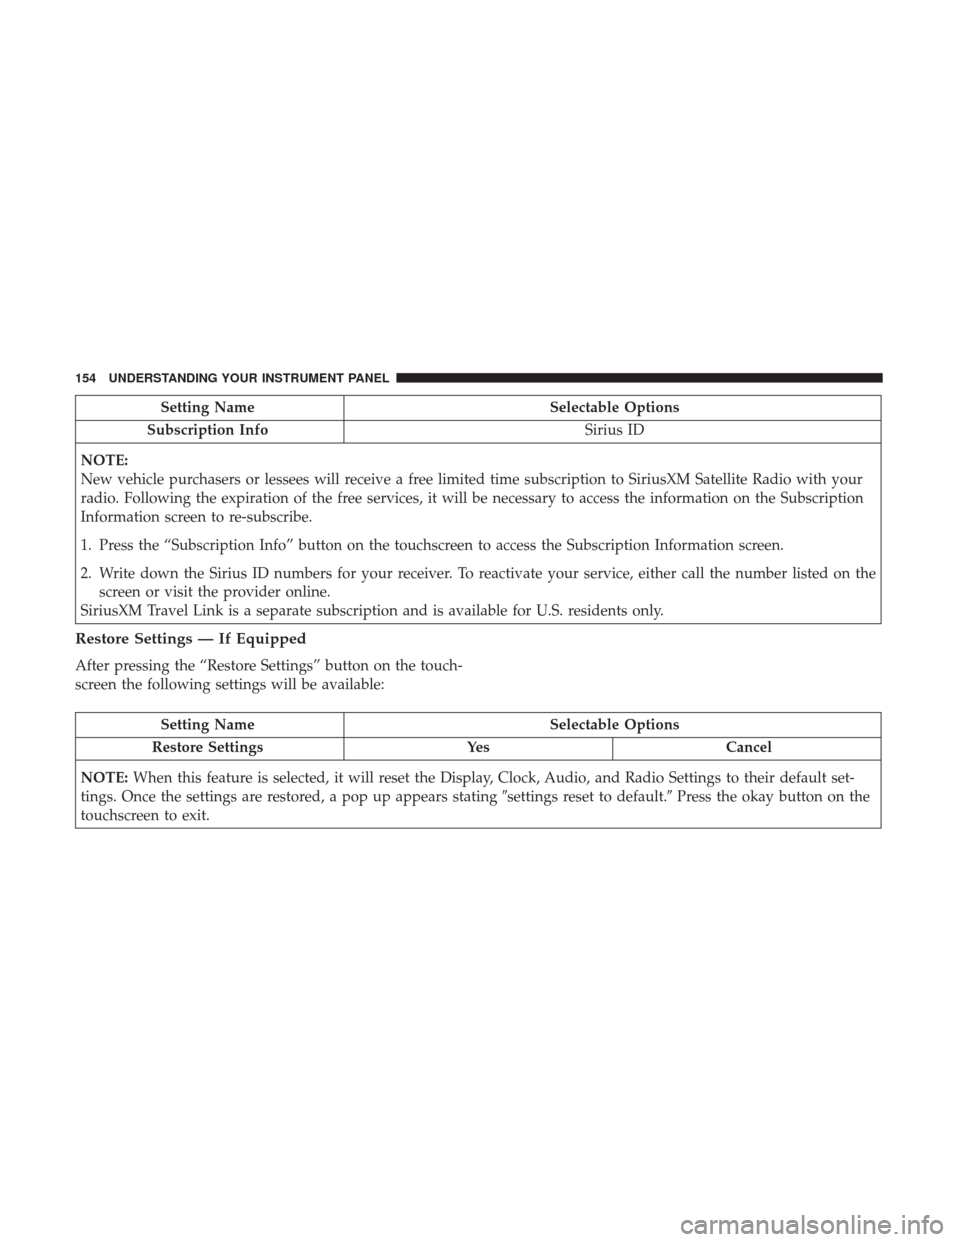
Setting NameSelectable Options
Subscription Info Sirius ID
NOTE:
New vehicle purchasers or lessees will receive a free limited time subscription to SiriusXM Satellite Radio with your
radio. Following the expiration of the free services, it will be necessary to access the information on the Subscription
Information screen to re-subscribe.
1. Press the “Subscription Info” button on the touchscreen to access the Subscription Information screen.
2. Write down the Sirius ID numbers for your receiver. To reactivate your service, either call the number listed on the screen or visit the provider online.
SiriusXM Travel Link is a separate subscription and is available for U.S. residents only.
Restore Settings — If Equipped
After pressing the “Restore Settings” button on the touch-
screen the following settings will be available:
Setting Name Selectable Options
Restore Settings YesCancel
NOTE: When this feature is selected, it will reset the Display, Clock, Audio, and Radio Settings to their default set-
tings. Once the settings are restored, a pop up appears stating �settings reset to default.�Press the okay button on the
touchscreen to exit.
154 UNDERSTANDING YOUR INSTRUMENT PANEL