Page 263 of 536

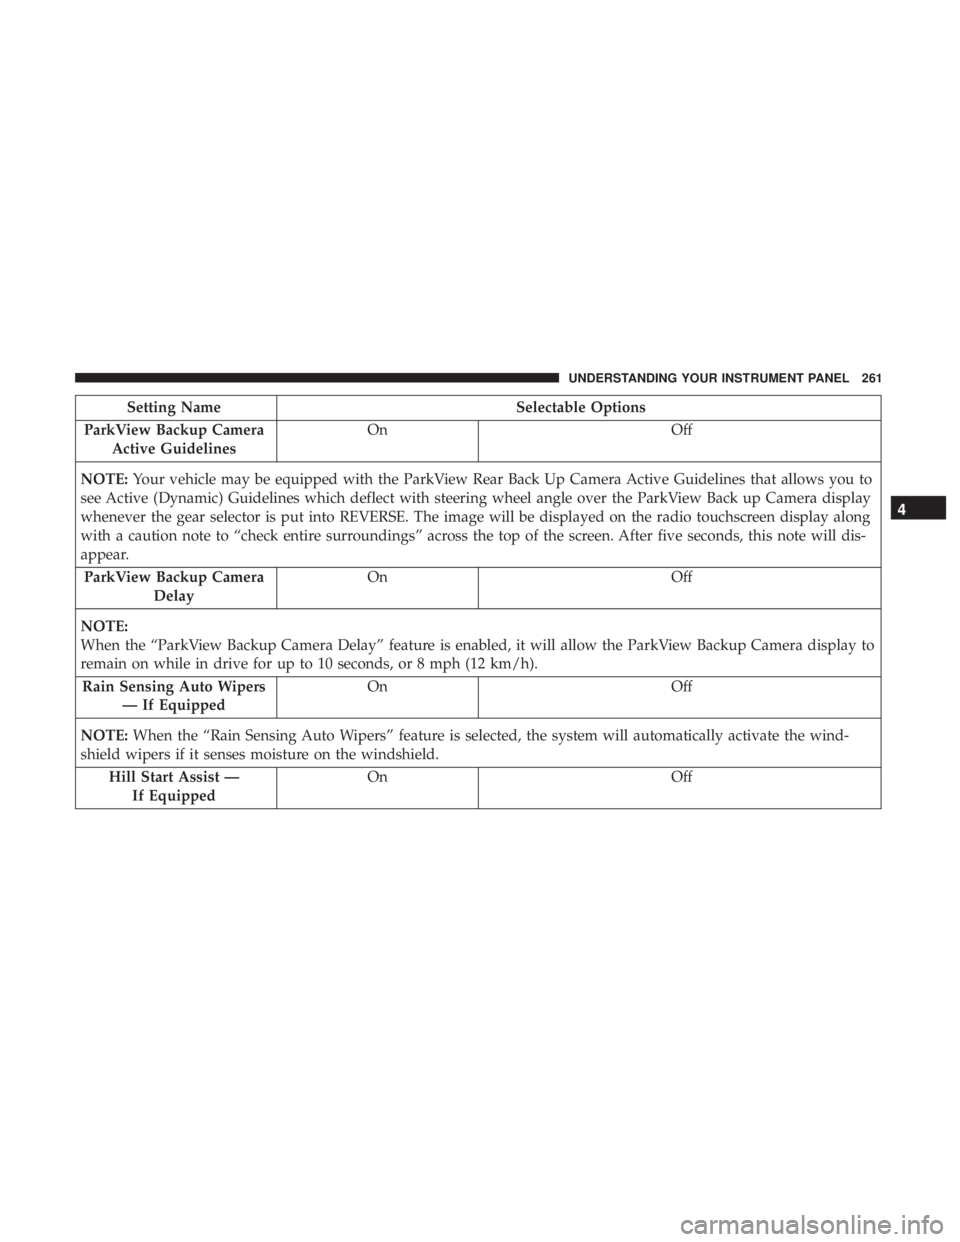
Setting Name Selectable Options
ParkView Backup Camera
Active Guidelines On Off
NOTE: Your vehicle may be equipped with the ParkView Rear Back Up Camera Active Guidelines that allows you to
see Active (Dynamic) Guidelines which deflect with steering wheel angle over the ParkView Back up Camera display
whenever the gear selector is put into REVERSE. The image will be displayed on the radio touchscreen display along
with a caution note to “check entire surroundings” across the top of the screen. After five seconds, this note will dis-
appear.
ParkView Backup Camera
Delay On Off
NOTE:
When the “ParkView Backup Camera Delay” feature is enabled, it will allow the ParkView Backup Camera display to
remain on while in drive for up to 10 seconds, or 8 mph (12 km/h).
Rain Sensing Auto Wipers
— If Equipped On Off
NOTE: When the “Rain Sensing Auto Wipers” feature is selected, the system will automatically activate the wind-
shield wipers if it senses moisture on the windshield.
Hill Start Assist —
If Equipped On Off 4UNDERSTANDING YOUR INSTRUMENT PANEL 261
Page 268 of 536
Auto Comfort Systems — If Equipped
After pressing the “Auto-On Comfort” button on the
touchscreen, the following settings will be available:
Setting Name Selectable Options
Auto-On Driver Heated/
Ventilated Seat & Steering
Wheel With Vehicle Start
— If Equipped Off Remote Start All Starts
NOTE: When the “Auto-On Driver Heated/Ventilated Seat & Steering Wheel With Vehicle Start” feature is selected
the driver’s heated seat and heated steering wheel will automatically turn on when temperatures are below 40° F
(4.4° C). When temperatures are above 80° F (26.7° C), the driver vented seat will turn on. 266 UNDERSTANDING YOUR INSTRUMENT PANEL
Page 276 of 536

STEERING WHEEL AUDIO CONTROLS — IF
EQUIPPED
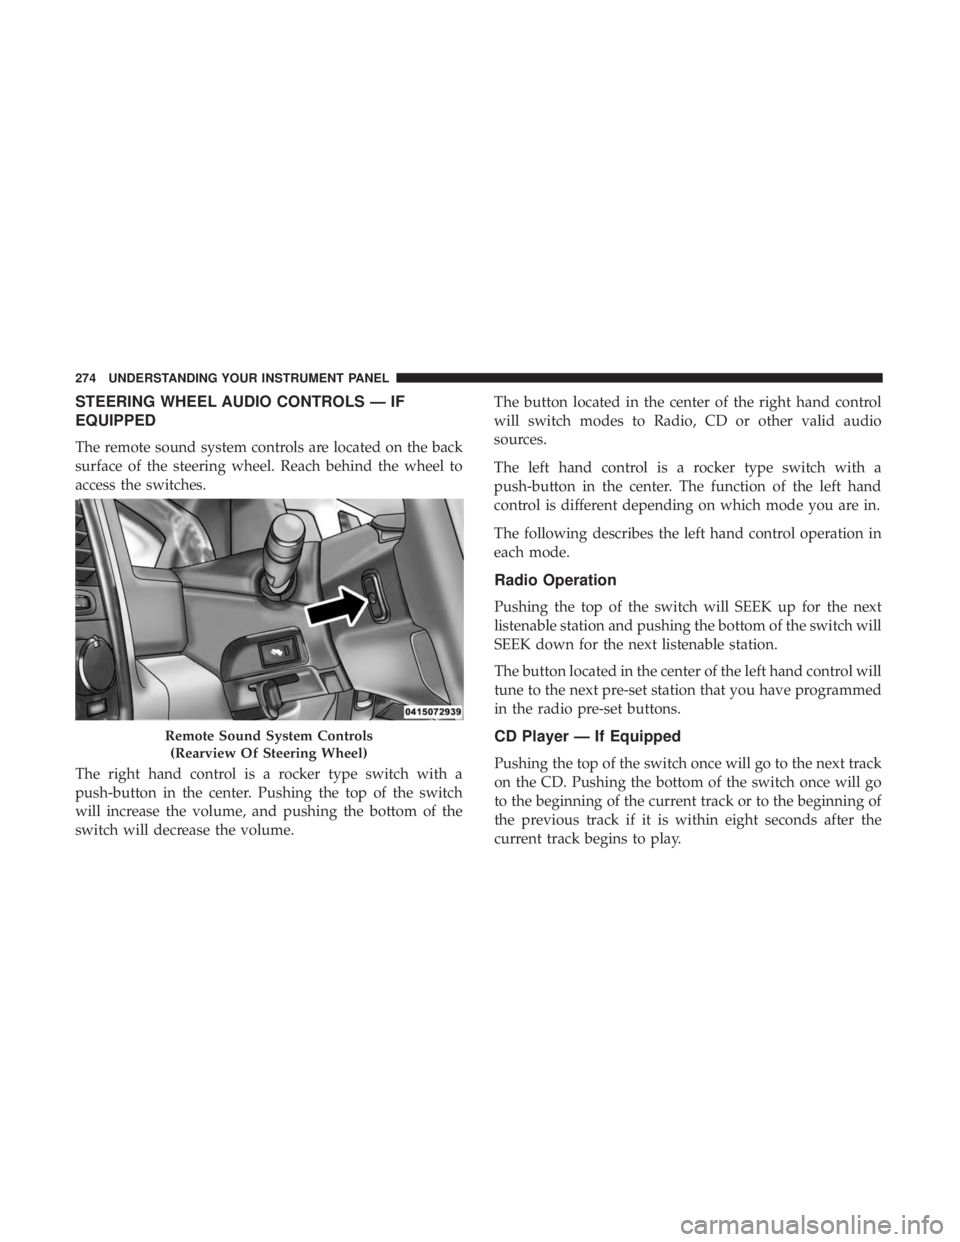
The remote sound system controls are located on the back
surface of the steering wheel. Reach behind the wheel to
access the switches.
The right hand control is a rocker type switch with a
push-button in the center. Pushing the top of the switch
will increase the volume, and pushing the bottom of the
switch will decrease the volume. The button located in the center of the right hand control
will switch modes to Radio, CD or other valid audio
sources.
The left hand control is a rocker type switch with a
push-button in the center. The function of the left hand
control is different depending on which mode you are in.
The following describes the left hand control operation in
each mode.
Radio Operation
Pushing the top of the switch will SEEK up for the next
listenable station and pushing the bottom of the switch will
SEEK down for the next listenable station.
The button located in the center of the left hand control will
tune to the next pre-set station that you have programmed
in the radio pre-set buttons.
CD Player — If Equipped
Pushing the top of the switch once will go to the next track
on the CD. Pushing the bottom of the switch once will go
to the beginning of the current track or to the beginning of
the previous track if it is within eight seconds after the
current track begins to play.Remote Sound System Controls
(Rearview Of Steering Wheel)274 UNDERSTANDING YOUR INSTRUMENT PANEL
Page 307 of 536

TIP: Voice Text Reply is not compatible with iPhone, but if
your vehicle is equipped with Siri Eyes Free, you can use
your voice to send a text message.
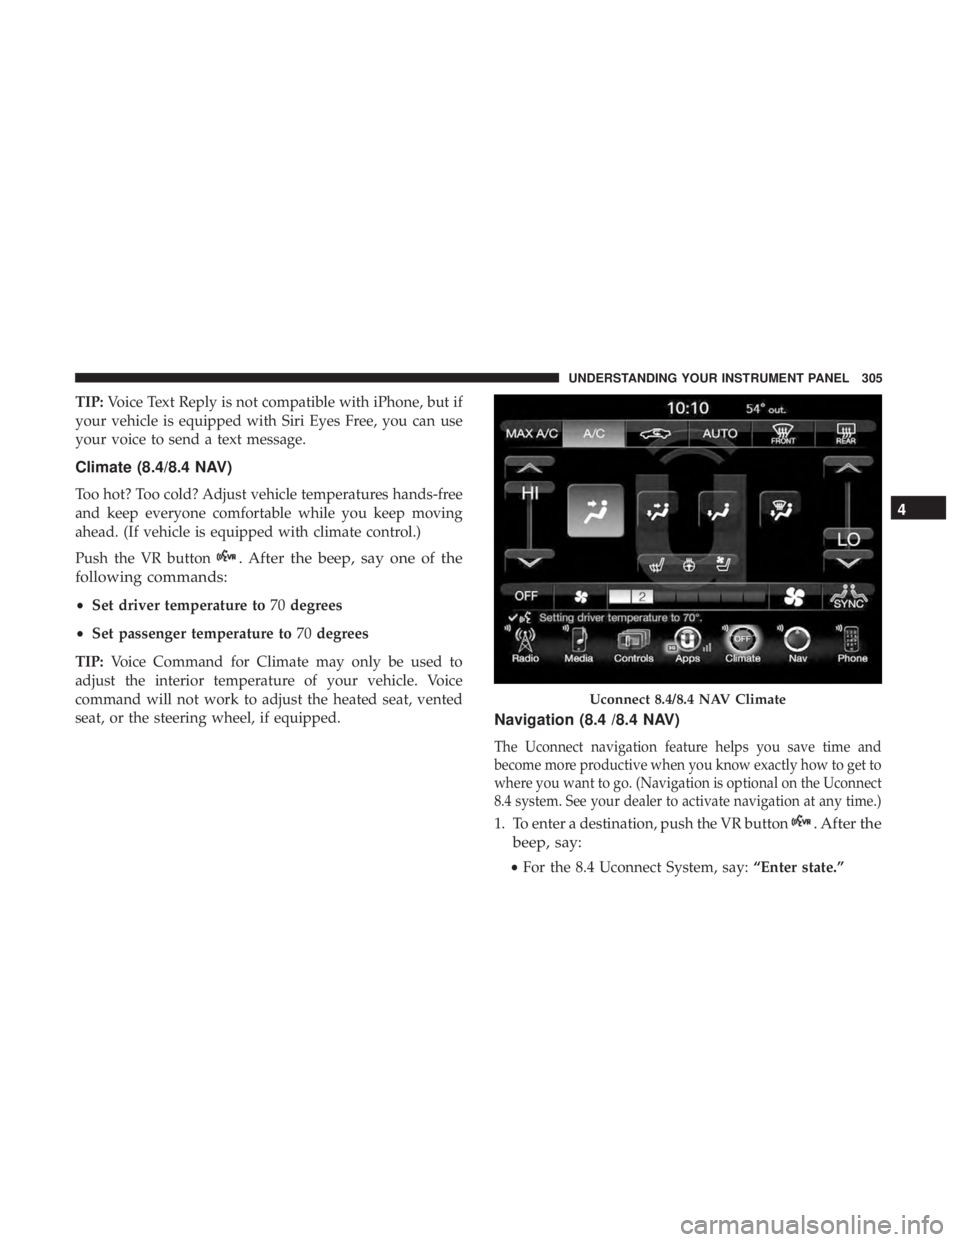
Climate (8.4/8.4 NAV)
Too hot? Too cold? Adjust vehicle temperatures hands-free
and keep everyone comfortable while you keep moving
ahead. (If vehicle is equipped with climate control.)
Push the VR button . After the beep, say one of the
following commands:
• Set driver temperature to 70 degrees
• Set passenger temperature to 70 degrees
TIP: Voice Command for Climate may only be used to
adjust the interior temperature of your vehicle. Voice
command will not work to adjust the heated seat, vented
seat, or the steering wheel, if equipped.
Navigation (8.4 /8.4 NAV)
The Uconnect navigation feature helps you save time and
become more productive when you know exactly how to get to
where you want to go. (Navigation is optional on the Uconnect
8.4 system. See your dealer to activate navigation at any time.)
1. To enter a destination, push the VR button . After the
beep, say:
• For the 8.4 Uconnect System, say: “Enter state.”Uconnect 8.4/8.4 NAV Climate 4UNDERSTANDING YOUR INSTRUMENT PANEL 305
Page 314 of 536
To enable Siri push and hold, then release the Uconnect
Voice Recognition (VR) button on the steering wheel. After
you hear a double beep, you can ask Siri to play podcasts
and music, get directions, read text messages, and many
other useful requests. Getting Started
Ensure Siri is enabled on your iPhone.
1. Pair your Siri enabled device to the vehicles sound
system. Refer to your Uconnect Owner ’s Manual
Supplement for a detailed pairing procedure.Siri Eyes Free Available Siri Enable Screens1 — Select Settings On Your
iPhone
2 — Select General 3 — Select Siri
4 — Enable Siri312 UNDERSTANDING YOUR INSTRUMENT PANEL
Page 351 of 536

CAUTION!• Always check the depth of the standing water before
driving through it. Never drive through standing
water that is deeper than the bottom of the tire rims
mounted on the vehicle.
• Determine the condition of the road or the path that
is under water and if there are any obstacles in the
way before driving through the standing water.
• Do not exceed 5 mph (8 km/h) when driving through
standing water. This will minimize wave effects.
• Driving through standing water may cause damage
to your vehicle’s drivetrain components. Always in-
spect your vehicle’s fluids (i.e., engine oil, transmis-
sion, axle, etc.) for signs of contamination (i.e., fluid
that is milky or foamy in appearance) after driving
through standing water. Do not continue to operate
the vehicle if any fluid appears contaminated, as this
may result in further damage. Such damage is not
covered by the New Vehicle Limited Warranty.
• Getting water inside your vehicle’s engine can cause
it to lock up and stall out, and cause serious internal
damage to the engine. Such damage is not covered by
the New Vehicle Limited Warranty. POWER STEERING
The standard power steering system will give you good
vehicle response and increased ease of maneuverability in
tight spaces. The system will provide mechanical steering
capability if power assist is lost.
If for some reason the power assist is interrupted, it will
still be possible to steer your vehicle. Under these condi-
tions, you will observe a substantial increase in steering
effort, especially at very low vehicle speeds and during
parking maneuvers.
NOTE:
• Increased noise levels at the end of the steering wheel
travel are considered normal and do not indicate that
there is a problem with the power steering system.
• Upon initial start-up in cold weather, the power steering
pump may make noise for a short amount of time. This
is due to the cold, thick fluid in the steering system. This
noise should be considered normal, and it does not in
any way damage the steering system. 5STARTING AND OPERATING 349
Page 352 of 536

CAUTION!Prolonged operation of the steering system at the end
of the steering wheel travel will increase the steering
fluid temperature and it should be avoided when
possible. Damage to the power steering pump may
occur.
Power Steering Fluid Check
Checking the power steering fluid level at a defined service
interval is not required. The fluid should be checked at
every oil change if a leak is suspected, abnormal noises are
apparent, and/or the system is not functioning as antici-
pated. Coordinate inspection efforts through an authorized
dealer.
CAUTION!Do not use chemical flushes in your power steering
system as the chemicals can damage your power steer-
ing components. Such damage is not covered by the
New Vehicle Limited Warranty. WARNING!Fluid level should be checked on a level surface and
with the engine off to prevent injury from moving
parts and to ensure accurate fluid level reading. Do not
overfill. Use only manufacturer’s recommended power
steering fluid.
If necessary, add fluid to restore to the proper indicated
level. With a clean cloth, wipe any spilled fluid from all
surfaces. Refer to “Fluids, Lubricants And Genuine Parts”
in “Maintaining Your Vehicle” for further information.
PARKING BRAKE
Before leaving the vehicle, make sure that the parking
brake is fully applied, the engine is off and the key fob is
removed from the ignition switch. Also, be certain to leave
an automatic transmission in PARK, or manual transmis-
sion in REVERSE or first gear.
The foot operated parking brake is located below the lower
left corner of the instrument panel. To apply the parking
brake, firmly push the parking brake pedal fully. To release
the parking brake, pull the parking brake release handle.350 STARTING AND OPERATING
Page 359 of 536

WARNING! (Continued)• Failure to follow these warnings may cause the
vehicle to roll down the incline and could collide
with another vehicle, object or person, and cause
serious or fatal injury. Always remember to use the
parking brake while parking on a hill and that the
driver is responsible for braking the vehicle.
Disabling And Enabling HSA
This feature can be turned on or turned off. To change the
current setting, proceed as follows:
• For vehicles equipped with the instrument cluster dis-
play, refer to “Instrument Cluster Display” in “Under-
standing Your Instrument Panel” for further informa-
tion.
• If disabling HSA using Uconnect Settings, refer to
“Uconnect Settings” in “Understanding Your Instrument
Panel” for further information.
For vehicles not equipped with the instrument cluster
display, perform the following steps:
1. Center the steering wheel (front wheels pointing
straight forward). 2. Shift the transmission into PARK.
3. Apply the parking brake.
4. Start the engine.
5. Rotate the steering wheel slightly more than one-half
turn to the left.
6. Push the “ESC Off” button located in the lower switch
bank below the climate control four times within twenty
seconds. The “ESC Off Indicator Light” should turn on
and turn off two times.
7. Rotate the steering wheel back to center and then an
additional slightly more than one-half turn to the right.
8. Turn the ignition switch to the OFF position and then
back to the ON position. If the sequence was completed
properly, the “ESC Off Indicator Light” will blink sev-
eral times to confirm HSA is disabled.
9. Repeat these steps if you want to return this feature to
its previous setting. 5STARTING AND OPERATING 357