Page 274 of 566
272
3008-2_en_Chap06_conduite_ed01-2016
Park Assist
This system provides active assistance with
parking. It detects a parking space then
operates the steering to park in the space.
It operates the steering while the driver
manages the accelerator, brakes, gears and
clutch (manual gearbox). During phases of
entry into and exit from a parking space, the
system provides visual and audible information
to the driver in order to make the manoeuvres
safe. It may be necessary to move for wards
and backwards more than once.During a manoeuvre, the steering
wheel turns quickly: do not hold the
steering wheel, do not place your
hands between the spokes of the
steering wheel and take care with
loose and bulky clothing (scarves, ties,
handbags...) - Risk of injury!
When Park Assist is activated, it
prevents a change to STOP mode of
Stop & Start. In STOP mode, activation
of Park Assist restarts the engine.
This manoeuvring assistance system
cannot, in any circumstances, replace
the need for vigilance on the part of the
driver.
The driver must remain in control of their
vehicle ensuring that the space remains
clear throughout the manoeuvre.
In some circumstances, the sensors may
not detect small obstacles located in
their blind spots.
The driver can take control at any time by
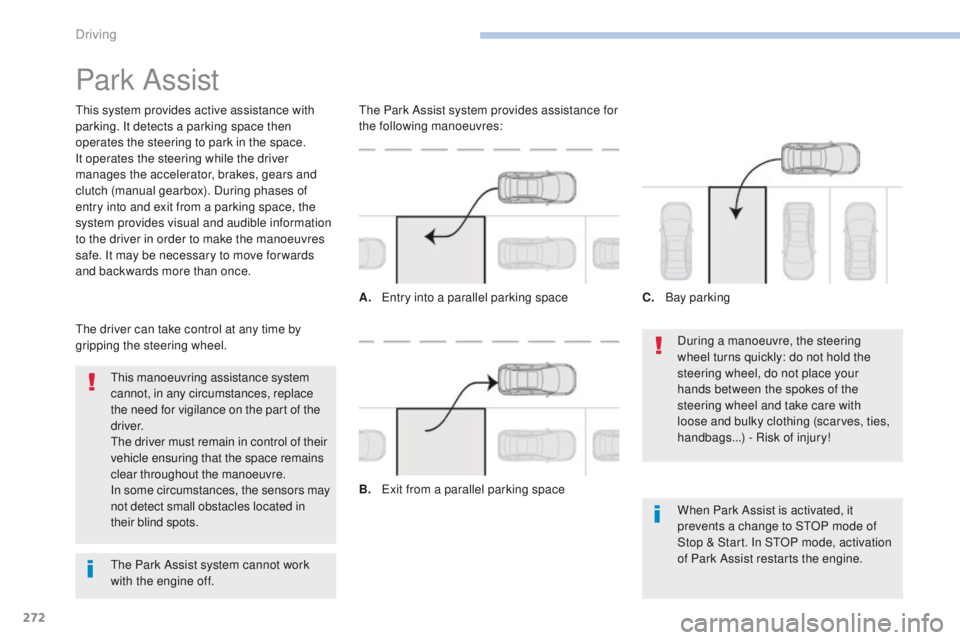
gripping the steering wheel. The Park Assist system provides assistance for
the following manoeuvres:
A.
E
ntry into a parallel parking space
B.
E
xit from a parallel parking spaceC.
B
ay parking
The Park Assist system cannot work
with the engine off.
Driving
Page 294 of 566
292
3008-2_en_Chap07_infos-pratiques_ed01-2016
Snow chains
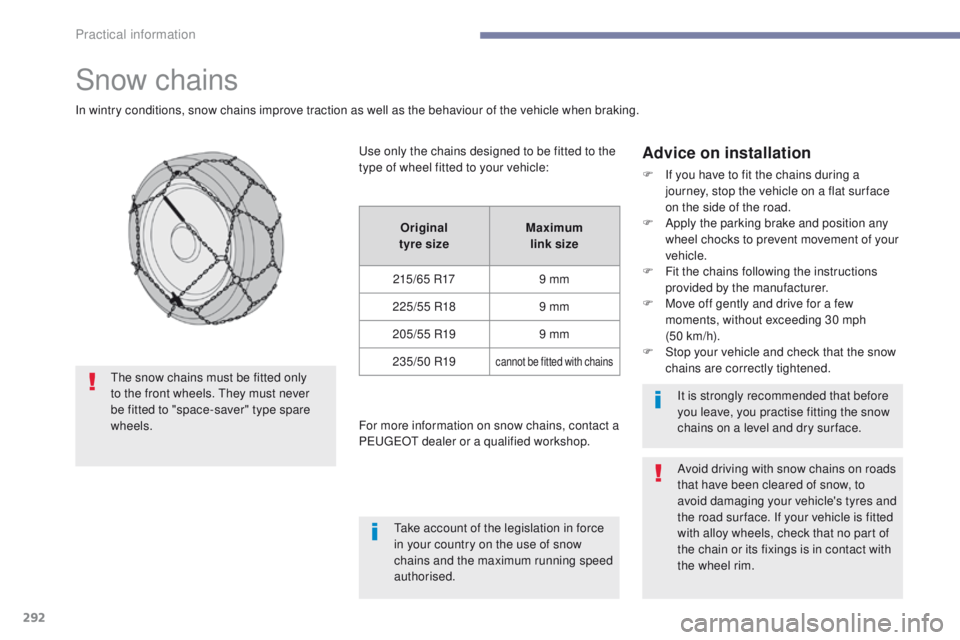
In wintry conditions, snow chains improve traction as well as the behaviour of the vehicle when braking.
Advice on installation
F If you have to fit the chains during a journey, stop the vehicle on a flat sur face
on the side of the road.
F
A
pply the parking brake and position any
wheel chocks to prevent movement of your
vehicle.
F
F
it the chains following the instructions
provided by the manufacturer.
F
M
ove off gently and drive for a few
moments, without exceeding 30 mph
(50
km/h).
F
S
top your vehicle and check that the snow
chains are correctly tightened.
Use only the chains designed to be fitted to the
type of wheel fitted to your vehicle:
For more information on snow chains, contact a
PEUGEOT dealer or a qualified workshop.
It is strongly recommended that before
you leave, you practise fitting the snow
chains on a level and dry sur face.
The snow chains must be fitted only
to the front wheels. They must never
be fitted to "space-saver" type spare
wheels.
Take account of the legislation in force
in your country on the use of snow
chains and the maximum running speed
authorised.Avoid driving with snow chains on roads
that have been cleared of snow, to
avoid damaging your vehicle's tyres and
the road sur face. If your vehicle is fitted
with alloy wheels, check that no part of
the chain or its fixings is in contact with
the wheel rim.
Original
tyre size Maximum
link size
215/65 R17 9 mm
225/55 R18 9 mm
205/55 R19 9 mm
235/50 R19
cannot be fitted with chains
Practical information
Page 300 of 566
298
3008-2_en_Chap07_infos-pratiques_ed01-2016
Topping-up the engine oil level
The location of the oil filler cap is shown in the
corresponding underbonnet layout view.
F
U
nscrew the oil filler cap to reveal the filler
aperture.
F
A
dd oil in small quantities, avoiding any
spills on engine components (risk of fire).
F
W
ait a few minutes before checking the
level again using the dipstick.
F
A
dd more oil if necessary.
F
A
fter checking the level, carefully refit the
oil filler cap and the dipstick in its tube.
After topping-up the oil, the check when
switching on the ignition with the oil
level indicator in the instrument panel
is not valid during the 30 minutes after
topping-up.
Engine oil change
Refer to the manufacturer's service schedule
for details of the interval for this operation.
In order to maintain the reliability of the engine
and emission control system, never use
additives in the engine oil.
Brake fluid level
Changing the fluid
Refer to the manufacturer's service schedule
for details of the interval for this operation.
Fluid specification
The brake fluid must conform to the
manufacturer's recommendations. The brake fluid level should be close
to the "MA X" mark. If it is not, check
the brake pad wear.
Practical information
Page 304 of 566
302
3008-2_en_Chap07_infos-pratiques_ed01-2016
Automatic gearbox
The gearbox does not require any
maintenance (no oil change).
Refer to the manufacturer's service
schedule for the checking interval
for this component.
Electric parking
brake
This system does not require any
routine servicing. However, in
the event of a problem, have the
system checked by a PEUGEOT
dealer or a qualified workshop.
Brake pads
Brake wear depends on the style
of driving, particularly in the case
of vehicles used in town, over short
distances. It may be necessary to
Brake disc wear
For information on checking brake
disc wear, contact a PEUGEOT
dealer or a qualified workshop.For more information on the Electric parking
brake
, refer to the corresponding section.
Manual gearbox
The gearbox does not require any
maintenance (no oil change).
Refer to the manufacturer's service
schedule for the checking interval
for this component.
Only use products recommended by
PEUGEOT or products of equivalent
quality and specification.
In order to optimise the operation of
units as important as those in the
braking system, PEUGEOT selects and
offers very specific products.
After washing the vehicle, dampness,
or in wintry conditions, ice can form
on the brake discs and pads: braking
efficiency may be reduced. Make light
brake applications to dry and defrost
the brakes.
have the condition of the brakes checked, even
between vehicle services.
Unless there is a leak in the circuit, a drop in
the brake fluid level indicates that the brake
pads are worn.
Practical information
Page 321 of 566
319
3008-2_en_Chap08_en cas-de-panne_ed01-2016
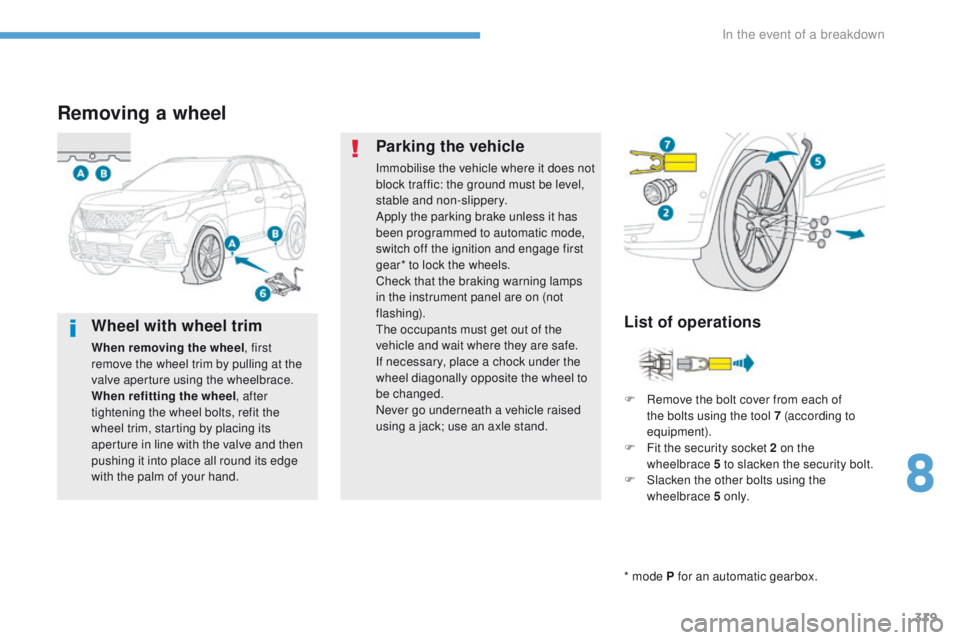
Removing a wheel
* mode P for an automatic gearbox.
List of operations
Parking the vehicle
Immobilise the vehicle where it does not
block traffic: the ground must be level,
stable and non-slippery.
Apply the parking brake unless it has
been programmed to automatic mode,
switch off the ignition and engage first
gear* to lock the wheels.
Check that the braking warning lamps
in the instrument panel are on (not
flashing).
The occupants must get out of the
vehicle and wait where they are safe.
If necessary, place a chock under the
wheel diagonally opposite the wheel to
be changed.
Never go underneath a vehicle raised
using a jack; use an axle stand.
F
R
emove the bolt cover from each of
the bolts using the tool 7 (according to
equipment).
F
F
it the security socket 2 on the
wheelbrace
5 to slacken the security bolt.
F
S
lacken the other bolts using the
wheelbrace 5 o n l y.
Wheel with wheel trim
When removing the wheel , first
remove the wheel trim by pulling at the
valve aperture using the wheelbrace.
When refitting the wheel , after
tightening the wheel bolts, refit the
wheel trim, starting by placing its
aperture in line with the valve and then
pushing it into place all round its edge
with the palm of your hand.
8
In the event of a breakdown
Page 330 of 566
328
3008-2_en_Chap08_en cas-de-panne_ed01-2016
Direction indicators
(on the wings)
F Open the tailgate then unclip the access cover on the side in question.
F
S
lacken the lamp fixing nut using a 10 mm
box spanner or socket.
F
T
o avoid losing the nut if it drops into the
wing trim, first place a cloth below it.
F
M
anually unscrew and remove the lamp
fixing nut.
F
D
isengage the retaining clip, while pushing
the lamp out slightly.
Rear lamps
1. Brake lamps (LEDs).
2. Si delamps / daytime running lamps
(LEDs).
3.
D
irection indicators (WY16W amber).
4.
R
eversing lamps (W16W).
5.
F
oglamp (P21W).
LEDs: light-emitting diodes. F
F
rom the outside, carefully remove the
lamp by pulling it to the rear, then up.
F
D
isconnect the lamp connector.
F
T
urn the bulb holder a quarter turn and pull
it out using a standard pair of pliers.
F
P
ull the bulb out and replace it.
For reassembly, carry out these operations in
reverse order.
In the event of a breakdown
Page 332 of 566
330
3008-2_en_Chap08_en cas-de-panne_ed01-2016
Third brake lamp (light emitting
diodes - LEDs)
Contact a PEUGEOT dealer or qualified
workshop.
Number plate lamps
F Insert a thin screwdriver into the slot in the lens.
F
P
ush it outwards to unclip it.
F
R
emove the lens.
F
P
ull the bulb out and change it.
In the event of a breakdown
Page 338 of 566
336
3008-2_en_Chap08_en cas-de-panne_ed01-2016
Towing the vehicle
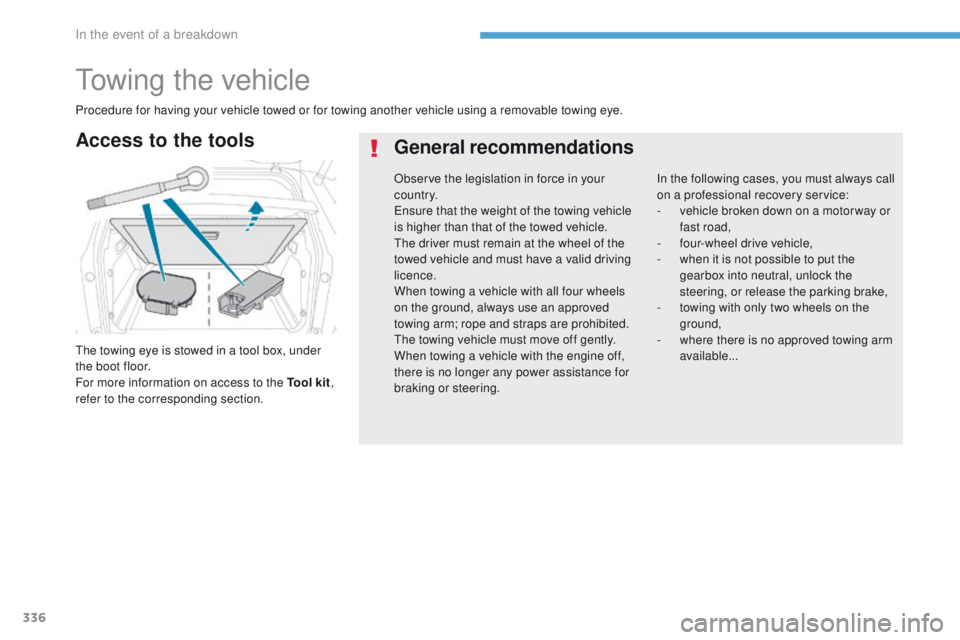
The towing eye is stowed in a tool box, under
the boot floor.
For more information on access to the Tool kit,
refer to the corresponding section.
Access to the tools General recommendations
In the following cases, you must always call
on a professional recovery service:
-
v
ehicle broken down on a motor way or
fast road,
-
f
our-wheel drive vehicle,
-
w
hen it is not possible to put the
gearbox into neutral, unlock the
steering, or release the parking brake,
-
t
owing with only two wheels on the
ground,
-
w
here there is no approved towing arm
available...
Procedure for having your vehicle towed or for towing another vehicle using a removable towing eye.
Observe the legislation in force in your
c o unt r y.
Ensure that the weight of the towing vehicle
is higher than that of the towed vehicle.
The driver must remain at the wheel of the
towed vehicle and must have a valid driving
licence.
When towing a vehicle with all four wheels
on the ground, always use an approved
towing arm; rope and straps are prohibited.
The towing vehicle must move off gently.
When towing a vehicle with the engine off,
there is no longer any power assistance for
braking or steering.
In the event of a breakdown