2017 Peugeot 308 dashboard
[x] Cancel search: dashboardPage 175 of 566
173
3008-2_en_Chap05_securite_ed01-2016
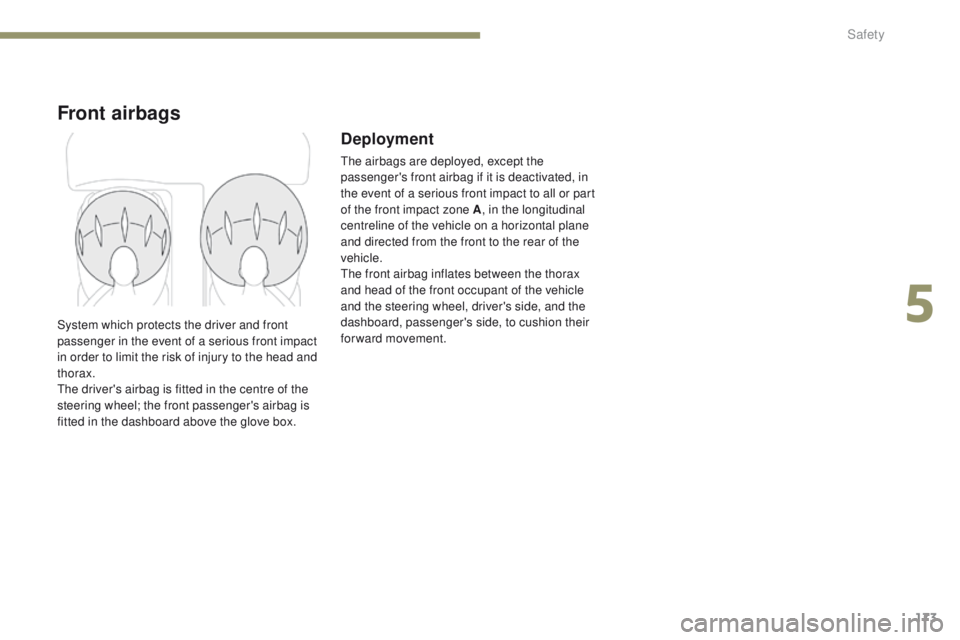
Front airbags
Deployment
The airbags are deployed, except the
passenger's front airbag if it is deactivated, in
the event of a serious front impact to all or part
of the front impact zone A, in the longitudinal
centreline of the vehicle on a horizontal plane
and directed from the front to the rear of the
vehicle.
The front airbag inflates between the thorax
and head of the front occupant of the vehicle
and the steering wheel, driver's side, and the
dashboard, passenger's side, to cushion their
for ward movement.
System which protects the driver and front
passenger in the event of a serious front impact
in order to limit the risk of injury to the head and
thorax.
The driver's airbag is fitted in the centre of the
steering wheel; the front passenger's airbag is
fitted in the dashboard above the glove box.
5
Safety
Page 178 of 566
176
3008-2_en_Chap05_securite_ed01-2016
Advice
Front airbags
Do not drive holding the steering wheel by its
spokes or resting your hands on the centre
part of the wheel.
Passengers must not place their feet on the
dashboard.
Do not smoke as deployment of the airbags
can cause burns or the risk of injury from a
cigarette or pipe.
Never remove or pierce the steering wheel or
hit it violently.
Do not fit or attach anything to the steering
wheel or dashboard, this could cause injuries
with deployment of the airbags.
Lateral airbags
Use only approved covers on the seats,
compatible with the deployment the lateral
airbags. For information on the range of seat
covers suitable for your vehicle, you can
contact a PEUGEOT dealer.
Do not fix or attach anything to the seat
backs (clothing...). This could cause injury
to the chest or arms if the lateral airbag is
deployed.
Do not sit with the upper part of the body any
nearer to the door than necessary.
Curtain airbags
Do not fix or attach anything to the roof. This
could cause injury to the head if the curtain
airbag is deployed.
If fitted on your vehicle, do not remove the
grab handles installed on the roof, they play
a part in securing the curtain airbags.
Sit in a normal upright position.
Wear a correctly adjusted seat belt.
Do not leave anything between the
occupants and the airbags (a child, pet,
object...), nor fix or attach anything close to
the inflation trajectory of the airbags; this
could cause injuries during their deployment.
Never modify the original definition of your
vehicle, particularly in the area directly
around the airbags.
After an accident or if the vehicle has been
stolen or broken into, have the airbag
systems checked.
All work on the airbag system must be
carried out by a PEUGEOT dealer or a
qualified workshop.
Even if all of the precautions mentioned
are observed, a risk of injury or of minor
burns to the head, chest or arms when an
airbag is deployed cannot be ruled out. The
bag inflates almost instantly (within a few
milliseconds) then deflates within the same
time discharging the hot gas via openings
provided for this purpose.
For the airbags to be fully effective, observe the safety recommendations below:
The vehicle's front door panels include side
impact sensors.
A damaged door or any unauthorised or
incorrectly executed work (modification or
repair) on the front doors or their interior trim
could compromise the operation of these
sensors - Risk of malfunction of the lateral
airbags!
Such work must only be done by a
PEUGEOT dealer or a qualified workshop.
Safety
Page 196 of 566
194
3008-2_en_Chap05_securite_ed01-2016
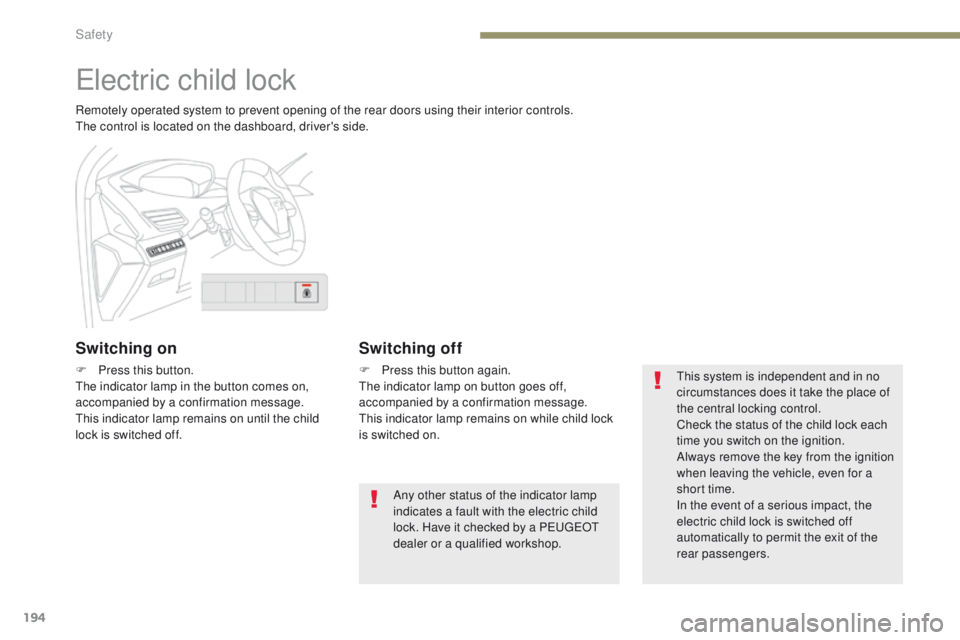
Electric child lock
Remotely operated system to prevent opening of the rear doors using their interior controls.
The control is located on the dashboard, driver's side.
Switching on
F Press this button.
The indicator lamp in the button comes on,
accompanied by a confirmation message.
This indicator lamp remains on until the child
lock is switched off.
Switching off
F Press this button again.
The indicator lamp on button goes off,
accompanied by a confirmation message.
This indicator lamp remains on while child lock
is switched on.Any other status of the indicator lamp
indicates a fault with the electric child
lock. Have it checked by a PEUGEOT
dealer or a qualified workshop. This system is independent and in no
circumstances does it take the place of
the central locking control.
Check the status of the child lock each
time you switch on the ignition.
Always remove the key from the ignition
when leaving the vehicle, even for a
short time.
In the event of a serious impact, the
electric child lock is switched off
automatically to permit the exit of the
rear passengers.
Safety
Page 223 of 566
221
3008-2_en_Chap06_conduite_ed01-2016
Deactivation / Reactivation
In certain circumstances, such as the need
to maintain the temperature in the passenger
compartment, it may be useful to deactivate the
Stop & Start system.
The system can be deactivated at any time,
once the ignition is switched on.
If the engine is in STOP mode, it then restarts.
The Stop & Start system is reactivated
automatically every time the ignition is
switched
on.
Opening the bonnet
Before doing anything under the
bonnet, deactivate the Stop & Start
system to avoid the risk of injury
related to an automatic change to
S TA R T
m o d e .
Driving on flooded roads
Before driving through a flooded road,
it is strongly recommended that you
deactivate the Stop & Start system.
For more information on Driving
advice , particularly on flooded roads,
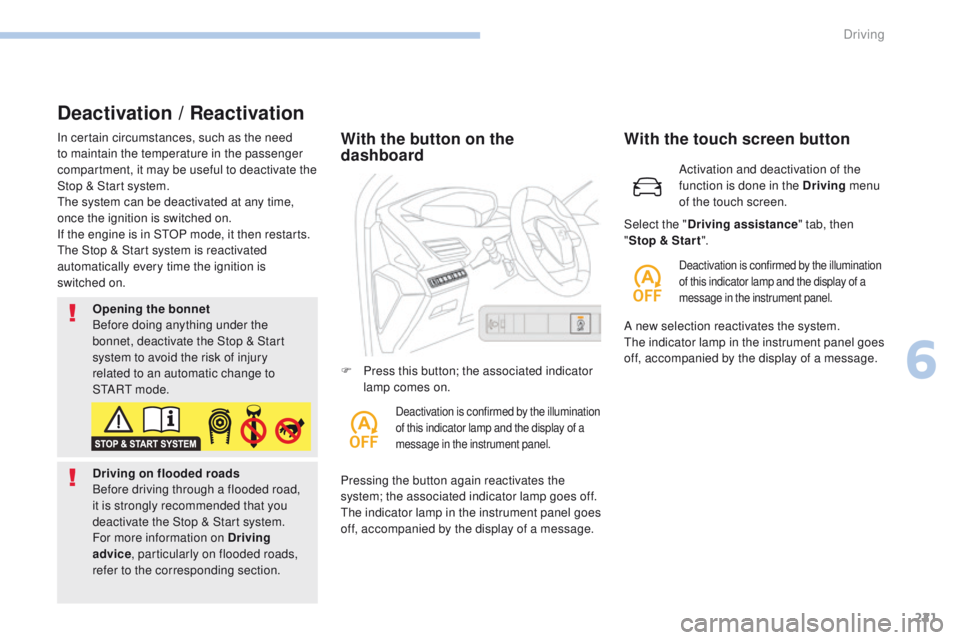
refer to the corresponding section.With the button on the
dashboard
Pressing the button again reactivates the
system; the associated indicator lamp goes off.
The indicator lamp in the instrument panel goes
off, accompanied by the display of a message. F
P
ress this button; the associated indicator
lamp comes on.
Deactivation is confirmed by the illumination
of this indicator lamp and the display of a
message in the instrument panel.
Activation and deactivation of the
function is done in the Driving menu
of the touch screen.
With the touch screen button
Deactivation is confirmed by the illumination
of this indicator lamp and the display of a
message in the instrument panel.
Select the " Driving assistance " tab, then
" Stop & Star t ".
A new selection reactivates the system.
The indicator lamp in the instrument panel goes
off, accompanied by the display of a message.
6
Driving
Page 254 of 566
252
3008-2_en_Chap06_conduite_ed01-2016
Fatigue detection system
It is recommended that you take a break as soon as you feel tired or at least every two hours.
Depending on version, the function either has the "Driving time warning" only, or this combined with the "Fatigue detection system".
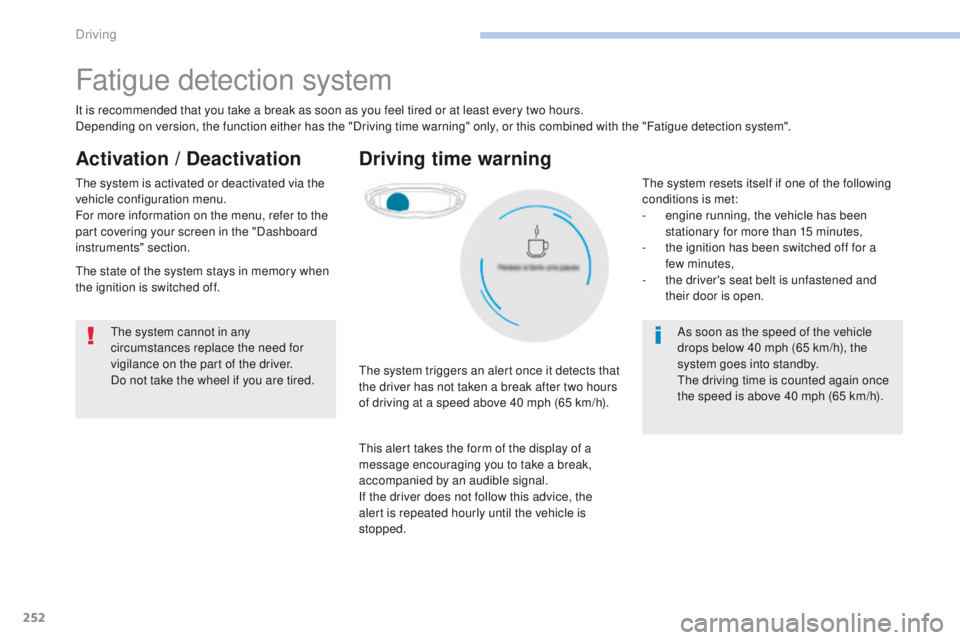
Driving time warning
The system triggers an alert once it detects that
the driver has not taken a break after two hours
of driving at a speed above 40 mph (65 km/h).
This alert takes the form of the display of a
message encouraging you to take a break,
accompanied by an audible signal.
If the driver does not follow this advice, the
alert is repeated hourly until the vehicle is
stopped.
The system cannot in any
circumstances replace the need for
vigilance on the part of the driver.
Do not take the wheel if you are tired.
As soon as the speed of the vehicle
drops below 40 mph (65 km/h), the
system goes into standby.
The driving time is counted again once
the speed is above 40 mph (65 km/h).
Activation / Deactivation
The system is activated or deactivated via the
vehicle configuration menu.
For more information on the menu, refer to the
part covering your screen in the "Dashboard
instruments" section.
The state of the system stays in memory when
the ignition is switched off.The system resets itself if one of the following
conditions is met:
-
e
ngine running, the vehicle has been
stationary for more than 15 minutes,
-
t
he ignition has been switched off for a
few
minutes,
-
t
he driver's seat belt is unfastened and
their door is open.
Driving
Page 347 of 566
345
3008-2_en_Chap09_caracteristiques_ed01-2016
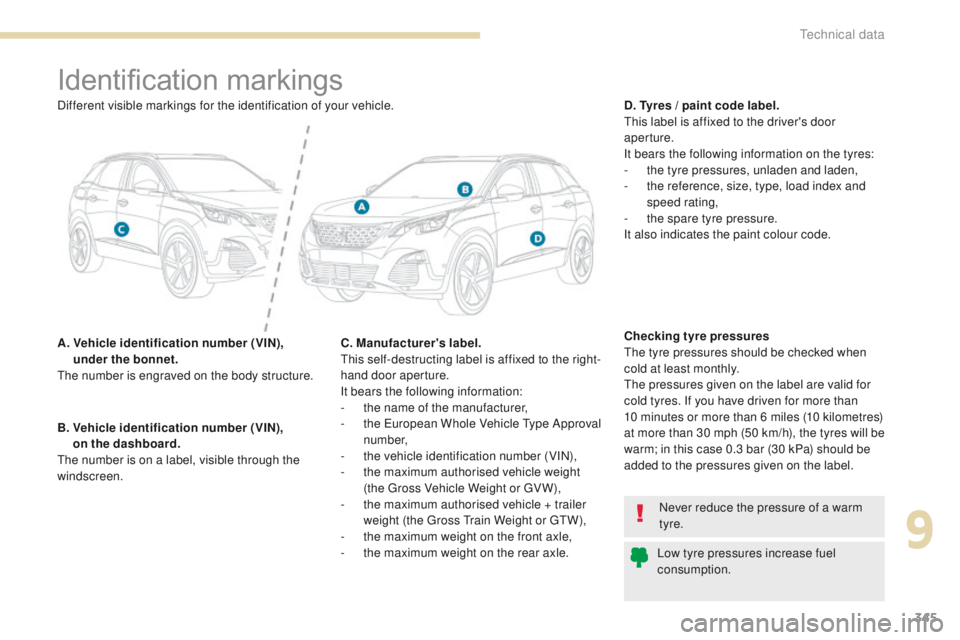
Identification markings
A. Vehicle identification number (VIN), under the bonnet.
The number is engraved on the body structure. D. Tyres / paint code label.
This label is affixed to the driver's door
aperture.
It bears the following information on the tyres:
-
t
he tyre pressures, unladen and laden,
-
t
he reference, size, type, load index and
speed rating,
-
t
he spare tyre pressure.
It also indicates the paint colour code.
B.
V
ehicle identification number (VIN),
on the dashboard.
The number is on a label, visible through the
windscreen.
Never reduce the pressure of a warm
tyre.
Low tyre pressures increase fuel
consumption.
Different visible markings for the identification of your vehicle.
Checking tyre pressures
The tyre pressures should be checked when
cold at least monthly.
The pressures given on the label are valid for
cold tyres. If you have driven for more than
10 minutes or more than 6 miles (10 kilometres)
at more than 30 mph (50 km/h), the tyres will be
warm; in this case 0.3 bar (30 kPa) should be
added to the pressures given on the label.
C. Manufacturer's label.
This self-destructing label is affixed to the right-
hand door aperture.
It bears the following information:
-
t
he name of the manufacturer,
-
t
he European Whole Vehicle Type Approval
number,
-
t
he vehicle identification number (VIN),
-
t
he maximum authorised vehicle weight
(the Gross Vehicle Weight or GV W),
-
t
he maximum authorised vehicle + trailer
weight (the Gross Train Weight or GTW),
-
t
he maximum weight on the front axle,
-
t
he maximum weight on the rear axle.
9
Technical data
Page 445 of 566
85
.
1
17
18
1
1
20
19
21
22
Audio and Telematics
Transversal-Peugeot_en_Chap01_NAC-2-2-0_ed01-2016
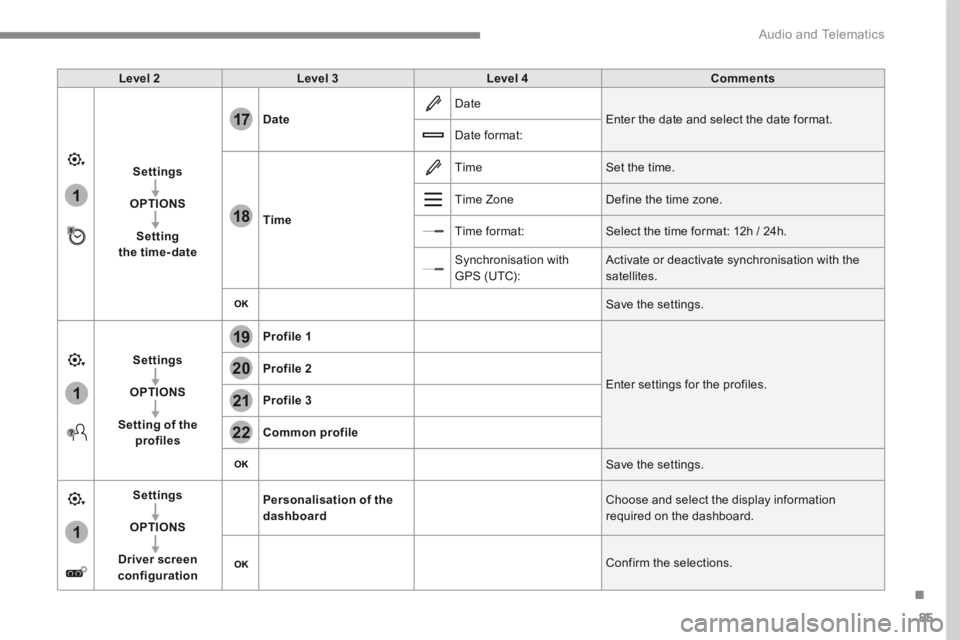
Level 2Level 3Level 4Comments
Settings
OPTIONS
Setting the time-date
Date Date Enter the date and select the date format. Date format:
Time
Time Set the time.
Time Zone Define the time zone.
Time format: Select the time format: 12h / 24h.
Synchronisation with GPS (UTC): Activate or deactivate synchronisation with the satellites.
Save the settings.
Settings
OPTIONS
Setting of the profiles
Profile 1
Enter settings for the profiles. Profile 2
Profile 3
Common profile
Save the settings.
Settings
OPTIONS
Driver screen configuration
Personalisation of the dashboard Choose and select the display information required on the dashboard.
Confirm the selections.
Page 542 of 566
2
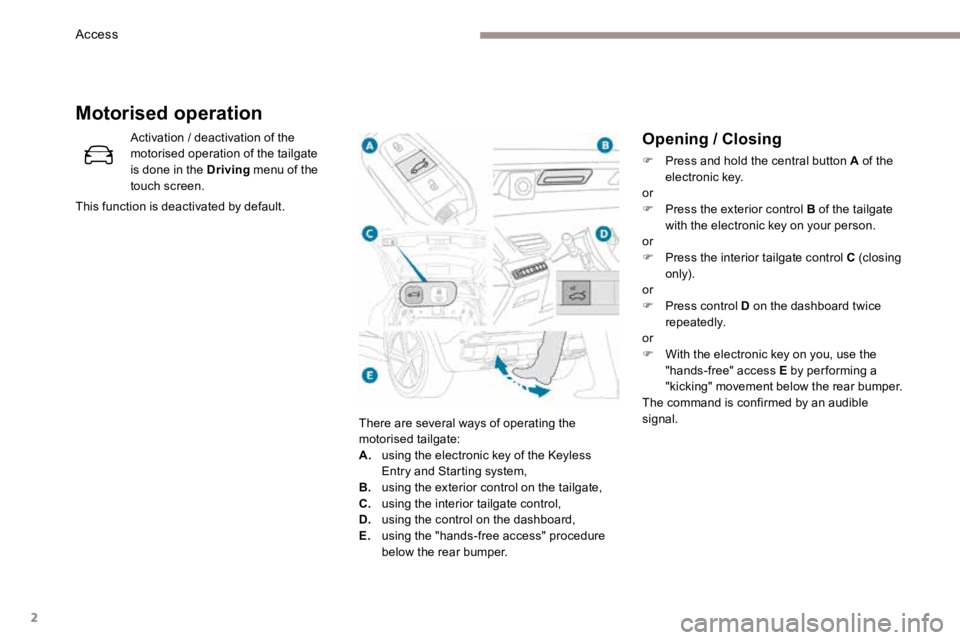
Opening / Closing
F Press and hold the central button A of the
electronic key.
or
F Press the exterior control B of the tailgate
with the electronic key on your person.
or
F Press the interior tailgate control C (closing
only).
or
F Press control D on the dashboard twice
repeatedly.
or
F With the electronic key on you, use the
"hands-free" access E by per forming a
"kicking" movement below the rear bumper.
The command is confirmed by an audible
signal.
Activation / deactivation of the
motorised operation of the tailgate
is done in the Driving
menu of the
touch screen.
This function is deactivated by default.
Motorised operation
There are several ways of operating the
motorised tailgate:
A. using the electronic key of the Keyless
Entry and Starting system,
B. using the exterior control on the tailgate,
C. using the interior tailgate control,
D. using the control on the dashboard,
E. using the "hands-free access" procedure
below the rear bumper.
Access