2017 Peugeot 308 remote control
[x] Cancel search: remote controlPage 114 of 392
112
Automatic
When the automatic illumination of headlamps
function is activated (lighting control stalk
in the "AUTO" position), under low ambient
light the dipped beams headlamps come on
automatically when the ignition is switched off.
Activation or deactivation, as well
as the duration of the guide-me-
home lighting, is set in the " Driving
assistance " menu, then " Vehicle
settings " in the secondary page.
Exterior welcome
lighting
the remote switching on of the lighting makes
your approach to the vehicle easier in poor
light. It is activated when the lighting control
is in the " AUTO" position and the level of light
detected by the sunshine sensor is low.
Switching on
F Press the open padlock on the remote control or one of the front
door handles with Keyless
e
n
try
and Starting.
Switching offthe exterior welcome lighting switches off
automatically after a set time, when the ignition
is switched on or on locking the vehicle.
Programmingthe activation, deactivation and
choice of welcome lighting duration
are done in the " Driving assistance "
menu then " Vehicle settings ".
th
e dipped beam headlamps and sidelamps
come on; your vehicle is also unlocked.
Direction
indicators
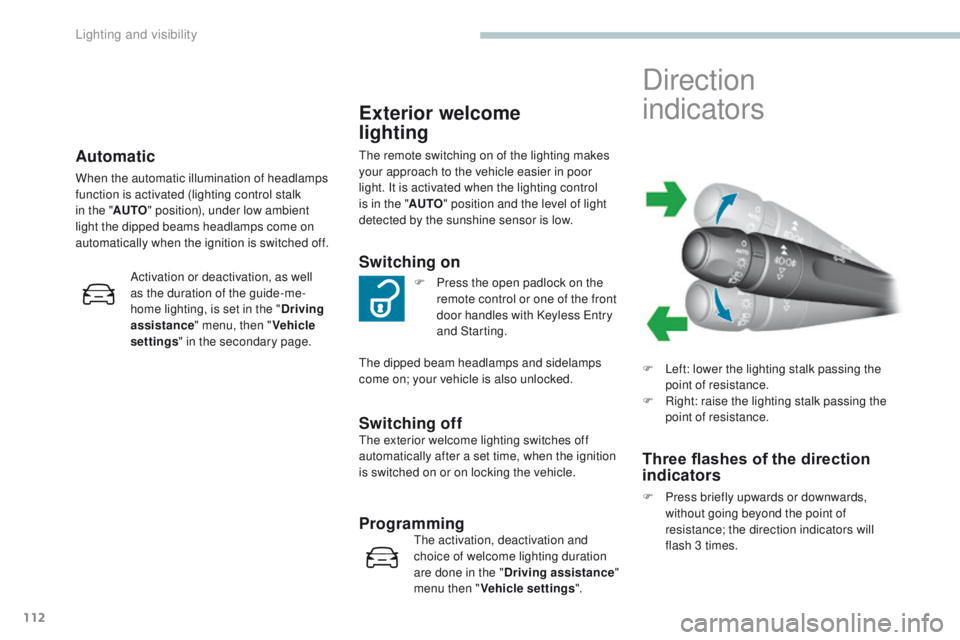
F Left: lower the lighting stalk passing the point of resistance.
F
R
ight: raise the lighting stalk passing the
point of resistance.
Three flashes of the direction
indicators
F Press briefly upwards or downwards, without going beyond the point of
resistance; the direction indicators will
flash 3 times.
Lighting and visibility
Page 115 of 392
113
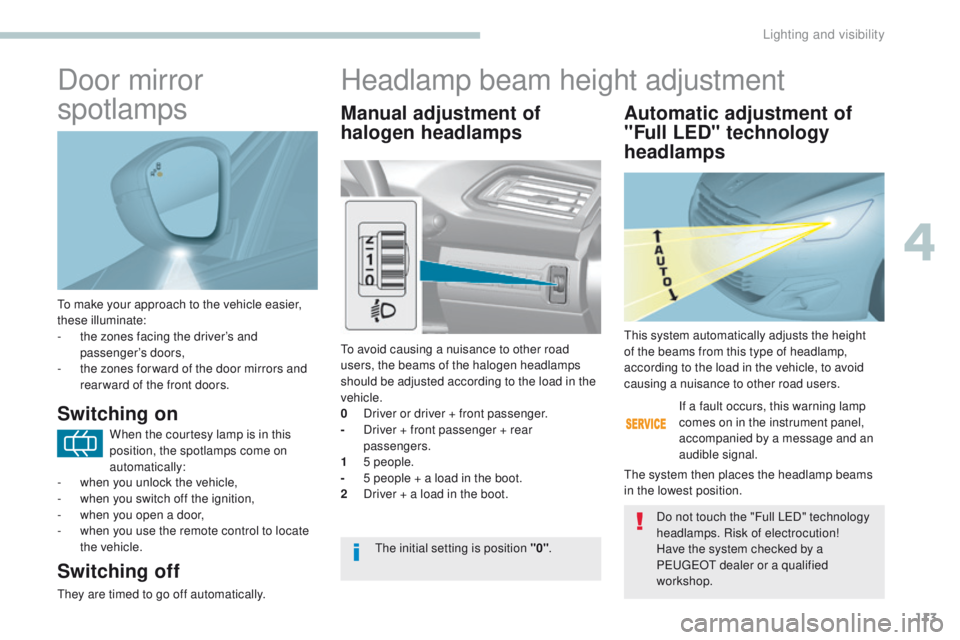
to make your approach to the vehicle easier,
these illuminate:
-
t
he zones facing the driver’s and
passenger’s doors,
-
t
he zones for ward of the door mirrors and
rear ward of the front doors.
Door mirror
spotlamps
Switching on
Switching off
they are timed to go off automatically.
Manual adjustment of
halogen headlamps Automatic adjustment of
"Full LED" technology
headlamps
to avoid causing a nuisance to other road
users, the beams of the halogen headlamps
should be adjusted according to the load in the
vehicle.
0
D
river or driver + front passenger.
-
D
river + front passenger + rear
passengers.
1
5
people.
-
5 p
eople + a load in the boot.
2
D
river + a load in the boot. If a fault occurs, this warning lamp
comes on in the instrument panel,
accompanied by a message and an
audible signal.th
is system automatically adjusts the height
of the beams from this type of headlamp,
according to the load in the vehicle, to avoid
causing a nuisance to other road users.
th
e system then places the headlamp beams
in the lowest position.
th
e initial setting is position "0" .Do not touch the "Full L
eD
" technology
headlamps. Risk of electrocution!
Have the system checked by a
P
e
uge
Ot
dealer or a qualified
workshop.
Headlamp beam height adjustment
When the courtesy lamp is in this
position, the spotlamps come on
automatically:
-
w
hen you unlock the vehicle,
-
w
hen you switch off the ignition,
-
w
hen you open a door,
-
w
hen you use the remote control to locate
the vehicle.
4
Lighting and visibility
Page 150 of 392
148
Starting-switching off the engine, remote control
Put the gear lever into neutral.
Ignition switch
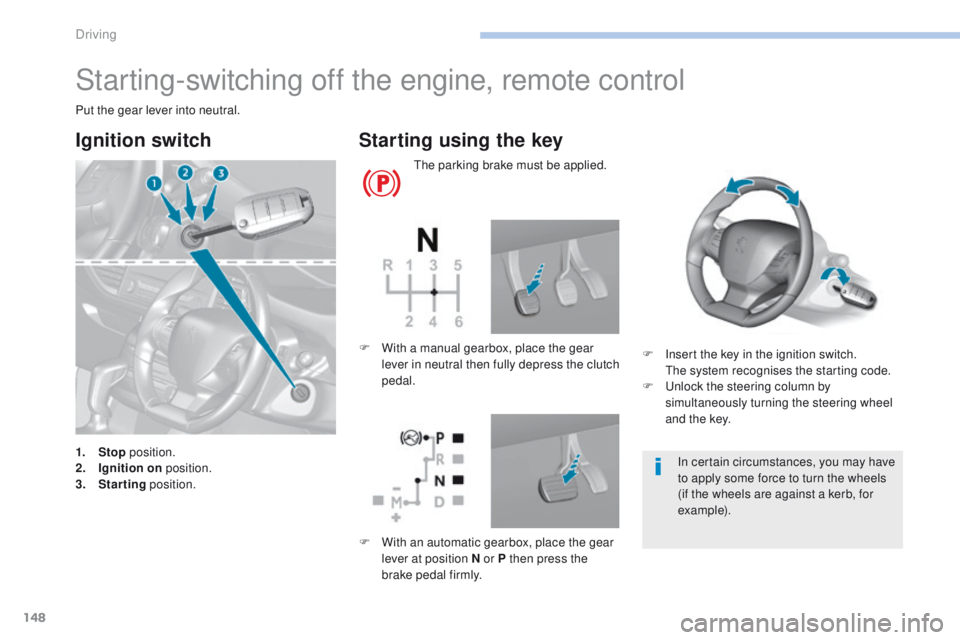
1. Stop position.
2. I gnition on position.
3.
S
tarting position.
Starting using the key
the parking brake must be applied.
F
I
nsert the key in the ignition switch.
t
h
e system recognises the starting code.
F
u
n
lock the steering column by
simultaneously turning the steering wheel
and the key.
F
W
ith a manual gearbox, place the gear
lever in neutral then fully depress the clutch
pedal.
In certain circumstances, you may have
to apply some force to turn the wheels
(if the wheels are against a kerb, for
example).
F
W
ith an automatic gearbox, place the gear
lever at position N or P then press the
brake pedal firmly.
Driving
Page 152 of 392
150
Avoid attaching heavy objects to the
key or the remote control, which would
weigh down on its blade in the ignition
switch and could cause a malfunction.
It could adversely affect the deployment
of the front airbag.
Switching off the engine leads to a loss
of braking assistance.
Key left in the "Ignition on"
position
If the key has been left in the ignition switch
at position 2 (Ignition on)
, the ignition will
be switched off automatically after one hour.
to s
witch the ignition back on, turn the
key to position 1 (Stop) , then back to
position
2
(Ignition on) .
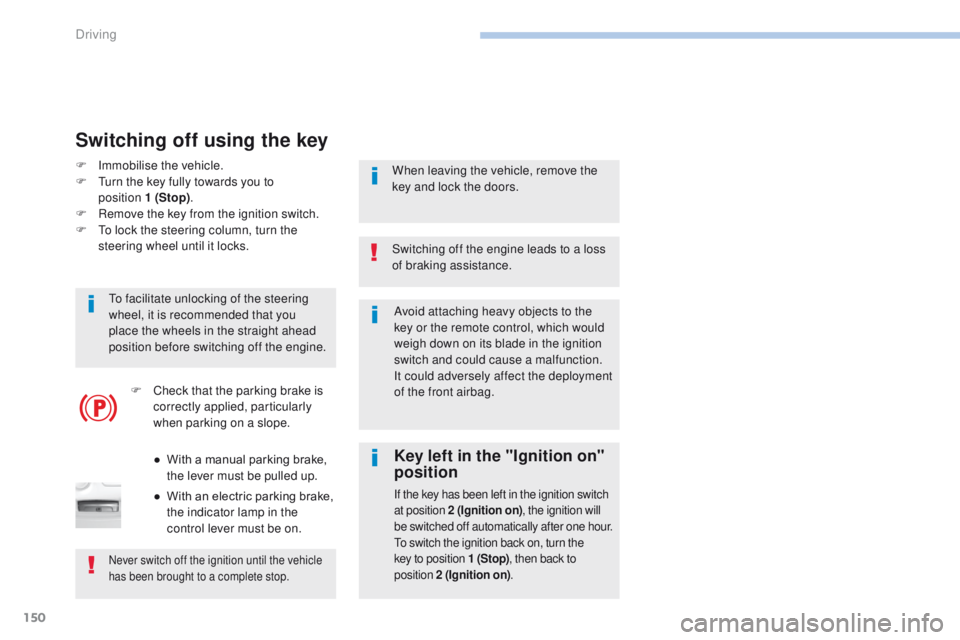
F Immobilise the vehicle.
F
tu rn the key fully towards you to
position
1
(Stop).
F
R
emove the key from the ignition switch.
F
t
o l
ock the steering column, turn the
steering wheel until it locks.
Switching off using the key
to facilitate unlocking of the steering
wheel, it is recommended that you
place the wheels in the straight ahead
position before switching off the engine.
Never switch off the ignition until the vehicle
has been brought to a complete stop.
When leaving the vehicle, remove the
key and lock the doors.
F
C
heck that the parking brake is
correctly applied, particularly
when parking on a slope.
●
W
ith a manual parking brake,
the lever must be pulled up.
●
W
ith an electric parking brake,
the indicator lamp in the
control lever must be on.
Driving
Page 154 of 392
152
If the vehicle is not immobilised, the
engine will not stop.
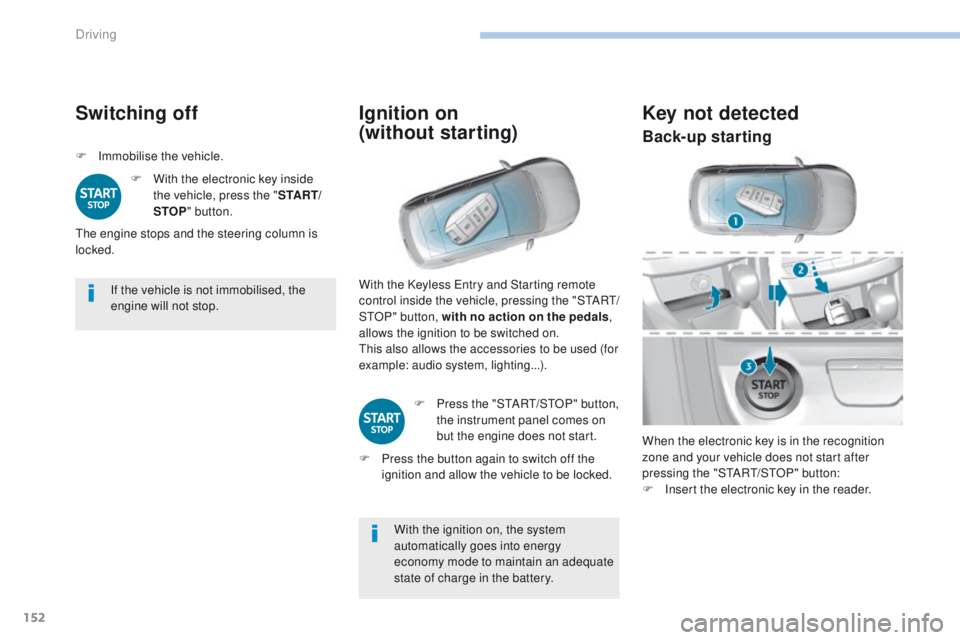
Switching off
F Immobilise the vehicle.F
W
ith the electronic key inside
the vehicle, press the " S TA R T/
STOP " button.
th
e engine stops and the steering column is
locked.
Ignition on
(without starting)
With the ignition on, the system
automatically goes into energy
economy mode to maintain an adequate
state of charge in the battery.
With the Keyless
e
n
try and Starting remote
control inside the vehicle, pressing the "S
tA
R
t/
StO
P" button, with no action on the pedals
,
allows the ignition to be switched on.
th
is also allows the accessories to be used (for
example: audio system, lighting...).
F
P
ress the "S
tA
R
t/
S
tO
P" button,
the instrument panel comes on
but the engine does not start.
F
P
ress the button again to switch off the
ignition and allow the vehicle to be locked.
Key not detected
When the electronic key is in the recognition
zone and your vehicle does not start after
pressing the "S
tA
R
t/
S
tO
P" button:
F
I
nsert the electronic key in the reader.
Back-up starting
Driving
Page 231 of 392
229
Oil grade
Before topping-up the oil or changing the oil,
check that the oil is the correct grade for your
engine and conforms to the manufacturer's
recommendations.
Topping-up the engine oil level
the location of the oil filler cap is shown in the
corresponding underbonnet layout view.
F u
n
screw the oil filler cap to reveal the filler
aperture.
F
A
dd oil in small quantities, avoiding any
spills on engine components (risk of fire).
F
W
ait a few minutes before checking the
level again using the dipstick.
F
A
dd more oil if necessary.
F
A
fter checking the level, carefully refit the
oil filler cap and the dipstick in its tube. After topping-up the oil, the check when
switching on the ignition with the oil
level indicator in the instrument panel
is not valid during the 30 minutes after
topping-up.
Engine oil change
Refer to the manufacturer's service schedule
for details of the interval for this operation.
In order to maintain the reliability of the engine
and emission control system, never use
additives in the engine oil.th
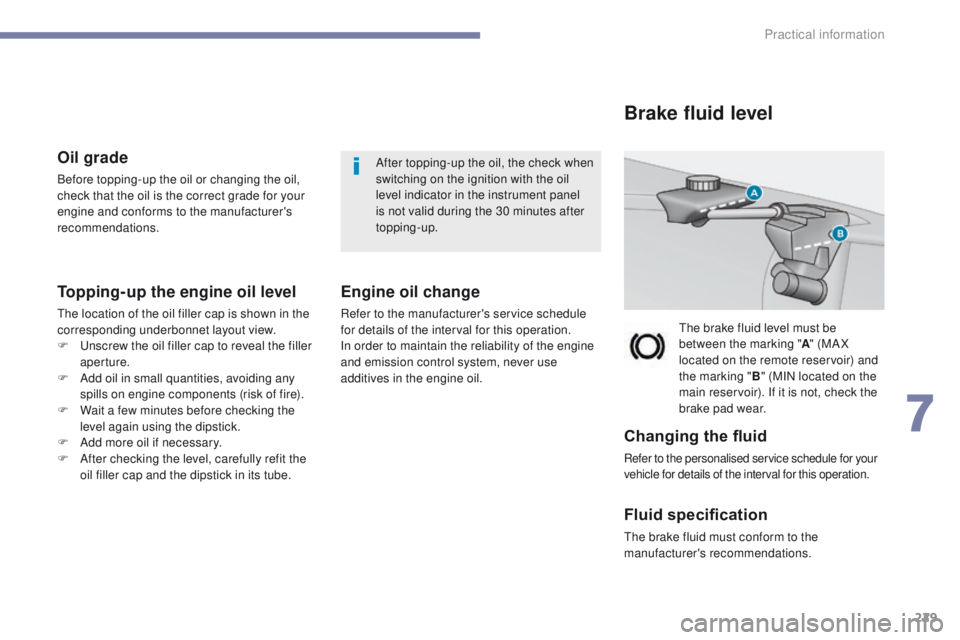
e brake fluid level must be
between the marking " A" (MA X
located on the remote reservoir) and
the marking " B" (MIN located on the
main reservoir). If it is not, check the
brake pad wear.
Brake fluid level
Changing the fluid
Refer to the personalised service schedule for your
vehicle for details of the interval for this operation.
Fluid specification
the brake fluid must conform to the
manufacturer's recommendations.
7
Practical information
Page 238 of 392
236
Never dispose of AdBlue® bottles in
the household waste. Place them in
a special container provided for this
purpose or take them to your dealer.
F
A
fter emptying the bottle, wipe away any
spillage around the tank filler using a damp
cloth. If any AdBlue
® fluid is spilt or splashed,
wash immediately with cold water or
wipe with a damp cloth.
If the AdBlue
® has crystallised, clean it
off using a sponge and hot water.
F
R
efit the blue cap to the tank and turn it a
6
th of a turn clockwise, to its stop.
F
R
efit the black cap and turn it a quarter of
a turn clockwise without pressing.
e
n
sure
that the indicator on the cap lines up with
the indicator on the support.
F
D
epending on equipment, return the spare
wheel and/or the storage box to the bottom
of the boot.
F
R
efit the boot carpet and close the tailgate. Important: when topping-up after
running out of AdBlue
®, signalled
by the message "to
p-up AdBlue:
Starting prevented", you must wait for
about 5 minutes before switching the
ignition on again, without opening the
driver's door, unlocking the vehicle,
introducing the remote control key
into the ignition switch, or placing
the electronic key of the "Keyless
Entr y and Star ting" system inside
the vehicle.
Switch on the ignition, then wait for
10
seconds before starting the engine.
F
O
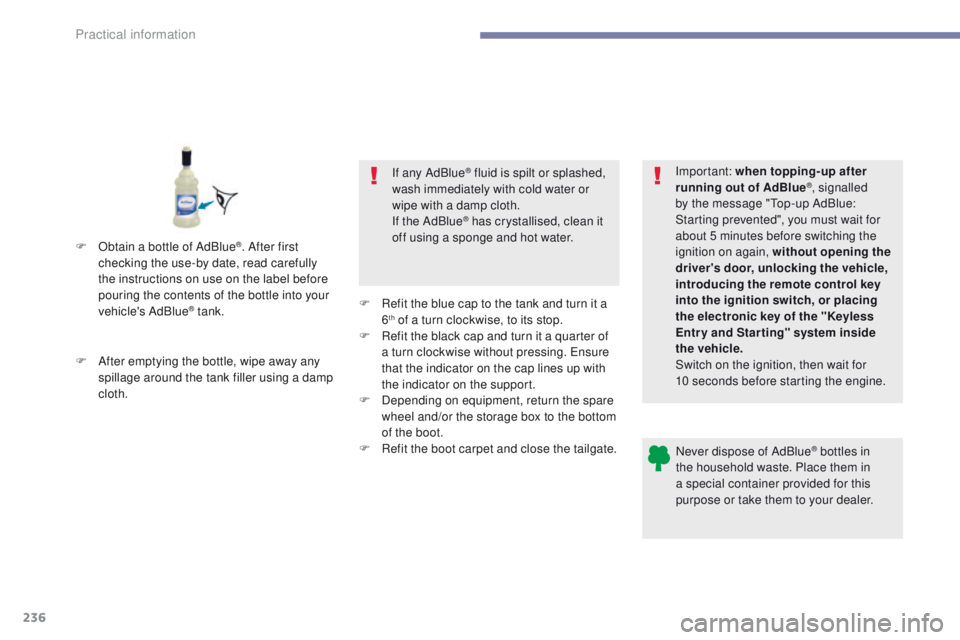
btain a bottle of AdBlue
®. After first
checking the use-by date, read carefully
the instructions on use on the label before
pouring the contents of the bottle into your
vehicle's AdBlue
® tank.
Practical information
Page 270 of 392
268
12 V battery
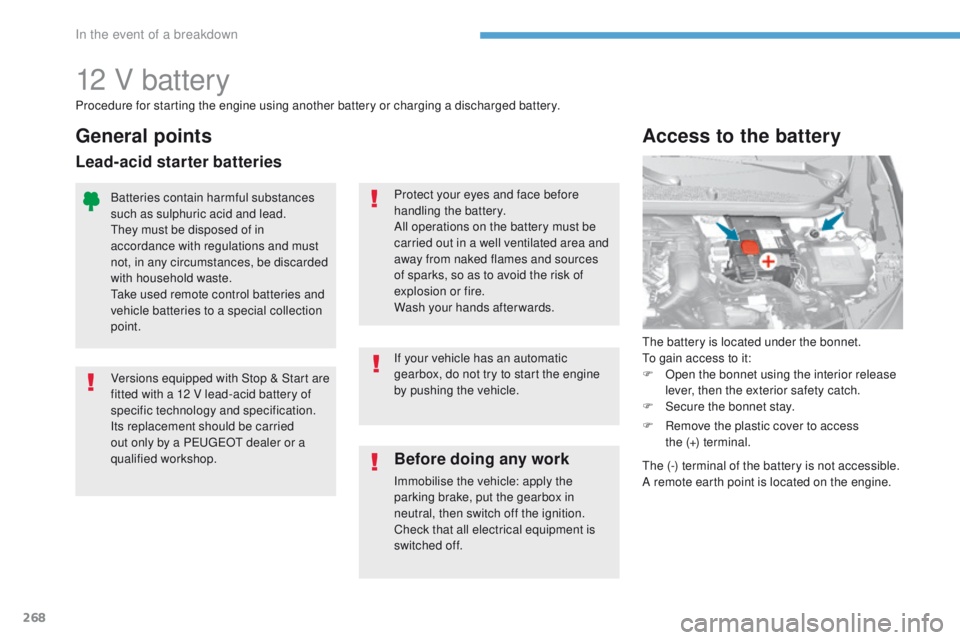
the battery is located under the bonnet.to gain access to it:
F
O
pen the bonnet using the interior release
lever, then the exterior safety catch.
F
S
ecure the bonnet stay.
Access to the battery
Procedure for starting the engine using another battery or charging a discharged battery.
Before doing any work
Immobilise the vehicle: apply the
parking brake, put the gearbox in
neutral, then switch off the ignition.
Check that all electrical equipment is
switched off. If your vehicle has an automatic
gearbox, do not try to start the engine
by pushing the vehicle.
Batteries contain harmful substances
such as sulphuric acid and lead.
th
ey must be disposed of in
accordance with regulations and must
not, in any circumstances, be discarded
with household waste.
ta
ke used remote control batteries and
vehicle batteries to a special collection
point. Protect your eyes and face before
handling the battery.
All operations on the battery must be
carried out in a well ventilated area and
away from naked flames and sources
of sparks, so as to avoid the risk of
explosion or fire.
Wash your hands afterwards.
Versions equipped with Stop & Start are
fitted with a 12 V lead-acid battery of
specific technology and specification.
Its replacement should be carried
out only by a P
e
uge
Ot
dealer or a
qualified workshop.
General points
Lead-acid starter batteries
F Remove the plastic cover to access the (+) terminal.
th
e (-) terminal of the battery is not accessible.
A remote earth point is located on the engine.
In the event of a breakdown