Page 4 of 392

.
.
Over view
Instrument panel 12
Indicator and warning lamps
1
3
ga
uges and indicators
2
8
Distance recorders
3
5
tr
ip computer
3
7
to
uch screen
4
0
Setting the date and time
4
7Remote control key
5
0
"Keyless e
n
try and Starting" with
remote control
5
6
"Keyless e
n
try and Starting"
5
8
Boot
61
Alarm
6
7
el
ectric windows
7
0
P
e
uge
Ot
i- Cockpit
7
2
Steering wheel adjustment
7
2
Front seats
7
3
Rear seats (hatchback)
7
9
Rear seats (SW)
8
0
Interior fittings 8 2
Front armrest
8
4
Boot fittings (hatchback)
87
B
oot fittings (SW)
8
8
Heating and Ventilation
9
1
Manual air conditioning
9
3
Manual air conditioning (
to
uch screen)
9
4
Dual-zone digital air conditioning (
to
uch screen)
9
5
Front demist - defrost
1
00
Rear screen demist - defrost
101
Panoramic sunroof
1
02
Courtesy lamps
1
03
Interior mood lighting
1
04Mirrors
105
Lighting control stalk
1
07
Daytime running lamps
1
10
Automatic illumination of headlamps
1
11
Direction indicators
1
12
Side spotlamps
1
13
Headlamp beam height adjustment
1
13
Wiper control stalk
1
14
Automatic rain sensitive wipers
1
16
Hazard warning lamps
1
18
Appel d'urgence ou d'assistance 1 19em
ergency or assistance 1 19
H or n
121
ele
ctronic stability control
(
e
SC) 121
Seat belts
1
24
Airbags
127
Carrying children
1
31
Deactivating the passenger front airbag
1
34
ISOFIX mountings and child seats
1
40
Child lock
1
44
eco-driving
In struments Access
ea
se of use and comfort Lighting and visibility
Safety
Contents
Page 7 of 392
5
Interior
Boot fittings 87
W arning triangle 2 38
AdBlue tank
2
33 -237Seat belts
1
24-126
Front seats
7
3 -78
-
m
anual adjustments
-
h
ead restraints
-
hea
ted seats
-
e
lectric lumbar adjustment
-
massage
P
e
uge
Ot
i- Cockpit
7
2
Child seats
1
31-145
ISOFIX child seats
1
40 -144
Manual child lock
1
44
Airbags 127-130
Adjusting the steering wheel 7 2
Interior fittings
8
2-85
- mats
-
f
ront armrest
-
1
2 V accessory socket
- u
S
B port / Auxiliary socket
Deactivating the passenger's front airbag
1
28, 134
Rear seats
7
9
Rear armrest, ski flap
8
6
Hatchback
.
Over view
Page 8 of 392
6
Boot fittings 88
Luggage cover 8 9 -90
High load retaining net
9
0
Warning triangle
2
38
AdBlue tank
2
33 -237Seat belts
1
24-126
Front seats
7
3 -78
-
m
anual adjustments
-
h
ead restraints
-
hea
ted seats
-
e
lectric lumbar adjustment
-
massage
P
e
uge
Ot
i- Cockpit
7
2
Child seats
1
31-145
ISOFIX child seats
1
40 -144
Manual child lock
1
44
Airbags 127-130
Adjusting the steering wheel 7 2
Interior fittings
8
2-85
- mats
-
f
ront armrest
-
1
2 V accessory socket
- u
S
B port / Auxiliary socket
Deactivating the passenger's front airbag
1
28, 134
Rear seats
8
0-81
Rear armrest, ski flap
8
6
SW
Over view
Page 74 of 392

72
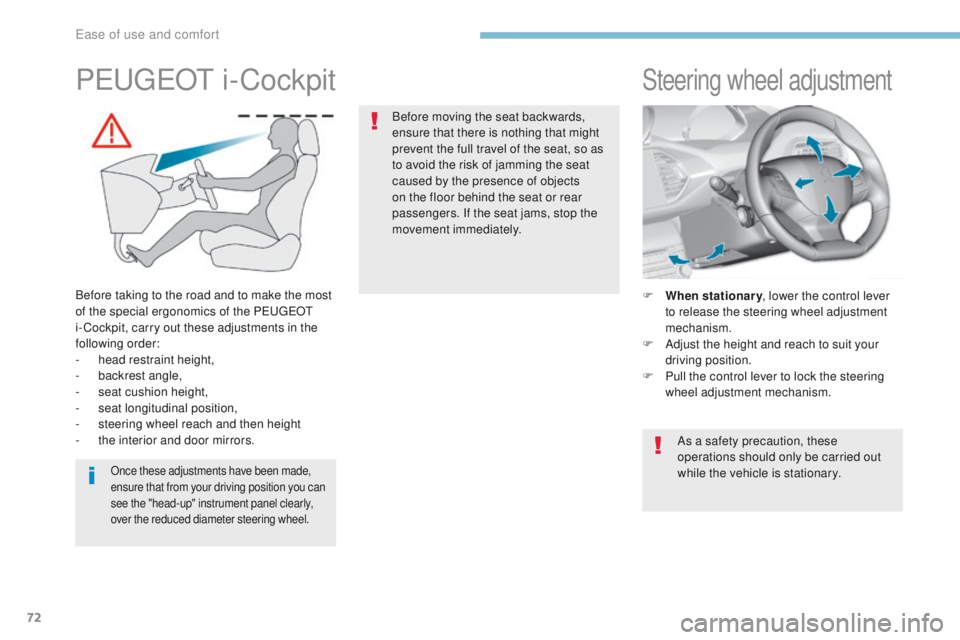
Steering wheel adjustment
F When stationary, lower the control lever
to release the steering wheel adjustment
mechanism.
F
A
djust the height and reach to suit your
driving position.
F
P
ull the control lever to lock the steering
wheel adjustment mechanism.
As a safety precaution, these
operations should only be carried out
while the vehicle is stationary.
PeugeOt i -Cockpit
Before taking to the road and to make the most
of the special ergonomics of the Pe
ugeOt
i- Cockpit, carry out these adjustments in the
following order:
-
hea
d restraint height,
-
b
ackrest angle,
-
sea
t cushion height,
-
s
eat longitudinal position,
-
s
teering wheel reach and then height
-
t
he interior and door mirrors.
Once these adjustments have been made,
ensure that from your driving position you can
see the "head-up" instrument panel clearly,
over the reduced diameter steering wheel.
Before moving the seat backwards,
ensure that there is nothing that might
prevent the full travel of the seat, so as
to avoid the risk of jamming the seat
caused by the presence of objects
on the floor behind the seat or rear
passengers. If the seat jams, stop the
movement immediately.
ease of use and comfort
Page 75 of 392
73
Front seats with manual adjustments
F Raise the control and slide the seat forwards or backwards. F
P ull the control upwards to raise or push
it downwards to lower, as many times as
required, to obtain the position required. F
tu rn the knob to adjust the backrest.
Forwards-backwards
HeightBackrest angle
As a safety measure, seat adjustments should only be carried out when stationary.
F t
u
rn the knob manually to obtain the
desired level of lumbar support.
LumbarBefore moving the seat backwards, ensure that there is nothing that might prevent the full
travel of the seat, so as to avoid the risk of jamming the seat caused by the presence of
objects on the floor behind the seat or rear passengers. If the seat jams, stop the movement
immediately.
3
ease of use and comfort
Page 78 of 392

76
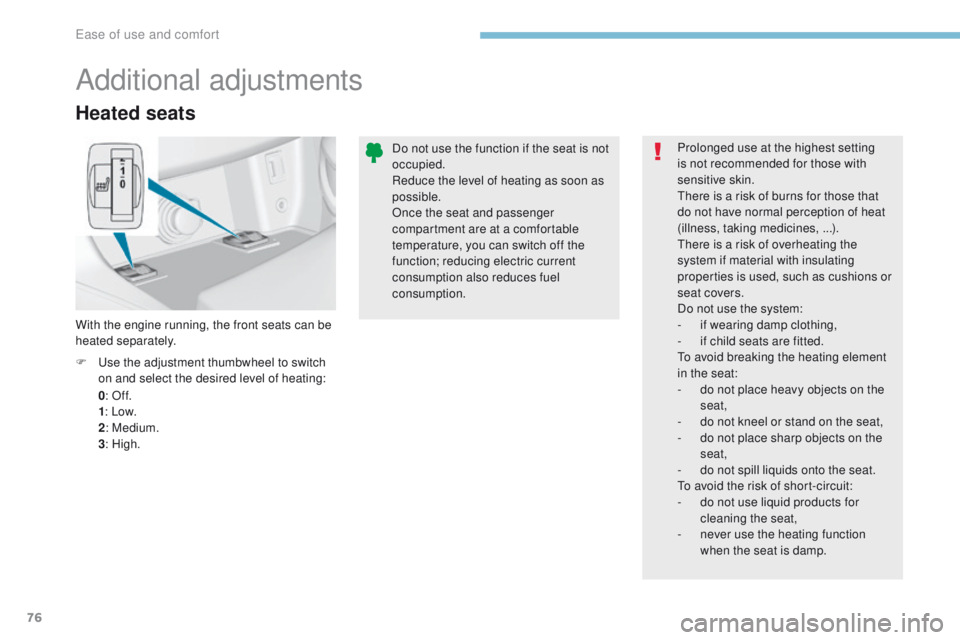
Heated seats
0: Of f.
1 : Low.
2 : Medium.
3 : High.
F
u
s
e the adjustment thumbwheel to switch
on and select the desired level of heating:
With the engine running, the front seats can be
heated separately.
Additional adjustments
Prolonged use at the highest setting
is not recommended for those with
sensitive skin.
th
ere is a risk of burns for those that
do not have normal perception of heat
(illness, taking medicines, ...).
ther
e is a risk of overheating the
system if material with insulating
properties is used, such as cushions or
seat covers.
Do not use the system:
-
i
f wearing damp clothing,
-
i
f child seats are fitted.
to
avoid breaking the heating element
in the seat:
-
d
o not place heavy objects on the
seat,
-
d
o not kneel or stand on the seat,
-
d
o not place sharp objects on the
seat,
-
d
o not spill liquids onto the seat.
to a
void the risk of short-circuit:
-
d
o not use liquid products for
cleaning the seat,
-
n
ever use the heating function
when the seat is damp.
Do not use the function if the seat is not
occupied.
Reduce the level of heating as soon as
possible.
Once the seat and passenger
compartment are at a comfortable
temperature, you can switch off the
function; reducing electric current
consumption also reduces fuel
consumption.
Ease of use and comfort
Page 79 of 392
77
Electric lumbar adjustment
F Press the control to obtain the desired lumbar support.
F
t
o r
aise the head restraint, pull it upwards.
F
t
o r
emove the head restraint, press the
lug
A and pull the head restraint upwards.
F
t
o p
ut the head restraint back in place,
engage the head restraint stems in the
openings keeping them in line with the seat
backrest.
F
t
o l
ower the head restraint, press the lug A
and the head restraint at the same time.
th
e head restraint is fitted with a frame
with notches which prevents it from
lowering; this is a safety device in case
of impact.
The adjustment is correct when the
upper edge of the head restraint is
level with the top of the head.
Never drive with the head restraints
removed; they must be in place and
adjusted correctly.
Head restraint height
3
Ease of use and comfort
Page 80 of 392
78
Activation / Deactivation
Massage function
this system provides the occupants of the front seats with a lumbar massage. It only operates
when the engine is running or in StOP mode of the Stop & Start system.
F
P
ress this button.
During this time, massage is per formed in
6
cycles of 10 minutes (6 minutes of massage
followed by 4 minutes break).
After one hour, the function is deactivated, the
indicator lamp goes off.
Deactivate the massage function by pressing
this button; its indicator lamp goes off.
Adjustment of intensity
F Press this button to adjust the intensity of the massage.
tw
o levels of massage are available.
Its indicator lamp comes on and the
massage function is activated for a
period of 1 hour.
Ease of use and comfort