2017 Peugeot 3008 Hybrid 4 fog light
[x] Cancel search: fog lightPage 6 of 566

4
3008-2_en_Chap00b_vue-ensemble_ed01-2016
Towing 336-337
Very cold climate screens
2
91
Dynamic cruise control with Stop
function
23
8-246
Front parking sensors
2
63 -264
Park Assist
2
72-279
Front foglamps
1
42
Cornering lighting
1
51
Remote control key
5
4, 63 - 67
Locking / Unlocking
5
5 -57
Starting the engine
1
97-199
Automatic illumination of
headlamps
14
6 -147
Automatic headlamp dipping
1
49-150
Automatic rain sensitive wipers
1
55
Fatigue detection system
2
52-253
Lane Departure Warning System
2
54
Assisted Lane Departure Warning System
255-259
Speed limit recognition
2
27-230
Distance alert / Active Safety B r a ke
2
47- 2 51
Electric windows
8
2- 83
D o o r s
74
C
entral locking
6
8 - 69
Alarm
70-73
Electronic stability programme (ESC)
160 -163
Advanced Grip Control
1
64-165
Hill Assist Descent Control
1
66 -167
Main lighting
14
1, 143 -14 4
Adjusting the headlamp beam height
1
45
Changing front bulbs
3
23-327
Heated windscreen
1
17
Demisting the windscreen
1
16
Windscreen wiper
1
52-154
Visiopark 2
26
5-266, 269-271 Electronic key
5
4, 63 - 67
Hands-free access
5
8 - 62
Keyless starting
1
97, 200 -202
Exterior
Over view
Page 12 of 566

3008-2_en_Chap00c_eco-conduite_ed01-2016
10
Optimise the use of your gearbox
With a manual gearbox, move off gently and change up without waiting.
During acceleration change up early.
With an automatic gearbox, give preference to automatic mode and
avoid pressing the accelerator pedal heavily or suddenly.
Control the use of your electrical
equipment
Before moving off, if the passenger compartment is too warm, ventilate it
by opening the windows and air vents before using the air conditioning.
Above 30 mph (50 km/h), close the windows and leave the air vents
open.
Remember to make use of equipment that can help keep the
temperature in the passenger compartment down (sunroof and window
blinds...).
Switch off the air conditioning, unless it has automatic regulation, as
soon as the desired temperature is attained.
Switch off the demisting and defrosting controls, if not automatic.
Switch off the heated seat as soon as possible.
Switch off the headlamps and front foglamps when the ambient light
level does not require their use.
Avoid running the engine before moving off, particularly in winter; your
vehicle will warm up much faster while driving.
As a passenger, if you avoid connecting your multimedia devices
(film, music, video game...), you will contribute towards limiting the
consumption of electrical energy, and so of fuel.
Disconnect your portable devices before leaving the vehicle.
Eco-driving
Eco-driving is a range of everyday practices that allow the motorist to optimise their fuel consumption and CO2 emissions.
Drive smoothly
Maintain a safe distance between vehicles, use engine braking rather
than the brake pedal, and press the accelerator progressively. These
practices contribute towards a reduction in fuel consumption and CO
2
emissions and also help reduce the background traffic noise.
If your vehicle has cruise control, make use of the system at speeds
above 25 mph (40 km/h) when the traffic is flowing well. The gear efficiency indicator invites you to engage the most suitable
gear: as soon as the indication is displayed in the instrument panel,
follow it straight away.
For vehicles fitted with an automatic gearbox, this indicator appears
only in manual mode.
Eco-driving
Page 20 of 566

18
3008-2_en_Chap01_instruments-de-bord_ed01-2016
Warning / indicator lampStateCause Action / Observations
Diesel engine
pre-heating fixed.
When the ignition is switched on
with a key in the ignition switch or
a starting instruction made using
the
"START/STOP " button, the
engine temperature makes engine
pre-heating necessary. The period of illumination of the indicator lamp is
determined by the ambient conditions (up to about
thirty seconds in severe winter conditions).
With an ignition switch and key, wait until the indicator
lamp goes off before starting.
With Keyless Entry and Starting, once it goes off,
starting is immediate, on condition that the brake
pedal remains pressed with an automatic gearbox, or
the clutch pedal is pressed fully down with a manual
gearbox.
If the engine does not start, switch the ignition off and
then on, wait until the indicator lamp goes off again,
then start the engine.
Stop & Star t fixed. When the vehicle stops (red lights, traffic
jams,
...) the Stop & Start system has put
the engine into STOP mode. The warning lamp goes off and the engine restarts
automatically in START mode, as soon as you want
to move off.
flashes for a few
seconds, then goes
of f. STOP mode is temporarily
unavailable,
or
START mode is invoked
automatically. For more information on Stop & Star t
, refer to the
corresponding section.
Rear foglamps
fixed. The rear foglamps have been
switched on using the ring on the
lighting control stalk. Turn the ring on the lighting control stalk rear wards to
switch off the rear foglamps.
Front foglamps fixed. The front foglamps are switched on
using the ring on the lighting control
stalk. Turn the ring on the lighting control stalk rear ward
twice to switch off the front foglamps.
Instruments
Page 144 of 566

142
3008-2_en_Chap04_eclairage-et-visibilite_ed01-2016
In good or rainy weather, by both
day and night, use of the front and
rear foglamps is prohibited. In these
situations, the power of their beams
may dazzle other drivers. They should
only be used in fog or falling snow.
In these weather conditions, you should
switch on the foglamps and dipped
beam headlamps manually, as the
sunshine sensor may detect sufficient
light.
Do not forget to switch off the foglamps
when they are no longer necessary.
Foglamps
Rear foglamps
The sidelamps or dipped or main beam
headlamps must be on.
Front and rear foglamps
The main or dipped beam headlamps
must be on.
Rotate and release ring C :
F
fo
rward to switch on the rear foglamps.
F
b
ackward to switch them off. Rotate and release ring C
:
F
f
or ward a first time to switch on the front
foglamps,
F
f
or ward a second time to switch on the rear
foglamps,
F
b
ackward a first time to switch off the rear
foglamps,
F
b
ackward a second time to switch off the
front foglamps.
Lighting and visibility
Page 148 of 566

146
3008-2_en_Chap04_eclairage-et-visibilite_ed01-2016
Automatic guide-me-home
lighting
With the "Automatic illumination of headlamps"
function activated, under low ambient light, the
sidelamps, dipped beam headlamps and door
mirror spotlamps come on automatically when
the ignition is switched off.
Activation, deactivation and the duration of the
guide-me-home lighting are set in the vehicle
parameters menu in the screen.
Automatic illumination of headlamps
When a low level of ambient light is detected by a sunshine sensor, the number plate
lamps, sidelamps and dipped beam headlamps are switched on automatically, without any action
on the part of the driver. They can also come on if rain is detected, at the same time as automatic
operation of the windscreen wipers.
As soon as the brightness returns to a sufficient level or after the windscreen wipers are switched
off, the lamps are switched off automatically.
Activation
F Turn the ring to the "AUTO" position.
Activation of the function is accompanied by
the display of a message.
Operating fault
In the event of a malfunction of the
sunshine sensor, the lighting comes
on, this warning lamp is displayed in
the instrument panel accompanied by
an audible signal and/or a message.
Contact a PEUGEOT dealer or a
qualified workshop.
Do not cover the sunshine sensor,
coupled with the rain sensor and
located at the top centre of the
windscreen behind the rear view mirror;
the associated functions would no
longer be controlled.
Deactivation
F Turn the ring to another position.
Deactivation of the function is accompanied by
the display of a message. In fog or snow, the sunshine sensor
may detect sufficient light. In this
case, the lighting will not come on
automatically.
Lighting and visibility
Page 152 of 566

150
3008-2_en_Chap04_eclairage-et-visibilite_ed01-2016
Activation
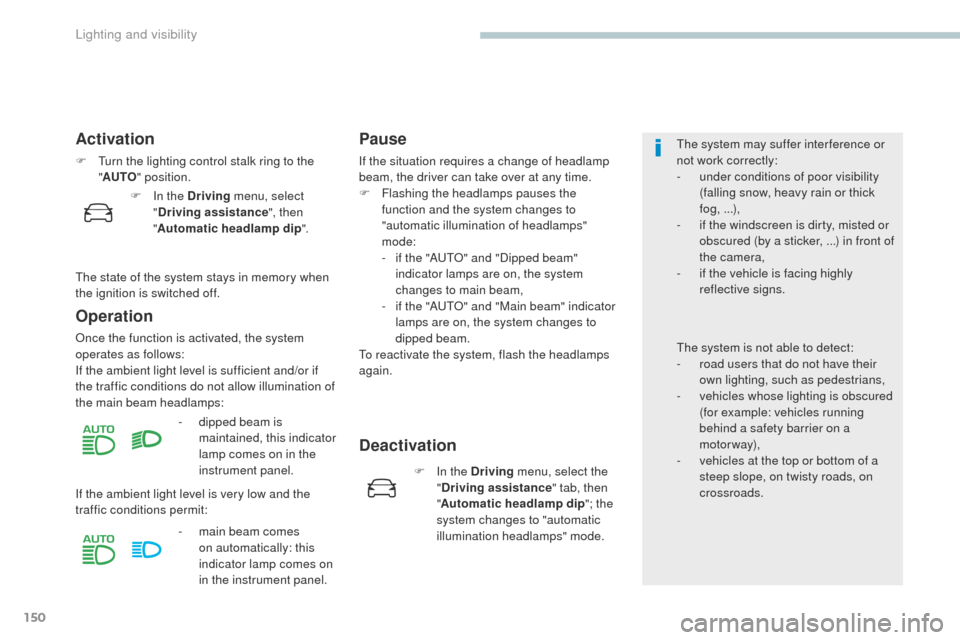
F Turn the lighting control stalk ring to the "AUTO " position.
Operation
Once the function is activated, the system
operates as follows:
If the ambient light level is sufficient and/or if
the traffic conditions do not allow illumination of
the main beam headlamps:
Pause
If the situation requires a change of headlamp
beam, the driver can take over at any time.
F
F
lashing the headlamps pauses the
function and the system changes to
"automatic illumination of headlamps"
mode:
-
i
f the "AUTO" and "Dipped beam"
indicator lamps are on, the system
changes to main beam,
-
i
f the "AUTO" and "Main beam" indicator
lamps are on, the system changes to
dipped beam.
To reactivate the system, flash the headlamps
again.
-
d
ipped beam is
maintained, this indicator
lamp comes on in the
instrument panel.
If the ambient light level is very low and the
traffic conditions permit: -
m
ain beam comes
on automatically: this
indicator lamp comes on
in the instrument panel.
Deactivation
The system may suffer interference or
not work correctly:
-
u
nder conditions of poor visibility
(falling snow, heavy rain or thick
fog, ...),
-
i
f the windscreen is dirty, misted or
obscured (by a sticker, ...) in front of
the camera,
-
i
f the vehicle is facing highly
reflective signs.
The system is not able to detect:
-
r
oad users that do not have their
own lighting, such as pedestrians,
-
v
ehicles whose lighting is obscured
(for example: vehicles running
behind a safety barrier on a
motorway),
-
v
ehicles at the top or bottom of a
steep slope, on twisty roads, on
crossroads.
F
I
n the Driving menu, select
" Driving assistance ", then
" Automatic headlamp dip ".
F
I
n the Driving menu, select the
" Driving assistance " tab, then
" Automatic headlamp dip "; the
system changes to "automatic
illumination headlamps" mode.
The state of the system stays in memory when
the ignition is switched off.
Lighting and visibility
Page 153 of 566

151
3008-2_en_Chap04_eclairage-et-visibilite_ed01-2016
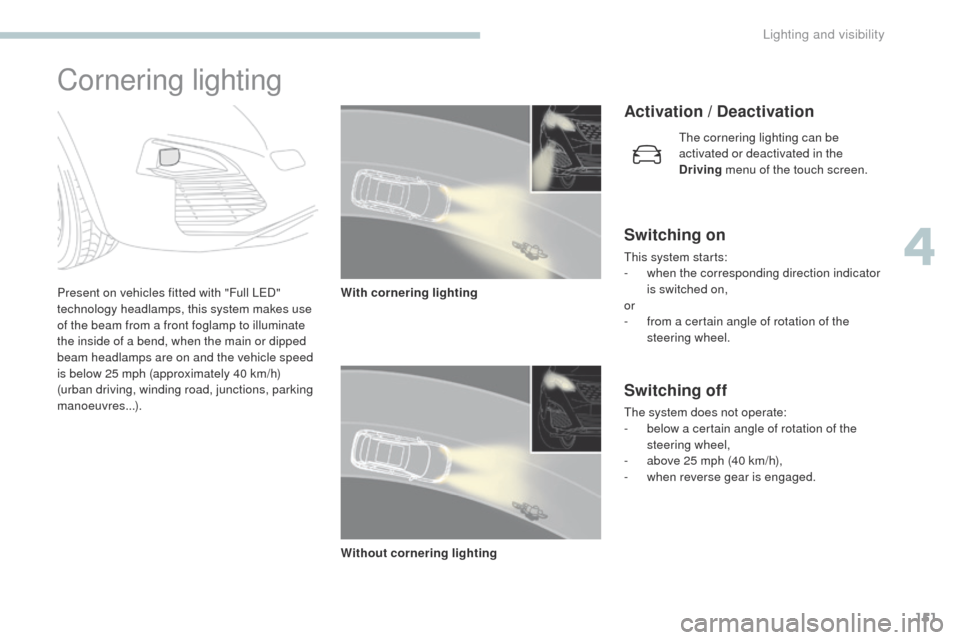
Cornering lighting
Present on vehicles fitted with "Full LED"
technology headlamps, this system makes use
of the beam from a front foglamp to illuminate
the inside of a bend, when the main or dipped
beam headlamps are on and the vehicle speed
is below 25 mph (approximately 40 km/h)
(urban driving, winding road, junctions, parking
manoeuvres...).With cornering lighting
Activation / Deactivation
Switching on
This system starts:
-
w hen the corresponding direction indicator
is switched on,
or
-
f
rom a certain angle of rotation of the
steering wheel.
Switching off
The system does not operate:
- b elow a certain angle of rotation of the
steering wheel,
-
a
bove 25 mph (40 km/h),
-
w
hen reverse gear is engaged.
Without cornering lighting The cornering lighting can be
activated or deactivated in the
Driving
menu of the touch screen.
4
Lighting and visibility
Page 231 of 566

229
3008-2_en_Chap06_conduite_ed01-2016
Memorising the speed
setting
This memorisation is in addition to the display
of Speed limit recognition.
The driver can choose to adapt the speed
setting to the speed limit suggested, by
pressing the memorisation button for the speed
limiter, the standard cruise control and the
dynamic cruise control with Stop function.
This speed setting then replaces the previous
speed setting for the speed limiter and/or cruise
control. For more information on the Speed
limiter, Cruise control , or Dynamic
cruise control with Stop function ,
refer to the corresponding sections.
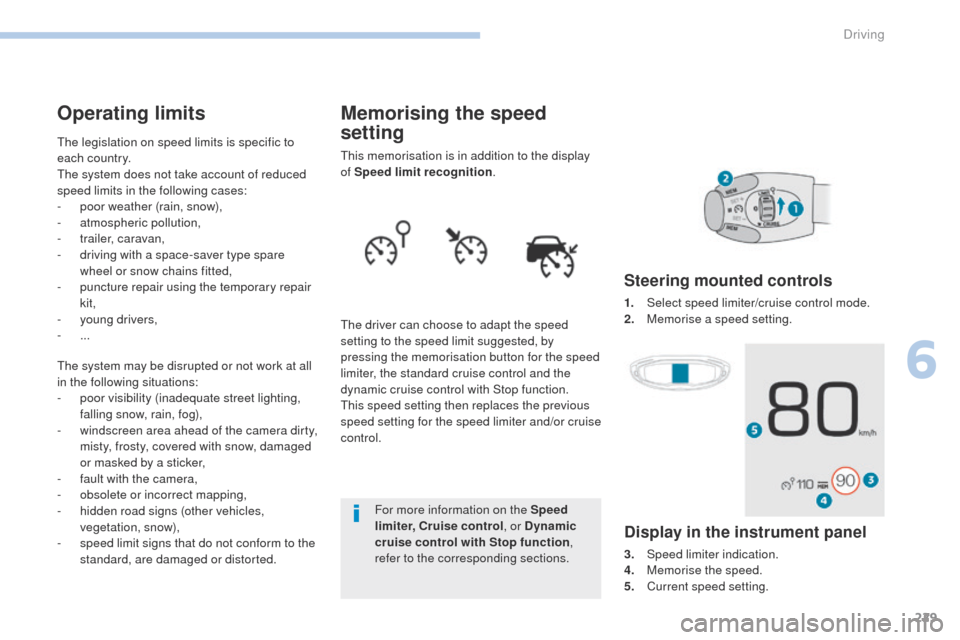
Steering mounted controls
1. Select speed limiter/cruise control mode.
2. M emorise a speed setting.
Operating limits
The legislation on speed limits is specific to
each country.
The system does not take account of reduced
speed limits in the following cases:
-
p
oor weather (rain, snow),
-
a
tmospheric pollution,
-
t
railer, caravan,
-
d
riving with a space-saver type spare
wheel or snow chains fitted,
-
p
uncture repair using the temporary repair
kit,
-
y
oung drivers,
-
...
The system may be disrupted or not work at all
in the following situations:
-
p
oor visibility (inadequate street lighting,
falling snow, rain, fog),
-
w
indscreen area ahead of the camera dirty,
misty, frosty, covered with snow, damaged
or masked by a sticker,
-
f
ault with the camera,
-
o
bsolete or incorrect mapping,
-
h
idden road signs (other vehicles,
vegetation, snow),
-
s
peed limit signs that do not conform to the
standard, are damaged or distorted.
Display in the instrument panel
3. Speed limiter indication.
4. M emorise the speed.
5.
C
urrent speed setting.
6
Driving