2017 OPEL MOKKA X screen
[x] Cancel search: screenPage 166 of 247

164Driving and operating
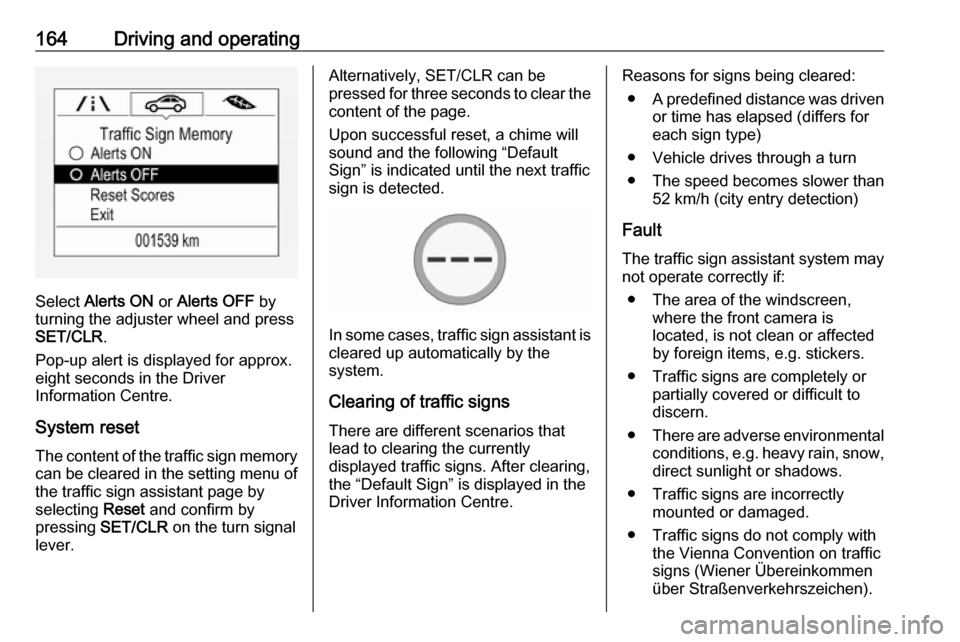
Select Alerts ON or Alerts OFF by
turning the adjuster wheel and press
SET/CLR .
Pop-up alert is displayed for approx.
eight seconds in the Driver
Information Centre.
System reset The content of the traffic sign memory
can be cleared in the setting menu of
the traffic sign assistant page by
selecting Reset and confirm by
pressing SET/CLR on the turn signal
lever.
Alternatively, SET/CLR can be
pressed for three seconds to clear the
content of the page.
Upon successful reset, a chime will
sound and the following “Default
Sign” is indicated until the next traffic
sign is detected.
In some cases, traffic sign assistant is
cleared up automatically by the
system.
Clearing of traffic signs
There are different scenarios that
lead to clearing the currently
displayed traffic signs. After clearing,
the “Default Sign” is displayed in the
Driver Information Centre.
Reasons for signs being cleared:
● A predefined distance was driven
or time has elapsed (differs for
each sign type)
● Vehicle drives through a turn
● The speed becomes slower than 52 km/h (city entry detection)
Fault
The traffic sign assistant system may
not operate correctly if:
● The area of the windscreen, where the front camera is
located, is not clean or affected
by foreign items, e.g. stickers.
● Traffic signs are completely or partially covered or difficult to
discern.
● There are adverse environmental
conditions, e.g. heavy rain, snow,direct sunlight or shadows.
● Traffic signs are incorrectly mounted or damaged.
● Traffic signs do not comply with the Vienna Convention on traffic
signs (Wiener Übereinkommen
über Straßenverkehrszeichen).
Page 168 of 247

166Driving and operatingDeactivation
The system is deactivated by
pressing ), the LED in the button
extinguishes.
At speeds below 56 km/h the system
is inoperable.
Fault
The lane departure warning system
may not operate properly when:
● the windscreen is not clean
● there are adverse environmental conditions like heavy rain, snow,
direct sunlight or shadows
The system can not operate when no
lane marking is detected.Fuel
Fuel for petrol engines Only use unleaded fuel that complies
with European standard EN 228 or
E DIN 51626-1 or equivalent.
The engine is capable of running with
fuel that contains up to 10% ethanol
(e.g. named E10).
Use fuel with the recommended
octane rating. A lower octane rating
can reduce engine power and torque
and slightly increases fuel
consumption.Caution
Do not use fuel or fuel additives
that contain metallic compounds
such as manganese-based
additives. This may cause engine
damage.
Caution
Use of fuel that does not comply to EN 228 or E DIN 51626-1 or
equivalent can lead to deposits or
engine damage.
Caution
Use of fuel with a lower octane
rating than the lowest possible
rating could lead to uncontrolled combustion and engine damage.
The engine-specific requirements
regarding octane rating are given in
the engine data overview 3 225. A
country-specific label at the fuel filler
flap can supersede the requirement.
Fuel for diesel engines Only use diesel fuel that complies
with EN 590.
In countries outside the European
Union use Euro-Diesel fuel with a
sulphur concentration below 50 ppm.
Page 184 of 247

182Vehicle care
Power steering fluid level normally
does not need to be checked. If an
unusual noise sounds during steering or the power steering reacts
conspicuously, seek the assistance of a workshop.
Washer fluid
Fill with clean water mixed with a
suitable quantity of approved
windscreen washer fluid which
contains antifreeze.
Caution
Only washer fluid with a sufficient
antifreeze concentration provides
protection at low temperatures or
a sudden drop in temperature.
Washer fluid 3 218.
Brakes
In the event of minimum thickness of
the brake lining, a squealing noise
sounds during braking.
Continued driving is possible but
have the brake lining replaced as
soon as possible.
Once new brake linings are installed,
do not brake unnecessarily hard for
the first few journeys.
Brake fluid9 Warning
Brake fluid is poisonous and
corrosive. Avoid contact with eyes, skin, fabrics and painted surfaces.
Page 188 of 247

186Vehicle careBulb replacement
Switch off the ignition and turn off the relevant switch or close the doors.
Only hold a new bulb at the base. Do
not touch the bulb glass with bare
hands.
Use only the same bulb type for
replacement.
Replace headlight bulbs from within
the engine compartment.
Note
After driving in heavy rain or after
washing, some exterior light lenses
could appear frosty.
This condition is caused by the
temperature difference between the
inside and outside of the light.
This is similar to the condensation
on your windows inside your vehicle during the rain and doesn't indicate
a problem with your vehicle.
If the water leaks into the light bulb
circuitry, have the vehicle checked
by your authorised workshop.Halogen bulbs9 Warning
Halogen bulbs have pressurized
gas inside and can burst if you
drop or scratch the bulb. You or others could be injured. Be sure to read and follow the instructions onthe bulb package.
LED lighting
This vehicle has several LED lights.
For replacement of any LED lighting
assembly, contact a workshop.
Halogen headlights
Baselevel headlight assembly
The base model vehicle has halogen
high beam and low beam headlights,
an LED turn and lane-change signal,
a sidelight and daytime running lights on the headlight assembly.
Passenger side shown, driver side
similar.
On the driver side remove the
windscreen washer bottle filler neck,
before changing a bulb.
1. High beam headlights
2. Low beam headlights
High beam and low beam headlights 1. Open the bonnet. Bonnet 3 179
Page 189 of 247

Vehicle care187
2. Remove the protective cover.
3. Turn the bulb anticlockwise and pull straight back.
4. Disconnect the wiring harnessconnector from the bulb.
5. Install the new bulb in theheadlight assembly by turning
clockwise.
6. Reconnect the wiring harness connector.
7. Install the protective cover.
For the driver side, reinstall the
windscreen washer bottle filler neck
by firmly pushing it straight into the
bottle. Ensure that the filler neck clip
engages into the underhood electrical centre retainer.
Uplevel headlight assembly The uplevel model vehicle has LED
high beam and low beam headlights, a turn and lane-change signal, asidelight and daytime running lights
on the headlight assembly.Fog lights
The bulbs are accessible from the
underside of the vehicle
1. Turn the respective wheel inside to get better access and remove
three torx screws on outside of
wheel house. Vehicle tools
3 195.
2. Pull and hold lining to get access to the bulb holder.
Page 214 of 247

212Vehicle careTowingTowing the vehicle
Disengage cap by using a
screwdriver and remove.
The towing eye is stowed with the vehicle tools 3 195.
Screw in the towing eye as far as it will
go until it stops in a horizontal
position.
Attach a tow rope – or better still a tow
rod – to the towing eye.
The towing eye must only be used for towing and not for recovering the
vehicle.
Switch on ignition to release steering
wheel lock and to permit operation of
brake lights, horn and windscreen
wiper.
Transmission in neutral.
Caution
Never tow a vehicle equipped with All Wheel Drive (AWD) with the
front or rear tyres on the road. If
you tow a vehicle equipped with
AWD while the front or rear tyres
are rolling on the road, the drive
system in the vehicle could be
severely damaged. When towing
vehicles equipped with AWD, all
four tyres must not be in contact
with the road.
Caution
Drive slowly. Do not drive jerkily.
Excessive tractive force can
damage the vehicle.
When the engine is not running,
considerably more force is needed to
brake and steer.
To prevent the entry of exhaust gases from the towing vehicle, switch on the
air recirculation system 3 127 and
close the windows.
Page 216 of 247

214Vehicle careCaution
Drive slowly. Do not drive jerkily.
Excessive tractive force can
damage the vehicle.
After towing, unscrew the towing eye.
Insert cap at the bottom and engage
cap.
Appearance care
Exterior care
Locks The locks are lubricated at the factoryusing a high quality lock cylinder
grease. Use de-icing agent only when
absolutely necessary, as this has a
degreasing effect and impairs lock function. After using a de-icing agent, have the locks regreased by a
workshop.
Washing The paintwork of your vehicle is
exposed to environmental influences. Wash and wax your vehicle regularly.
When using automatic vehicle
washes, select a programme that
includes waxing.
Bird droppings, dead insects, resin,
pollen and the like should be cleaned
off immediately, as they contain
aggressive constituents which can
cause paint damage.If using a vehicle wash, comply with
the vehicle wash manufacturer's
instructions. The windscreen wiper
and rear window wiper must be
switched off. Remove antenna and
external accessories such as roof
racks etc.
If you wash your vehicle by hand,
make sure that the insides of the
wheel housings are also thoroughly
rinsed out.
Clean edges and folds on opened
doors and the bonnet as well as the
areas they cover.Caution
Always use a cleaning agent with
a pH value of 4 to 9.
Do not use cleaning agents on hot surfaces.
Have the door hinges of all doors
greased by a workshop.
Do not clean the engine compartment with a steam-jet or high-pressure jet
cleaner.
Page 217 of 247

Vehicle care215Thoroughly rinse and leather-off the
vehicle. Rinse leather frequently. Use
separate leathers for painted and
glass surfaces: remnants of wax on the windows will impair vision.
Do not use hard objects to remove
spots of tar. Use tar removal spray on
painted surfaces.
Exterior lights
Headlight and other light covers are
made of plastic. Do not use any
abrasive or caustic agents, do not use
an ice scraper, and do not clean them
dry.
Polishing and waxing
Wax the vehicle regularly (at the
latest when water no longer beads).
Otherwise, the paintwork will dry out.
Polishing is necessary only if the paint
has become dull or if solid deposits
have become attached to it.
Paintwork polish with silicone forms a
protective film, making waxing
unnecessary.
Plastic body parts must not be treated with wax or polishing agents.Windows and windscreen wiper
blades
Use a soft lint-free cloth or chamoisleather together with window cleaner and insect remover.
When cleaning the rear window from
inside, always wipe in parallel to the
heating element to prevent damage.
For mechanical removal of ice, use a
sharp-edged ice scraper. Press the
scraper firmly against the glass so
that no dirt can get under it and
scratch the glass.
Clean smearing wiper blades with a
soft cloth and window cleaner.
Remove dirt residues from smearing
wiper blades by using a soft cloth and window cleaner. Also make sure to
remove any residues such as wax,
insect residues and similar from the
window.
Ice residues, pollution and continuous
wiping on dry windows will damage or
even destroy the wiper blades.Wheels and tyres
Do not use high-pressure jet
cleaners.
Clean rims with a pH-neutral wheel
cleaner.
Rims are painted and can be treated
with the same agents as the body.
Paintwork damageRectify minor paintwork damage with
a touch-up pen before rust forms.
Have more extensive damage or rust
areas repaired by a workshop.
Underbody Some areas of the vehicle underbody
have a PVC undercoating while other
critical areas have a durable
protective wax coating.
After the underbody is washed, check the underbody and have it waxed if
necessary.
Bitumen/rubber materials could
damage the PVC coating. Have
underbody work carried out by a
workshop.