Page 9 of 263
In brief7Seat adjustmentLongitudinal adjustment
Pull handle, slide seat, release
handle. Try to move the seat back and forth to ensure that the seat is locked
in place.
Seat position 3 49, Manual seat
adjustment 3 50, Power seat
adjustment 3 53.
Backrest inclination
Turn lever to the rear, adjust
inclination and release lever. Allow
the seat to engage audibly.
Seat position 3 49, Manual seat
adjustment 3 50, Power seat
adjustment 3 53, Seat folding
3 52.
Seat height
Lever pumping motion
up:seat higherdown:seat lower
Seat position 3 49, Manual seat
adjustment 3 50, Power seat
adjustment 3 53.
Page 10 of 263
8In briefHead restraint adjustment
Press release button, adjust height,
engage.
Head restraints 3 47.
Seat belt
Pull out the seat belt and fasten in belt
buckle. The seat belt must not be
twisted and must fit close against the
body. The backrest must not be tilted back too far (maximum approx. 25 °).
To unfasten belt, press red button on belt buckle.
Seat position 3 49, Seat belts
3 56, Seat belt presenter 3 56,
Airbag system 3 59.
Mirror adjustment
Interior mirror
To adjust the mirror, move the mirror
housing in the desired direction.
Manual anti-dazzle interior mirror
3 32.
Automatic anti-dazzle interior mirror 3 32.
Page 38 of 263

36Keys, doors and windowsHeated rear window
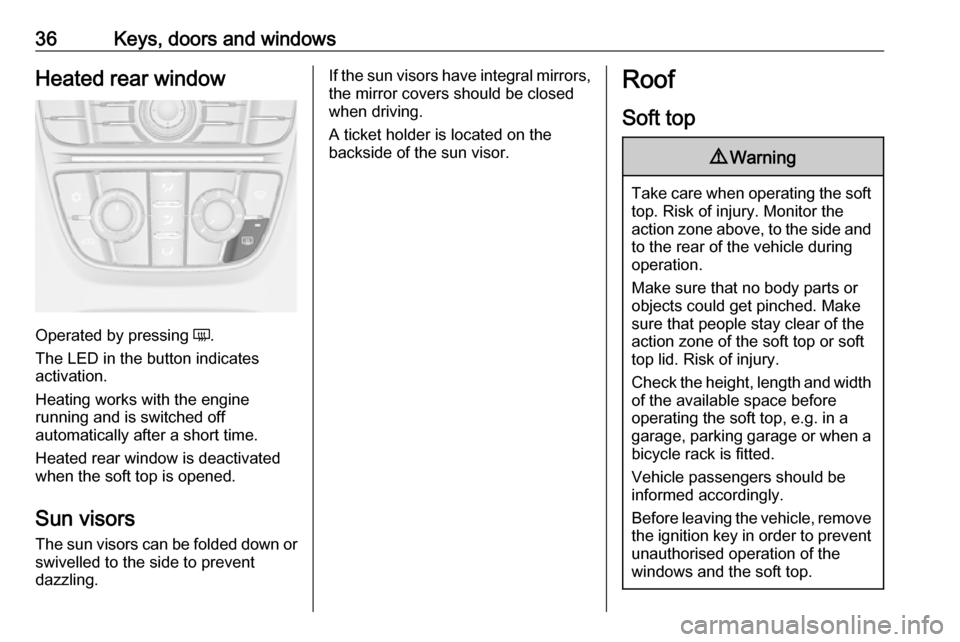
Operated by pressing Ü.
The LED in the button indicates
activation.
Heating works with the engine
running and is switched off
automatically after a short time.
Heated rear window is deactivated
when the soft top is opened.
Sun visors
The sun visors can be folded down or swivelled to the side to prevent
dazzling.
If the sun visors have integral mirrors, the mirror covers should be closed
when driving.
A ticket holder is located on the
backside of the sun visor.Roof
Soft top9 Warning
Take care when operating the soft
top. Risk of injury. Monitor the
action zone above, to the side and to the rear of the vehicle during
operation.
Make sure that no body parts or
objects could get pinched. Make
sure that people stay clear of the
action zone of the soft top or soft
top lid. Risk of injury.
Check the height, length and width of the available space before
operating the soft top, e.g. in a
garage, parking garage or when a
bicycle rack is fitted.
Vehicle passengers should be
informed accordingly.
Before leaving the vehicle, remove the ignition key in order to prevent
unauthorised operation of the
windows and the soft top.
Page 49 of 263

Seats, restraints47Seats, restraintsHead restraints............................ 47
Active head restraints ................48
Front seats ................................... 49
Seat position .............................. 49
Manual seat adjustment ............50
Seat folding ............................... 52
Power seat adjustment ..............53
Armrest ...................................... 55
Heating ...................................... 55
Ventilating .................................. 55
Seat belts ..................................... 56
Three-point seat belt .................57
Airbag system .............................. 59
Front airbag system ...................62
Side airbag system ....................63
Airbag deactivation ....................63
Child restraints ............................. 64
Child restraint systems ..............64
Child restraint installation locations ................................... 66
ISOFIX child restraint systems ..69
Top-tether fastening eyes ..........69Head restraints
Position9 Warning
Only drive with the head restraint
set to the proper position.
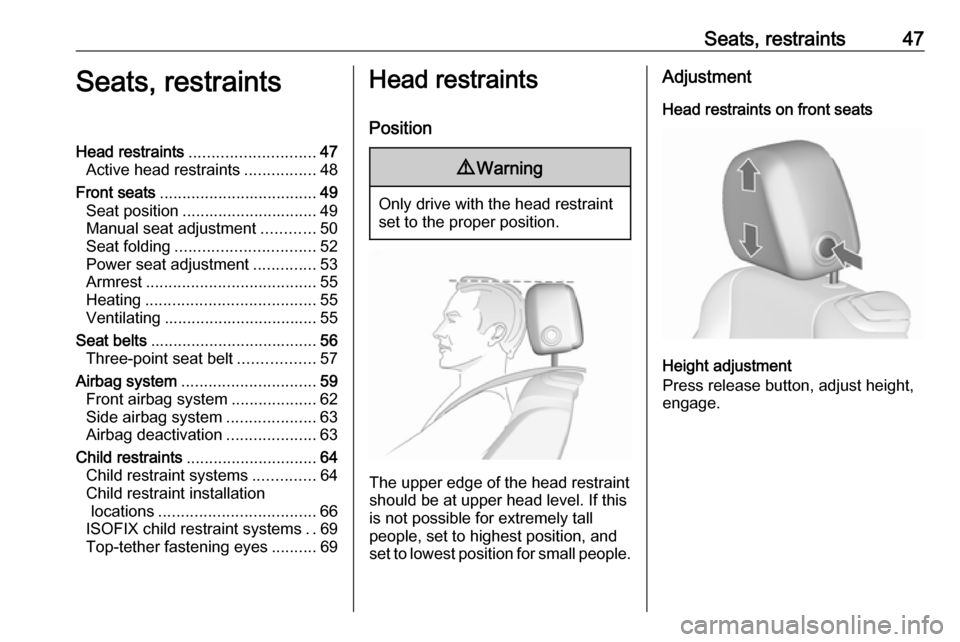
The upper edge of the head restraint
should be at upper head level. If this
is not possible for extremely tall
people, set to highest position, and
set to lowest position for small people.
Adjustment
Head restraints on front seats
Height adjustment
Press release button, adjust height,
engage.
Page 50 of 263
48Seats, restraintsHorizontal adjustment
Pull bolster of head restraint forwardsslowly. It engages in several
positions.
To return to its rearmost position, pull
fully forwards and release.
Head restraints on rear seats
Height adjustment
Pull the head restraint upwards and
let engage. To move downwards, press the catch to release and push
the head restraint downwards.
Removal of rear head restraint
E.g. when using a child restraint
system 3 64.
Press both catches, pull the head
restraint upwards and remove.
Place the head restraint in a net bag
and secure the underside of the bag
with the Velcro fasteners on the load
compartment floor. A suitable net bag
is available at your workshop.
Active head restraints
In the event of a rear-end impact, the front parts of the active head
restraints are moved slightly
forwards. Thus the head is supported
so that the risk of whiplash injury is
reduced.
Page 51 of 263
Seats, restraints49Note
Approved accessories may only be
attached if the seat is not in use.Front seats
Seat position9 Warning
Only drive with the seat correctly
adjusted.
9 Danger
Do not sit nearer than 25 cm from
the steering wheel, to permit safe
airbag deployment.
9 Warning
Never adjust seats while driving as
they could move uncontrollably.
9 Warning
Never store any objects under the
seats.
● Sit with buttocks as far back against the backrest as possible.
Adjust the distance between the
seat and the pedals so that legs
are slightly angled when pressing the pedals. Slide the front
passenger seat as far back as
possible.
● Set seat height high enough to have a clear field of vision on allsides and of all display
instruments. There should be at
least one hand of clearance
between head and the roof
frame. Your thighs should rest
lightly on the seat without
pressing into it.
Page 53 of 263
Seats, restraints51Seat height
Lever pumping motion
up:seat higherdown:seat lowerSeat inclination
Lever pumping motion
up:front end higherdown:front end lowerLumbar support
Adjust lumbar support using the four-way switch to suit personal
requirements.
Moving support up and down: push switch up or down.
Increasing and decreasing support:
push switch forwards or backwards.
Page 54 of 263

52Seats, restraintsAdjustable thigh support
Pull the lever and slide the thigh
support.
Seat folding
9 Warning
Passengers on rear seats should
take care not to be trapped by the
adjustment mechanism when the
seat moves back to its original
position.
Caution
When seat height is in highest
position, push head restraints
down and lift up sun visors before
folding backrest forwards.
Seat folding on manual operated
seats
Lift release lever and fold backrest
forwards, then slide seat forwards to
the stop.
To restore, slide the seat backwards
to the stop. Lift backrest to upright
position without operating any lever.
Ensure backrest engages.
9 Warning
When folding up, ensure that the
seat is securely locked in position
before driving. Failure to do so
may result in personal injury in the event of hard braking or collision.
When fully engaged the seat will be in
original position again.
Do not operate backrest inclination
lever while backrest is folded forward.
Seat folding on power seats