2017 NISSAN VERSA NOTE service
[x] Cancel search: servicePage 187 of 414
The air conditioner system in your NISSAN ve-
hicle is charged with a refrigerant designed with
the environment in mind.
This refrigerant does not harm the earth’s
ozone layer.
Special charging equipment and lubricant is re-
quired when servicing your NISSAN air condi-
tioner. Using improper refrigerants or lubricants
will cause severe damage to your air conditioner
system. For additional information, refer to “Air
conditioner system refrigerant and oil recommen-
dations” in the “Technical and consumer informa-
tion” section of this manual.
It is recommended that you visit a NISSAN dealer
to service your “environmentally friendly” air con-
ditioning system.
WARNING
The air conditioner system contains refrig-
erant under high pressure. To avoid per-
sonal injury, any air conditioner service
should be done only by an experienced
technician with proper equipment.
LHA4354
SERVICING AIR CONDITIONER
4-34Monitor, climate, audio, phone and voice recognition systems
Page 189 of 414
SATELLITE RADIO RECEPTION (if so
equipped)
When the satellite radio is used for the first time
or the battery has been replaced, the satellite
radio may not work properly. This is not a mal-
function. Wait more than 10 minutes with satellite
radio ON and the vehicle outside of any metal or
large building for satellite radio to receive all of
the necessary data.
No satellite radio reception is available and “NO
SAT” is displayed when the SAT band option is
selected unless optional satellite receiver and
antenna are installed and a SiriusXM® Satellite
Radio service subscription is active. Satellite ra-
dio is not available in Alaska, Hawaii and Guam.
Satellite radio performance may be affected if
cargo carried on the roof blocks the satellite radio
signal.
If possible, do not put cargo over the satellite
antenna.
A build up of ice on the satellite radio antenna can
affect satellite radio performance. Remove the
ice to restore satellite radio reception.
AUDIO OPERATION PRECAUTIONSCompact disc (CD) player
CAUTION
●
Do not force a compact disc into the CD
insert slot. This could damage the CD
and/or CD player.
● Trying to load a CD with the CD door
closed could damage the CD and/or CD
player.
● Only one CD can be loaded into the CD
player at a time.
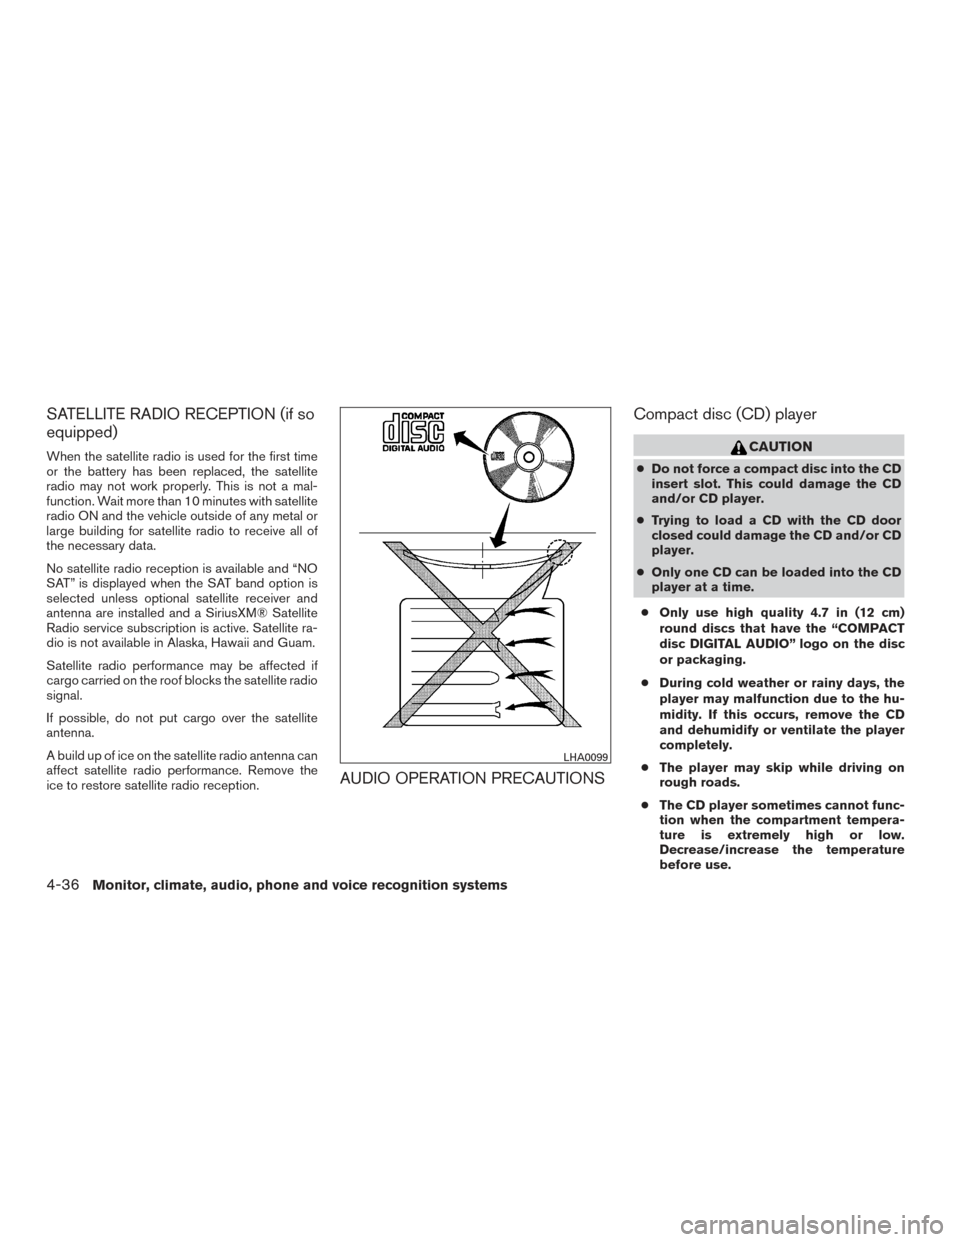
● Only use high quality 4.7 in (12 cm)
round discs that have the “COMPACT
disc DIGITAL AUDIO” logo on the disc
or packaging.
● During cold weather or rainy days, the
player may malfunction due to the hu-
midity. If this occurs, remove the CD
and dehumidify or ventilate the player
completely.
● The player may skip while driving on
rough roads.
● The CD player sometimes cannot func-
tion when the compartment tempera-
ture is extremely high or low.
Decrease/increase the temperature
before use.
LHA0099
4-36Monitor, climate, audio, phone and voice recognition systems
Page 200 of 414
FM/AM/SAT RADIO WITH
COMPACT DISC (CD) PLAYER (Type
A) (if so equipped)
For additional information, refer to “Audio opera-
tion precautions” in this section.1.
CD eject button
2. RPT button
3. RDM button
4. Display screen 5. SCAN button
6.
SEEK/CAT buttons
7. iPod MENU button
8.
BACK button
9. ENTER/SETTING/CLOCK button and TUNE/SCROLL control knob
10. Station select (1–6) buttons
11. VOL (volume) knob /
(power) button
12. DISP button
13. MEDIA button
14. XM button*
15. FM•AM button
*No satellite radio reception is available when the
XM button is pressed to access satellite radio
stations unless optional satellite receiver and an-
tenna are installed and an SiriusXM® Satellite
Radio service subscription is active. Satellite ra-
dio is not available in Alaska, Hawaii or Guam.
LHA4375
Monitor, climate, audio, phone and voice recognition systems4-47
Page 202 of 414
Clock Set1. Press the ENTER/CLOCK button.
2. Turn the TUNE/SCROLL knob to select CLOCK.
3. Press the ENTER/CLOCK button.
4. Turn the TUNE/SCROLL knob to select “set time”.
5. Press the ENTER/CLOCK button.
6. Rotate the TUNE/SCROLL knob to adjust hours.
7. Press the ENTER/CLOCK button.
8. Turn the TUNE/SCROLL knob to adjust min- utes.
9. Press the ENTER/CLOCK button.
10. Press the
BACK button to finish.
iPod® MENU button
This button can only be used for iPod® opera-
tions. For additional information, refer to “iPod®
player operation without Navigation System” in
this section regarding the function of this button.
BACK button
Press the
BACK button to return to the
previous menu screen. DISP (display) button
The DISP (display) button turns the display
screen on or off.
FM/AM/SAT radio operation
FM·AM button
Press the FM·AM button to change the band as
follows:
AM
→FM1 →FM2 →AM
If another audio source is playing when the
FM·AM button is pressed, the audio source play-
ing will automatically be turned off and the last
radio station played will begin playing.
XM band select
Press the XM button to change the band as
follows:
XM1* →XM2* →XM3* →XM1
When the XM button is pressed while the ignition
switch is in the ACC or ON position, the radio will
come on at the station last played.
The last station played will also come on when
the VOL/
control knob is pressed ON.
*When the XM button is pressed, the satellite
radio reception will not be available unless an
optional satellite receiver and antenna are in-
stalled and a SiriusXM® Satellite Radio service subscription is active. Satellite radio is not avail-
able in Alaska, Hawaii and Guam.
If a compact disc is playing when the XM button
is pressed, the compact disc will automatically be
turned off and the last radio station played will
come on.
TUNE/SCROLL knob (Tuning)
Turn the TUNE/SCROLL knob to the left or right
for manual tuning.
SEEK tuning
Press the SEEK button
orto tune
from low to high or high to low frequencies and to
stop at the next broadcasting station.
SCAN tuning
Press the SCAN button to stop at each broad-
casting station for 5 seconds. SCAN will appear
on the screen while the radio is scan tuning.
Pressing the button again during this 5 second
period will stop SCAN tuning and the radio will
remain tuned to that station. If the SCAN button is
not pressed within 5 seconds, SCAN tuning
moves to the next station.
Monitor, climate, audio, phone and voice recognition systems4-49
Page 205 of 414
FM/AM/SAT RADIO WITH
COMPACT DISC (CD) PLAYER (Type
B) (if so equipped)
For additional information, refer to “Audio opera-
tion precautions” in this section.1.
CD eject button
2. FM-AM button
3. AUX button
4. CD insert slot 5.
Backward seek button andForward seek button
6. BACK button
7. TUNE knob / AUDIO button
8. Display screen
9. ON-OFF button / VOL (volume) control knob
10. CD button
11. SXM button*
*No satellite radio reception is available when the
SXM button is pressed to access satellite radio
stations unless optional satellite receiver and an-
tenna are installed and a SiriusXM® Satellite
Radio service subscription is active. Satellite ra-
dio is not available in Alaska, Hawaii and Guam.
LHA2895
4-52Monitor, climate, audio, phone and voice recognition systems
Page 207 of 414
![NISSAN VERSA NOTE 2017 2.G Owners Manual SXM settings
To view the SXM settings:1. Press the [
] button.
2. Touch the “Settings” key.
3. Touch the “SXM” key.
The signal strength, activation status and other
information are displayed o NISSAN VERSA NOTE 2017 2.G Owners Manual SXM settings
To view the SXM settings:1. Press the [
] button.
2. Touch the “Settings” key.
3. Touch the “SXM” key.
The signal strength, activation status and other
information are displayed o](/manual-img/5/559/w960_559-206.png)
SXM settings
To view the SXM settings:1. Press the [
] button.
2. Touch the “Settings” key.
3. Touch the “SXM” key.
The signal strength, activation status and other
information are displayed on the screen.
FM/AM/SAT radio operation
FM·AM button
Press the FM·AM button to change the band as
follows:
AM →FM1 →FM2 →AM
If another audio source is playing when the
FM·AM button is pressed, the audio source play-
ing will automatically be turned off and the last
radio station played will begin playing.
The FM stereo indicator (ST) is shown on the
screen during FM stereo reception. When the
stereo broadcast signal is weak, the radio auto-
matically changes from stereo to monaural re-
ception. SXM band select
Pressing the SXM button will change the band as
follows:
SXM1*
→SXM2* →SXM3*→ SXM1* (satellite,
if so equipped)
When the SXM button is pressed while the igni-
tion switch is in the ACC or ON position, the
radio will come on at the last station played.
The last station played will also come on when
the ON-OFF button is pressed.
*When the SXM button is pressed, the satellite
radio mode will be skipped unless an optional
satellite receiver and antenna are installed and a
SiriusXM® Satellite Radio service subscription is
active. Satellite radio is not available in Alaska,
Hawaii and Guam.
If a compact disc is playing when the SXM button
is pressed, the compact disc will automatically be
turned off and the last radio station played will
come on.
While the radio is in SXM mode, the operation can
be controlled through the touch-screen. Touch the
“Channels” key to display a list of channels. Touch
a channel displayed on the list to change to that
channel. Touch the “Categories” key to display a
list of categories. Touch a category displayed on
the list to display options within that category.
Tuning with the touch-screen
When in AM or FM mode, the radio can be tuned
using the touch-screen. To bring up the visual
tuner, touch the “Tune” key on the lower right
corner of the screen. A screen appears with a bar
running from low frequencies on the left to high
frequencies on the right. Touch the screen at the
location of the frequency you wish to tune and the
station will change to that frequency. To return to
the regular radio display screen, touch the “OK”
key.
Tuning with the TUNE control knob
The radio can also be manually tuned using the
TUNE knob. When in FM or AM mode, turn the
TUNE knob to the left for lower frequencies or to
the right for higher frequencies. When in SXM
mode, turn the TUNE knob to change the chan-
nel.
SEEK tuning
When in FM or AM mode, press the seek
buttons
orto tune from low to high
or high to low frequencies and to stop at the next
broadcasting station.
When in SXM mode, press the seek
buttons
orto change the category.
4-54Monitor, climate, audio, phone and voice recognition systems
Page 269 of 414
WARNING
●Do not leave children or adults who would
normally require the assistance of others
alone in your vehicle. Pets should also not
be left alone. They could accidentally in-
jure themselves or others through inad-
vertent operation of the vehicle. Also, on
hot, sunny days, temperatures in a closed
vehicle could quickly become high enough
to cause severe or possibly fatal injuries
to people or animals.
●Properly secure all cargo to help pre-
vent it from sliding or shifting. Do not
place cargo higher than the seatbacks.
In a sudden stop or collision, unsecured
cargo could cause personal injury.
EXHAUST GAS (carbon monoxide)
WARNING
●Do not breathe exhaust gases; they con-
tain colorless and odorless carbon mon-
oxide. Carbon monoxide is dangerous. It
can cause unconsciousness or death.
●If you suspect that exhaust fumes are
entering the vehicle, drive with all win-
dows fully open, and have the vehicle
inspected immediately. ●
Do not run the engine in closed spaces
such as a garage.
● Do not park the vehicle with the engine
running for any extended length of time.
● Keep the rear vent windows, doors and
trunk lids (if so equipped) closed while
driving, otherwise exhaust gases could
be drawn into the passenger compart-
ment. If you must drive with one of
these open, follow these precautions:
1. Open all the windows.
2. Turn the air recirculation mode off and set the fan speed control to the
highest level to circulate the air.
● The exhaust system and body should be
inspected by a qualified mechanic
whenever:
a. The vehicle is raised for service.
b. You suspect that exhaust fumes are entering into the passenger
compartment.
c. You notice a change in the sound of the exhaust system.
d. You have had an accident involving damage to the exhaust system, un-
derbody, or rear of the vehicle.
THREE-WAY CATALYST
The three-way catalyst is an emission control
device installed in the exhaust system. Exhaust
gases in the three-way catalyst are burned at
high temperatures to help reduce pollutants.
WARNING
●The exhaust gas and the exhaust sys-
tem are very hot. Keep people, animals
or flammable materials away from the
exhaust system components.
● Do not stop or park the vehicle over
flammable materials such as dry grass,
waste paper or rags. They may ignite
and cause a fire.
CAUTION
●Do not use leaded gasoline. Deposits
from leaded gasoline will seriously re-
duce the three-way catalyst’s ability to
help reduce exhaust pollutants.
PRECAUTIONS WHEN STARTING
AND DRIVING
5-2Starting and driving
Page 270 of 414
●Keep your engine tuned up. Malfunc-
tions in the ignition, fuel injection, or
electrical systems can cause over rich
fuel flow into the three-way catalyst,
causing it to overheat. Do not keep driv-
ing if the engine misfires, or if notice-
able loss of performance or other un-
usual operating conditions are
detected. Have the vehicle inspected
promptly. It is recommended that you
visit a NISSAN dealer for this service.
● Avoid driving with an extremely low fuel
level. Running out of fuel could cause
the engine to misfire, damaging the
three-way catalyst.
● Do not race the engine while warming it
up.
● Do not push or tow your vehicle to start
the engine.
TIRE PRESSURE MONITORING
SYSTEM (TPMS) (if so equipped)
Each tire, including the spare (if provided) ,
should be checked monthly when cold and in-
flated to the inflation pressure recommended by
the vehicle manufacturer on the vehicle placard
or tire inflation pressure label. (If your vehicle has
tires of a different size than the size indicated on
the vehicle placard or tire inflation pressure label, you should determine the proper tire inflation
pressure for those tires.)
As an added safety feature, your vehicle has been
equipped with a Tire Pressure Monitoring System
(TPMS) that illuminates a low tire pressure telltale
when one or more of your tires is significantly
under-inflated. Accordingly, when the low tire
pressure telltale illuminates, you should stop and
check your tires as soon as possible, and inflate
them to the proper pressure. Driving on a signifi-
cantly under-inflated tire causes the tire to over-
heat and can lead to tire failure. Under-inflation
also reduces fuel efficiency and tire tread life, and
may affect the vehicle’s handling and stopping
ability.
Please note that the TPMS is not a substitute for
proper tire maintenance, and it is the driver’s
responsibility to maintain correct tire pressure,
even if under-inflation has not reached the level to
trigger illumination of the TPMS low tire pressure
telltale.
Your vehicle has also been equipped with a
TPMS malfunction indicator to indicate when the
system is not operating properly. The TPMS mal-
function indicator is combined with the low tire
pressure telltale. When the system detects a
malfunction, the telltale will flash for approxi-
mately one minute and then remain continuously
illuminated. This sequence will continue uponsubsequent vehicle start-ups as long as the mal-
function exists. When the malfunction indicator is
illuminated, the system may not be able to detect
or signal low tire pressure as intended. TPMS
malfunctions may occur for a variety of reasons,
including the installation of replacement or alter-
nate tires or wheels on the vehicle that prevent
the TPMS from functioning properly. Always
check the TPMS malfunction telltale after replac-
ing one or more tires or wheels on your vehicle to
ensure that the replacement or alternate tires and
wheels allow the TPMS to continue to function
properly.
Additional information:
● Since the spare tire is not equipped with
TPMS, the TPMS does not monitor the tire
pressure of the spare tire.
● The TPMS will activate only when the vehicle
is driven at speeds above 16 mph (25 km/h).
Also, this system may not detect a sudden
drop in tire pressure (for example, a flat tire
while driving) .
Starting and driving5-3