2017 NISSAN TITAN tow
[x] Cancel search: towPage 2 of 40
Beneath the
instrument panel
2
3
5
4
1617
7
8
18
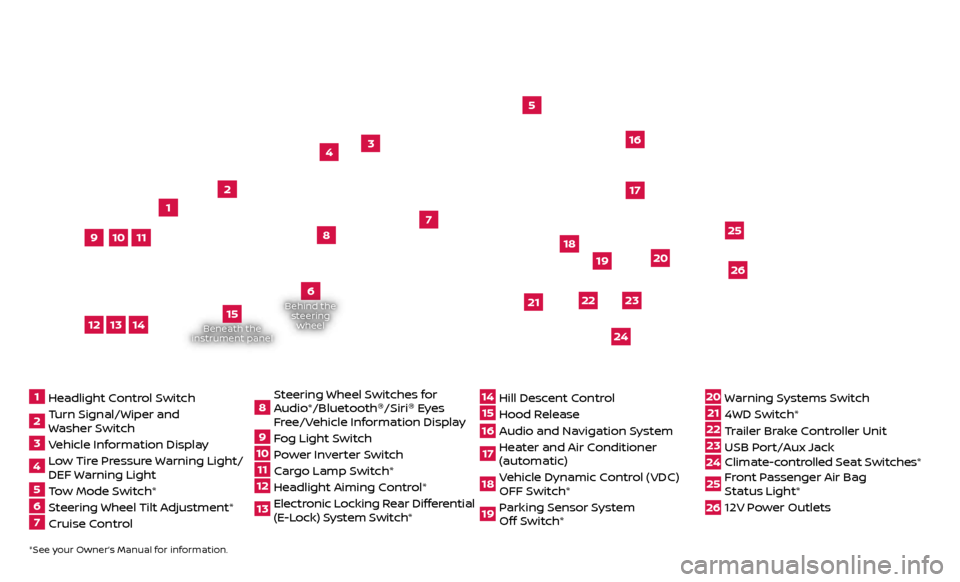
*See your Owner’s Manual for information.1 Headlight Control Switch2 Turn Signal/Wiper and
Washer Switch3 Vehicle Information Display4 L ow Tire Pressure Warning Light/
DEF Warning Light5 Tow Mode Switch*6 Steering Wheel Tilt Adjustment*7 Cruise Control
8 S teering Wheel Switches for
Audio*/Bluetooth ®
/Siri ®
Eyes
Free/Vehicle Information Display9 Fog Light Switch10 P ower Inverter Switch11 C argo Lamp Switch*12 He adlight Aiming Control*13 Elec tronic Locking Rear Differential
(E-Lock) System Switch*
14 Hil l Descent Control15 Hood Release16 Audio and Navigation System 17 He ater and Air Conditioner
(automatic)18 Vehicle Dynamic Control (VDC) OFF Switch*19 P arking Sensor System
Off Switch*
20 Warning Systems Switch21 4WD Switch*22 T railer Brake Controller Unit23 USB Port/Aux Jack24 Climate-c ontrolled Seat Switches* 25 Front Passenger Air Bag
Status Light*26 12V Power Outlets
23
1
24
15
21
6
Behind the
steering wheel
2219
2526
11
9
1013
12
14
20
Page 7 of 40
5
When the vehicle’s outside mirrors are extended for towing, you may see the
mirrors in the bird’s-eye view or the front-side view.
For information regarding how to access additional viewing cycles, please see your Owner’s Manual.
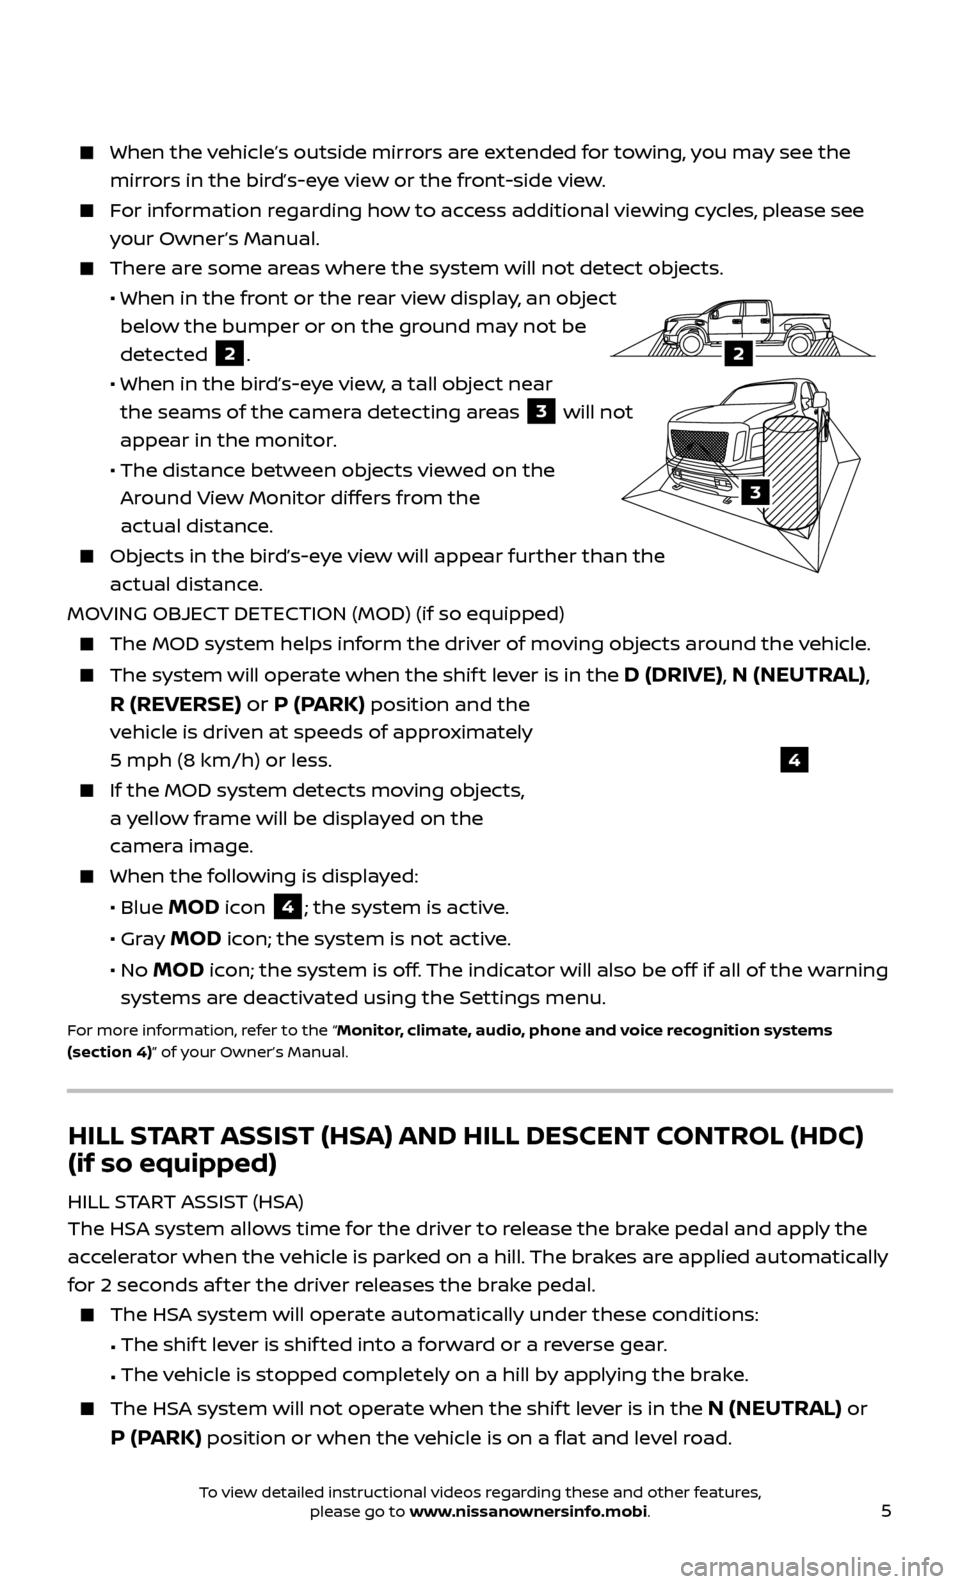
There are some areas where the system will not detect objects.
• When in the fr
ont or the rear view display, an object
below the bumper or on the ground may not be
detected
2.
• When in the bir
d’s-eye view, a tall object near
the seams of the camera detecting areas
3 will not
appear in the monitor.
• The distanc
e between objects viewed on the
Around View Monitor differs from the
actual distance.
Objects in the bird’s-eye view will appear further than the actual distance.
MOVING OBJECT DETECTION (MOD) (if so equipped)
The MOD system helps inf orm the driver of moving objects around the vehicle.
The system will operate when the shif t lever is in the D (DRIVE), N (NEUTRAL),
R (REVERSE) or P (PARK)
position and the
vehicle is driven at speeds of approximately
5 mph (8 km/h) or less.
If the MOD system detec ts moving objects,
a yellow frame will be displayed on the
camera image.
When the f ollowing is displayed:
• Blue MOD icon 4; the system is active.
• Gr
ay
MOD icon; the system is not active.
•
No
MOD icon; the system is off. The indicator will also be off if all of the warning
systems are deactivated using the Settings menu.
For more information, refer to the “Monitor, climate, audio, phone and voice recognition systems
(section 4)” of your Owner’s Manual.
4
HILL START ASSIST (HSA) AND HILL DESCENT CONTROL (HDC)
(if so equipped)
HILL START ASSIST (HSA)
The HSA system allows time for the driver to release the brake pedal and apply the
accelerator when the vehicle is parked on a hill. The brakes are applied automatically
for 2 seconds af ter the driver releases the brake pedal.
The HSA system will operate automatically under these conditions:
•
The shif
t lever is shif ted into a forward or a reverse gear.
•
The v
ehicle is stopped completely on a hill by applying the brake.
The HSA system will not operate when the shif t lever is in the N (NEUTRAL) or
P (PARK) position or when the vehicle is on a flat and level road.
LHA3807
2A
2
3
To view detailed instructional videos regarding these and other features, please go to www.nissanownersinfo.mobi.
Page 9 of 40
7
TOWING1
TRAILER BRAKE CONTROLLER UNIT (if so equipped)
The
Trailer Brake Controller Unit will assist with effective and smooth braking while
towing a trailer.
Operating Modes
•
A
utomatic: Automatic operation of trailer brake pressure based on gain and
boost settings.
•
Manual
: Manually applies trailer brake pressure without pressing the vehicle’s
brake pedal.
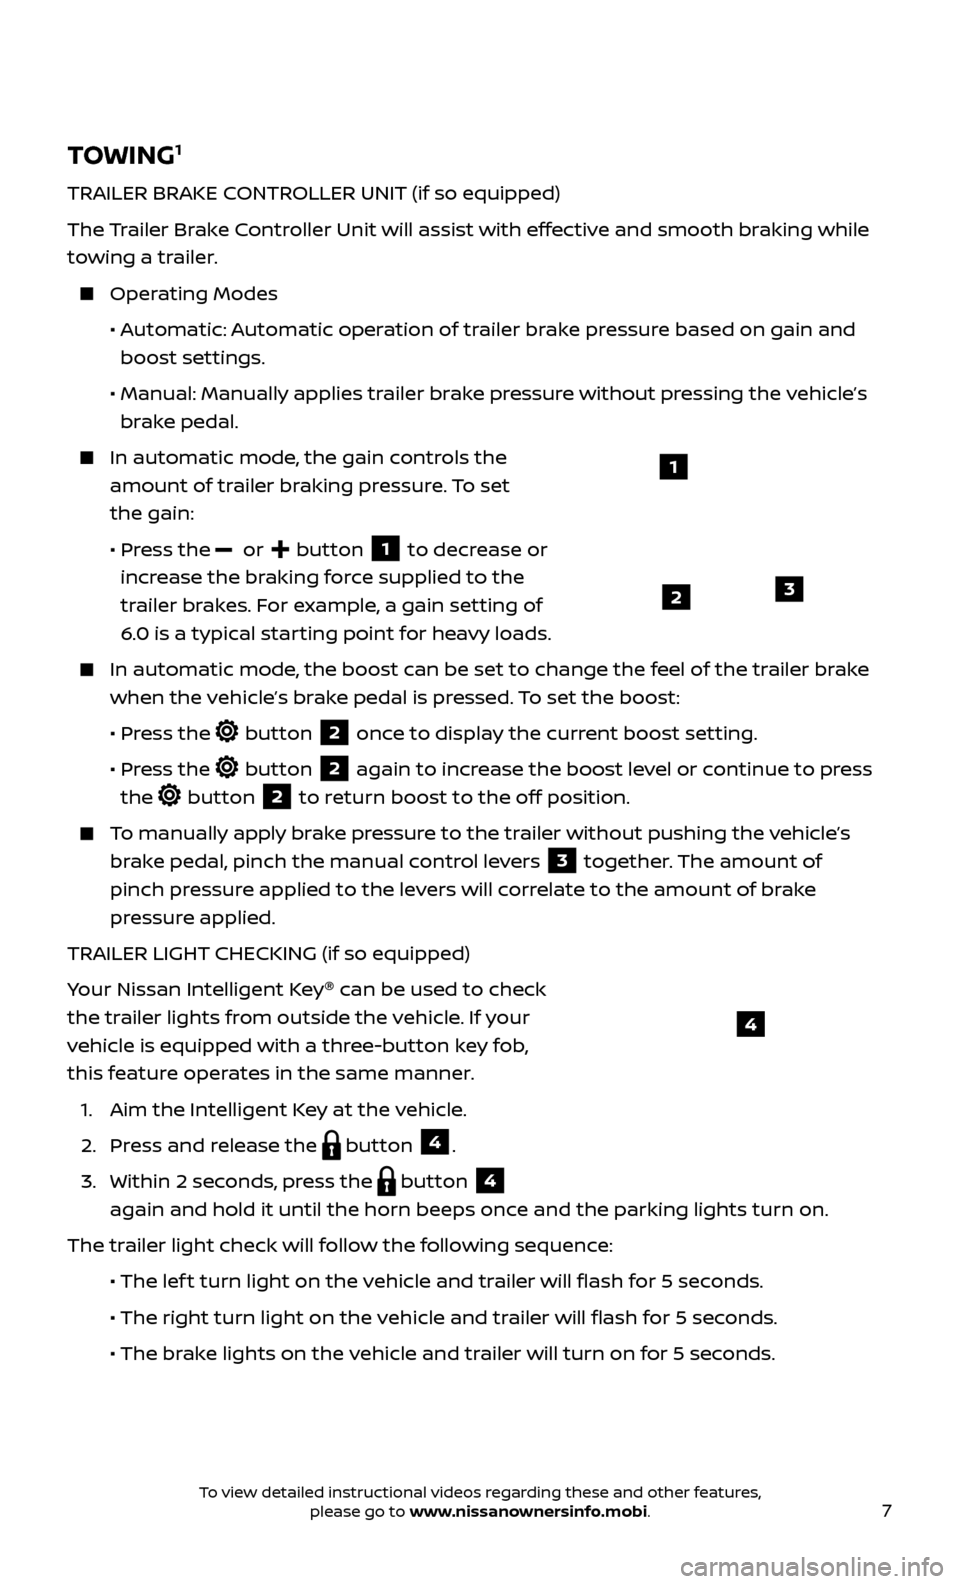
In automatic mode, the gain controls the
amount of trailer braking pressure. To set
the gain:
•
Pr
ess the
or button 1 to decrease or
increase the braking force supplied to the
trailer brakes. For example, a gain setting of
6.0 is a typical starting point for heavy loads.
In automatic mode, the boost can be set to change the feel of the trailer brake
when the vehicle’s brake pedal is pressed. To set the boost:
•
Pr
ess the
button 2 once to display the current boost setting.
•
Pr
ess the
button 2 again to increase the boost level or continue to press
the
button 2 to return boost to the off position.
To manually apply brake pressure to the trailer without pushing the vehicle’s brake pedal, pinch the manual control levers
3 together. The amount of
pinch pressure applied to the levers will correlate to the amount of brake
pressure applied.
TRAILER LIGHT CHECKING (if so equipped)
Your Nissan Intelligent Key ®
can be used to check
the trailer lights from outside the vehicle. If your
vehicle is equipped with a three-button key fob,
this feature operates in the same manner.
1. Aim the Intel
ligent Key at the vehicle.
2. Pr
ess and release the
button 4.
3.
Within 2 sec
onds, press the
button 4
again and hold it until the horn beeps once and the parking lights turn on.
The trailer light check will follow the following sequence:
• The lef
t turn light on the vehicle and trailer will flash for 5 seconds.
• The right turn light on the v
ehicle and trailer will flash for 5 seconds.
• The br
ake lights on the vehicle and trailer will turn on for 5 seconds.
1
23
4
To view detailed instructional videos regarding these and other features, please go to www.nissanownersinfo.mobi.
Page 10 of 40
8
NEW SYSTEM FEATURES
DIESEL PARTICULATE FILTER (DPF) (diesel models only)
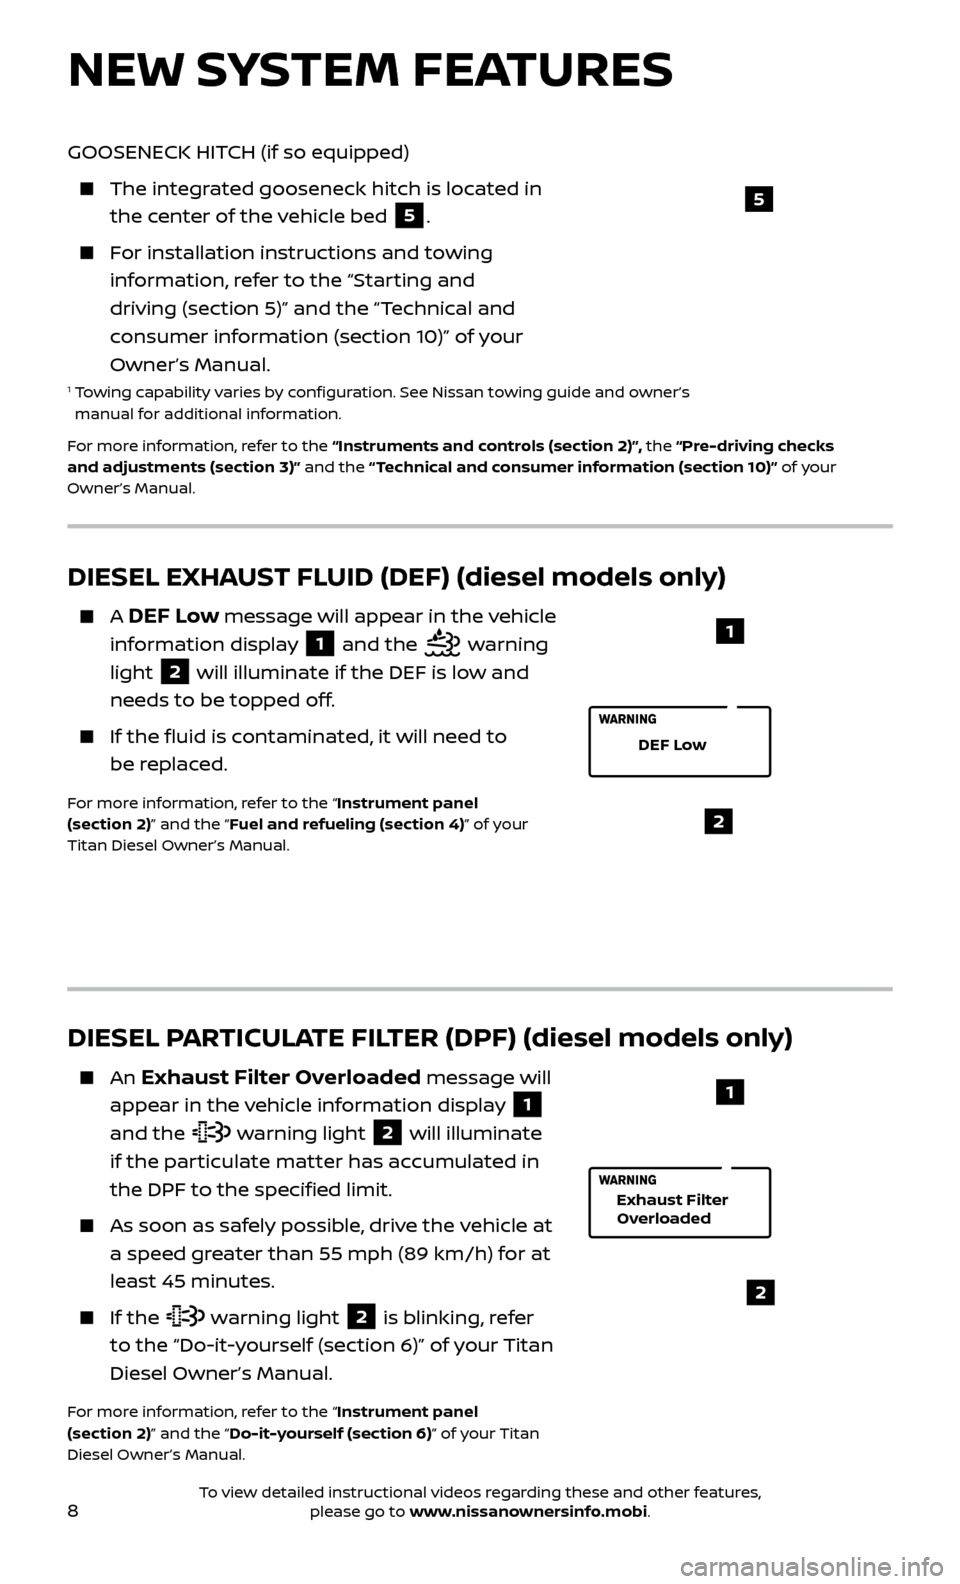
An Exhaust Filter Overloaded message will
appear in the vehicle information display
1
and the warning light 2 will illuminate
if the particulate matter has accumulated in
the DPF to the specified limit.
As soon as saf ely possible, drive the vehicle at
a speed greater than 55 mph (89 km/h) for at
least 45 minutes.
If the warning light 2 is blinking, refer
to the “Do-it-yourself (section 6)” of your Titan
Diesel Owner’s Manual.
For more information, refer to the “Instrument panel
(section 2)” and the “Do-it-yourself (section 6)” of your Titan
Diesel Owner’s Manual.
2
1
Exhaust Filter
Overloaded
DIESEL EXHAUST FLUID (DEF) (diesel models only)
A DEF Low message will appear in the vehicle
information display
1 and the warning
light
2 will illuminate if the DEF is low and
needs to be topped off.
If the fluid is c ontaminated, it will need to
be replaced.
For more information, refer to the “Instrument panel
(section 2)” and the “Fuel and refueling (section 4)” of your
Titan Diesel Owner’s Manual.2
DEF Low
1
GOOSENECK HITCH (if so equipped)
The integr ated gooseneck hitch is located in
the center of the vehicle bed
5.
For installation instructions and towing information, refer to the “Starting and
driving (section 5)” and the “Technical and
consumer information (section 10)” of your
Owner’s Manual.
1 Towing capability varies by configuration. See Nissan towing guide and owner’s manual for additional information.
For more information, refer to the “Instruments and controls (section 2)”, the “Pre-driving checks
and adjustments (section 3)” and the “ Technical and consumer information (section 10)” of your
Owner’s Manual.
5
To view detailed instructional videos regarding these and other features, please go to www.nissanownersinfo.mobi.
Page 17 of 40
15
REAR SEATS (if so equipped)
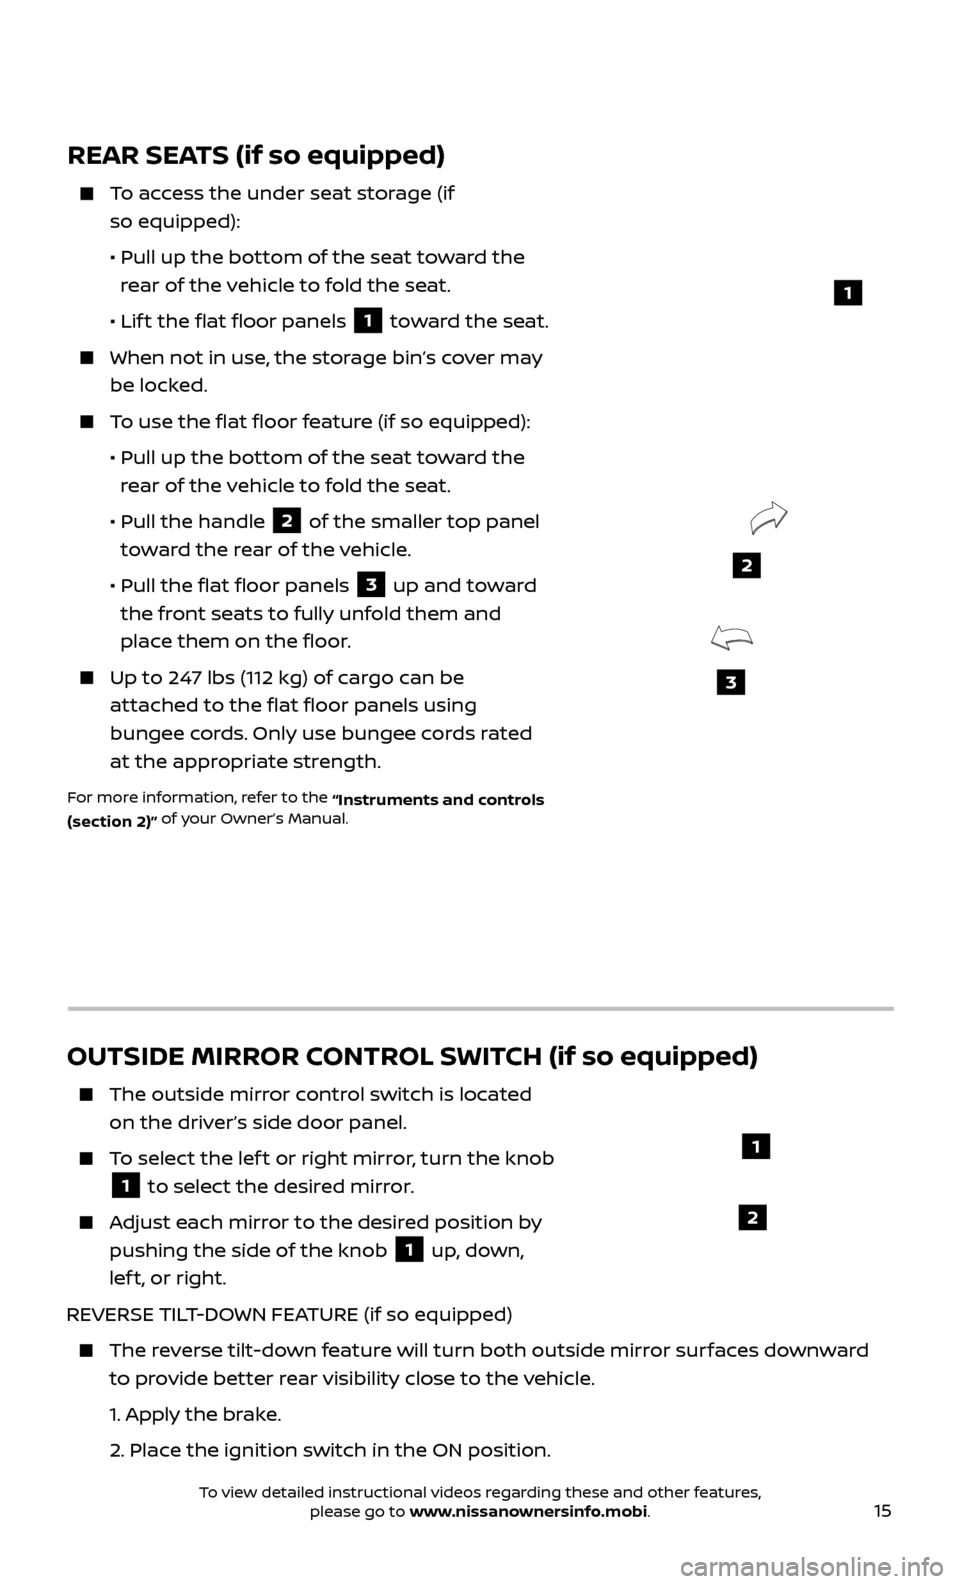
To access the under seat storage (if so equipped):
•
Pul
l up the bottom of the seat toward the
rear of the vehicle to fold the seat.
• Lif
t the flat floor panels
1 toward the seat.
When not in use, the storage bin’s cover may
be locked.
To use the flat floor feature (if so equipped):
•
Pul
l up the bottom of the seat toward the
rear of the vehicle to fold the seat.
•
Pul
l the handle
2 of the smaller top panel
toward the rear of the vehicle.
•
Pul
l the flat floor panels
3 up and toward
the front seats to fully unfold them and
place them on the floor.
Up to 247 lbs (112 kg) of cargo can be attached to the flat floor panels using
bungee cords. Only use bungee cords rated
at the appropriate strength.
For more information, refer to the “Instruments and controls
(section 2)” of your Owner’s Manual.
3
2
1
OUTSIDE MIRROR CONTROL SWITCH (if so equipped)
The outside mirr
or control switch is located
on the driver’s side door panel.
To select the lef t or right mirror, turn the knob
1 to select the desired mirror.
Adjust each mirror to the desired position by
pushing the side of the knob
1 up, down,
lef t, or right.
REVERSE TILT-DOWN FEATURE (if so equipped)
The reverse tilt-down feature will turn both outside mirror surfaces downward to provide better rear visibility close to the vehicle.
1.
Apply the brake.
2.
Place the ignition switch in the ON position.
1
2
To view detailed instructional videos regarding these and other features, please go to www.nissanownersinfo.mobi.
Page 26 of 40
24
VEHICLE INFORMATION DISPLAY
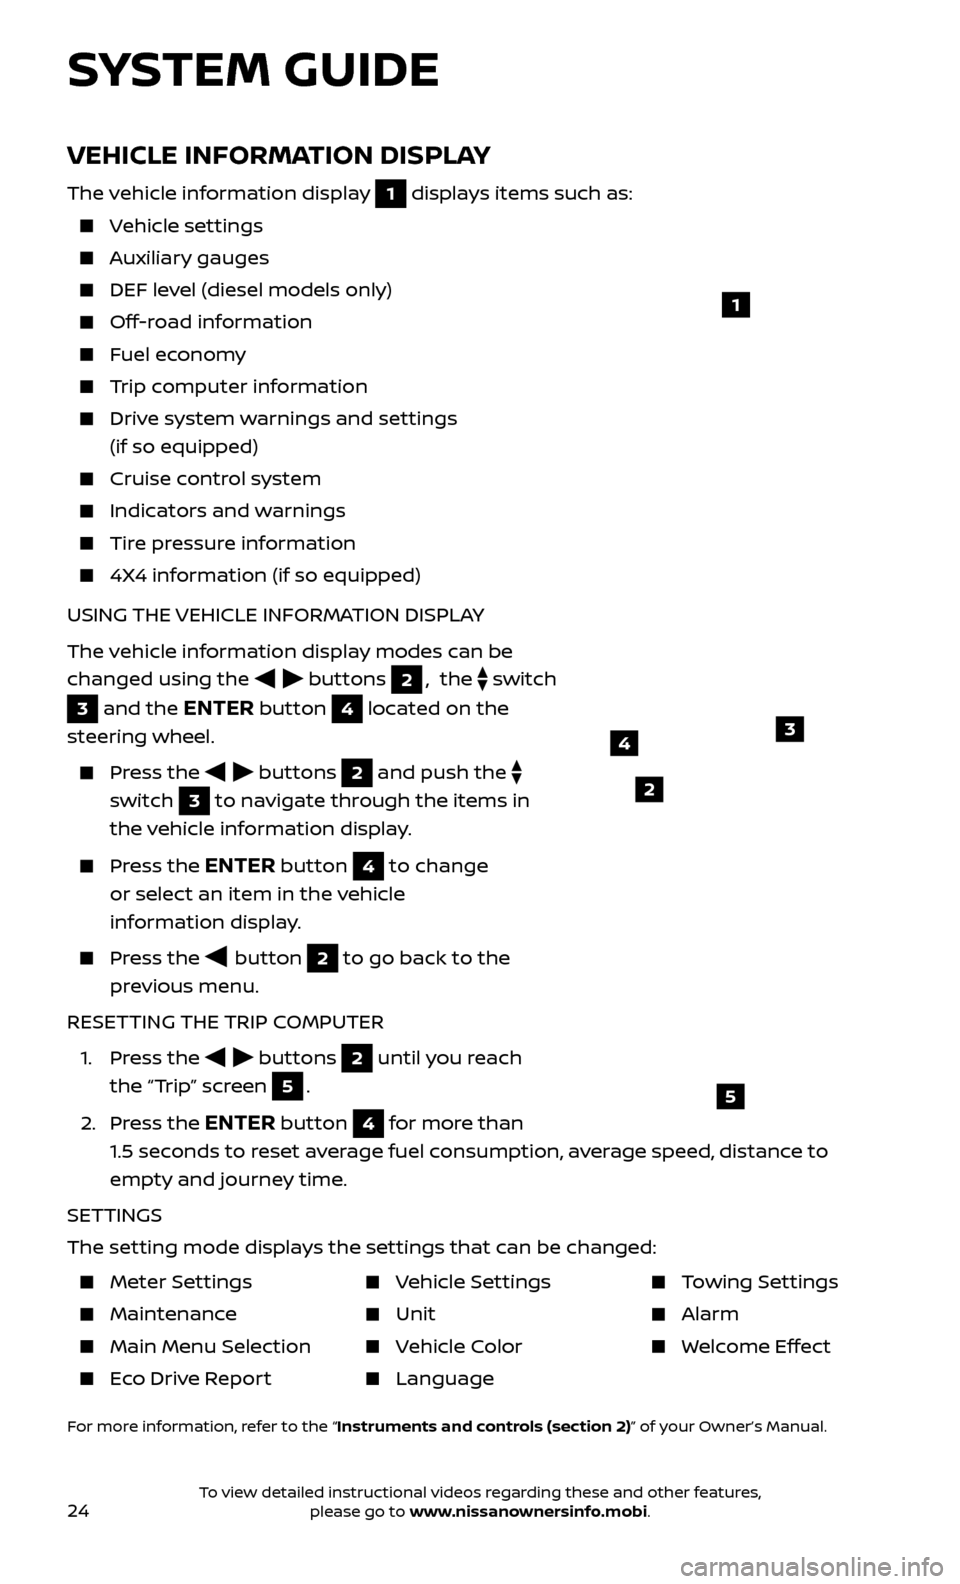
The vehicle information display 1 displays items such as:
Vehicle settings
Auxiliary gauges
DEF level (diesel models only)
Off-road information
Fuel economy
Trip computer information
Drive system warnings and settings (if so equipped)
Cruise control system
Indicators and warnings
Tire pressure information
4X4 information (if so equipped)
USING THE VEHICLE INFORMATION DISPLAY
The vehicle information display modes can be
changed using the
buttons 2, the switch
3 and the ENTER button 4 located on the
steering wheel.
Press the buttons 2 and push the
switch
3 to navigate through the items in
the vehicle information display.
Press the ENTER button 4 to change
or select an item in the vehicle
information display.
Press the button 2 to go back to the
previous menu.
RESETTING THE TRIP COMPUTER
1.
Press the
buttons 2 until you reach
the “Trip” screen
5.
2.
Press the
ENTER button 4 for more than
1.5 seconds to reset average fuel consumption, average speed, distance to
empty and journey time.
SETTINGS
The setting mode displays the settings that can be changed:
1
34
5
2
SYSTEM GUIDE
Meter Settings
Maintenance
Main Menu Selec tion
Eco Drive Report
Vehicle Settings
Unit
Vehicle Color
Language
Towing Settings
Alarm
Welcome Effect
For more information, refer to the “Instruments and controls (section 2)” of your Owner’s Manual.
To view detailed instructional videos regarding these and other features, please go to www.nissanownersinfo.mobi.