2017 NISSAN TITAN key
[x] Cancel search: keyPage 315 of 671
Interface
The interface for iPod® operation shown on the
vehicle’s audio system display screen is similar to
the iPod® interface. Use the
touch-screen,
BACK button or the scroll-
ing knob to navigate the menus on the screen.
When the iPod® is playing, touch the “Menu” key
to bring up the iPod® interface.
Depending on the iPod® model, the following
items may be available on the menu list screen.
For additional information, refer to the iPod®
Owner’s Manual regarding each menu item.
● Playlists ●
Artists
● Albums
● Genres
● Songs
● Composers
● Audiobooks
● Podcasts
● Update Music Library (if so equipped)
Shuffle and repeat play mode
While the iPod® is playing, the play pattern can
be altered so that songs are repeated or played
randomly.
Shuffle
Touch the “Shuffle” key to apply a random play
pattern to the iPod®. When the Shuffle mode is
active, the text is illuminated. Touching the
“Shuffle” key once more will display the “Shuffle
songs” key. To cancel Shuffle mode, touch the
“Shuffle” key again until the text is no longer
illuminated. Repeat
Touch the “Repeat” key to apply a repeat play
pattern to the iPod®. When the repeat mode is
active, the text is illuminated. Touching the “Re-
peat” key once more will display the “Repeat
song” key. To cancel Repeat mode, touch the
“Repeat” key again until the text is no longer
illuminated.
Seek buttons
Press the
orseek button to skip
backward or forward one track.
Press and hold the
orseek button
for 1.5 seconds while a track is playing to reverse
or fast forward the track being played. The track
plays at an increased speed while reversing or
fast forwarding. When the button is released, the
track returns to normal play speed.LHA2907
4-78Monitor, climate, audio, phone and voice recognition systems
Page 316 of 671
Scrolling menus
While navigating long lists of artists, albums or
songs in the music menu, it is possible to scroll
the list by the first character in the name. To
activate character indexing, touch and hold the
“A-Z” key in the upper right corner of the screen.
Turn the TUNE/SCROLL knob to choose the
number or letter to jump to in the list and then
press the ENTER/AUDIO button.
If no character is selected after a few seconds,
the display returns to normal.
BLUETOOTH® STREAMING AUDIO
WITHOUT NAVIGATION SYSTEM (if
so equipped)
If you have a compatible Bluetooth® audio de-
vice that is capable of playing audio files, the
device can be connected to the vehicle’s audio
system so that the audio files on the device play
through the vehicle’s speakers.
Connecting Bluetooth® audio
To connect your Bluetooth® audio device to the
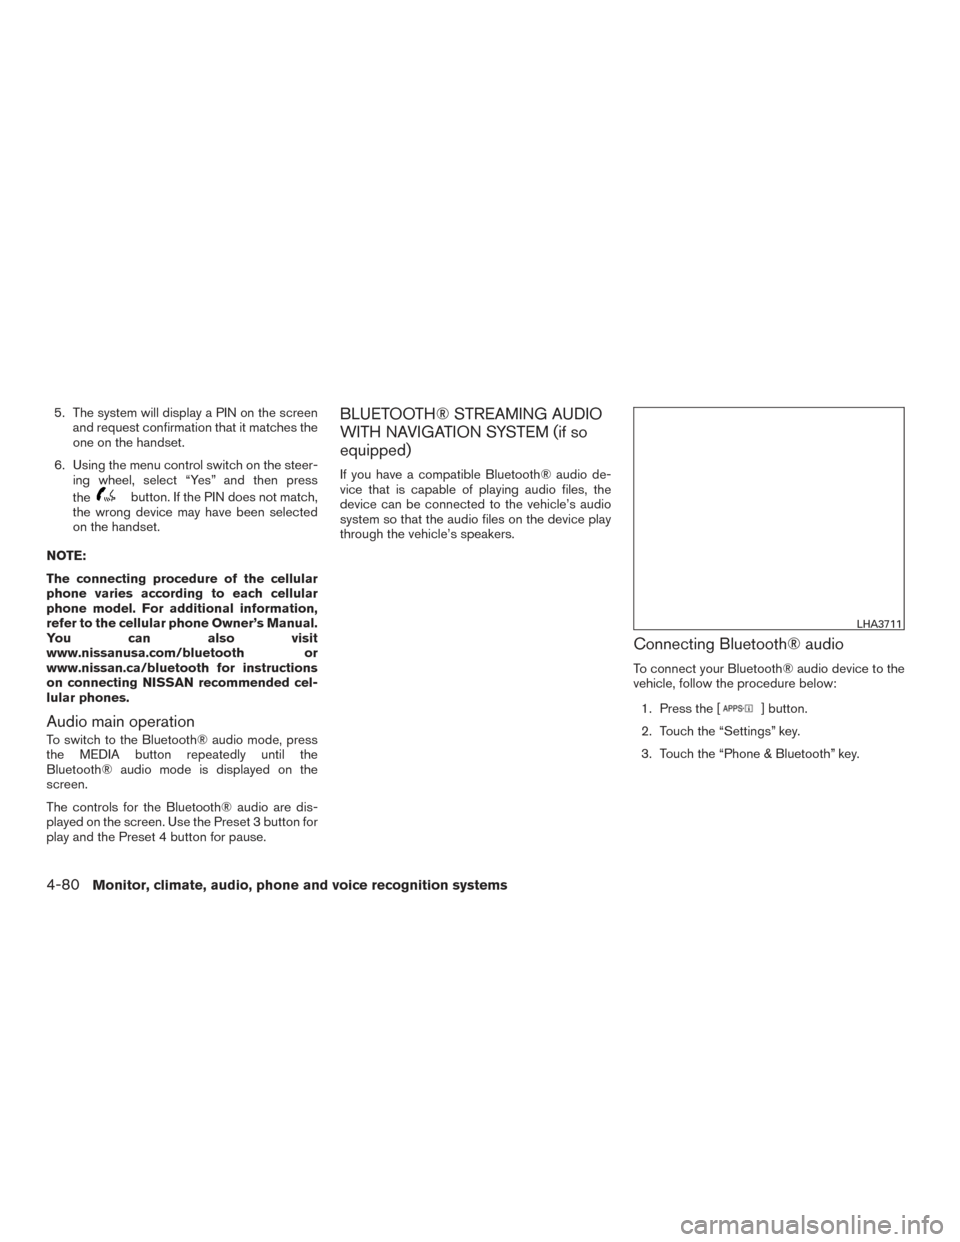
vehicle, follow the procedure below:1. Press the ENTER/SETTING button.
2. Select “Bluetooth”.
3. Select “Add Phone or Device”. This same screen can be accessed to remove, replace
or select a different Bluetooth® device.
4. The system acknowledges the command and asks you to initiate connecting from the
phone handset.
LHA2279LHA2775
Monitor, climate, audio, phone and voice recognition systems4-79
Page 317 of 671
5. The system will display a PIN on the screenand request confirmation that it matches the
one on the handset.
6. Using the menu control switch on the steer- ing wheel, select “Yes” and then press
the
button. If the PIN does not match,
the wrong device may have been selected
on the handset.
NOTE:
The connecting procedure of the cellular
phone varies according to each cellular
phone model. For additional information,
refer to the cellular phone Owner’s Manual.
You can also visit
www.nissanusa.com/bluetooth or
www.nissan.ca/bluetooth for instructions
on connecting NISSAN recommended cel-
lular phones.
Audio main operation
To switch to the Bluetooth® audio mode, press
the MEDIA button repeatedly until the
Bluetooth® audio mode is displayed on the
screen.
The controls for the Bluetooth® audio are dis-
played on the screen. Use the Preset 3 button for
play and the Preset 4 button for pause.
BLUETOOTH® STREAMING AUDIO
WITH NAVIGATION SYSTEM (if so
equipped)
If you have a compatible Bluetooth® audio de-
vice that is capable of playing audio files, the
device can be connected to the vehicle’s audio
system so that the audio files on the device play
through the vehicle’s speakers.
Connecting Bluetooth® audio
To connect your Bluetooth® audio device to the
vehicle, follow the procedure below: 1. Press the [
] button.
2. Touch the “Settings” key.
3. Touch the “Phone & Bluetooth” key.
LHA3711
4-80Monitor, climate, audio, phone and voice recognition systems
Page 318 of 671
4. Touch the “Connect New Device” key.
5. The system acknowledges the commandand asks you to initiate connecting from the
phone handset.
NOTE:
The connecting procedure of the cellular
phone varies according to each cellular
phone model. For additional information, re-
fer to the cellular phone Owner’s Manual. You
can also visit www.nissanusa.com/bluetooth
or www.nissan.ca/bluetooth for instructions
on connecting NISSAN recommended cellu-
lar phones.
Audio main operation
To switch to the Bluetooth® audio mode, press
the AUX button repeatedly until the Bluetooth®
audio mode is displayed on the screen.
The controls for the Bluetooth® audio are dis-
played on the screen.
CD CARE AND CLEANING
● Handle a CD by its edges. Do not bend the
disc. Never touch the surface of the disc.
● Always place the discs in the storage case
when they are not being used.
●
To clean a disc, wipe the surface from the center
to the outer edge using a clean, soft cloth. Do
not wipe the disc using a circular motion.
● Do not use a conventional record cleaner or
alcohol intended for industrial use.
● A new disc may be rough on the inner and
outer edges. Remove the rough edges by
rubbing the inner and outer edges with the
side of a pen or pencil as illustrated.
LHA2844LHA0049
Monitor, climate, audio, phone and voice recognition systems4-81
Page 323 of 671
Models without navigation system1. Connect a Siri Eyes Free enabled iPhone® to the vehicle. For additional information,
refer to “Initialization” in this section.
2. After the Bluetooth® connection is estab- lished, the switch operation select screen is
displayed.
3. Select “Short Press” or “Long Press” for Siri Eyes Free activation Switch action can also
be changed from the Bluetooth® settings
menu. For additional information, refer to
“Changing Siri Eyes Free Settings (models
without navigation system)” in this section.
OPERATING SIRI® EYES FREE
1. Push or push and hold theTALK
switch.
2. Speak your command and then listen to the Siri Eyes Free reply.
After starting Siri Eyes Free, push the
TALK switch again within 5 seconds of the end of
the Siri Eyes Free announcement to extend the
session.
Example 1 – Playing music
1. Push or push and hold the
TALK
switch.
2. Say “Play (artist name, song name, etc.)”. 3. Your vehicle will automatically change to
Bluetooth® Audio or iPod® mode* when
the music starts playing. Mode selection is
determined by the phone.
* If the iPhone® is also connected with the USB
cable.
If the audio track does not start playing automati-
cally after Siri Eyes Free ends, try changing the
track or audio source to resume playback.
NOTE:
For best results, use the native music app.
Performance of music control function
while using Podcasts, Audiobook or other
3rd party music apps may vary and is con-
trolled by the iPhone®.
Example 2 – Replying to text messages 1. If a compatible iPhone® is connected and “Show Notifications” of the iPhone® set-
tings is enabled, the vehicle will display a
notification for new incoming text messages.
2. After reading the message, push or push and hold the
TALK switch to reply
using Siri Eyes Free.
3. After a beep sounds, say “Text message” or a similar command to reply using Siri Eyes
Free.
CHANGING SIRI® EYES FREE
SETTINGS (models with navigation
system)
Settings for Siri® Eyes Free can be found in the
Bluetooth settings menu. For additional informa-
tion, refer to “Bluetooth® settings” in this section.
1. Press the [
] button.
2. Touch the “Settings” key.
3. Touch the “Phone & Bluetooth” key.
4. Touch the “Phone settings” key.
5. Select “Short Press” or “Long Press” to set the activation.
4-86Monitor, climate, audio, phone and voice recognition systems
Page 331 of 671
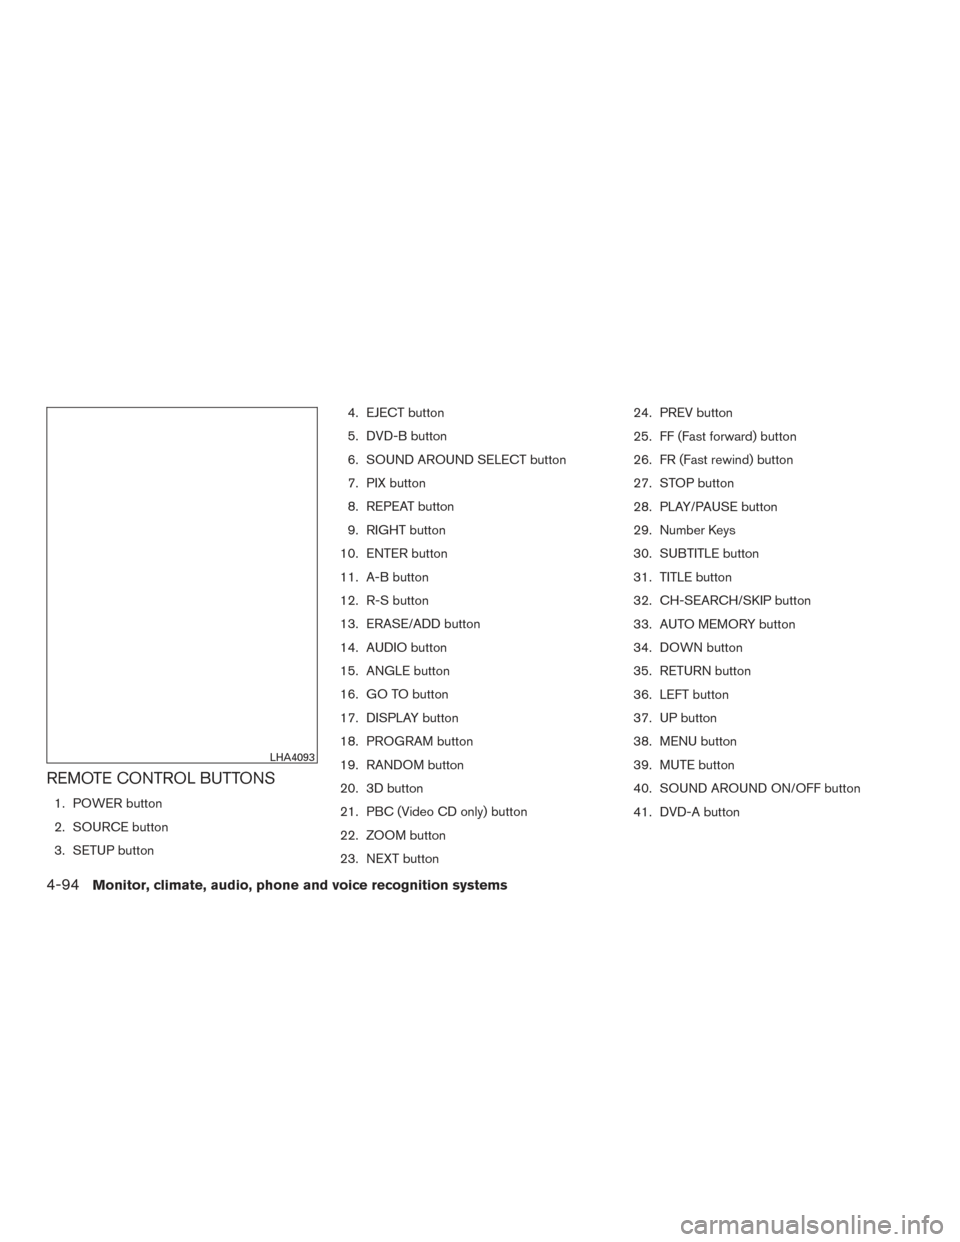
REMOTE CONTROL BUTTONS
1. POWER button
2. SOURCE button
3. SETUP button4. EJECT button
5. DVD-B button
6. SOUND AROUND SELECT button
7. PIX button
8. REPEAT button
9. RIGHT button
10. ENTER button
11. A-B button
12. R-S button
13. ERASE/ADD button
14. AUDIO button
15. ANGLE button
16. GO TO button
17. DISPLAY button
18. PROGRAM button
19. RANDOM button
20. 3D button
21. PBC (Video CD only) button
22. ZOOM button
23. NEXT button 24. PREV button
25. FF (Fast forward) button
26. FR (Fast rewind) button
27. STOP button
28. PLAY/PAUSE button
29. Number Keys
30. SUBTITLE button
31. TITLE button
32. CH-SEARCH/SKIP button
33. AUTO MEMORY button
34. DOWN button
35. RETURN button
36. LEFT button
37. UP button
38. MENU button
39. MUTE button
40. SOUND AROUND ON/OFF button
41. DVD-A button
LHA4093
4-94Monitor, climate, audio, phone and voice recognition systems
Page 333 of 671
3D button
Press this button to select between several audio
effects. DVD mode: Concert, Living Room, Hall,
Bathroom, Cave, Arena, Church, and Off.
PBC (Video CD only) button
Press this button to run the playback control on or
off.
ZOOM button
Press this button to zoom in or out when display-
ing images or playing DVDs. The zoom range for
images is from 50% to 200%. The zoom range
for DVDs is from 1/4 size to 4x the original size.
NEXT button
Press this button to select the next chapter, track,
or file.
PREV button
Press this button to select the previous chapter,
track, or file.
FF (Fast foward) button
Press this button to search media forwards.
FR (Fast rewind) button
Press this button to search media backwards.
STOP button
Press this button once to stop playback (press
play to resume playback) . Press this button twice
to perform a full stop (press play to start playback
from the beginning) .
PLAY/PAUSE button
Press this button to begin media playback. Press
this button again to pause media playback.
Number Keys
0—9
SUBTITLE button
Press this button to select and display subtitles
(this function only applies to DVD titles that sup-
port subtitles) .
TITLE button
Press this button to navigate the title menu if
included on the disc.
CH- SEARCH/SKIP button
Non-functioning.
AUTO MEMORY button
Non-functioning.
DOWN button
Press this button to navigate down when display-
ing a menu or file list.
RETURN button
Press this button to return to a previous menu
screen.
LEFT button
Press this button to navigate left when displaying
a menu or file list.
UP button
Press this button to navigate up when displaying
a menu or file list.
MENU button
Press this button to go to the root menu if in-
cluded on the disc.
MUTE button
Press this button to mute the audio when playing
discs or playing files from a USB device. Press
this button again to resume audio.
SOUND AROUND ON/OFF
Turns the FM transmitter ON/OFF.
4-96Monitor, climate, audio, phone and voice recognition systems
Page 342 of 671
Repeat Modes
To access the repeat mode options, press the
REPEAT button on the remote control. The re-
peat mode options are as follows:●
REPEAT ALL: Repeat the entire disc
(default) .
●
REPEAT ONE: Repeat the current
track.
● REPEAT OFF: Playback stops after the disc
in its entirety.
Random Mode
You can choose what order the tracks will be
played. To access the random play mode, press
the RANDOM button on the remote control. All
tracks on the disc will playback in random order.
Press RANDOM again to cancel random mode.
Direct Track Access
Press the number keys on the remote control
(0–9) to access a track directly. For example, to
go to track 14, press “1”,”4”, then ENTER on the
remote control.
PLAYING AUDIO FILES
MP3 and WMA are formats for storing digital
audio. A CD quality song can be compressed into
the MP3 or WMA format with very little loss of
quality, while talking up much less storage space.
Encoded discs and USB devices that include
MP3 or WMA audio files can be played on this
system.
Insert a disc or USB device into the unit and
select monitor A mode (if using monitor A) or
monitor B (if using monitor B) using the front
panel controls or the remote control.
Using a USB Device
Insert a USB device into the USB connection
port. When inserting a USB device, the top side
of the devices should face upwards.
When an MP3/WMA encoded disc or USB de-
vice is inserted, the information screen appears
automatically and playback will begin.
Display
During audio file playback, press the DISPLAY
button on the remote control to select between
the file list and currently playing file.
Selecting Files
1. To change files when a file is playing, press
the
orbuttons on the re-
mote control to display the file list, and then
press the
orbuttons to
select the desired file.
2. Once the desired file is highlighted, press the ENTER button on the remote control to
select it.
LHA3865
Monitor, climate, audio, phone and voice recognition systems4-105