Page 466 of 671

REMOVING SPOTS
Remove tar and oil spots, industrial dust, insects,
and tree sap as quickly as possible from the
surface of the paint to avoid lasting damage or
staining. Special cleaning products are available
at a NISSAN dealer or any automotive accessory
store. It is recommended that you visit a NISSAN
dealer for these products.
UNDERBODY
In areas where road salt is used in winter, it is
necessary to clean the underbody regularly in
order to prevent dirt and salt from building up and
causing the acceleration of corrosion on the un-
derbody and suspension. Before the winter pe-
riod and again in the spring, the underseal must
be checked and, if necessary, re-treated.
GLASS
Use glass cleaner to remove smoke and dust film
from the glass surfaces. It is normal for glass to
become coated with a film after the vehicle is
parked in the hot sun. Glass cleaner and a soft
cloth will easily remove this film.
CAUTION
When cleaning the inside of the windows,
do not use sharp-edged tools, abrasive
cleaners or chlorine-based disinfectant
cleaners. They could damage the electrical
conductors, radio antenna elements or
rear window defroster elements.
ALUMINUM ALLOY WHEELS (if so
equipped)
Wash the wheels regularly with a sponge damp-
ened in a mild soap solution, especially during
winter months in areas where road salt is used. If
not removed, road salt can discolor the wheels.
CAUTION
Follow the directions below to avoid
staining or discoloring the wheels:
●Do not use a cleaner that uses strong
acid or alkali contents to clean the
wheels.
● Do not apply wheel cleaners to the
wheels when they are hot. The wheel
temperature should be the same as am-
bient temperature. ●
Do not use chrome cleaner on any
wheel. Doing so can damage the
chrome-like coating on the wheel.
● Rinse the wheel to completely remove
the cleaner within 15 minutes after the
cleaner is applied.
CHROME PARTS
Clean all chrome parts regularly with a non-
abrasive chrome polish to maintain the finish.
CAUTION
Do not use chrome cleaner on any wheel.
Doing so can damage the chrome-like
coating on the wheel.
TIRE DRESSINGS
NISSAN does not recommend the use of tire
dressings. Tire manufacturers apply a coating to
the tires to help reduce discoloration of the rub-
ber. If a tire dressing is applied to the tires, it may
react with the coating and form a compound. This
compound may come off the tire while driving and
stain the vehicle paint.
Appearance and care7-3
Page 472 of 671
Wheels and tires................................. 8-32
Tire pressure .................................. 8-32
Tire labeling. . ................................. 8-36Types of tires
.................................. 8-38
Tire chains . . . ................................. 8-39
Changing wheels and tires .....................8-40
Page 503 of 671
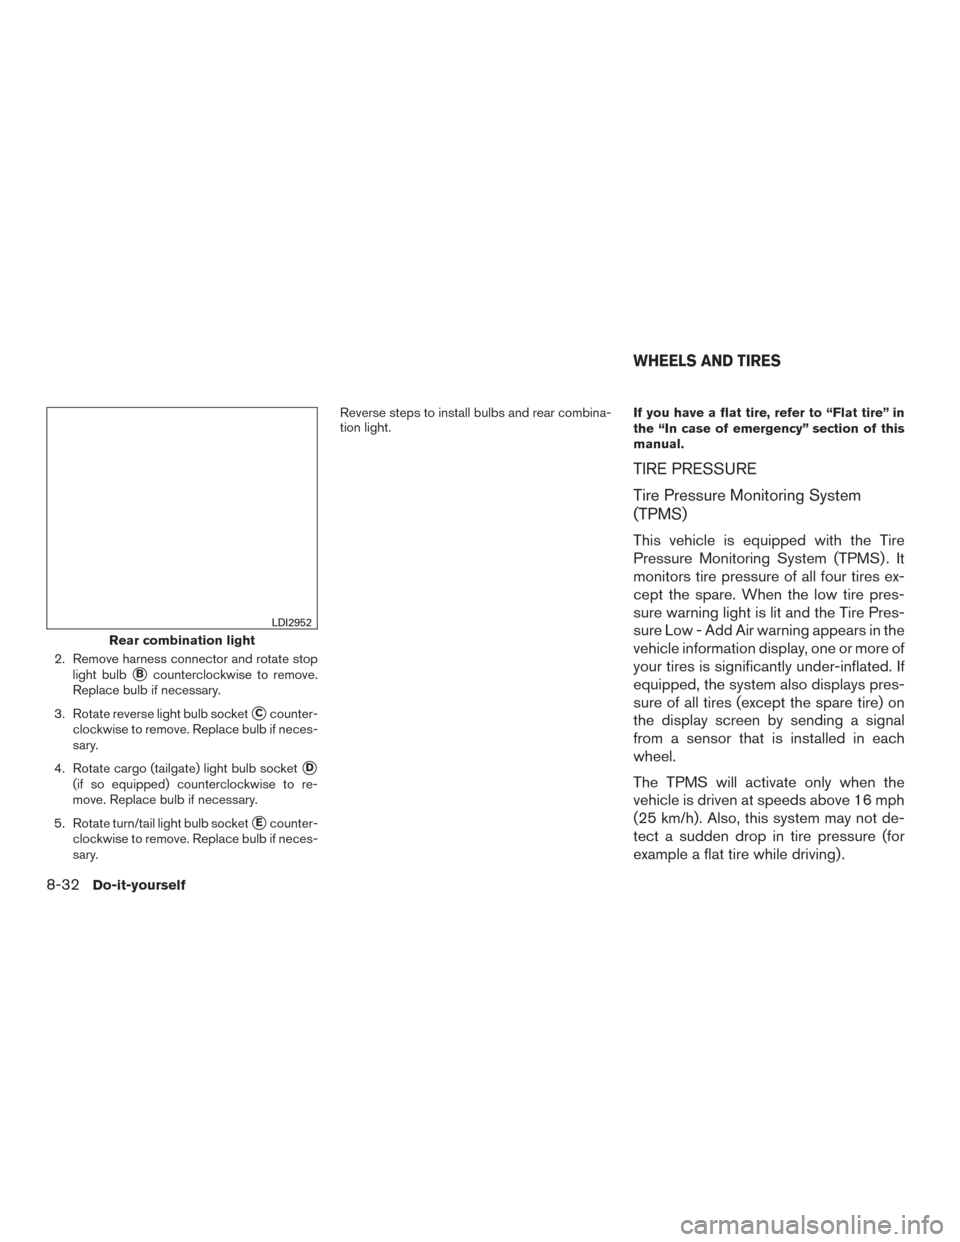
2. Remove harness connector and rotate stoplight bulb
�Bcounterclockwise to remove.
Replace bulb if necessary.
3. Rotate reverse light bulb socket
�Ccounter-
clockwise to remove. Replace bulb if neces-
sary.
4. Rotate cargo (tailgate) light bulb socket
�D
(if so equipped) counterclockwise to re-
move. Replace bulb if necessary.
5. Rotate turn/tail light bulb socket
�Ecounter-
clockwise to remove. Replace bulb if neces-
sary. Reverse steps to install bulbs and rear combina-
tion light.
If you have a flat tire, refer to “Flat tire” in
the “In case of emergency” section of this
manual.
TIRE PRESSURE
Tire Pressure Monitoring System
(TPMS)
This vehicle is equipped with the Tire
Pressure Monitoring System (TPMS) . It
monitors tire pressure of all four tires ex-
cept the spare. When the low tire pres-
sure warning light is lit and the Tire Pres-
sure Low - Add Air warning appears in the
vehicle information display, one or more of
your tires is significantly under-inflated. If
equipped, the system also displays pres-
sure of all tires (except the spare tire) on
the display screen by sending a signal
from a sensor that is installed in each
wheel.
The TPMS will activate only when the
vehicle is driven at speeds above 16 mph
(25 km/h). Also, this system may not de-
tect a sudden drop in tire pressure (for
example a flat tire while driving) .
Rear combination light
LDI2952
WHEELS AND TIRES
8-32Do-it-yourself
Page 504 of 671

For additional information, refer to “Warn-
ing lights, indicator lights and audible re-
minders” in the “Instruments and controls”
section, “Tire Pressure Monitoring Sys-
tem (TPMS)” in the “Starting and driving”
section, and “Flat tire” in the “In case of
emergency” section of this manual.
Tire inflation pressure
Check the tire pressures (including the
spare) often and always prior to long dis-
tance trips. The recommended tire pres-
sure specifications are shown on the
F.M.V.S.S./C.M.V.S.S. certification label
or the Tire and Loading Information label
under the “Cold Tire Pressure” heading.
The Tire and Loading Information label is
affixed to the driver side center pillar. Tire
pressures should be checked regularly
because:● Most tires naturally lose air over time.
● Tires can lose air suddenly when
driven over potholes or other objects
or if the vehicle strikes a curb while
parking. The tire pressures should be checked
when the tires are cold. The tires are
considered COLD after the vehicle has
been parked for 3 or more hours, or driven
less than 1 mile (1.6 km) at moderate
speeds.
The TPMS with Easy Fill Tire Alert pro-
vides visual and audible signals outside
the vehicle for inflating tires to the recom-
mended COLD tire pressure. For addi-
tional information, refer to “TPMS with
Easy Fill Tire Alert” in the “Starting and
driving” section of this manual.
Incorrect tire pressure, including un-
der inflation, may adversely affect
tire life and vehicle handling.
WARNING
● Improperly inflated tires can fail
suddenly and cause an accident.
● The Gross Vehicle Weight Rating
(GVWR) is located on the
F.M.V.S.S./C.M.V.S.S. certifica-
tion label. The vehicle weight ca-
pacity is indicated on the Tire and Loading Information label. Do
not load your vehicle beyond this
capacity. Overloading your ve-
hicle may result in reduced tire
life, unsafe operating conditions
due to premature tire failure, or
unfavorable handling character-
istics and could also lead to a
serious accident. Loading beyond
the specified capacity may also
result in failure of other vehicle
components.
● Before taking a long trip, or
whenever you heavily load your
vehicle, use a tire pressure gauge
to ensure that the tire pressures
are at the specified level.
● For additional information re-
garding tires, refer to “Important
Tire Safety Information” (US) or
“Tire Safety Information”
(Canada) in the Warranty Infor-
mation Booklet.
Do-it-yourself8-33
Page 505 of 671
Tire and loading information label
�1Seating capacity: The maximum num-
ber of occupants that can be seated
in the vehicle.
�2Vehicle load limit: For additional infor-
mation, refer to “Vehicle loading infor-
mation” in the “Technical and con-
sumer information” section of this
manual.
�3Original tire size: The size of the tires
originally installed on the vehicle at
the factory.
�4Cold tire pressure: Inflate the tires to
this pressure when the tires are cold.
Tires are considered COLD after the
vehicle has been parked for 3 or more
hours, or driven less than 1 mile
(1.6 km) at moderate speeds. The
recommended cold tire inflation is set
by the manufacturer to provide the
best balance of tire wear, vehicle
handling, driveability, tire noise, etc.,
up to the vehicle’s GVWR.
�5Tire size - refer to “Tire labeling” in
this section.
�6Spare tire size.
LDI2926
8-34Do-it-yourself
Page 506 of 671

Checking tire pressure
1. Remove the valve stem cap from thetire.
2. Press the pressure gauge squarely onto the valve stem. Do not press too
hard or force the valve stem side-
ways, or air will escape. If the hissing
sound of air escaping from the tire is
heard while checking the pressure,
reposition the gauge to eliminate this
leakage.
3. Remove the gauge. 4. Read the tire pressure on the gauge
stem and compare to the specifica-
tion shown on the Tire and Loading
Information label.
5. Add air to the tire as needed. If too much air is added, press the core of
the valve stem briefly with the tip of
the gauge stem to release pressure.
Recheck the pressure and add or
release air as needed.
6. Install the valve stem cap.
7. Check the pressure of all other tires, including the spare.Size Cold Tire Inflation
Pressure
Front Original
Tire:
265/70R18
P265/70R18
P275/70R20
P275/70R18
LT245/75R17
LT275/65R18
LT265/60R20 250 kPa, 36 psi
250 kPa, 36 psi
250 kPa, 36 psi
240 kPa, 35 psi
450 kPa, 65 psi
450 kPa, 65 psi
450 kPa, 65 psi
Size
Cold Tire Inflation
Pressure
Rear Original Tire:
265/70R18
P265/70R18
P275/70R20
P275/70R18
LT245/75R17
LT275/65R18
LT265/60R20 250 kPa, 36 psi
250 kPa, 36 psi
250 kPa, 36 psi
240 kPa, 35 psi
500 kPa, 73 psi
450 kPa, 65 psi
480 kPa, 70 psi
Spare Tire:
265/70R18
P265/70R18
P275/70R20
P275/70R18
LT245/75R17
LT275/65R18
LT265/60R20 250 kPa, 36 psi
250 kPa, 36 psi
250 kPa, 36 psi
240 kPa, 35 psi
500 kPa, 73 psi
450 kPa, 65 psi
480 kPa, 70 psi
LDI0393
Do-it-yourself8-35
Page 507 of 671
TIRE LABELING
Federal law requires tire manufacturers to
place standardized information on the
sidewall of all tires. This information iden-
tifies and describes the fundamental
characteristics of the tire and also pro-
vides the tire identification number (TIN)
for safety standard certification. The TIN
can be used to identify the tire in case of a
recall.
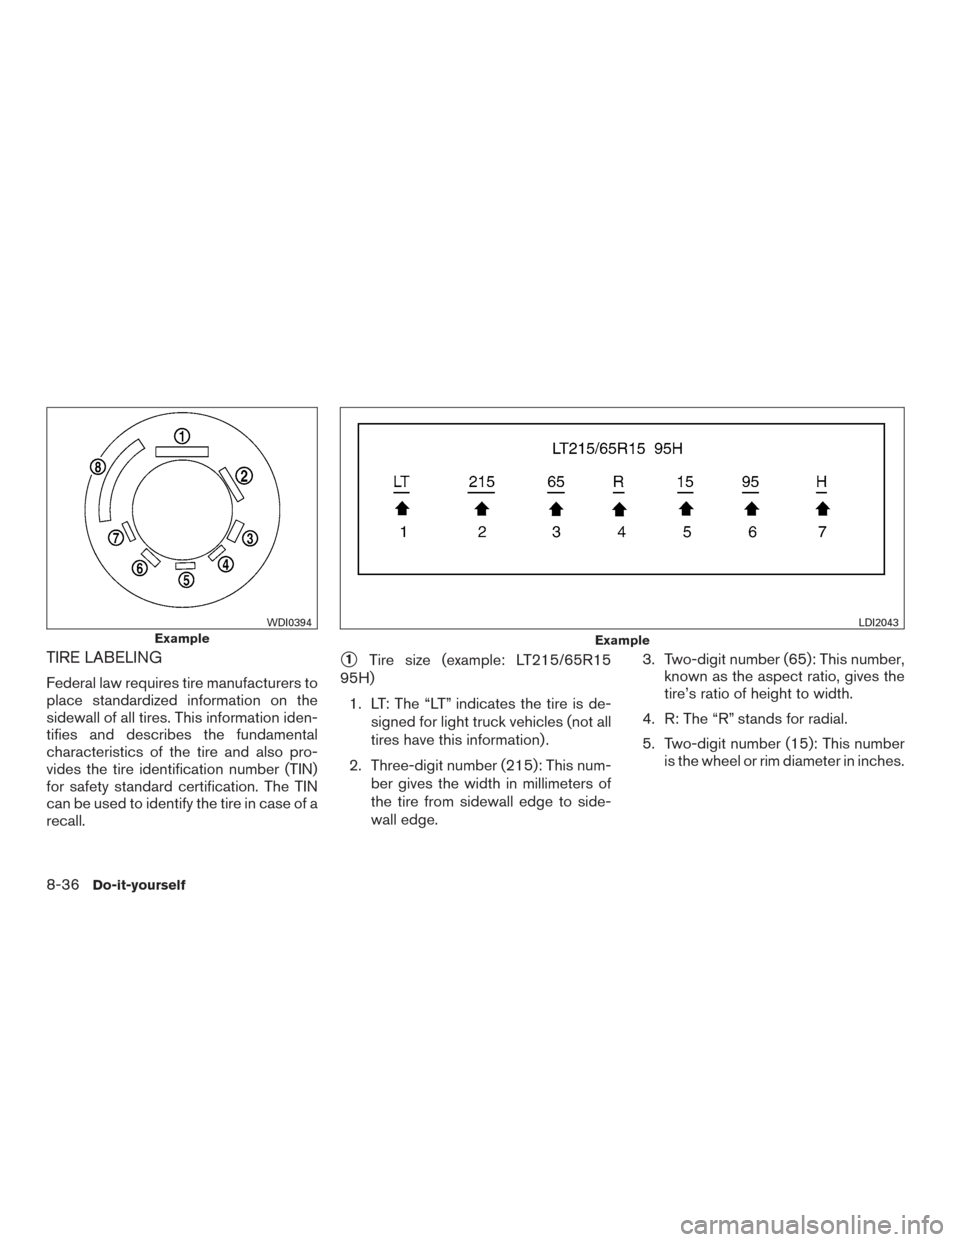
�1Tire size (example: LT215/65R15
95H)
1. LT: The “LT” indicates the tire is de- signed for light truck vehicles (not all
tires have this information) .
2. Three-digit number (215): This num- ber gives the width in millimeters of
the tire from sidewall edge to side-
wall edge. 3. Two-digit number (65): This number,
known as the aspect ratio, gives the
tire’s ratio of height to width.
4. R: The “R” stands for radial.
5. Two-digit number (15): This number is the wheel or rim diameter in inches.
Example
WDI0394
Example
LDI2043
8-36Do-it-yourself
Page 508 of 671
6. Two- or three-digit number (95): Thisnumber is the tire’s load index. It is a
measurement of how much weight
each tire can support. You may not
find this information on all tires be-
cause it is not required by law.
7. H: Tire speed rating. You should not drive the vehicle faster than the tire
speed rating.
�2TIN (Tire Identification Number) for a
new tire (example: DOT XX XX XXX
XXXX)
1. DOT: Abbreviation for the “Depart- ment Of Transportation”. The symbol
can be placed above, below or to the
left or right of the Tire Identification
Number.
2. Two-digit code: Manufacturer’s identification mark.
3. Two-digit code: Tire size. 4. Three-digit code: Tire type code
(Optional) .
5. Four numbers represent the week and year the tire was built. For ex-
ample, the numbers 3103 means the
31st week of 2003. If these numbers
are missing then look on the other
sidewall of the tire.
Example
LDI2786
Do-it-yourself8-37