2017 NISSAN TITAN ECO mode
[x] Cancel search: ECO modePage 134 of 671
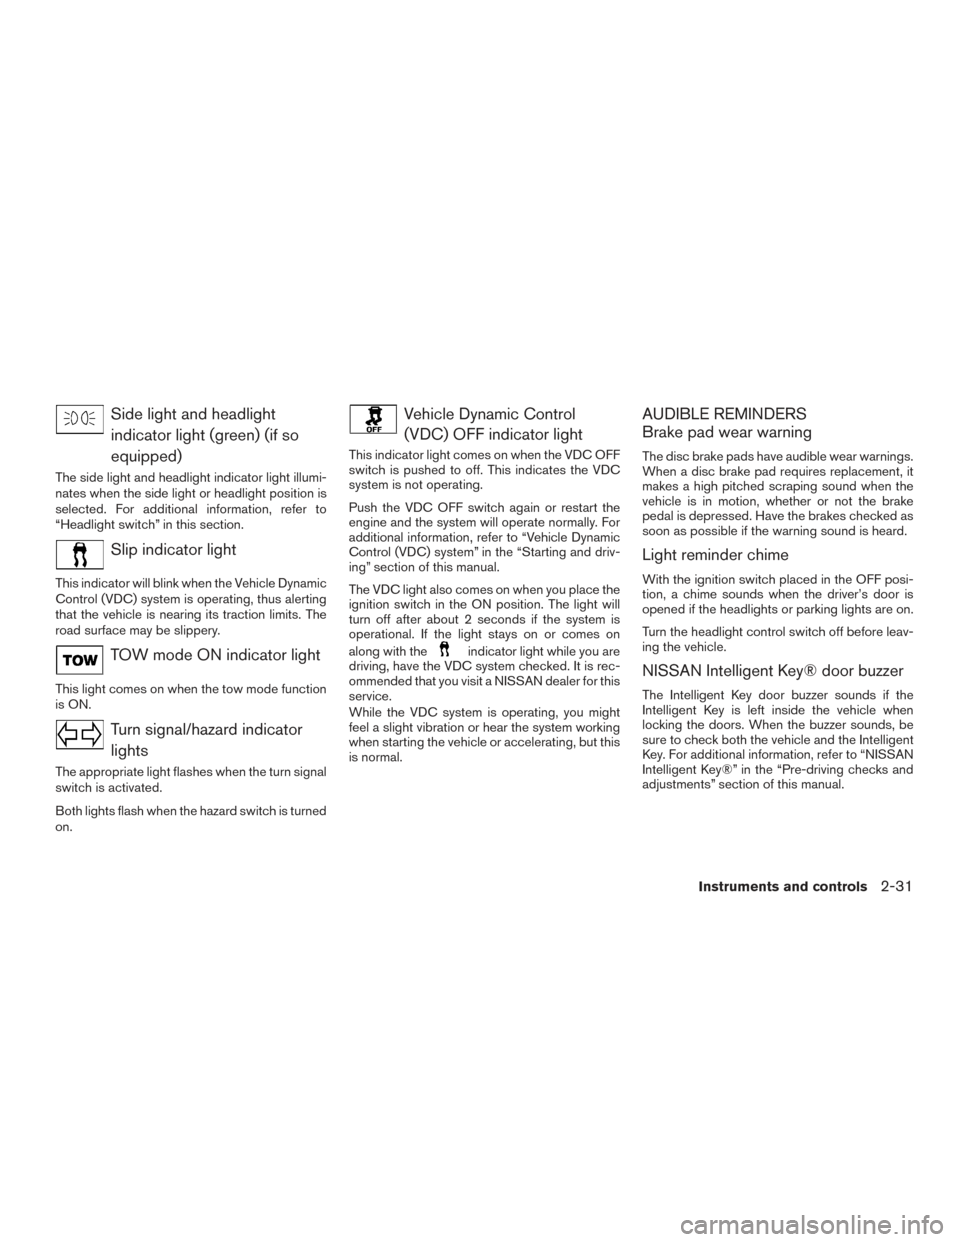
Side light and headlightindicator light (green) (if so
equipped)
The side light and headlight indicator light illumi-
nates when the side light or headlight position is
selected. For additional information, refer to
“Headlight switch” in this section.
Slip indicator light
This indicator will blink when the Vehicle Dynamic
Control (VDC) system is operating, thus alerting
that the vehicle is nearing its traction limits. The
road surface may be slippery.
TOW mode ON indicator light
This light comes on when the tow mode function
is ON.
Turn signal/hazard indicatorlights
The appropriate light flashes when the turn signal
switch is activated.
Both lights flash when the hazard switch is turned
on.
Vehicle Dynamic Control(VDC) OFF indicator light
This indicator light comes on when the VDC OFF
switch is pushed to off. This indicates the VDC
system is not operating.
Push the VDC OFF switch again or restart the
engine and the system will operate normally. For
additional information, refer to “Vehicle Dynamic
Control (VDC) system” in the “Starting and driv-
ing” section of this manual.
The VDC light also comes on when you place the
ignition switch in the ON position. The light will
turn off after about 2 seconds if the system is
operational. If the light stays on or comes on
along with the
indicator light while you are
driving, have the VDC system checked. It is rec-
ommended that you visit a NISSAN dealer for this
service.
While the VDC system is operating, you might
feel a slight vibration or hear the system working
when starting the vehicle or accelerating, but this
is normal.
AUDIBLE REMINDERS
Brake pad wear warning
The disc brake pads have audible wear warnings.
When a disc brake pad requires replacement, it
makes a high pitched scraping sound when the
vehicle is in motion, whether or not the brake
pedal is depressed. Have the brakes checked as
soon as possible if the warning sound is heard.
Light reminder chime
With the ignition switch placed in the OFF posi-
tion, a chime sounds when the driver’s door is
opened if the headlights or parking lights are on.
Turn the headlight control switch off before leav-
ing the vehicle.
NISSAN Intelligent Key® door buzzer
The Intelligent Key door buzzer sounds if the
Intelligent Key is left inside the vehicle when
locking the doors. When the buzzer sounds, be
sure to check both the vehicle and the Intelligent
Key. For additional information, refer to “NISSAN
Intelligent Key®” in the “Pre-driving checks and
adjustments” section of this manual.
Instruments and controls2-31
Page 136 of 671
The ENTER button also controls audio functions.
For additional information, refer to “Steering
wheel switch for audio control” in the “Monitor,
climate, audio, phone and voice recognition sys-
tems” section of this manual.
STARTUP DISPLAY
When the vehicle is placed in the ON or ACC (if
so equipped) position, the vehicle information
display may display the following screens:● Home
● Off Road
● Auxiliary Gauges (if so equipped)
● DEF Level (if so equipped)
● Trip
● Fuel Economy
● Navigation (if so equipped)
● Audio
● Driving Aids (if so equipped)
● Tire Pressures
● Warning Confirmation
● Settings Warning Confirmation will only display if there are
any warnings present. For additional information,
refer to “Vehicle information display warnings and
indicators” in this section.
To control which items display in the vehicle
information display, refer to “Settings” in this sec-
tion.
SETTINGS
The setting mode allows you to change the infor-
mation displayed in the vehicle information dis-
play:
● Driver Assistance (if so equipped)
● Meter Settings
● Vehicle Settings
● Towing Settings (if so equipped)
● Alarm (if so equipped)
● Maintenance
● Unit
● Language
● Factory Reset
Instruments and controls2-33
Page 145 of 671
Low Fuel
This warning illuminates when the fuel level in the
fuel tank is getting low. Refuel as soon as it is
convenient, preferably before the fuel gauge
reaches 0 (Empty) .There will be a small re-
serve of fuel in the tank when the fuel
gauge needle reaches 0 (Empty) .
Oil Level Low (For Diesel engines only)
If the Oil Level Low indicator is displayed, the
engine oil level is low. If the low level reminder is
displayed, check the level using the engine oil
dipstick.
CAUTION
The oil level should be checked regularly
using the engine oil dipstick. Operating
with an insufficient amount of oil can
damage the engine and such damage is
not covered by the warranty.
Low Oil Pressure Stop Vehicle (For Diesel
engines only)
This warning appears in message area of the
vehicle information display if low oil pressure is
detected. This gauge is not designed to indicate
low oil level. The low oil pressure warning is
not designed to indicate a low oil level. Use
the dipstick to check the oil level. For additional information, refer to “Engine oil” in the “Do-it-
yourself” section of this manual.
Oil Level Sensor fault (For Diesel engines
only)
This warning appears in message area of the
vehicle information display if the oil level sensor
malfunctions. It is recommended that you visit a
NISSAN dealer to have this system checked.
AT (Automatic Transmission) CHECK
If the AT Check warning appears while the engine
is running, or while driving, it may indicate that the
AT is not functioning properly and may need
servicing. Have the system checked, and if nec-
essary, repaired promptly. It is recommended that
you visit a NISSAN dealer for this service.
AT (Automatic Transmission) Error: See
Owner’s Manual
If this message appears while the engine is run-
ning, or while driving, it may indicate that the AT is
not functioning properly and may need servicing.
Have the system checked, and if necessary, re-
paired promptly. It is recommended that you visit
a NISSAN dealer for this service.
Tire Pressure Low - Add Air
This warning appears when the low tire pressure
warning light in the meter illuminates and low tire
pressure is detected. The warning appears eachtime the ignition switch is placed in the ON
position as long as the low tire pressure warning
light remains illuminated. If this warning appears,
stop the vehicle and adjust the tire pressures of
all four tires to the recommended COLD tire
pressure shown on the Tire and Loading Informa-
tion label. For additional information, refer to
“Low tire pressure warning light” in this section
and “Tire Pressure Monitoring System (TPMS)”
in the “Starting and driving” section of this
manual.
Low Tire Pressure Error — Info
This warning appears when the low tire pressure
warning light in the meter illuminates and low tire
pressure is detected. Press the
button for
information about the low tire pressure. For addi-
tional information, refer to “Low tire pressure
warning light” in this section and “Tire Pressure
Monitoring System (TPMS)” in the “Starting and
driving” section of this manual.
Flat Tire
This warning appears when the low tire pressure
warning light in the meter illuminates and one or
more flat tires are detected while driving.
Shipping Mode On Push Storage Fuse
This warning may appear if the extended storage
switch is not pushed in. When this warning ap-
pears, push in the extended storage switch to
turn off the warning. For additional information,
2-42Instruments and controls
Page 146 of 671
refer to “Extended storage switch” in the “Instru-
ments and controls” section of this manual.
Push brake and start button to drive
This indicator appears when the shift lever is in
the P (Park) position.
This indicator means that the engine will start by
pushing the ignition switch with the brake pedal
depressed. You can start the engine from any
position of the ignition switch.
Remote Engine Start Mode (if so
equipped)
This warning appears in the vehicle information
display when the vehicle has been started using
the remote start function. To start the vehicle,
apply the brake and place the ignition switch in
the ON position.
Brightness indicator
This indicator appears when the vehicle informa-
tion display screen brightness is being adjusted.
Low Outside Temperature
This warning appears if the outside temperature
is below 37°F (3°C) . The temperature can be
changed to display in Celsius or Fahrenheit. For
additional information, refer to “Settings” in this
section.Shift to Park
This warning illuminates when the ignition switch
is in the ACC or OFF position and the shift lever
is not in the P (Park) position. Also, a chime
sounds when the ignition switch is in the ACC or
OFF position.
If this warning illuminates, move the shift lever to
the P (Park) position and start the engine.
Low Fuel Pressure Service Fuel System
This warning appears when the fuel pressure is
low. Check the fuel level and refuel if needed. If
the warning remains illuminated, have the system
checked. It is recommended that you visit a
NISSAN dealer for this service. For additional
information, refer to “Diesel fuel system” in the
“Introduction” of the “Titan Diesel Owner’s
Manual”.
CAUTION
Since the fuel pump is lubricated by the
fuel itself, prolonged driving with low fuel
levels may cause progressive damage to
the fuel pump. This may cause the pump to
fail.
Low Washer Fluid
This warning illuminates when the windshield-
washer fluid is at a low level. Add windshield- washer fluid as necessary. For additional informa-
tion, refer to “Windshield-washer fluid” in the
“Do-it-yourself” section of this manual.
Cruise control indicator
This indicator shows the cruise control system
status.
For additional information, refer to “Cruise con-
trol” in the “Starting and driving” section of this
manual.
4WD shift indicators (if so equipped)
These indicators show which 4WD mode is se-
lected. For additional information, refer to “Using
4–wheel drive (4WD)” in the “Starting and driv-
ing” section of this manual.
FRT & RR tire size difference: See Own-
er’s Manual (if so equipped)
This warning may appear if there is a large differ-
ence between the diameters of the front and rear
wheels. Pull off the road in a safe area, with the
engine idling. Check that all the tire sizes are the
same, that the tire pressure is correct and that the
tires are not excessively worn. For additional in-
formation, refer to “Wheels and tires” in the
“Technical and consumer information” of this
manual.
Instruments and controls2-43
Page 148 of 671
Battery Voltage Low Charge Battery
This warning appears when the battery is low and
needs to be charged.
Maintenance indicators
When engine oil service is due, one or more of
these icons will appear automatically to remind
you. For additional information, refer to “Engine
oil” in the “Do-it-yourself” section of this manual.
These will also appear when the user-set remind-
ers are met. For additional information, refer to
“Vehicle information display” in this section.
Parking Sensor Error: See Owner’s
Manual (if so equipped)
This warning illuminates when there is an error
with the system. For additional information, refer
to “Front and rear sonar system” in the “Starting
and driving” section of this manual.
TPMS Error: See Owner’s Manual
This warning appears when there is an error with
your TPMS. If this warning comes on, have the
system checked. It is recommended that you visit
a NISSAN dealer for this service.4WD MODE SHIFTING (if so equipped)
This message appears when the vehicle is shift-
ing into 4WD. For additional information, refer to
“Using 4–wheel drive (4WD)” in the “Starting
and driving” section of this manual.
Loose Fuel Cap (if so equipped)
This warning appears when the fuel-filler cap is
not tightened correctly after the vehicle has been
refueled. For additional information, refer to
“Fuel-filler cap” in the “Pre-driving checks and
adjustments” section of this manual.
Blind Spot Warning (BSW) and Rear Cross
Traffic Alert (RCTA) indicator (if so
equipped)
This indicator shows when the BSW and RCTA
systems are engaged.
For additional information, refer to “Blind Spot
Warning (BSW)” and “Rear Cross Traffic Alert
(RCTA)” in the “Starting and driving” section of
this manual.
Malfunction: See Owner’s Manual (if so
equipped)
This warning appears when one or more of the
following systems (if so equipped) is not func-
tioning properly:
● Blind Spot Warning (BSW)
● Rear Cross Traffic alert (RCTA)
If one or more of these warning appears, have the
system checked. It is recommended that you visit
a NISSAN dealer for this service.
Instruments and controls2-45
Page 169 of 671
When the E-Lock system switch is turned ON,
the indicator light will flash until the system en-
gages. However, if all operation conditions listed
above are not met or the system becomes disen-
gaged, the indicator light will continue to flash.
The Anti-Lock Brake (ABS) system is disabled
and the ABS light illuminates when the E-Lock
system is ON. Also, the Vehicle Dynamic Control
(VDC) system is disabled and the VDC light
illuminates when the E-Lock system is ON.
For additional information, refer to “Electronic
locking rear differential (E-Lock) system” in the
“Starting and driving” section of this manual for
further explanation and system limitations.
WARNING
●Never leave the E-Lock system ON when
driving on paved or hard-surfaced
roads. Turning the vehicle may result in
the rear wheels slipping and result in an
accident and personal injury. After us-
ing the E-Lock system to free the ve-
hicle, turn the system OFF. ●
Use the E-lock system only in an emer-
gency when it is not possible to free a
stuck vehicle even using 4LO. Never use
the E-Lock system on a slippery road
surface such as snow or ice surface.
Using the E-Lock system when driving
in these road conditions may cause un-
expected movement of the vehicle dur-
ing engine braking, accelerating or
turning, which may result in an accident
and serious personal injury.
● Observe the above warnings. Other-
wise, loss of normal steering control
may result. This may result in an acci-
dent and serious personal injury.
CAUTION
● After using the E-Lock system, or during
normal driving, turn the switch OFF to
prevent possible damage to drivetrain
components from extended use.
● When the E-Lock system is in operation,
turning the vehicle becomes difficult.
This can be dangerous, especially at
high speeds. Doing so could damage
drivetrain components. ●
Do not operate the E-Lock system when
the vehicle is turning or when one side
wheel is rotating. Otherwise, the drive-
train components could be damaged.
● The E-Lock system operates only when
the engine is running.
● In 4H mode, the E-Lock system does not
operate when the E-Lock system switch
is turned to the ON position. (The
E-Lock system indicator light will flash.)
● Avoid quick starts while the E-Lock sys-
tem is in operation. Otherwise the drive-
train components could be damaged.
● Observe the above cautions. Otherwise,
loss of normal steering may result.
2-66Instruments and controls
Page 171 of 671
The parking sensor (sonar) , MOD, or RCTA sys-
tems will be turned on automatically under the
following conditions:● When the ignition switch is switched from
the OFF position to the ON position.
● When the shift lever is shifted into the R
(Reverse) position.
● When the vehicle speed increases to 6 mph
(10 km/h) and decreases.
The automatic turning on function can be turned
on and off for these systems in the vehicle infor-
mation display (if so equipped) . For additional
information, refer to “Settings” in the “Instrument
and controls” section of this manual.
For additional information, refer to “Front and rear
sonar system” or “Rear Cross Traffic Alert
(RCTA)” in the “Starting and driving” section of
this manual, or the “Moving Object Detection
(MOD)” in the “Monitor, climate, audio, phone
and voice recognition systems” section of this
manual. Tow mode should be used when pulling a heavy
trailer or hauling a heavy load. Driving the vehicle
in the tow mode with no trailer/load or light
trailer/light load will not cause any damage. How-
ever, fuel economy may be reduced, and the
transmission/engine driving characteristics may
feel unusual.
Push the tow mode switch to activate tow mode.
The TOW indicator light illuminates when tow
mode is selected. Push the tow mode switch
again to turn tow mode off.
Tow mode is automatically canceled when the
ignition switch is placed in the OFF position.For additional information, refer to “Tow mode” in
the “Technical and consumer information” sec-
tion of this manual.
LIC3381
TOW MODE SWITCH (if so equipped)
2-68Instruments and controls
Page 195 of 671
Proceed with “Programming HomeLink®”
step 3 to complete.
If the device was unplugged during the pro-
gramming procedure, remember to plug it
back in when programming is completed.
OPERATING THE HOMELINK®
UNIVERSAL TRANSCEIVER
The HomeLink® Universal Transceiver, after it is
programmed, can be used to activate the pro-
grammed device. To operate, simply press and
release the appropriate programmed
HomeLink® Universal Transceiver button. The
amber indicator light will illuminate while the sig-
nal is being transmitted.
For convenience, the hand-held transmitter of the
device may also be used at any time.
PROGRAMMING TROUBLE-
DIAGNOSIS
If the HomeLink® does not quickly learn the
hand-held transmitter information:● replace the hand-held transmitter batteries
with new batteries.
● position the hand-held transmitter with its
battery area facing away from the
HomeLink® surface. ●
press and hold both the HomeLink® and
hand-held transmitter buttons without inter-
ruption.
● position the hand-held transmitter 1 -
3 inches (26 - 76 mm) away from the
HomeLink® surface. Hold the transmitter in
that position for up to 15 seconds. If
HomeLink® is not programmed within that
time, try holding the transmitter in another
position – keeping the indicator light in view
at all times.
If you have any questions or are having difficulty
programming your HomeLink® buttons, refer to
the HomeLink® web site at: www.homelink.com
or call 1-800-355-3515.
CLEARING THE PROGRAMMED
INFORMATION
The following procedure clears the programmed
information from both buttons. Individual buttons
cannot be cleared. However, individual buttons
can be reprogrammed. For additional informa-
tion, refer to “Reprogramming a single
HomeLink® button” in this section. To clear all programming:
1. Press and hold the two outer HomeLink® buttons until the indicator light begins to
flash in approximately 10 seconds. Do not
hold for longer than 20 seconds.
2. Release both buttons.
HomeLink® is now in the programming mode
and can be programmed at any time beginning
with “Programming HomeLink®” - Step 1.
REPROGRAMMING A SINGLE
HOMELINK® BUTTON
To reprogram a HomeLink® Universal Trans-
ceiver button, complete the following: 1. Press and hold the desired HomeLink® but- ton. DO NOT release the button.
2. The indicator light will begin to flash after 20 seconds. Without releasing the
HomeLink® button, proceed with “Pro-
gramming HomeLink®” - Step 1.
For questions or comments, contact HomeLink®
at: www.homelink.com or 1–800–355–3515
(except Mexico) .
2-92Instruments and controls