2017 NISSAN SENTRA bluetooth
[x] Cancel search: bluetoothPage 222 of 491
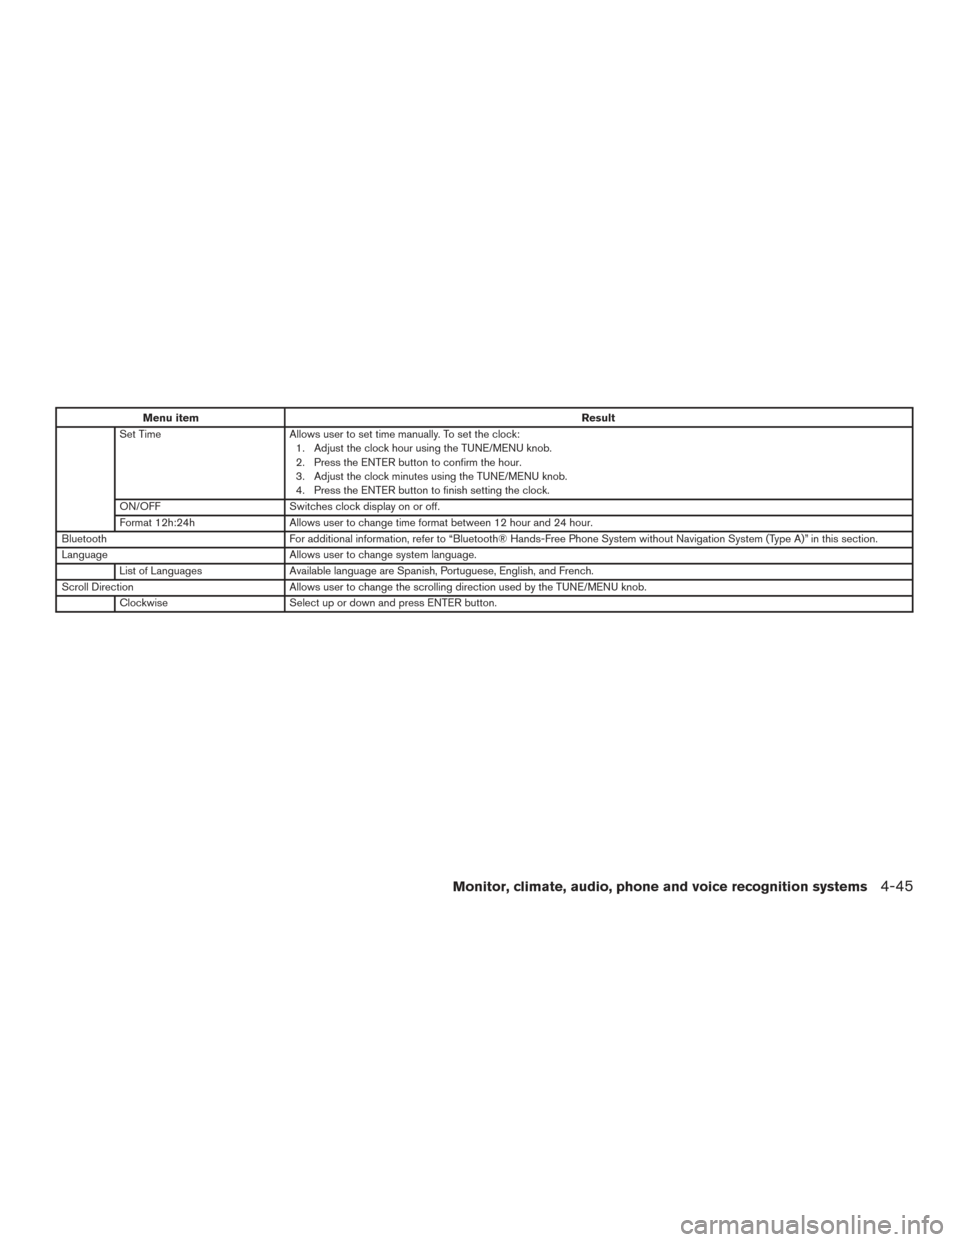
Menu itemResult
Set Time Allows user to set time manually. To set the clock:
1. Adjust the clock hour using the TUNE/MENU knob.
2. Press the ENTER button to confirm the hour.
3. Adjust the clock minutes using the TUNE/MENU knob.
4. Press the ENTER button to finish setting the clock.
ON/OFF Switches clock display on or off.
Format 12h:24h Allows user to change time format between 12 hour and 24 hour.
Bluetooth For additional information, refer to “Bluetooth® Hands-Free Phone System without Navigation System (Type A)” in this section.
Language Allows user to change system language.
List of Languages Available language are Spanish, Portuguese, English, and French.
Scroll Direction Allows user to change the scrolling direction used by the TUNE/MENU knob.
Clockwise Select up or down and press ENTER button.
Monitor, climate, audio, phone and voice recognition systems4-45
Page 226 of 491
Audio main operation
(power) button / VOL (volume)
control knob
Place the ignition switch in the ACC or ON
position and press the
(power) button
while the system is off to call up the mode (radio,
CD, AUX, Bluetooth® audio, USB or iPod®) that
was playing immediately before the system was
turned off. To turn the system off, press the
(power)
button.
Turn the VOL (volume) control knob to adjust the
volume.
This vehicle may be equipped with Speed Sen-
sitive Volume. When this feature is active, the
audio volume changes as the driving speed
changes. ENTER/SETTING button
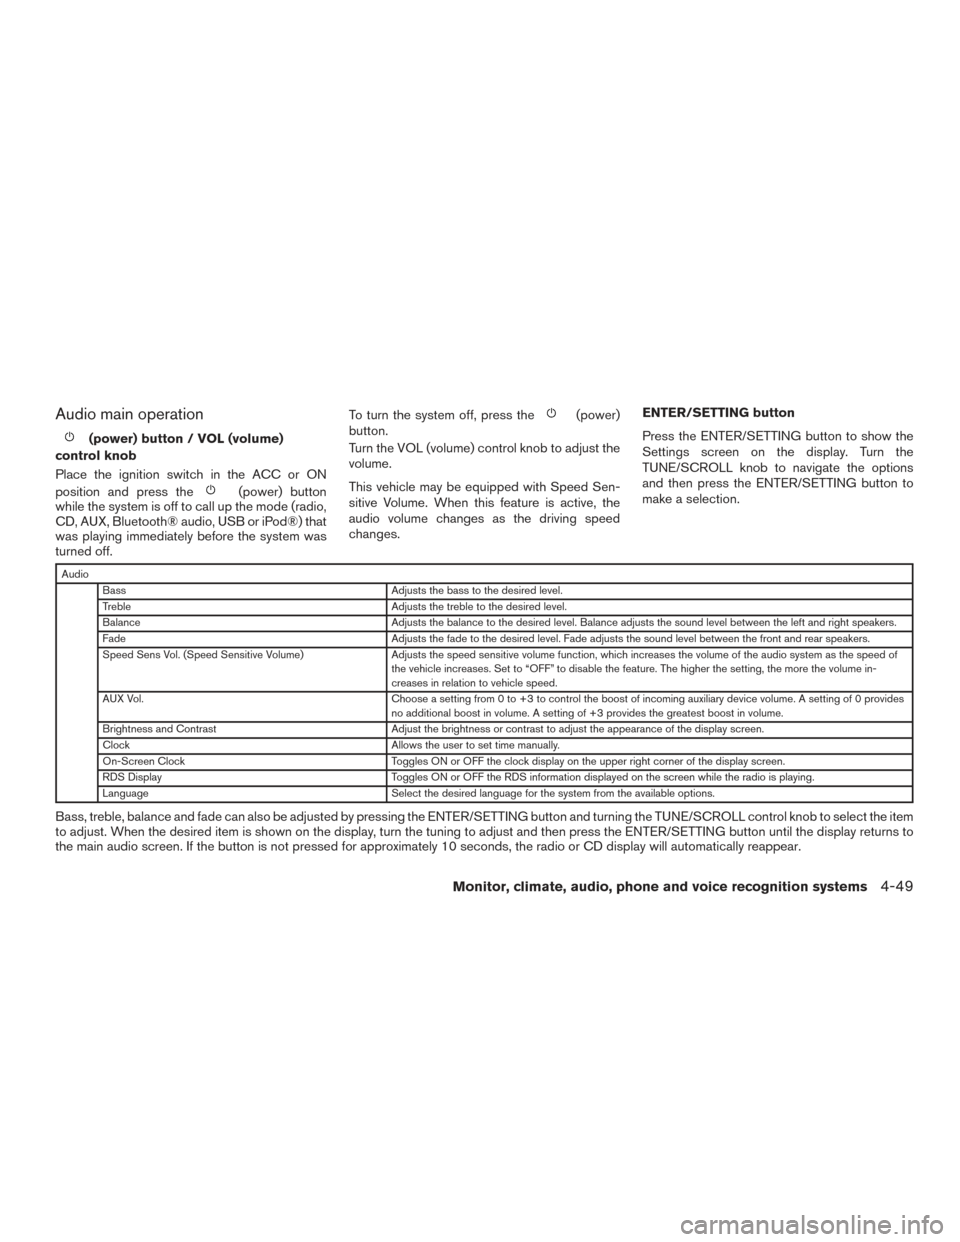
Press the ENTER/SETTING button to show the
Settings screen on the display. Turn the
TUNE/SCROLL knob to navigate the options
and then press the ENTER/SETTING button to
make a selection.
Audio
Bass Adjusts the bass to the desired level.
Treble Adjusts the treble to the desired level.
Balance Adjusts the balance to the desired level. Balance adjusts the sound level between the left and right speakers.
Fade Adjusts the fade to the desired level. Fade adjusts the sound level between the front and rear speakers.
Speed Sens Vol. (Speed Sensitive Volume) Adjusts the speed sensitive volume function, which increases the volume of the audio system as the speed of
the vehicle increases. Set to “OFF” to disable the feature. The higher the setting, the more the volume in-
creases in relation to vehicle speed.
AUX Vol. Choose a setting from 0 to +3 to control the boost of incoming auxiliary device volume. A setting of 0 provides
no additional boost in volume. A setting of +3 provides the greatest boost in volume.
Brightness and Contrast Adjust the brightness or contrast to adjust the appearance of the display screen.
Clock Allows the user to set time manually.
On-Screen Clock Toggles ON or OFF the clock display on the upper right corner of the display screen.
RDS Display Toggles ON or OFF the RDS information displayed on the screen while the radio is playing.
Language Select the desired language for the system from the available options.
Bass, treble, balance and fade can also be adjusted by pressing the ENTER/SETTING button and turning the TUNE/SCROLL control knob to select the item
to adjust. When the desired item is shown on the display, turn the tuning to adjust and then press the ENTER/SETTING button until the display returns to
the main audio screen. If the button is not pressed for approximately 10 seconds, the radio or CD display will automatically reappear.
Monitor, climate, audio, phone and voice recognition systems4-49
Page 229 of 491
CD with MP3 or WMA:
1 Folder Repeat→1 Track Repeat →OFF
1 Track Repeat: the current track will be re-
peated.
1 Folder Repeat: the current folder will be re-
peated.
OFF: No repeat play pattern is applied. The indi-
cator on the display will turn off.
The current play pattern of the CD is displayed on
the screen unless no pattern is applied.
RDM (random) button
When the RDM button is pressed while a com-
pact disc is playing, the play pattern can be
changed as follows:
CD:
1 Disc Random ←→OFF
CD with MP3 or WMA:
1 Disc Random →1 Folder Random →OFF
1 Disc Random: all tracks on the disc will be
played randomly.
1 Folder Random: all tracks in the current folder
will be played randomly.
OFF: No random play pattern is applied. The
indicator on the display will turn off. The current play pattern of the CD is displayed on
the screen unless no pattern is applied.
EJECT button
When the
button is pressed with a com-
pact disc loaded, the compact disc will eject and
the last source will be played.
When the
button is pressed twice with a
compact disc loaded, the compact disc will be
ejected further for easier CD removal. If the disc
is not removed within 20 seconds, the disc will
reload.
Additional features
For additional information, refer to “iPod® player
operation without Navigation System” in this sec-
tion.
For additional information, refer to “USB (Univer-
sal Serial Bus) connection port (models without
Navigation System)” in this section.
For additional information, refer to “Bluetooth®
streaming audio without Navigation System” in
this section. Microsoft (WMA) Obligation of Labeling
Additional Obligation of Labeling
This product is protected by certain intellectual
property rights of Microsoft Corporation and third
parties. Use or distribution of such technology
outside of this product is prohibited without a
license from Microsoft or an authorized Microsoft
subsidiary and third parties.
4-52Monitor, climate, audio, phone and voice recognition systems
Page 230 of 491
FM/AM/SAT RADIO WITH
COMPACT DISC (CD) PLAYER (Type
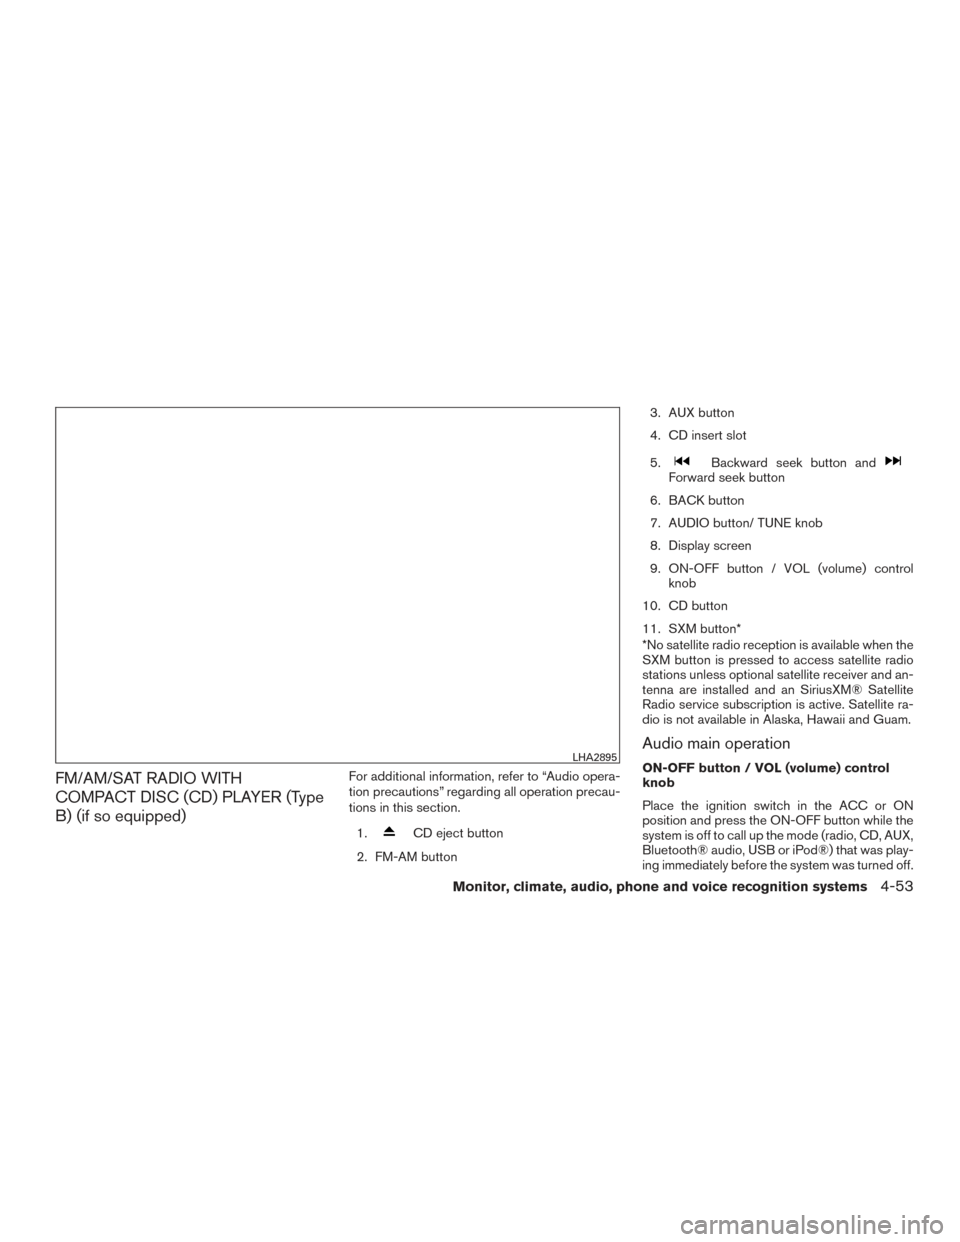
B) (if so equipped)For additional information, refer to “Audio opera-
tion precautions” regarding all operation precau-
tions in this section.1.
CD eject button
2. FM-AM button 3. AUX button
4. CD insert slot
5.
Backward seek button andForward seek button
6. BACK button
7. AUDIO button/ TUNE knob
8. Display screen
9. ON-OFF button / VOL (volume) control knob
10. CD button
11. SXM button*
*No satellite radio reception is available when the
SXM button is pressed to access satellite radio
stations unless optional satellite receiver and an-
tenna are installed and an SiriusXM® Satellite
Radio service subscription is active. Satellite ra-
dio is not available in Alaska, Hawaii and Guam.
Audio main operation
ON-OFF button / VOL (volume) control
knob
Place the ignition switch in the ACC or ON
position and press the ON-OFF button while the
system is off to call up the mode (radio, CD, AUX,
Bluetooth® audio, USB or iPod®) that was play-
ing immediately before the system was turned off.LHA2895
Monitor, climate, audio, phone and voice recognition systems4-53
Page 237 of 491
SEEK (Reverse or FastForward) buttons
Press and hold the SEEK buttons
orfor 1.5 seconds while the compact disc
is playing to reverse or fast forward the track
being played. The compact disc plays at an in-
creased speed while reversing or fast forwarding.
When the button is released, the compact disc
returns to normal play speed.
SEEK buttons
Press the SEEK button
while a CD or
MP3/WMA CD is playing to return to the begin-
ning of the current track. Press the SEEK
button
several times to skip backward sev-
eral tracks.
Press the SEEK button
while a CD or
MP3/WMA CD is playing to advance one track.
Press the SEEK button
several times to
skip forward several tracks. If the last track on a
CD is skipped, the first track on the disc is played.
If the last track in a folder of an MP3/WMA CD is
skipped, the first track of the next folder is played. AUX button
The AUX IN audio input jack accepts any stan-
dard analog audio input such as from a portable
cassette tape/CD player, MP3 player or a laptop
computer. Press the AUX button to play a com-
patible device plugged into the AUX IN jack.
CD EJECT button
When the
CD EJECT button is pressed
with a compact disc loaded, the compact disc
will eject and the last source will be played.
If the disc is not removed within 10 seconds, the
disc will reload.
Additional features
For additional information, refer to “iPod® player
operation with Navigation System” in this section.
For additional information, refer to “USB (Univer-
sal Serial Bus) Connection Port (models with
Navigation System)” in this section.
For additional information, refer to “Bluetooth®
streaming audio with Navigation System” in this
section.USB (Universal Serial Bus)
CONNECTION PORT (models
without Navigation System) (if so
equipped)
Connecting a device to the USB
connection port
WARNING
Do not connect, disconnect, or operate the
USB device while driving. Doing so can be
a distraction. If distracted you could lose
control of your vehicle and cause an acci-
dent or serious injury.
LHA4294
4-60Monitor, climate, audio, phone and voice recognition systems
Page 247 of 491
BLUETOOTH® STREAMING AUDIO
WITHOUT NAVIGATION SYSTEM (if
so equipped)
If you have a compatible Bluetooth® audio de-
vice that is capable of playing audio files, the
device can be connected to the vehicle’s audio
system so that the audio files on the device play
through the vehicle’s speakers. For additional
information, refer to “FM/AM/SAT radio with
compact disc (CD) player (Type A) (if so
equipped)” in this section.
NOTE:
For additional information, refer to the Cel-
lular Phone Owner’s Manual.
Connecting Bluetooth® audio
To connect your Bluetooth® audio device to the
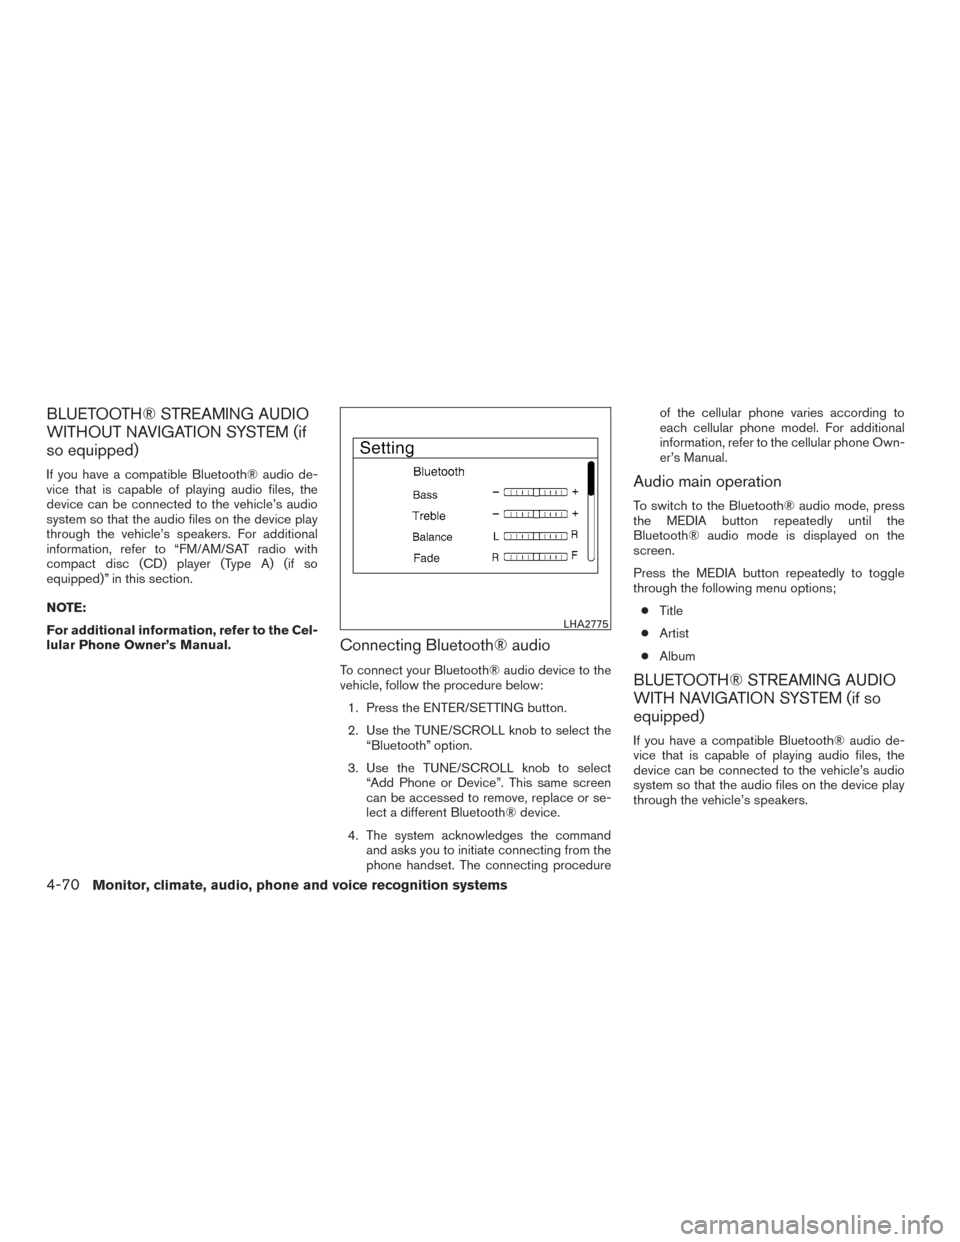
vehicle, follow the procedure below:1. Press the ENTER/SETTING button.
2. Use the TUNE/SCROLL knob to select the “Bluetooth” option.
3. Use the TUNE/SCROLL knob to select “Add Phone or Device”. This same screen
can be accessed to remove, replace or se-
lect a different Bluetooth® device.
4. The system acknowledges the command and asks you to initiate connecting from the
phone handset. The connecting procedure of the cellular phone varies according to
each cellular phone model. For additional
information, refer to the cellular phone Own-
er’s Manual.
Audio main operation
To switch to the Bluetooth® audio mode, press
the MEDIA button repeatedly until the
Bluetooth® audio mode is displayed on the
screen.
Press the MEDIA button repeatedly to toggle
through the following menu options;
● Title
● Artist
● Album
BLUETOOTH® STREAMING AUDIO
WITH NAVIGATION SYSTEM (if so
equipped)
If you have a compatible Bluetooth® audio de-
vice that is capable of playing audio files, the
device can be connected to the vehicle’s audio
system so that the audio files on the device play
through the vehicle’s speakers.
LHA2775
4-70Monitor, climate, audio, phone and voice recognition systems
Page 248 of 491
![NISSAN SENTRA 2017 B17 / 7.G Owners Manual Connecting Bluetooth® audio
To connect your Bluetooth® audio device to the
vehicle, follow the procedure below:1. Press the [
] button.
2. Touch the “Settings” key.
3. Touch the “Phone & Bluet NISSAN SENTRA 2017 B17 / 7.G Owners Manual Connecting Bluetooth® audio
To connect your Bluetooth® audio device to the
vehicle, follow the procedure below:1. Press the [
] button.
2. Touch the “Settings” key.
3. Touch the “Phone & Bluet](/manual-img/5/555/w960_555-247.png)
Connecting Bluetooth® audio
To connect your Bluetooth® audio device to the
vehicle, follow the procedure below:1. Press the [
] button.
2. Touch the “Settings” key.
3. Touch the “Phone & Bluetooth” key.
4. Touch the “Connect New Device” key.
5. The system acknowledges the command and asks you to initiate connecting from the
phone handset. The connecting procedure
of the cellular phone varies according to
each cellular phone model. For additional information, refer to the cellular phone Own-
er’s Manual. You can also visit
www.nissanusa.com/bluetooth or
www.nissan.ca/bluetooth for instructions on
connecting NISSAN recommended cellular
phones.
Audio main operation
To switch to the Bluetooth® audio mode, press
the AUX button repeatedly until the Bluetooth®
audio mode is displayed on the screen.
The controls for the Bluetooth® audio are dis-
played on the screen.
CD CARE AND CLEANING
●
Handle a CD by its edges. Do not bend the
disc. Never touch the surface of the disc.
● Always place the discs in the storage case
when they are not being used.
● To clean a disc, wipe the surface from the
center to the outer edge using a clean, soft
cloth. Do not wipe the disc using a circular
motion.
● Do not use a conventional record cleaner or
alcohol intended for industrial use.
LHA3747LHA2844LHA0049
Monitor, climate, audio, phone and voice recognition systems4-71
Page 249 of 491
●A new disc may be rough on the inner and
outer edges. Remove the rough edges by
rubbing the inner and outer edges with the
side of a pen or pencil as illustrated.
STEERING WHEEL SWITCH FOR
AUDIO CONTROL
1. Tuning switch/ENTER button (if so equipped)
2. SOURCE switch
3. Volume control switch
The audio system can be operated using the
controls on the steering wheel.
SOURCE switch
Press the SOURCE switch to change the mode
in the following sequence:
AM →FM1 →FM2 →(XM1 →XM2 →XM3
(satellite radio, if so
equipped))→(SXM1→SXM2→SXM3 (satellite,
if so equipped))→ CD*→USB/iPod®* →
Bluetooth® Audio* (if so equipped) →AUX* →
AM.
* These modes are only available when compat-
ible media storage is inserted into the device or
connected to the system.
Type A (if so equipped)
LHA2498
Type B (if so equipped)
LHA4000
4-72Monitor, climate, audio, phone and voice recognition systems