Page 16 of 38

3-1 Preparation Items
Preparation Items
SpecificationPurpose
PPE
(personal protective equipment): Up to 1,000V For protection from high-
voltage electrical shock.
Insulated gloves Insulated shoes
—
Safety
shield —
T
o protect eyes when around
high-voltage components and
wiring.
Safety Glasses Leather gloves Must be able to fasten tight
around
the wrist (worn over
insulated gloves) . To protect insulated gloves.
Wrenches Size:10mm
To remove the 12-volt battery
terminal
bolt.
Solvent resistant protection gloves
Solvent resistant protection shoes —To utilize in the event of a
high-voltage battery
electrolytic solution leak.
Absorbent pad The same pad used for
internal combustion engine
fluids can be used. To absorb any high-voltage
battery electrolytic solution
leakage.
Standard fire fighting equipment Standard fire fighting
equipment.
Depending on type of fire
(vehicle or battery) use
standard fire fighting
equipment (water or
extinguisher) . To extinguish a fire.
Insulated tape InsulatingTo cover any damaged
harnesses to protect from and
prevent electrical shock. Tape
should cover all bare or
damaged wire.
RAG–16
Page 25 of 38
4-2 Tools Installed in the Vehicle
The
tool kit is housed along with the jack located inside the rear cargo area.
The jack and tool kit are located in the storage compartment to the left. • Remove the storage door by pressing the two release tabs simultaneously.
• Remove jacking tools located inside the compartment as illustrated.
4-3 Towing
4-3.1 Vehicle Specifications Length
184.5
in. (4,686 mm)
Width 72.4 in. (1,840 mm)
Overall Height
(with roof rack) With All-Wheel drive 68.4 in. (1,737 mm)
With Front wheel drive 67.6 in. (1,717 mm)
Wheel Base 106.5 in. (2,706 mm)
Minimum ground clearance 7.4 in. (187 mm)
Overall vehicle weight 3,624 – 3,814 lbs. (1,644 – 1,730 kg)
(Weight varies by equipment and trim level.)
Front approach angle 17.4°
Rear departure angle 25.0° AAYIA0514ZZ
RAG–25
Page 28 of 38

4-4 Jacking Up the Vehicle and Changing a Tire
Always follow these instructions when jacking up the vehicle and changing a tire:
•
Never change a tire when the vehicle is on a slope, ice or slippery areas. Jack must be on
level ground.
• Make sure the parking brake is securely applied and shift selector is in P (Park) position.
• Never get under the vehicle while it is supported only by the jack. If it is necessary to work under the vehicle, support it with safety stands.
• Use the correct jack-up points. Never use any other part of the vehicle for jack support.
• Never jack up the vehicle more than necessary.
• Never use blocks on or under the jack.
• Do not start or run the engine while vehicle is on the jack. It may cause the vehicle to move. This is especially true for vehicles with limited slip differentials.
• Do not allow passengers to stay in the vehicle while it is on the jack.
• Never run the engine with a wheel(s) off the ground. It may cause the vehicle to move.
• Be sure to block the wheel diagonally opposite the wheel being removed as the vehicle may move and result in personal injury.
Failure to follow these instructions can result in serious personal injury or death and/or
vehicle damage.
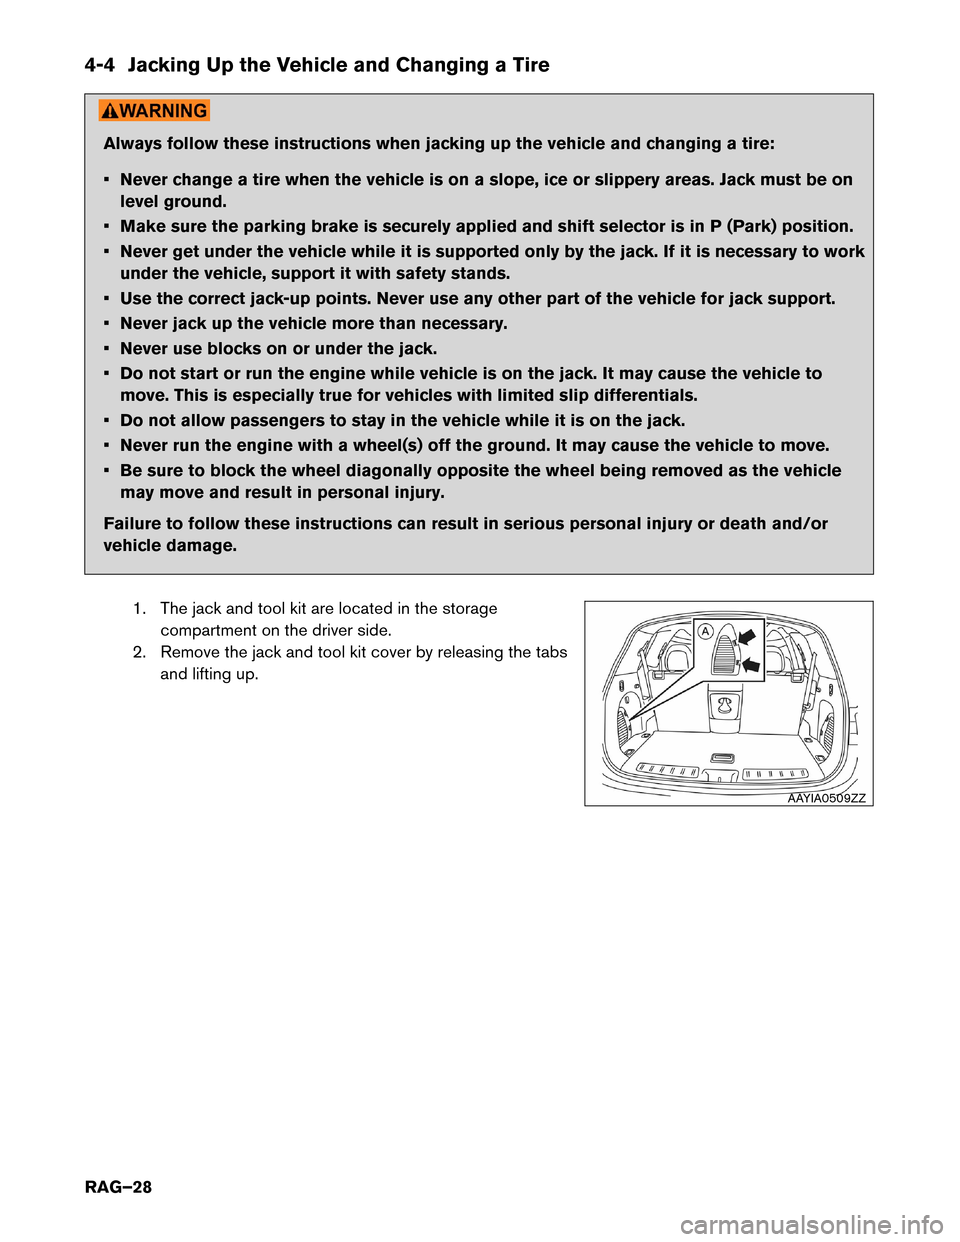
1. The jack and tool kit are located in the storagecompartment on the driver side.
2. Remove the jack and tool kit cover by releasing the tabs and lifting up. AAYIA0509ZZ
RAG–28
Page 36 of 38
6. Open luggage compartment, release the 2 push pin retainers
(A)and lift rear luggage board.
Detach the 2 straps (B)and remove the rear luggage board.
7. Use a suitable tool (A)to release the locking tabs and
remove the service plug access cover.
8. Remove the service plug (A)by pulling the locking lever (B), then pressing the locking tab (C)
and rotating the handle (D)fully outward. Using the handle, pull the service plug (E)completely
out of its socket.
9. Wait approximately ten (10) minutes for complete discharge of the high-voltage capacitor
after the service plug has been removed. AAYIA0535ZZ
AAYIA0525ZZ
AAYIA0536ZZ
RAG–36