2017 NISSAN ROGUE HYBRID service
[x] Cancel search: servicePage 5 of 53
1. About the Rogue HYBRID
This
hybrid electric vehicle (HEV) uses two types of batteries. One is a 12-volt battery that is the same as
the battery in vehicles powered by internal combustion engines. The 12-volt battery is located behind
the second row seat with battery cable access underneath the cargo area luggage board. The other is the
high-voltage battery for the traction motor which propels the vehicle. The high-voltage battery is located
behind the second row seat with service plug access through the cargo area storage bin.
When the high-voltage battery level is low, engine output is used to generate power from the traction motor
and charge the high-voltage battery. Additionally, the vehicle system can recharge the high-voltage battery
by converting driving force into electricity while the vehicle is decelerating or being driven downhill. This
is called regenerative charging.
DG–5
Page 12 of 53
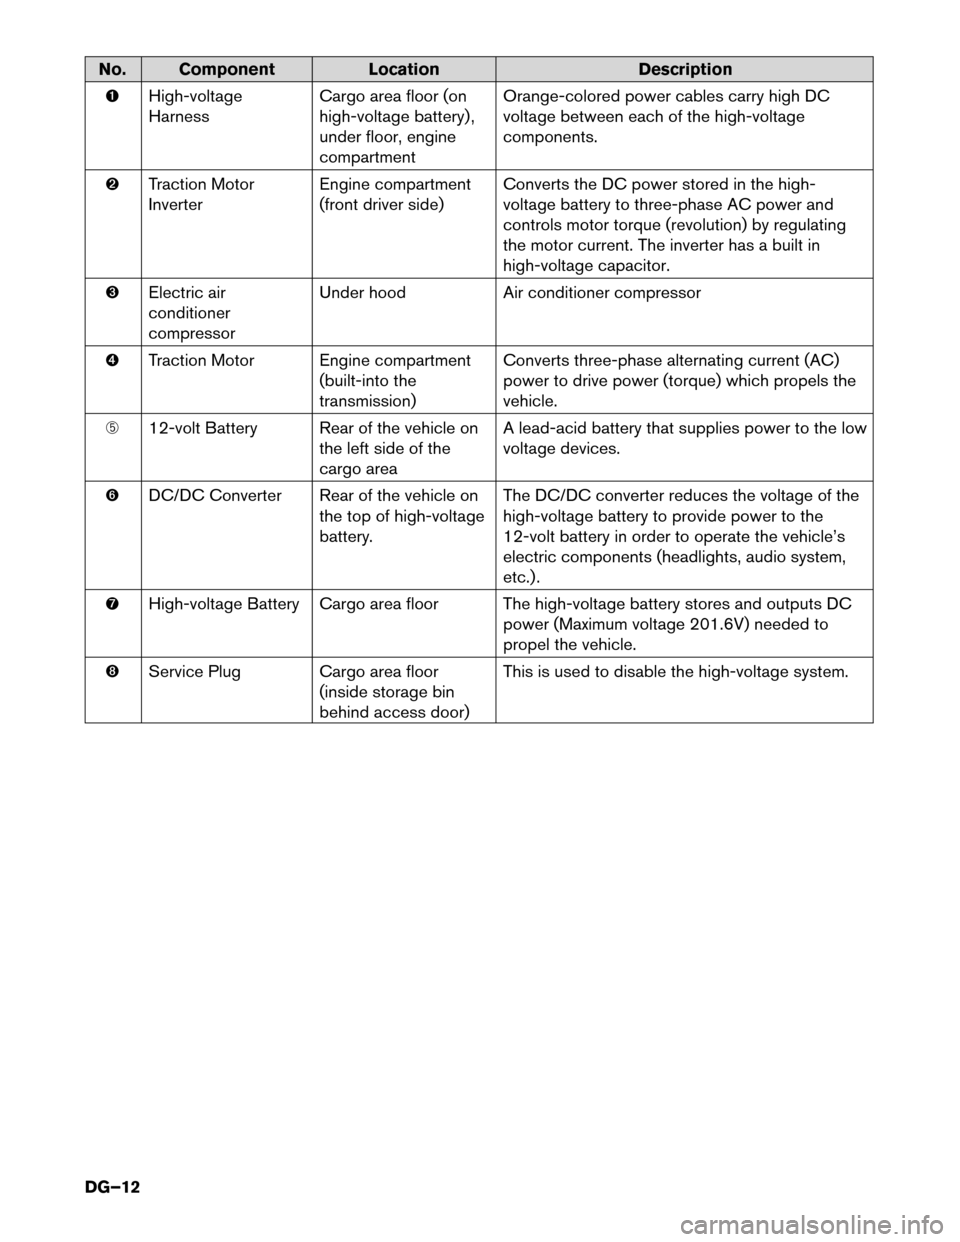
No. Component
LocationDescription
� High-voltage
Harness Cargo
area floor (on
high-voltage battery) ,
under floor, engine
compartment Orange-colored power cables carry high DC
voltage between each of the high-voltage
components.
� Traction Motor
Inverter Engine compartment
(front driver side) Converts the DC power stored in the high-
voltage battery to three-phase AC power and
controls motor torque (revolution) by regulating
the motor current. The inverter has a built in
high-voltage capacitor.
� Electric air
conditioner
compressor Under hood
Air conditioner compressor
� Traction Motor Engine compartment
(built-into the
transmission) Converts three-phase alternating current (AC)
power to drive power (torque) which propels the
vehicle.
� 12-volt Battery Rear of the vehicle on
the left side of the
cargo area A lead-acid battery that supplies power to the low
voltage devices.
� DC/DC Converter Rear of the vehicle on
the top of high-voltage
battery. The DC/DC converter reduces the voltage of the
high-voltage battery to provide power to the
12-volt battery in order to operate the vehicle’s
electric components (headlights, audio system,
etc.) .
� High-voltage Battery Cargo area floor The high-voltage battery stores and outputs DC
power (Maximum voltage 201.6V) needed to
propel the vehicle.
� Service Plug Cargo area floor
(inside storage bin
behind access door) This is used to disable the high-voltage system.
DG–12
Page 14 of 53
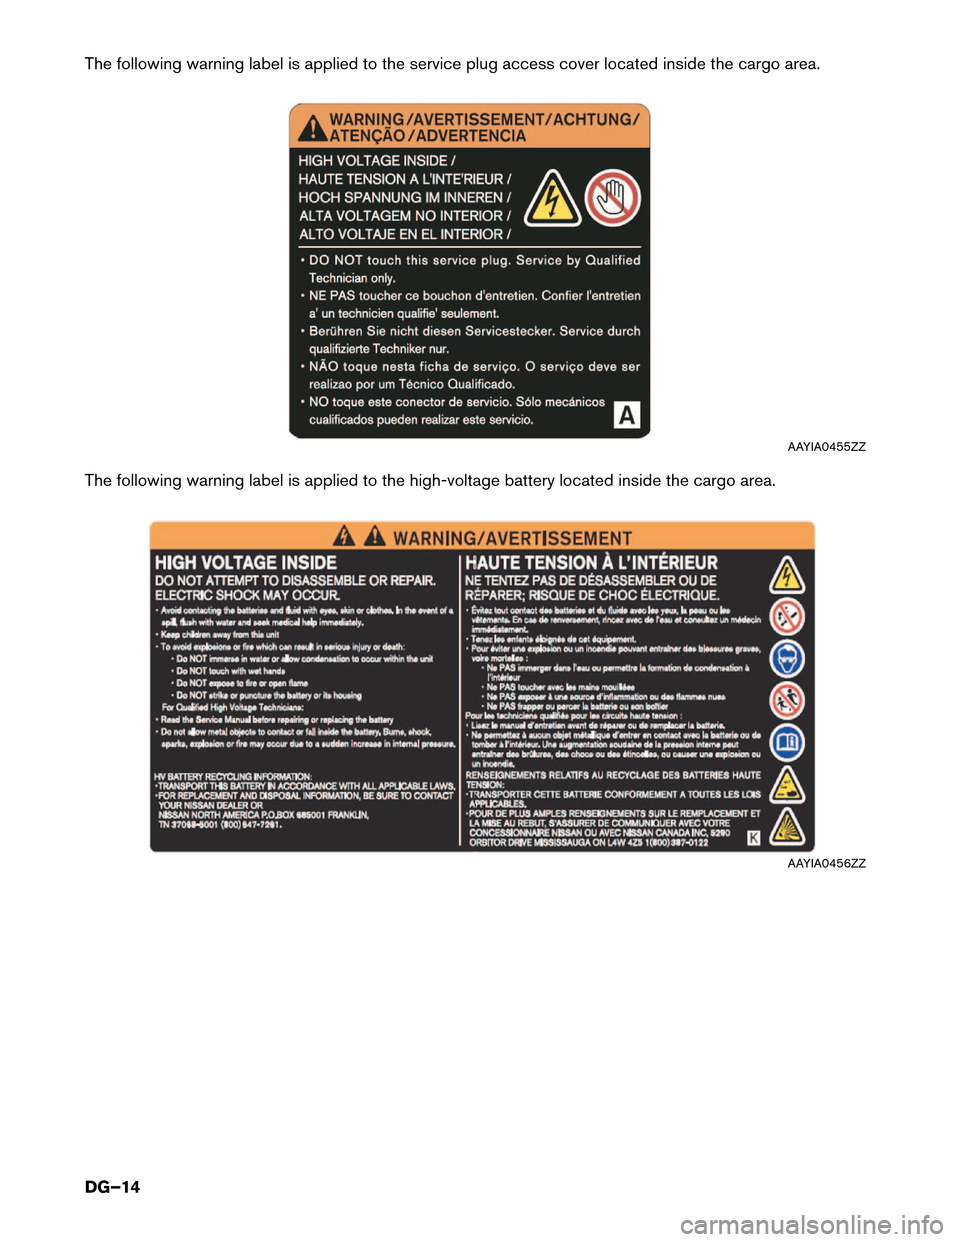
The following warning label is applied to the service plug access cover located inside the cargo area.
The
following warning label is applied to the high-voltage battery located inside the cargo area. AAYIA0455ZZ
AAYIA0456ZZ
DG–14
Page 15 of 53
2-5 High-voltage Safety System
The
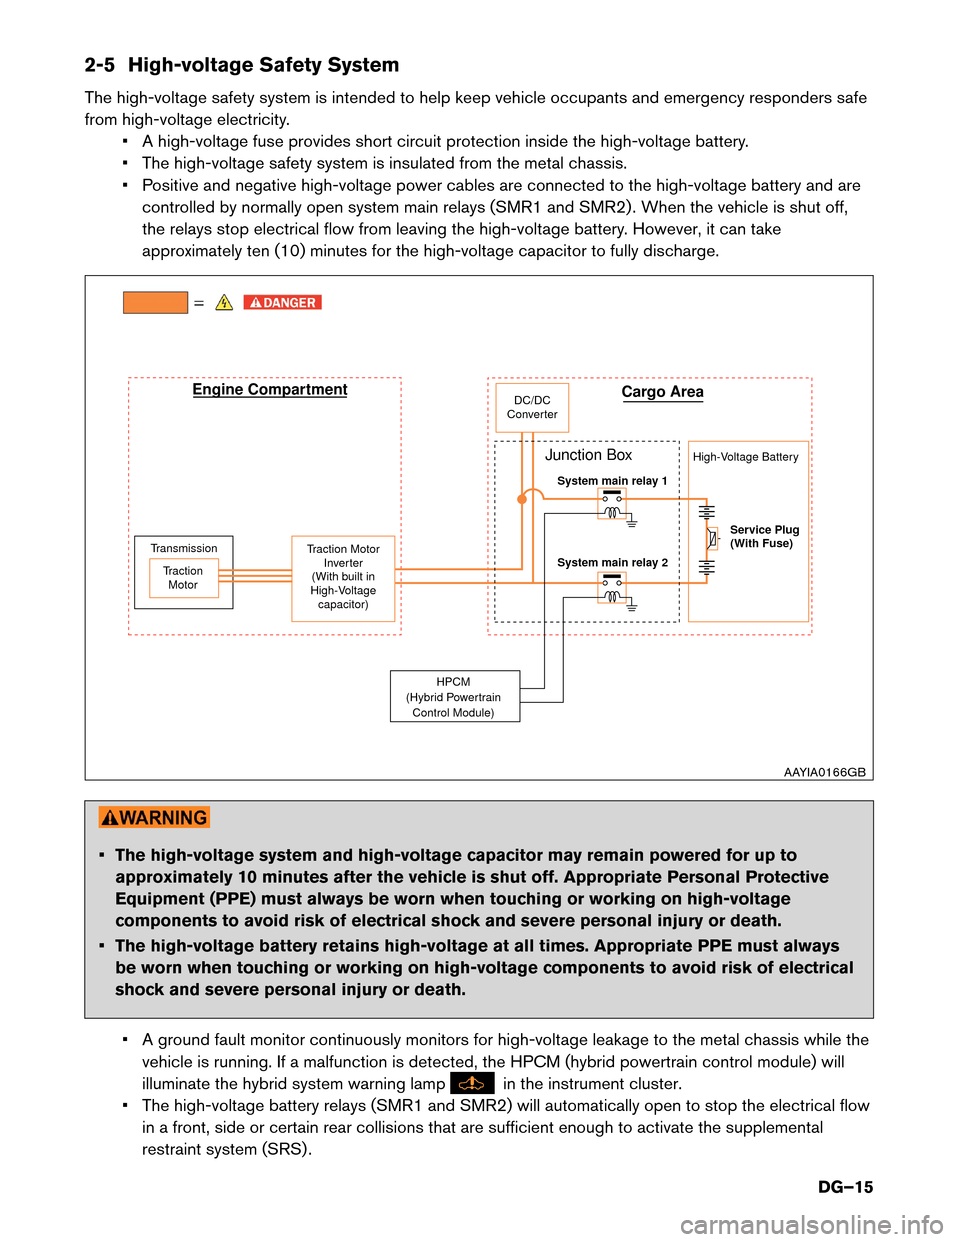
high-voltage safety system is intended to help keep vehicle occupants and emergency responders safe
from high-voltage electricity. • A high-voltage fuse provides short circuit protection inside the high-voltage battery.
• The high-voltage safety system is insulated from the metal chassis.
• Positive and negative high-voltage power cables are connected to the high-voltage battery and arecontrolled by normally open system main relays (SMR1 and SMR2) . When the vehicle is shut off,
the relays stop electrical flow from leaving the high-voltage battery. However, it can take
approximately ten (10) minutes for the high-voltage capacitor to fully discharge. • The high-voltage system and high-voltage capacitor may remain powered for up to
approximately
10 minutes after the vehicle is shut off. Appropriate Personal Protective
Equipment (PPE) must always be worn when touching or working on high-voltage
components to avoid risk of electrical shock and severe personal injury or death.
• The high-voltage battery retains high-voltage at all times. Appropriate PPE must always be worn when touching or working on high-voltage components to avoid risk of electrical
shock and severe personal injury or death.
• A ground fault monitor continuously monitors for high-voltage leakage to the metal chassis while the vehicle is running. If a malfunction is detected, the HPCM (hybrid powertrain control module) will
illuminate the hybrid system warning lamp in the instrument cluster.
•
The high-voltage battery relays (SMR1 and SMR2) will automatically open to stop the electrical flow
in a front, side or certain rear collisions that are sufficient enough to activate the supplemental
restraint system (SRS) . HPCM
(Hybr
id Powertrain
Control Module) DC/DC
Converter
Service Plug
(With Fuse)
Traction Motor
Inverter
(With built in
High-Voltage capacitor)
Traction
Motor Junction Box
Transmission Engine Compartment
Cargo Area
High-Voltage Battery
System main relay 1
System main relay 2 AAYIA0166GB
DG–15
Page 16 of 53
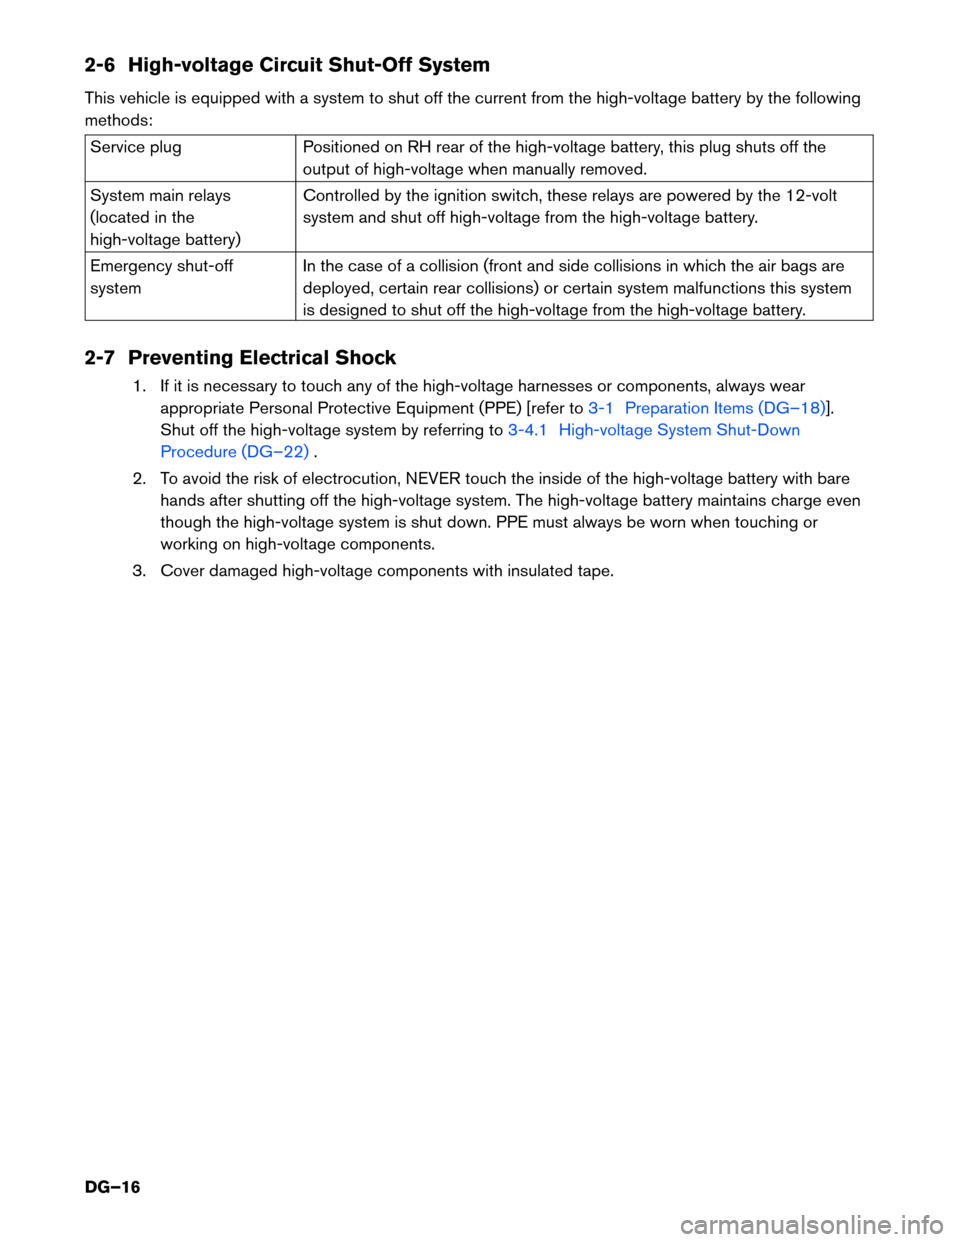
2-6 High-voltage Circuit Shut-Off System
This
vehicle is equipped with a system to shut off the current from the high-voltage battery by the following
methods: Service plug
Positioned on RH rear of the high-voltage battery, this plug shuts off the
output
of high-voltage when manually removed.
System main relays
(located in the
high-voltage battery) Controlled by the ignition switch, these relays are powered by the 12-volt
system and shut off high-voltage from the high-voltage battery.
Emergency shut-off
system In the case of a collision (front and side collisions in which the air bags are
deployed, certain rear collisions) or certain system malfunctions this system
is designed to shut off the high-voltage from the high-voltage battery.
2-7 Preventing Electrical Shock 1. If it is necessary to touch any of the high-voltage harnesses or components, always wearappropriate Personal Protective Equipment (PPE) [refer to 3-1 Preparation Items (DG–18)].
Shut
off the high-voltage system by referring to 3-4.1 High-voltage System Shut-Down
Procedure
(DG–22) .
2.
To avoid the risk of electrocution, NEVER touch the inside of the high-voltage battery with bare
hands after shutting off the high-voltage system. The high-voltage battery maintains charge even
though the high-voltage system is shut down. PPE must always be worn when touching or
working on high-voltage components.
3. Cover damaged high-voltage components with insulated tape.
DG–16
Page 23 of 53
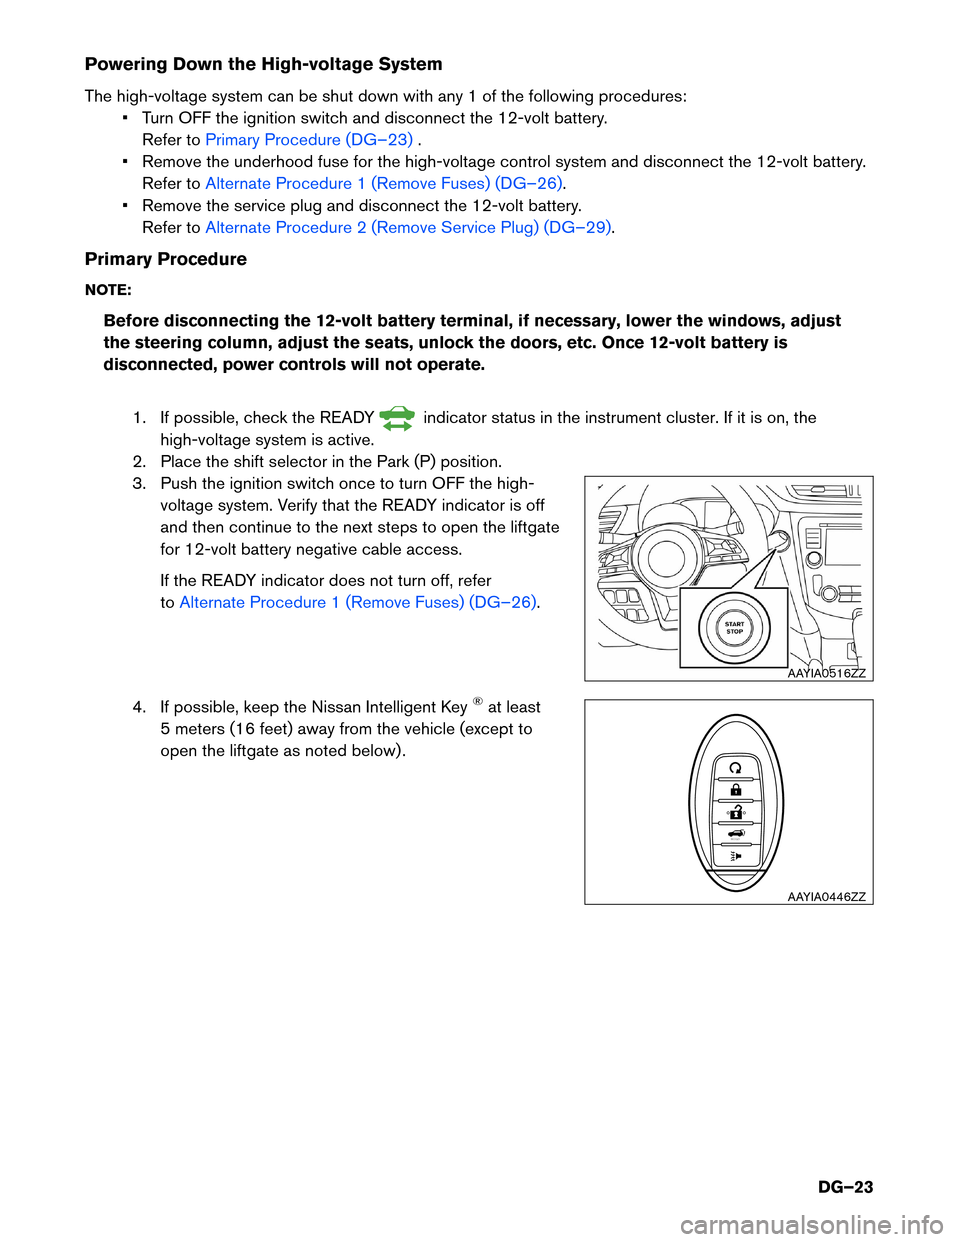
Powering Down the High-voltage System
The
high-voltage system can be shut down with any 1 of the following procedures:• Turn OFF the ignition switch and disconnect the 12-volt battery. Refer to Primary Procedure (DG–23) .
•
Remove the underhood fuse for the high-voltage control system and disconnect the 12-volt battery.
Refer to Alternate Procedure 1 (Remove Fuses) (DG–26).
•
Remove the service plug and disconnect the 12-volt battery.
Refer to Alternate Procedure 2 (Remove Service Plug) (DG–29).
Primary
Procedure
NOTE:
Before disconnecting the 12-volt battery terminal, if necessary, lower the windows, adjust
the steering column, adjust the seats, unlock the doors, etc. Once 12-volt battery is
disconnected, power controls will not operate.
1. If possible, check the READY indicator status in the instrument cluster. If it is on, the
high-voltage
system is active.
2. Place the shift selector in the Park (P) position.
3. Push the ignition switch once to turn OFF the high- voltage system. Verify that the READY indicator is off
and then continue to the next steps to open the liftgate
for 12-volt battery negative cable access.
If the READY indicator does not turn off, refer
toAlternate Procedure 1 (Remove Fuses) (DG–26).
4.
If possible, keep the Nissan Intelligent Key
®at least
5 meters (16 feet) away from the vehicle (except to
open the liftgate as noted below) . AAYIA0516ZZ
HOLD
AAYIA0446ZZ
DG–23
Page 29 of 53
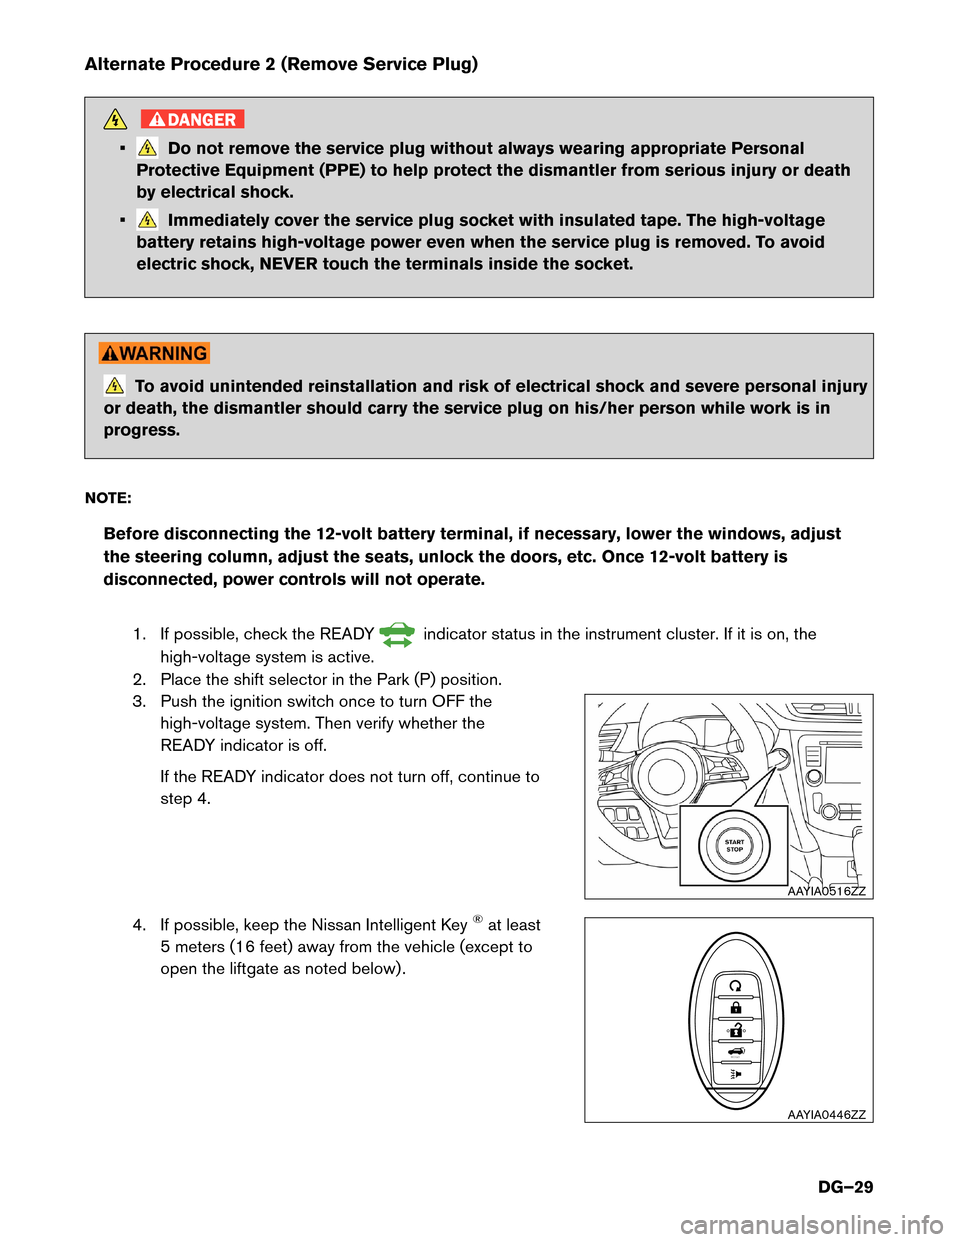
Alternate Procedure 2 (Remove Service Plug)
DANGER
• Do not remove the service plug without always wearing appropriate Personal
Protective Equipment (PPE) to help protect the dismantler from serious injury or death
by electrical shock.
• Immediately cover the service plug socket with insulated tape. The high-voltage
battery
retains high-voltage power even when the service plug is removed. To avoid
electric shock, NEVER touch the terminals inside the socket. To avoid unintended reinstallation and risk of electrical shock and severe personal injury
or
death, the dismantler should carry the service plug on his/her person while work is in
progress.
NOTE: Before disconnecting the 12-volt battery terminal, if necessary, lower the windows, adjust
the steering column, adjust the seats, unlock the doors, etc. Once 12-volt battery is
disconnected, power controls will not operate.
1. If possible, check the READY indicator status in the instrument cluster. If it is on, the
high-voltage
system is active.
2. Place the shift selector in the Park (P) position.
3. Push the ignition switch once to turn OFF the high-voltage system. Then verify whether the
READY indicator is off.
If the READY indicator does not turn off, continue to
step 4.
4. If possible, keep the Nissan Intelligent Key
®at least
5 meters (16 feet) away from the vehicle (except to
open the liftgate as noted below) . AAYIA0516ZZ
HOLD
AAYIA0446ZZ
DG–29
Page 31 of 53
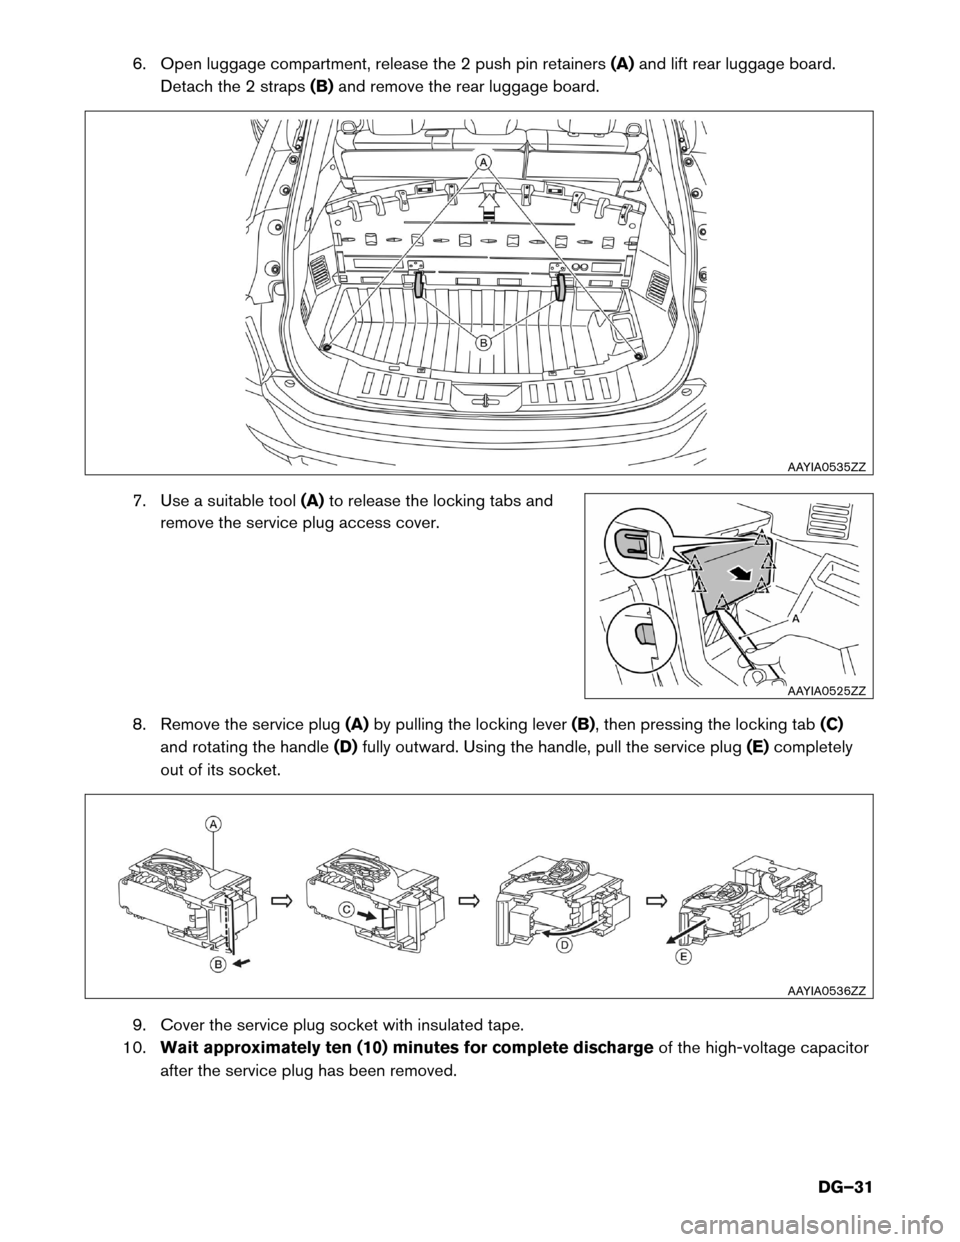
6. Open luggage compartment, release the 2 push pin retainers
(A)and lift rear luggage board.
Detach the 2 straps (B)and remove the rear luggage board.
7. Use a suitable tool (A)to release the locking tabs and
remove the service plug access cover.
8. Remove the service plug (A)by pulling the locking lever (B), then pressing the locking tab (C)
and rotating the handle (D)fully outward. Using the handle, pull the service plug (E)completely
out of its socket.
9. Cover the service plug socket with insulated tape.
10. Wait approximately ten (10) minutes for complete discharge of the high-voltage capacitor
after the service plug has been removed. AAYIA0535ZZ
AAYIA0525ZZ
AAYIA0536ZZ
DG–31