2017 NISSAN QUEST key
[x] Cancel search: keyPage 211 of 520
4-22Monitor, heater, air conditioner, audio, phone and voice recognition systems
hour or per minute.
Daylight Saving Time:
Turn this item to ON for daylight saving time
application.
Time Zone:
Choose the time zone from the following
Models with navigation system
.Pacific
. Mountain
. Central
. Eastern
. Atlantic
. Newfoundland
. Hawaii
. Alaska
Models without navigation system
. Eniwetok, Kwajalein
. Midway Island, Samoa
. Hawaii
. Alaska
. Pacific
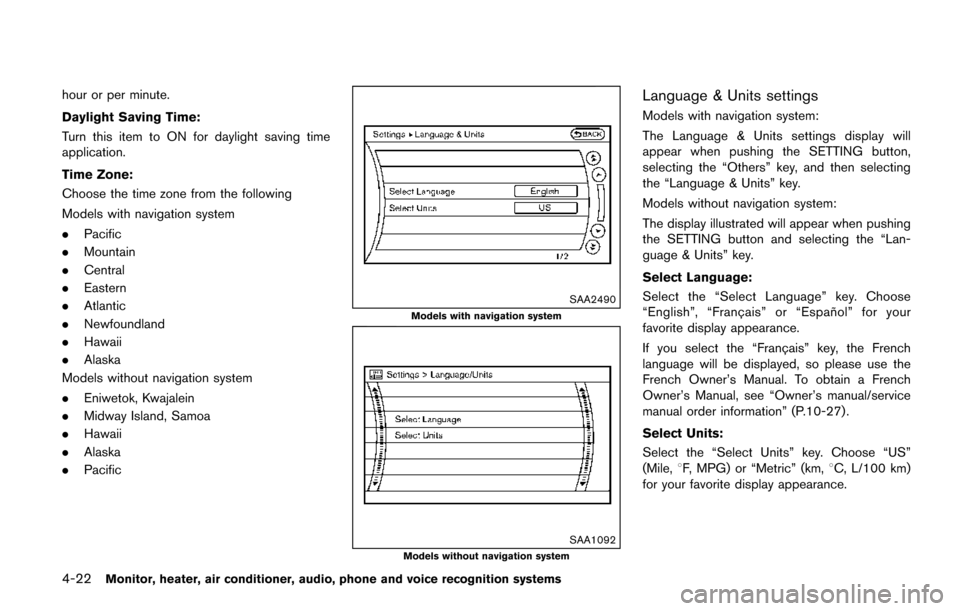
SAA2490
Models with navigation system
SAA1092Models without navigation system
Language & Units settings
Models with navigation system:
The Language & Units settings display will
appear when pushing the SETTING button,
selecting the “Others” key, and then selecting
the “Language & Units” key.
Models without navigation system:
The display illustrated will appear when pushing
the SETTING button and selecting the “Lan-
guage & Units” key.
Select Language:
Select the “Select Language” key. Choose
“English”, “Franc¸ ais” or “Espan ˜
ol” for your
favorite display appearance.
If you select the “Franc¸ ais” key, the French
language will be displayed, so please use the
French Owner’s Manual. To obtain a French
Owner’s Manual, see “Owner’s manual/service
manual order information” (P.10-27) .
Select Units:
Select the “Select Units” key. Choose “US”
(Mile, 8F, MPG) or “Metric” (km, 8C, L/100 km)
for your favorite display appearance.
Page 212 of 520
Voice Recognition settings (models with
navigation system)
For details about the “Voice Recognition”
settings, see “NISSAN Voice Recognition sys-
tem (models with navigation system)” (P.4-154) .
Camera settings (models without navi-
gation system)
For the details about the “Camera” settings, see
“RearView Monitor” (P.4-25) .
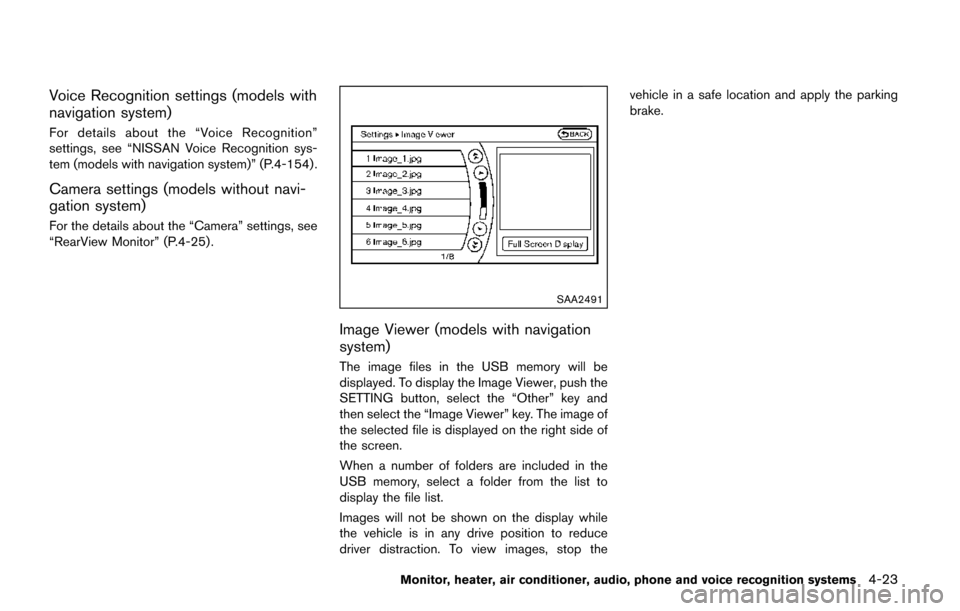
SAA2491
Image Viewer (models with navigation
system)
The image files in the USB memory will be
displayed. To display the Image Viewer, push the
SETTING button, select the “Other” key and
then select the “Image Viewer” key. The image of
the selected file is displayed on the right side of
the screen.
When a number of folders are included in the
USB memory, select a folder from the list to
display the file list.
Images will not be shown on the display while
the vehicle is in any drive position to reduce
driver distraction. To view images, stop thevehicle in a safe location and apply the parking
brake.
Monitor, heater, air conditioner, audio, phone and voice recognition systems4-23
Page 213 of 520
4-24Monitor, heater, air conditioner, audio, phone and voice recognition systems
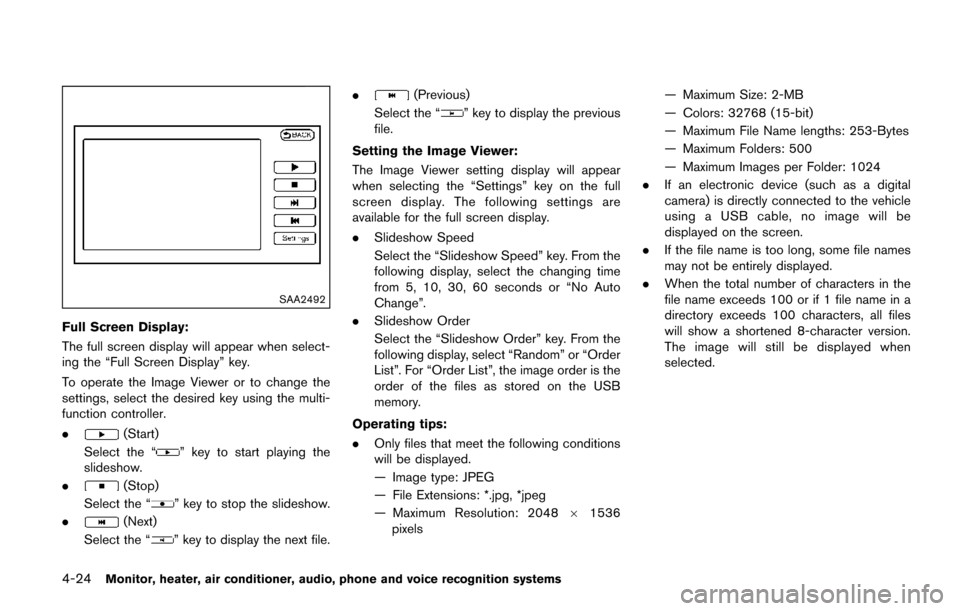
SAA2492
Full Screen Display:
The full screen display will appear when select-
ing the “Full Screen Display” key.
To operate the Image Viewer or to change the
settings, select the desired key using the multi-
function controller.
.
(Start)
Select the “
” key to start playing the
slideshow.
.
(Stop)
Select the “
” key to stop the slideshow.
.
(Next)
Select the “
” key to display the next file. .
(Previous)
Select the “
” key to display the previous
file.
Setting the Image Viewer:
The Image Viewer setting display will appear
when selecting the “Settings” key on the full
screen display. The following settings are
available for the full screen display.
. Slideshow Speed
Select the “Slideshow Speed” key. From the
following display, select the changing time
from 5, 10, 30, 60 seconds or “No Auto
Change”.
. Slideshow Order
Select the “Slideshow Order” key. From the
following display, select “Random” or “Order
List”. For “Order List”, the image order is the
order of the files as stored on the USB
memory.
Operating tips:
. Only files that meet the following conditions
will be displayed.
— Image type: JPEG
— File Extensions: *.jpg, *jpeg
— Maximum Resolution: 2048 61536
pixels — Maximum Size: 2-MB
— Colors: 32768 (15-bit)
— Maximum File Name lengths: 253-Bytes
— Maximum Folders: 500
— Maximum Images per Folder: 1024
. If an electronic device (such as a digital
camera) is directly connected to the vehicle
using a USB cable, no image will be
displayed on the screen.
. If the file name is too long, some file names
may not be entirely displayed.
. When the total number of characters in the
file name exceeds 100 or if 1 file name in a
directory exceeds 100 characters, all files
will show a shortened 8-character version.
The image will still be displayed when
selected.
Page 218 of 520
5. When the vehicle is parked in the spacecompletely, move the shift lever to the P
(Park) position and apply the parking brake.
ADJUSTING THE SCREEN
Models with Center Multi-function Control
Panel:
.To adjust the Display ON/OFF, Brightness,
Tint, Color, Contrast and Black Level of the
RearView Monitor, push the SETTING but-
ton with the RearView Monitor on, select the
item key and adjust the level using the
multifunction controller.
Do not adjust the Brightness, Tint, Color,
Contrast and Black Level of the RearView
Monitor while the vehicle is moving. Make
sure the parking brake is firmly applied.
The display of the predictive course lines
can be set to ON or OFF. For details, see
“Predictive course line settings” (P.4-29).
Models without Center Multi-function Control
Panel:
. To set up the RearView Monitor to your
preferred settings, push the ENTER/
SETTING button while the RearView Moni-
tor screen is displayed. Each time the
ENTER/SETTING button is pushed, the next
setting item is selected. Turn the TUNE
SCROLL control knob to adjust each item. Available setting items:
— Brightness
— Contrast
The setting items will disappear and the display
will return to the original screen if ENTER/
SETTING button is pushed when the last setting
item is selected or if the screen is left without
operation for some time. For details, see “FM-
AM-SAT radio with Compact Disc (CD) player
(Type A)” (P.4-77) .
NOTE:
Do not adjust any of the display settings of
the RearView Monitor while the vehicle is
moving. Make sure the parking brake is
firmly applied.
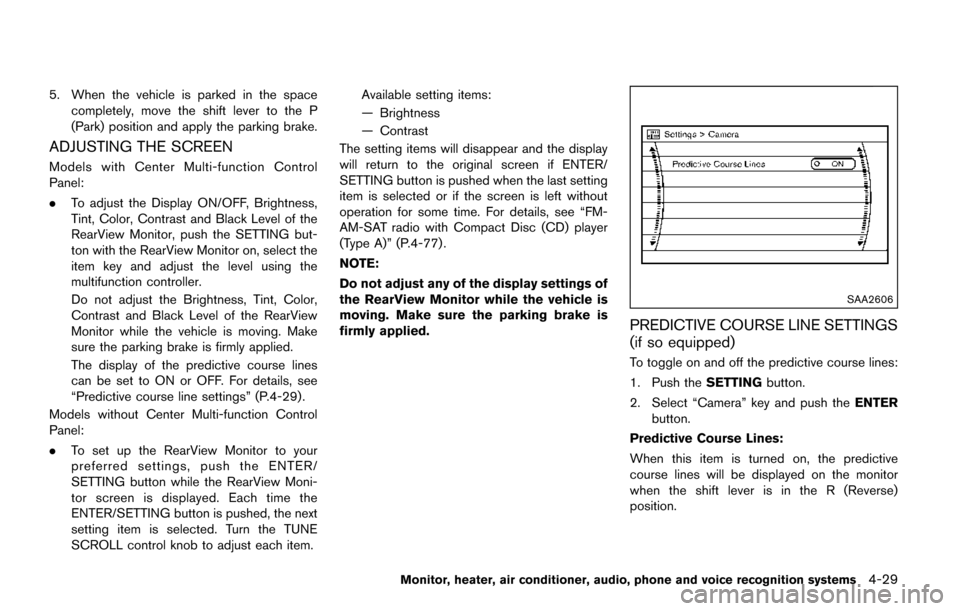
SAA2606
PREDICTIVE COURSE LINE SETTINGS
(if so equipped)
To toggle on and off the predictive course lines:
1. Push the SETTINGbutton.
2. Select “Camera” key and push the ENTER
button.
Predictive Course Lines:
When this item is turned on, the predictive
course lines will be displayed on the monitor
when the shift lever is in the R (Reverse)
position.
Monitor, heater, air conditioner, audio, phone and voice recognition systems4-29
Page 233 of 520
4-44Monitor, heater, air conditioner, audio, phone and voice recognition systems
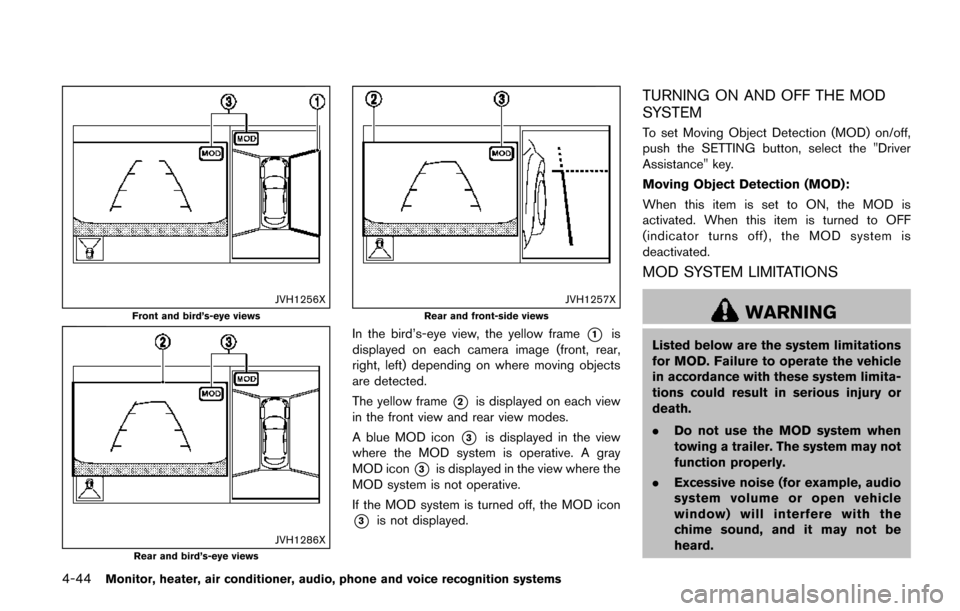
JVH1256X
Front and bird’s-eye views
JVH1286XRear and bird’s-eye views
JVH1257X
Rear and front-side views
In the bird’s-eye view, the yellow frame*1is
displayed on each camera image (front, rear,
right, left) depending on where moving objects
are detected.
The yellow frame
*2is displayed on each view
in the front view and rear view modes.
A blue MOD icon
*3is displayed in the view
where the MOD system is operative. A gray
MOD icon
*3is displayed in the view where the
MOD system is not operative.
If the MOD system is turned off, the MOD icon
*3is not displayed.
TURNING ON AND OFF THE MOD
SYSTEM
To set Moving Object Detection (MOD) on/off,
push the SETTING button, select the "Driver
Assistance" key.
Moving Object Detection (MOD):
When this item is set to ON, the MOD is
activated. When this item is turned to OFF
(indicator turns off) , the MOD system is
deactivated.
MOD SYSTEM LIMITATIONS
WARNING
Listed below are the system limitations
for MOD. Failure to operate the vehicle
in accordance with these system limita-
tions could result in serious injury or
death.
. Do not use the MOD system when
towing a trailer. The system may not
function properly.
. Excessive noise (for example, audio
system volume or open vehicle
window) will interfere with the
chime sound, and it may not be
heard.
Page 274 of 520
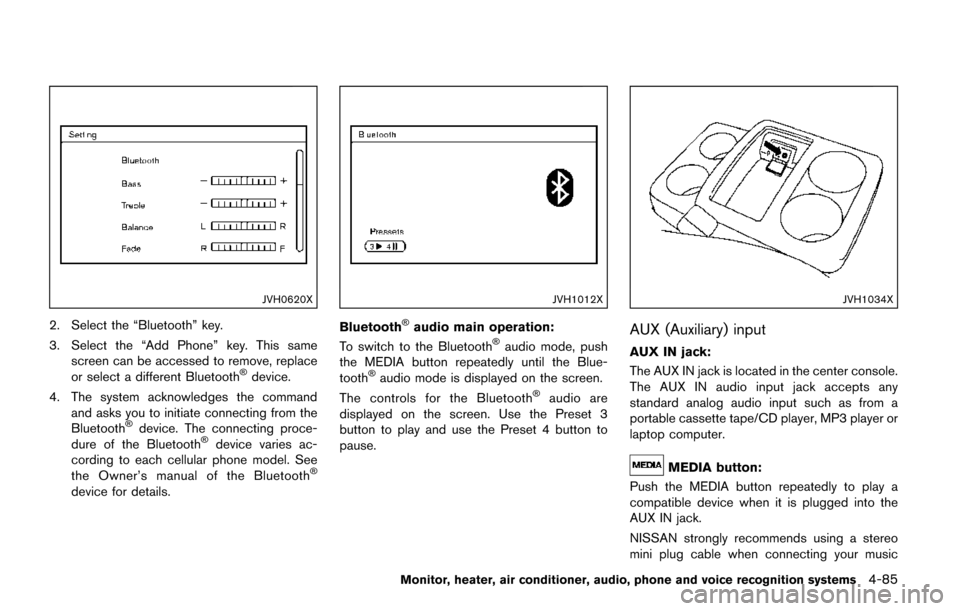
JVH0620X
2. Select the “Bluetooth” key.
3. Select the “Add Phone” key. This samescreen can be accessed to remove, replace
or select a different Bluetooth
�Šdevice.
4. The system acknowledges the command and asks you to initiate connecting from the
Bluetooth
�Šdevice. The connecting proce-
dure of the Bluetooth�Šdevice varies ac-
cording to each cellular phone model. See
the Owner’s manual of the Bluetooth
�Š
device for details.
JVH1012X
Bluetooth�Šaudio main operation:
To switch to the Bluetooth�Šaudio mode, push
the MEDIA button repeatedly until the Blue-
tooth
�Šaudio mode is displayed on the screen.
The controls for the Bluetooth�Šaudio are
displayed on the screen. Use the Preset 3
button to play and use the Preset 4 button to
pause.
JVH1034X
AUX (Auxiliary) input
AUX IN jack:
The AUX IN jack is located in the center console.
The AUX IN audio input jack accepts any
standard analog audio input such as from a
portable cassette tape/CD player, MP3 player or
laptop computer.
MEDIA button:
Push the MEDIA button repeatedly to play a
compatible device when it is plugged into the
AUX IN jack.
NISSAN strongly recommends using a stereo
mini plug cable when connecting your music
Monitor, heater, air conditioner, audio, phone and voice recognition systems4-85
Page 278 of 520
.UPDATING (When the satellite radio sub-
scription is not active)
SCAN tuning:
Push the SCAN tuning button to tune from low
to high frequencies and stop at each broad-
casting station/channel for 5 seconds. Pushing
the button again during this 5 seconds period
will stop SCAN tuning and the radio will remain
tuned to that station/channel.
If the SCAN tuning button is not pushed within 5
seconds, SCAN tuning moves to the next
station/channel.
*1to*6Station memory operations:
12 stations/channels can be set for the FM band
(6 each for FM1 and FM2) , 18 for SiriusXM
Satellite Radio (6 each for XM1, XM2 and XM3)
and 6 stations can be set for the AM band.
1. Choose the radio band using the radio band select button.
2. Tune to the desired station/channel using the SEEK/TRACK, SCAN button or the
radio TUNE knob.
3. Push and hold the desired station preset button
*1to*6until the radio mutes.
4. The station indicator will then come on and the sound will resume. Memorizing is now
complete. 5. Other buttons can be set in the same
manner.
If the battery cable is disconnected, or if the fuse
opens, the radio memory will be erased. In that
case, reset the desired stations/channels.
List (AM and FM radio) (models with
navigation system):
When the “List” key on the display is selected
while the FM or AM radio is being played, the
preset station list will be displayed.
If 1 of the 6 preset stations listed is touched and
held, the current station will be stored as the
new preset.
Menu (SiriusXM Satellite Radio):
When the “Menu” key on the display is selected
while the SiriusXM Satellite Radio is being
played, the menu list will be displayed.
The following items are available.
. Preset List
Displays the preset channel list. If 1 of the 6
preset stations listed is touched and held,
the current station will be stored as the new
preset.
. Customize Channel List
Selects specific channels to skip while using
the TUNE, SEEK/CATEGORY or Menu-
Categories feature. .
Favorite Artists & Songs
Stores the current artist or song that is being
played. Touch the “Alert” key to be reminded
when the stored artist or song is playing on a
station while listening to SiriusXM Satellite
Radio.
. Categories
Selecting a category will go to the first
channel in that category as defined by
SiriusXM Satellite Radio.
. Direct Tune
Inputs the channel number by using a
keypad.
Text (models without navigation system):
When the “Text” key is selected with the multi-
function controller on the display and then the
ENTER button is pushed while the satellite radio
is being played, the text information listed below
will be displayed on the screen.
. CH Name
. Category
. Name
. Title
. Other
Monitor, heater, air conditioner, audio, phone and voice recognition systems4-89
Page 279 of 520
4-90Monitor, heater, air conditioner, audio, phone and voice recognition systems
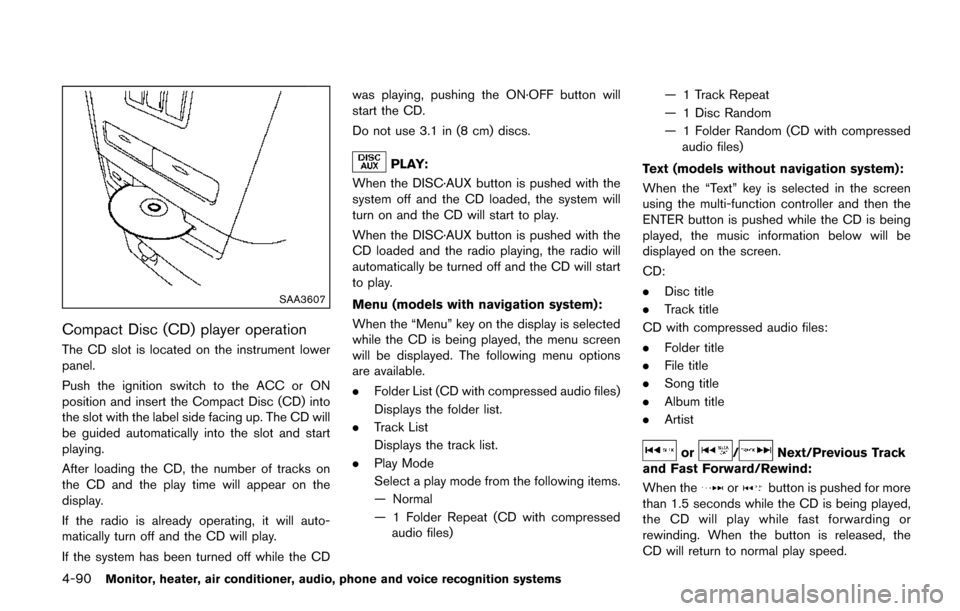
SAA3607
Compact Disc (CD) player operation
The CD slot is located on the instrument lower
panel.
Push the ignition switch to the ACC or ON
position and insert the Compact Disc (CD) into
the slot with the label side facing up. The CD will
be guided automatically into the slot and start
playing.
After loading the CD, the number of tracks on
the CD and the play time will appear on the
display.
If the radio is already operating, it will auto-
matically turn off and the CD will play.
If the system has been turned off while the CDwas playing, pushing the ON·OFF button will
start the CD.
Do not use 3.1 in (8 cm) discs.
PLAY:
When the DISC·AUX button is pushed with the
system off and the CD loaded, the system will
turn on and the CD will start to play.
When the DISC·AUX button is pushed with the
CD loaded and the radio playing, the radio will
automatically be turned off and the CD will start
to play.
Menu (models with navigation system):
When the “Menu” key on the display is selected
while the CD is being played, the menu screen
will be displayed. The following menu options
are available.
. Folder List (CD with compressed audio files)
Displays the folder list.
. Track List
Displays the track list.
. Play Mode
Select a play mode from the following items.
— Normal
— 1 Folder Repeat (CD with compressed
audio files) — 1 Track Repeat
— 1 Disc Random
— 1 Folder Random (CD with compressed
audio files)
Text (models without navigation system):
When the “Text” key is selected in the screen
using the multi-function controller and then the
ENTER button is pushed while the CD is being
played, the music information below will be
displayed on the screen.
CD:
. Disc title
. Track title
CD with compressed audio files:
. Folder title
. File title
. Song title
. Album title
. Artist
or/Next/Previous Track
and Fast Forward/Rewind:
When the
orbutton is pushed for more
than 1.5 seconds while the CD is being played,
the CD will play while fast forwarding or
rewinding. When the button is released, the
CD will return to normal play speed.