2017 NISSAN QUEST spare tire
[x] Cancel search: spare tirePage 411 of 520
6-6In case of emergency
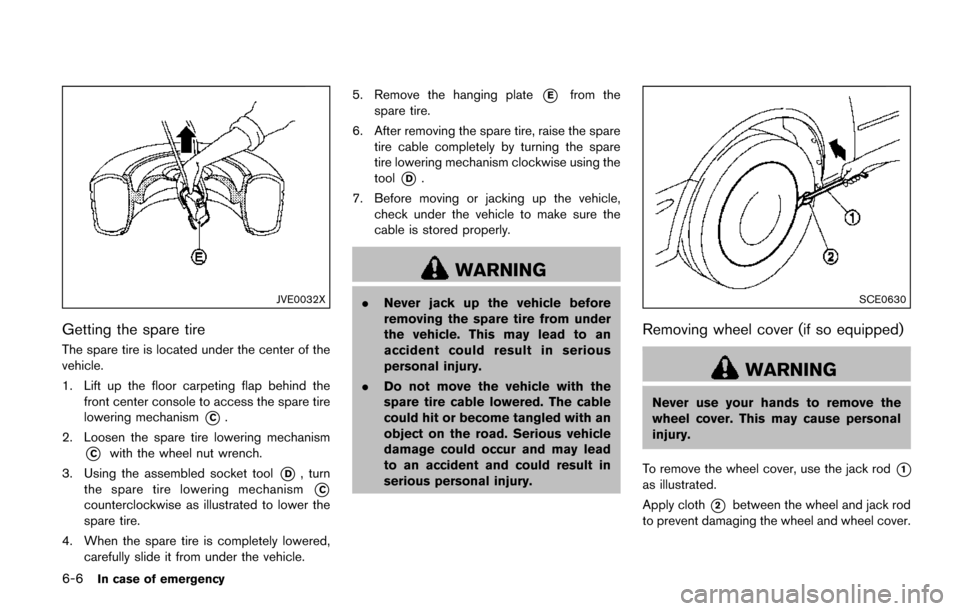
JVE0032X
Getting the spare tire
The spare tire is located under the center of the
vehicle.
1. Lift up the floor carpeting flap behind thefront center console to access the spare tire
lowering mechanism
*C.
2. Loosen the spare tire lowering mechanism
*Cwith the wheel nut wrench.
3. Using the assembled socket tool
*D, turn
the spare tire lowering mechanism
*C
counterclockwise as illustrated to lower the
spare tire.
4. When the spare tire is completely lowered, carefully slide it from under the vehicle. 5. Remove the hanging plate
*Efrom the
spare tire.
6. After removing the spare tire, raise the spare tire cable completely by turning the spare
tire lowering mechanism clockwise using the
tool
*D.
7. Before moving or jacking up the vehicle, check under the vehicle to make sure the
cable is stored properly.
WARNING
.Never jack up the vehicle before
removing the spare tire from under
the vehicle. This may lead to an
accident could result in serious
personal injury.
. Do not move the vehicle with the
spare tire cable lowered. The cable
could hit or become tangled with an
object on the road. Serious vehicle
damage could occur and may lead
to an accident and could result in
serious personal injury.SCE0630
Removing wheel cover (if so equipped)
WARNING
Never use your hands to remove the
wheel cover. This may cause personal
injury.
To remove the wheel cover, use the jack rod
*1
as illustrated.
Apply cloth
*2between the wheel and jack rod
to prevent damaging the wheel and wheel cover.
Page 413 of 520
6-8In case of emergency
SCE0504
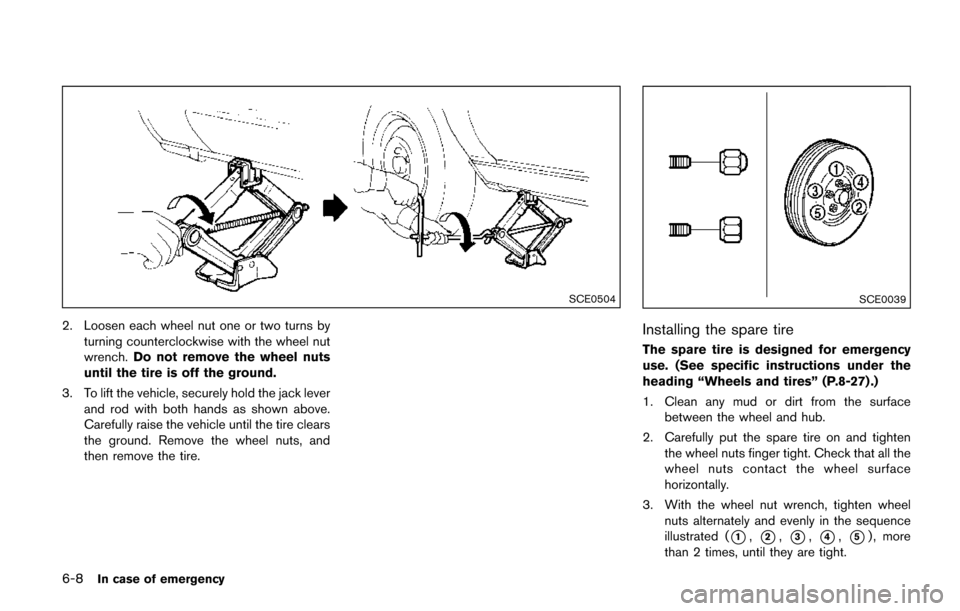
2. Loosen each wheel nut one or two turns byturning counterclockwise with the wheel nut
wrench. Do not remove the wheel nuts
until the tire is off the ground.
3. To lift the vehicle, securely hold the jack lever and rod with both hands as shown above.
Carefully raise the vehicle until the tire clears
the ground. Remove the wheel nuts, and
then remove the tire.
SCE0039
Installing the spare tire
The spare tire is designed for emergency
use. (See specific instructions under the
heading “Wheels and tires” (P.8-27) .)
1. Clean any mud or dirt from the surfacebetween the wheel and hub.
2. Carefully put the spare tire on and tighten the wheel nuts finger tight. Check that all the
wheel nuts contact the wheel surface
horizontally.
3. With the wheel nut wrench, tighten wheel nuts alternately and evenly in the sequence
illustrated (
*1,*2,*3,*4,*5) , more
than 2 times, until they are tight.
Page 414 of 520
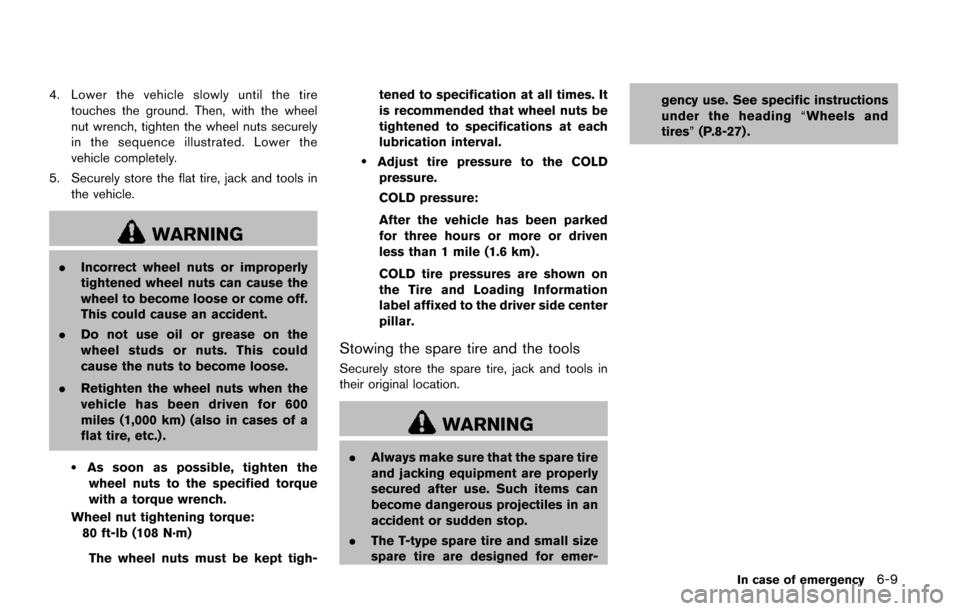
4. Lower the vehicle slowly until the tiretouches the ground. Then, with the wheel
nut wrench, tighten the wheel nuts securely
in the sequence illustrated. Lower the
vehicle completely.
5. Securely store the flat tire, jack and tools in the vehicle.
WARNING
.Incorrect wheel nuts or improperly
tightened wheel nuts can cause the
wheel to become loose or come off.
This could cause an accident.
. Do not use oil or grease on the
wheel studs or nuts. This could
cause the nuts to become loose.
. Retighten the wheel nuts when the
vehicle has been driven for 600
miles (1,000 km) (also in cases of a
flat tire, etc.) .
.As soon as possible, tighten the
wheel nuts to the specified torque
with a torque wrench.
Wheel nut tightening torque: 80 ft-lb (108 N·m)
The wheel nuts must be kept tigh- tened to specification at all times. It
is recommended that wheel nuts be
tightened to specifications at each
lubrication interval.
.Adjust tire pressure to the COLD
pressure.
COLD pressure:
After the vehicle has been parked
for three hours or more or driven
less than 1 mile (1.6 km) .
COLD tire pressures are shown on
the Tire and Loading Information
label affixed to the driver side center
pillar.
Stowing the spare tire and the tools
Securely store the spare tire, jack and tools in
their original location.
WARNING
. Always make sure that the spare tire
and jacking equipment are properly
secured after use. Such items can
become dangerous projectiles in an
accident or sudden stop.
. The T-type spare tire and small size
spare tire are designed for emer- gency use. See specific instructions
under the heading
“Wheels and
tires” (P.8-27) .
In case of emergency6-9
Page 415 of 520

6-10In case of emergency
SCE0978
WARNING
.When storing the spare tire, make
sure that the outer side of the spare
tire
*Ais facing up and that the
hanging plate*Bis in the center of
the wheel as illustrated. Failure to
store the spare tire properly could
result in serious vehicle damage
and may lead to an accident and
could result in serious personal
injury.
. Do not store any tire with the cable
except the spare tire. .
Do not use an impact wrench when
tightening or loosening the spare
tire lowering mechanism.
. When raising the spare tire, tighten
the spare tire lowering mechanism
until three clicks are heard.
. After storing the spare tire, check
under the vehicle to make sure it is
stored properly. To start your engine with a booster battery, the
instructions and precautions below must be
followed.
WARNING
.
If done incorrectly, jump starting
can lead to a battery explosion,
resulting in severe injury or death.
It could also damage your vehicle.
. Explosive hydrogen gas is always
present in the vicinity of the battery.
Keep all sparks and flames away
from the battery.
. Do not allow battery fluid to come
into contact with eyes, skin, clothing
or painted surfaces. Battery fluid is
a corrosive sulfuric acid solution
which can cause severe burns. If
the fluid should come into contact
with anything, immediately flush the
contacted area with water.
. Keep the battery out of the reach of
children.
. The booster battery must be rated at
12 volts. Use of an improperly rated
battery can damage your vehicle.
JUMP STARTING
Page 456 of 520
If you have a flat tire, see “Flat tire” (P.6-3) .
TIRE PRESSURE
Tire Pressure Monitoring System (TPMS)
This vehicle is equipped with the Tire Pressure
Monitoring System (TPMS) . It monitors tire
pressure of all tires except the spare. When
the low tire pressure warning light is lit and the
CHECK TIRE PRESSURE warning appears on
the vehicle information display, one or more of
your tires is significantly under-inflated.
The TPMS will activate only when the vehicle is
driven at speeds above 16 MPH (25 km/h) .
Also, this system may not detect a sudden drop
in tire pressure (for example a flat tire while
driving) .
For more details, see “Low tire pressure warning
light” (P.2-14) , “Tire Pressure Monitoring Sys-
tem (TPMS)” (P.5-3) and “Tire Pressure Mon-
itoring System (TPMS)” (P.6-3) .
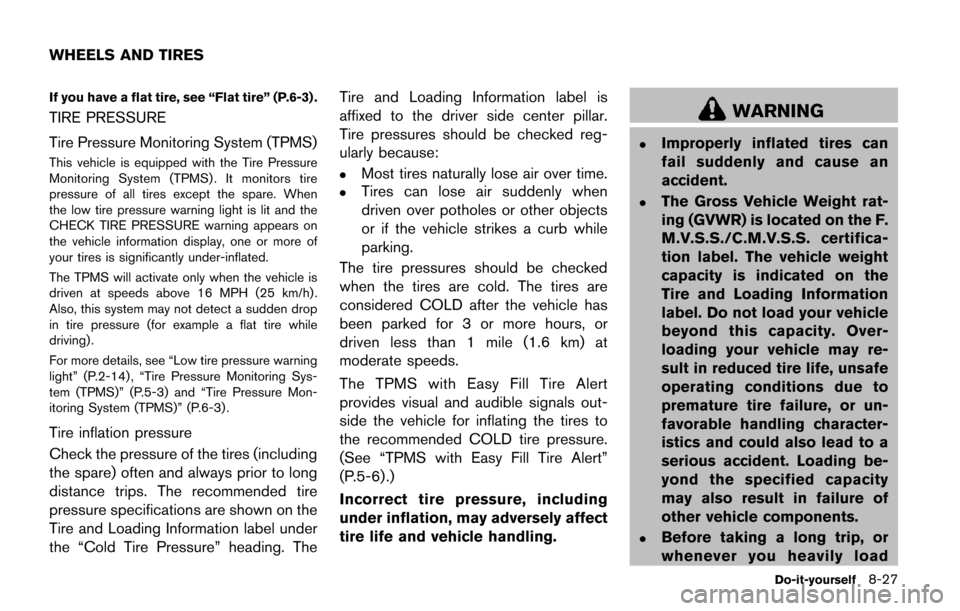
Tire inflation pressure
Check the pressure of the tires (including
the spare) often and always prior to long
distance trips. The recommended tire
pressure specifications are shown on the
Tire and Loading Information label under
the “Cold Tire Pressure” heading. TheTire and Loading Information label is
affixed to the driver side center pillar.
Tire pressures should be checked reg-
ularly because:
.Most tires naturally lose air over time.
.Tires can lose air suddenly when
driven over potholes or other objects
or if the vehicle strikes a curb while
parking.
The tire pressures should be checked
when the tires are cold. The tires are
considered COLD after the vehicle has
been parked for 3 or more hours, or
driven less than 1 mile (1.6 km) at
moderate speeds.
The TPMS with Easy Fill Tire Alert
provides visual and audible signals out-
side the vehicle for inflating the tires to
the recommended COLD tire pressure.
(See “TPMS with Easy Fill Tire Alert”
(P.5-6) .)
Incorrect tire pressure, including
under inflation, may adversely affect
tire life and vehicle handling.
WARNING
.Improperly inflated tires can
fail suddenly and cause an
accident.
.The Gross Vehicle Weight rat-
ing (GVWR) is located on the F.
M.V.S.S./C.M.V.S.S. certifica-
tion label. The vehicle weight
capacity is indicated on the
Tire and Loading Information
label. Do not load your vehicle
beyond this capacity. Over-
loading your vehicle may re-
sult in reduced tire life, unsafe
operating conditions due to
premature tire failure, or un-
favorable handling character-
istics and could also lead to a
serious accident. Loading be-
yond the specified capacity
may also result in failure of
other vehicle components.
.Before taking a long trip, or
whenever you heavily load
Do-it-yourself8-27
WHEELS AND TIRES
Page 458 of 520
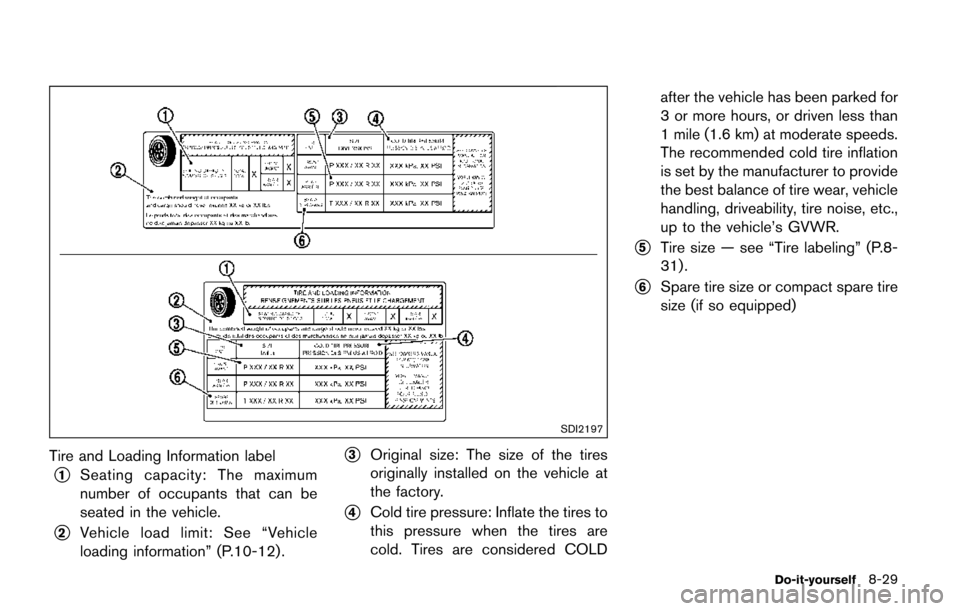
SDI2197
Tire and Loading Information label
*1Seating capacity: The maximum
number of occupants that can be
seated in the vehicle.
*2Vehicle load limit: See “Vehicle
loading information” (P.10-12) .
*3Original size: The size of the tires
originally installed on the vehicle at
the factory.
*4Cold tire pressure: Inflate the tires to
this pressure when the tires are
cold. Tires are considered COLDafter the vehicle has been parked for
3 or more hours, or driven less than
1 mile (1.6 km) at moderate speeds.
The recommended cold tire inflation
is set by the manufacturer to provide
the best balance of tire wear, vehicle
handling, driveability, tire noise, etc.,
up to the vehicle’s GVWR.
*5Tire size — see “Tire labeling” (P.8-
31) .
*6Spare tire size or compact spare tire
size (if so equipped)
Do-it-yourself8-29
Page 459 of 520
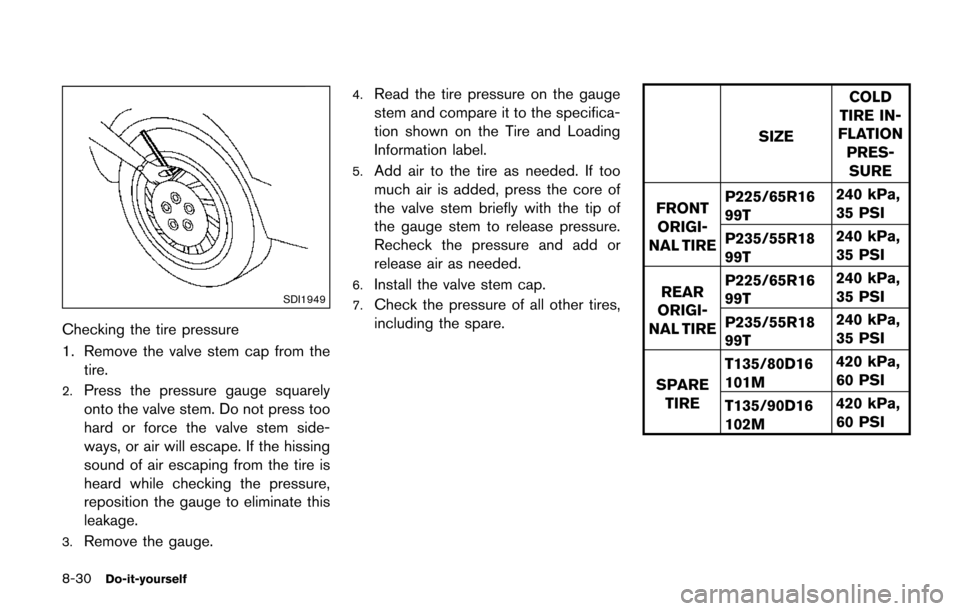
8-30Do-it-yourself
SDI1949
Checking the tire pressure
1. Remove the valve stem cap from thetire.
2.Press the pressure gauge squarely
onto the valve stem. Do not press too
hard or force the valve stem side-
ways, or air will escape. If the hissing
sound of air escaping from the tire is
heard while checking the pressure,
reposition the gauge to eliminate this
leakage.
3.Remove the gauge.
4.Read the tire pressure on the gauge
stem and compare it to the specifica-
tion shown on the Tire and Loading
Information label.
5.Add air to the tire as needed. If too
much air is added, press the core of
the valve stem briefly with the tip of
the gauge stem to release pressure.
Recheck the pressure and add or
release air as needed.
6.Install the valve stem cap.
7.Check the pressure of all other tires,
including the spare.
SIZE COLD
TIRE IN-
FLATION
PRES-SURE
FRONT ORIGI-
NAL TIRE P225/65R16
99T
240 kPa,
35 PSI
P235/55R18
99T 240 kPa,
35 PSI
REAR
ORIGI-
NAL TIRE P225/65R16
99T
240 kPa,
35 PSI
P235/55R18
99T 240 kPa,
35 PSI
SPARE TIRE T135/80D16
101M
420 kPa,
60 PSI
T135/90D16
102M 420 kPa,
60 PSI
Page 464 of 520
a tight fit. Loose end links of the tire chain must
be secured or removed to prevent the possibility
of whipping action damage to the fenders or
underbody. If possible, avoid fully loading your
vehicle when using tire chains. In addition, drive
at a reduced speed. Otherwise, your vehicle may
be damaged and/or vehicle handling and
performance may be adversely affected.
Tire chains must be installed only on the
front wheels and not on the rear wheels.
Never install tire chains on a TEMPORARY USE
ONLY spare tire.
Do not use tire chains on dry roads. Driving with
tire chains in such conditions can cause damage
to the various mechanisms of the vehicle due to
some overstress.
SDI1662
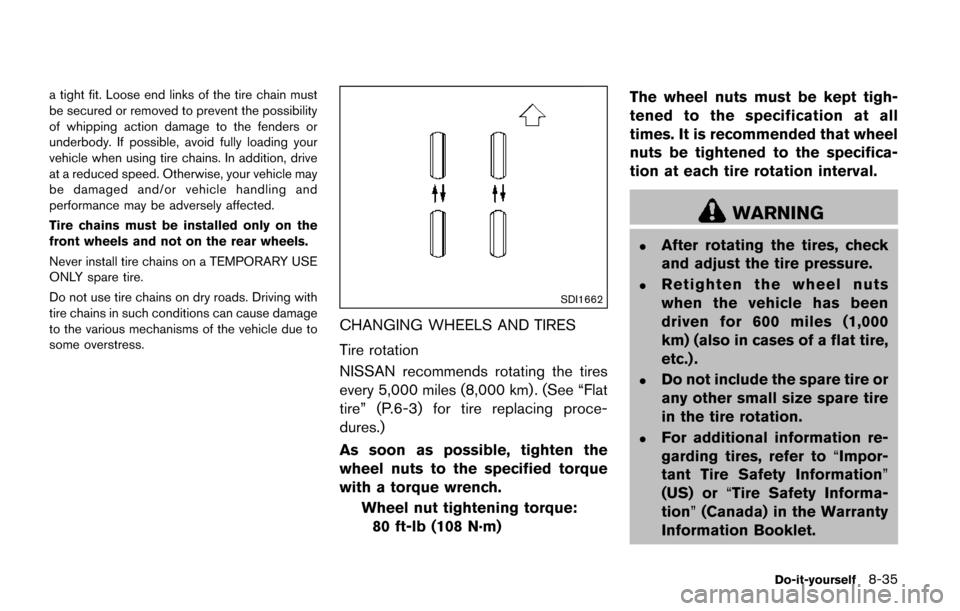
CHANGING WHEELS AND TIRES
Tire rotation
NISSAN recommends rotating the tires
every 5,000 miles (8,000 km) . (See “Flat
tire” (P.6-3) for tire replacing proce-
dures.)
As soon as possible, tighten the
wheel nuts to the specified torque
with a torque wrench.Wheel nut tightening torque:80 ft-lb (108 N·m) The wheel nuts must be kept tigh-
tened to the specification at all
times. It is recommended that wheel
nuts be tightened to the specifica-
tion at each tire rotation interval.
WARNING
.After rotating the tires, check
and adjust the tire pressure.
.Retighten the wheel nuts
when the vehicle has been
driven for 600 miles (1,000
km) (also in cases of a flat tire,
etc.) .
.Do not include the spare tire or
any other small size spare tire
in the tire rotation.
.For additional information re-
garding tires, refer to
“Impor-
tant Tire Safety Information”
(US) or “Tire Safety Informa-
tion” (Canada) in the Warranty
Information Booklet.
Do-it-yourself8-35