Page 175 of 558
HOW TO USE THE REMOTE
KEYLESS ENTRY FUNCTION
The remote keyless entry function can operate all
door locks using the remote keyless function of
the Intelligent Key. The remote keyless function
can operate at a distance of 33 ft (10 m) away
from the vehicle. The operating distance de-
pends upon the conditions around the vehicle.
The remote keyless entry function will not func-
tion under the following conditions:● When the Intelligent Key is not within the
operational range.
● When the doors or the rear liftgate are open
or not closed securely.
● When the Intelligent Key battery is dis-
charged.
Page 185 of 558

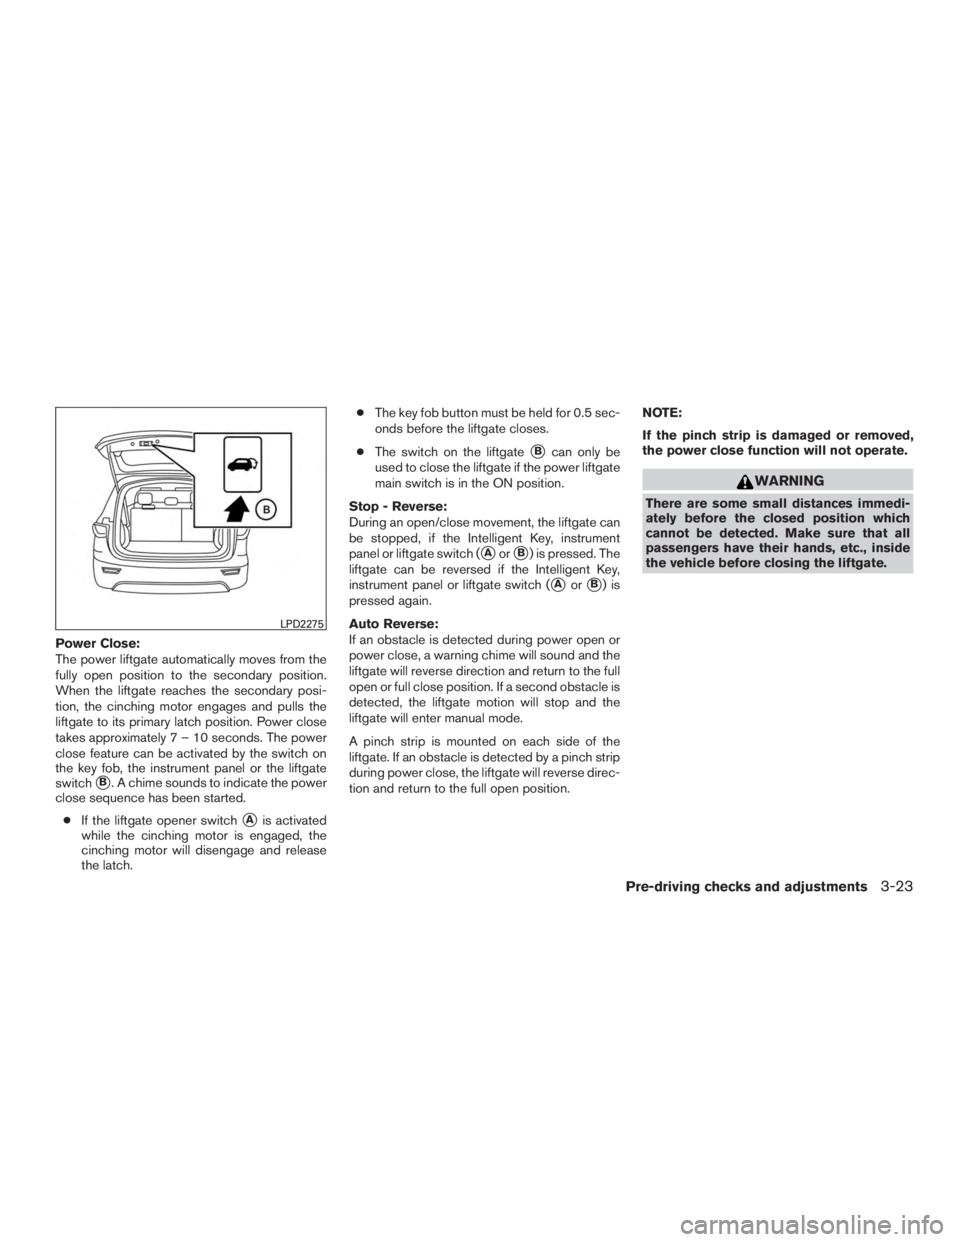
Power Close:
The power liftgate automatically moves from the
fully open position to the secondary position.
When the liftgate reaches the secondary posi-
tion, the cinching motor engages and pulls the
liftgate to its primary latch position. Power close
takes approximately7–10seconds. The power
close feature can be activated by the switch on
the key fob, the instrument panel or the liftgate
switch
�B. A chime sounds to indicate the power
close sequence has been started.
● If the liftgate opener switch
�Ais activated
while the cinching motor is engaged, the
cinching motor will disengage and release
the latch. ●
The key fob button must be held for 0.5 sec-
onds before the liftgate closes.
● The switch on the liftgate
�Bcan only be
used to close the liftgate if the power liftgate
main switch is in the ON position.
Stop - Reverse:
During an open/close movement, the liftgate can
be stopped, if the Intelligent Key, instrument
panel or liftgate switch (
�Aor�B) is pressed. The
liftgate can be reversed if the Intelligent Key,
instrument panel or liftgate switch (
�Aor�B)is
pressed again.
Auto Reverse:
If an obstacle is detected during power open or
power close, a warning chime will sound and the
liftgate will reverse direction and return to the full
open or full close position. If a second obstacle is
detected, the liftgate motion will stop and the
liftgate will enter manual mode.
A pinch strip is mounted on each side of the
liftgate. If an obstacle is detected by a pinch strip
during power close, the liftgate will reverse direc-
tion and return to the full open position. NOTE:
If the pinch strip is damaged or removed,
the power close function will not operate.
Page 188 of 558
WARNING
Prevent unintentional liftgate
opening/closing. There may be conditions
when opening/closing the liftgate is not
desired. Keep the Intelligent Key out of
the range of the liftgate (3 ft or 1 m) , when
washing or working around the back of
the vehicle.
Page 228 of 558
ADJUSTING THE SCREEN
To adjust the Display ON/OFF, Brightness, Tint,
Color, Contrast and Black Level of the RearView
Monitor, press the SETTING button with the
RearView Monitor on, touch the Camera or
Camera/Sonar key and then select the “Display”
key. Select one of the items and change the value
by touching the “+” or “-” key or by turning the
multi-function controller.NOTE:
Do not adjust the Brightness, Tint, Color,
Contrast and Black Level of the RearView
Monitor while the vehicle is moving. Make
sure the parking brake is firmly applied.
HOW TO TURN ON AND OFF
PREDICTED COURSE LINES
To toggle on and off the predicted course lines
while in the P (Park) position:
1. Press the SETTING button.
2. Touch the Camera or Camera/Sonar key.
3. Touch the Camera key.
4. Touch the Predicted Course Lines key to turn the feature on or off.
REARVIEW MONITOR SYSTEM
LIMITATIONS
Page 243 of 558

Sonar function settings
To set up the sonar function to your preferred
settings, press the SETTING button, select the
“Others” key and then select the “Camera” key on
the center display.
Designs and items displayed on the screen
may vary depending on the models.
Sonar Volume:Adjust the volume of the buzzer.
Sonar: When this item is turned ON, the rear
sonar is activated. When this item is turned OFF
(indicator turns off) , the rear sonar is deactivated.
The amber markers are displayed at the corners
of the vehicle icon. The next time the ignition
switch is placed in the “ON” position, “sonar is
OFF” is displayed briefly.
Towing mode: When this item is turned ON,
only the rear sonar is OFF. The amber markers are
displayed at the rear corners of the vehicle icon.
Show Camera when Sonar Activate: When
this item is turned ON, the camera view is auto-
matically shown on the display in the case that
the distance to the objects measured by the
sonar is becoming short.
Sonar Sensitivity: Adjust the sensitivity level of
the sonar higher (right) or lower (left) .
SONAR SYSTEM LIMITATIONS
Page 246 of 558

●When the shift lever is in the R (Reverse)
position and the vehicle speed is below ap-
proximately 6 mph (10 km/h), the MOD sys-
tem detects moving objects in the rear view.
The MOD system will not operate if the
liftgate is open.
The MOD system does not detect moving ob-
jects in the front-side view. The MOD icon is not
displayed on the screen when in this view.
When the MOD system detects moving objects
near the vehicle, a yellow frame will be displayed
on the view where the objects are detected. While the MOD system continues to detect mov-
ing objects, the yellow frame continues to be
displayed.
NOTE:
While the RCTA chime (if so equipped) is
beeping, the MOD system does not chime.
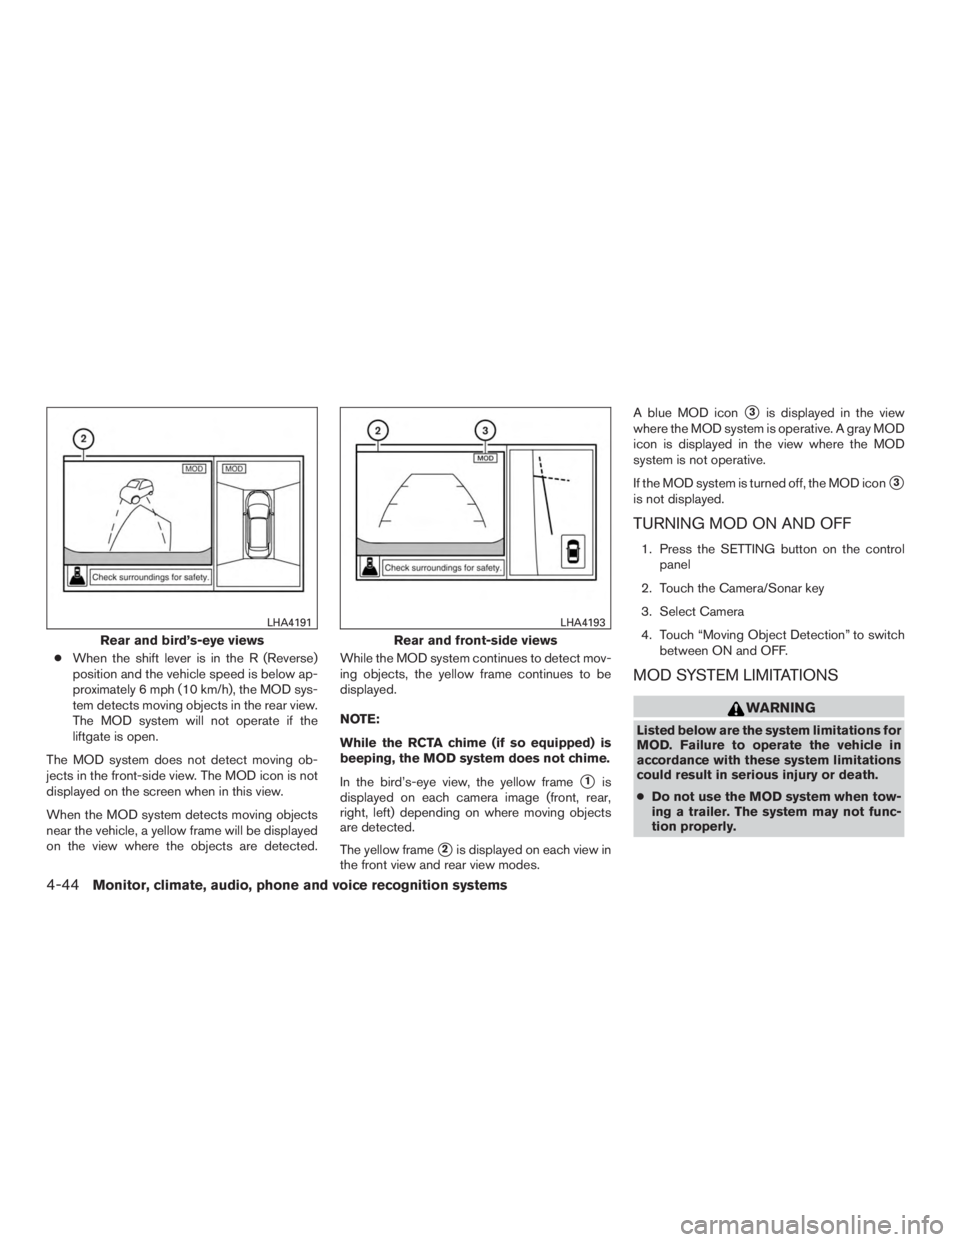
In the bird’s-eye view, the yellow frame
�1is
displayed on each camera image (front, rear,
right, left) depending on where moving objects
are detected.
The yellow frame
�2is displayed on each view in
the front view and rear view modes. A blue MOD icon
�3is displayed in the view
where the MOD system is operative. A gray MOD
icon is displayed in the view where the MOD
system is not operative.
If the MOD system is turned off, the MOD icon
�3
is not displayed.
TURNING MOD ON AND OFF
1. Press the SETTING button on the control panel
2. Touch the Camera/Sonar key
3. Select Camera
4. Touch “Moving Object Detection” to switch between ON and OFF.
MOD SYSTEM LIMITATIONS
Page 280 of 558

●Do not grab the USB port cover (if so
equipped) when pulling the USB device
out of the port. This could damage the
port and the cover.
● Do not leave the USB cable in a place
where it can be pulled unintentionally.
Pulling the cable may damage the port.
Refer to your device manufacturer’s owner infor-
mation regarding the proper use and care of the
device.
Two USB connection ports are located on the
center console box. For additional information,
refer to “USB/iPod® connection port” in this
section.
When compatible storage devices are plugged
into the jack, compatible audio files on the stor-
age devices can be played through the vehicle’s
audio system.
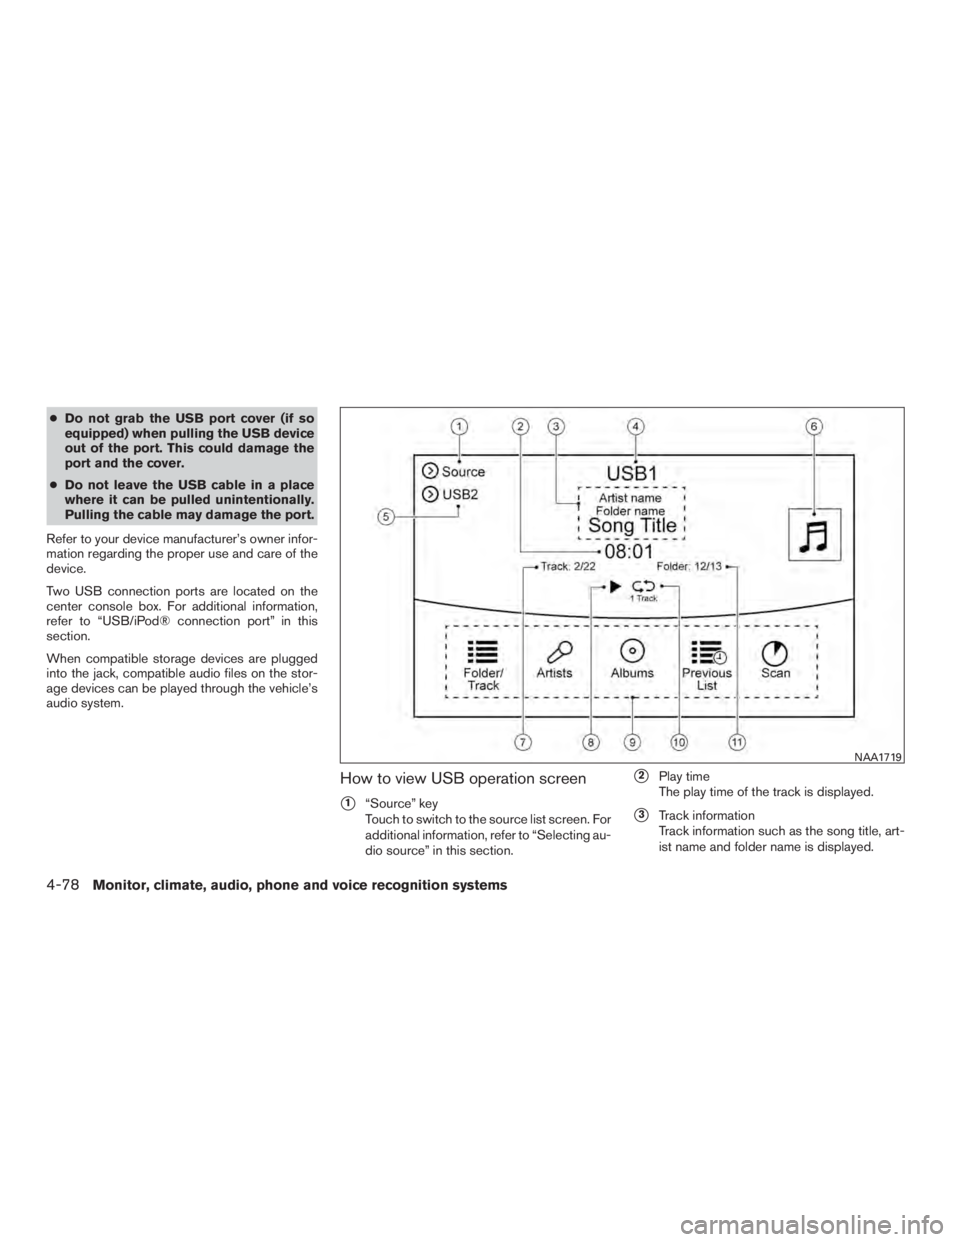
How to view USB operation screen
�1“Source” key
Touch to switch to the source list screen. For
additional information, refer to “Selecting au-
dio source” in this section.
�2Play time
The play time of the track is displayed.
�3Track information
Track information such as the song title, art-
ist name and folder name is displayed.
Page 282 of 558
Changing play mode
Touch the “Play Mode” key on the display to
select the play mode.
Only one of the two connected USB memory
devices can be operated by the voice recognition
system.
iPod® PLAYER
Connecting iPod®