2017 NISSAN MURANO tow
[x] Cancel search: towPage 2 of 38
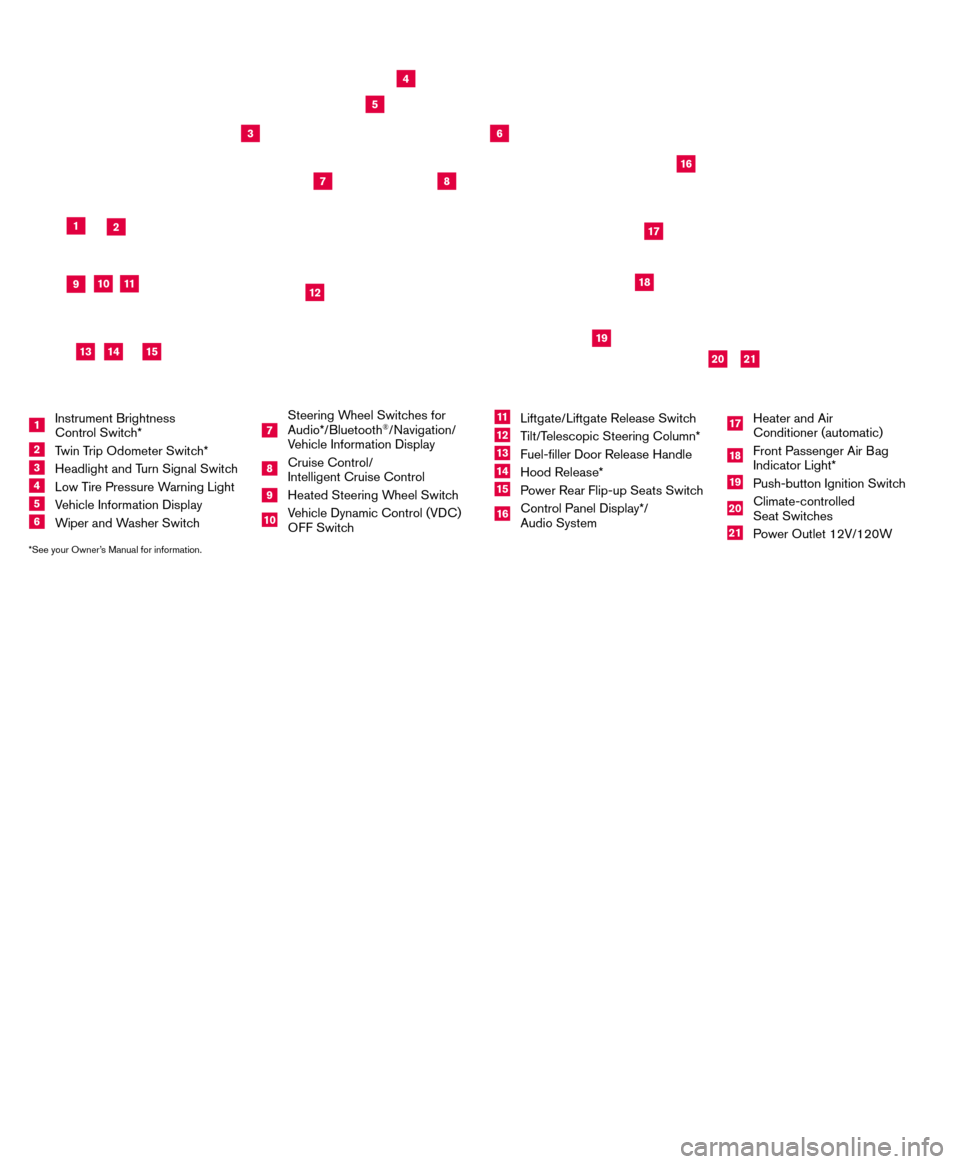
*See your Owner’s Manual for information.
19
20
16
12
5
6
18
8
3
10
9
211
1
4
7
17
21
Behind
steering
wheel
Please see your Owner’s Manual for important safety information and system operation limitations.
• A cellular telephone should not be used for any purpose while driving so\
full attention may be given to
vehicle operation.
•
Always wear your seat belt.
•Supplemental air bags do not replace proper seat belt us
age.
•
Children 12 and under should always ride in the rear seat properly secur\
ed in child restraints or seat
belts according to their age and weight.
•
Do not drink and drive.
For more information, refer to the “
Safety — Seats, seat belts and supplemental restraint system (sectio\
n 1) ”, the
“Display screen, heater, air conditioner, audio and phone systems (section 4)” and the “Starting and driving
(section 5)” of your Owner’s Manual.
Additional information about your vehicle is also available in your Owne\
r’s Manual, Navigation System
Owner’s Manual and at www.NissanUSA.com.
NEW SYSTEM FEATURESHow to Use Your Murano’s Touch-screen Display.......................................2
Heated Steering Wheel (if so equipped) ..............................................3
Around View® Monitor (AVM) with Moving Object Detection (MOD) (if so equipped).........3
Blind Spot Warning (B SW) (if so equipped)...........................................5
Predictive Forward Collision W
arning (PFCW) (if so equipped)
...........................5
Vehicle Dynamic Control (VD
C)
.....................................................5
Hill Start Assist (H
SA)
.............................................................5
Forward Emergency Braking (F
EB) (if so equipped)
....................................6
SiriusXM T
ravel Link and SiriusXM Traffic (if so equipped)
...............................
6
ESSENTIAL INFORMATIONTire Pressure Monitoring System (TPMS) with Easy Fill Tire Alert..........................7
Loose Fuel Cap...................................................................8
Fuel-filler Door....................................................................8
Towing Y
our Vehicle (if so equipped)
.................................................8
Cloc
k Set/Adjustment
.............................................................9
FIRST DRIVE FEATURESNissan Intelligent Key® System.....................................................10
Power Liftgate Release (if so equipped) .............................................12
Front Seat Adjustments...........................................................12
Automatic Drive Positioner (if so equipped)...........................................13
Rear Seat Adjustments ...........................................................14
Starting/Stopping the Engine ......................................................14
Outside Mirror Control Switch .....................................................15
Headlight Control Switch .........................................................15
Wiper and W
asher Switch
.........................................................16
Heater and Air Conditioner (automatic) (if so equipped) ................................17
FM
/AM/SiriusXM
® Satellite Radio with CD Player and Navigation........................18
US
B (Universal Serial Bus) Connection Port/iPod® Interface and AUX Jack................20
Front Armrest/Center Console Storage Bo
x ..........................................20
Cruise Control (if so equipped).....................................................20
Intelligent Cruise Control (IC
C) (if so equipped)
.......................................21
SYSTEM GUIDETrip Computer...................................................................22
Hands-free Text Mess aging Assistant (if so equipped) .................................23
NissanConnectsm Mobile Apps (if so equipped) .......................................24
Bluetooth® Hands-free Phone System...............................................24 System Operating Tips.........................................................24
Bluetooth® System with Navigation (if so equipped) ...................................25
Bluetooth® System without Navigation (if so equipped).................................27
Bluetooth® Streaming Audio .......................................................28
Navigation System (if so equipped) .................................................30
HomeLink® Universal Transceiver (if so equipped) .....................................31
TAB LE OF CONTE NTS
1 Instrument Brightness
Control Switch*
2 Twin Trip Odometer Switch*
3 Headlight and Turn Signal Switc h4 Low Tire Pressure Warning Light
5 Vehicle Information Display
6 Wiper and Washer Switch
7
Steering Wheel Switches for
Audio*/Bluetooth
®/Navigation/
Vehicle Information Display
8 Cruise Control/
Intelligent Cruise Control
9 Heated Steering Wheel Switc h10 Vehicle Dynamic Control (VDC)
O
FF Switch
11 Liftgate/Liftgate Release Switch
12 Tilt/Telescopic Steering Column*
13 Fuel-filler Door Release Handle
14 Hood Release*
15 Power Rear Flip-up Seats Switch
16 Control Panel Display*/
Audio System
17 Heater and Air
Conditioner (automatic)
18 Front Passenger Air Bag
Indicator Light*
19 Push-button Ignition Switch
20 Climate-controlled
Seat Switches
21 Power Outlet 12V/120W
14
15
13
Page 3 of 38
*See your Owner’s Manual for information.
19
20
16
12
5
6
18
8
3
10
9
211
1
4
7
17
21
Behind
steering
wheel
Please see your Owner’s Manual for important safety information and system operation limitations.
• A cellular telephone should not be used for any purpose while driving so\
full attention may be given to
vehicle operation.
•
Always wear your seat belt.
•Supplemental air bags do not replace proper seat belt us
age.
•
Children 12 and under should always ride in the rear seat properly secur\
ed in child restraints or seat
belts according to their age and weight.
•
Do not drink and drive.
For more information, refer to the “
Safety — Seats, seat belts and supplemental restraint system (sectio\
n 1) ”, the
“Display screen, heater, air conditioner, audio and phone systems (section 4)” and the “Starting and driving
(section 5)” of your Owner’s Manual.
Additional information about your vehicle is also available in your Owne\
r’s Manual, Navigation System
Owner’s Manual and at www.NissanUSA.com.
NEW SYSTEM FEATURESHow to Use Your Murano’s Touch-screen Display.......................................2
Heated Steering Wheel (if so equipped) ..............................................3
Around View® Monitor (AVM) with Moving Object Detection (MOD) (if so equipped).........3
Blind Spot Warning (B SW) (if so equipped)...........................................5
Predictive Forward Collision W
arning (PFCW) (if so equipped)
...........................5
Vehicle Dynamic Control (VD
C)
.....................................................5
Hill Start Assist (H
SA)
.............................................................5
Forward Emergency Braking (F
EB) (if so equipped)
....................................6
SiriusXM T
ravel Link and SiriusXM Traffic (if so equipped)
...............................
6
ESSENTIAL INFORMATIONTire Pressure Monitoring System (TPMS) with Easy Fill Tire Alert..........................7
Loose Fuel Cap...................................................................8
Fuel-filler Door....................................................................8
Towing Y
our Vehicle (if so equipped)
.................................................8
Cloc
k Set/Adjustment
.............................................................9
FIRST DRIVE FEATURESNissan Intelligent Key® System.....................................................10
Power Liftgate Release (if so equipped) .............................................12
Front Seat Adjustments...........................................................12
Automatic Drive Positioner (if so equipped)...........................................13
Rear Seat Adjustments ...........................................................14
Starting/Stopping the Engine ......................................................14
Outside Mirror Control Switch .....................................................15
Headlight Control Switch .........................................................15
Wiper and W
asher Switch
.........................................................16
Heater and Air Conditioner (automatic) (if so equipped) ................................17
FM
/AM/SiriusXM
® Satellite Radio with CD Player and Navigation........................18
US
B (Universal Serial Bus) Connection Port/iPod® Interface and AUX Jack................20
Front Armrest/Center Console Storage Bo
x ..........................................20
Cruise Control (if so equipped).....................................................20
Intelligent Cruise Control (IC
C) (if so equipped)
.......................................21
SYSTEM GUIDETrip Computer...................................................................22
Hands-free Text Mess aging Assistant (if so equipped) .................................23
NissanConnectsm Mobile Apps (if so equipped) .......................................24
Bluetooth® Hands-free Phone System...............................................24 System Operating Tips.........................................................24
Bluetooth® System with Navigation (if so equipped) ...................................25
Bluetooth® System without Navigation (if so equipped).................................27
Bluetooth® Streaming Audio .......................................................28
Navigation System (if so equipped) .................................................30
HomeLink® Universal Transceiver (if so equipped) .....................................31
TAB LE OF CONTE NTS
1 Instrument Brightness
Control Switch*
2 Twin Trip Odometer Switch*
3 Headlight and Turn Signal Switc h4 Low Tire Pressure Warning Light
5 Vehicle Information Display
6 Wiper and Washer Switch
7
Steering Wheel Switches for
Audio*/Bluetooth
®/Navigation/
Vehicle Information Display
8 Cruise Control/
Intelligent Cruise Control
9 Heated Steering Wheel Switc h10 Vehicle Dynamic Control (VDC)
O
FF Switch
11 Liftgate/Liftgate Release Switch
12 Tilt/Telescopic Steering Column*
13 Fuel-filler Door Release Handle
14 Hood Release*
15 Power Rear Flip-up Seats Switch
16 Control Panel Display*/
Audio System
17 Heater and Air
Conditioner (automatic)
18 Front Passenger Air Bag
Indicator Light*
19 Push-button Ignition Switch
20 Climate-controlled
Seat Switches
21 Power Outlet 12V/120W
14
15
13
Page 10 of 38
9
8
CLOCK SET/ADJUSTMENT
SYSTEM WITHOUT NAVIGATION
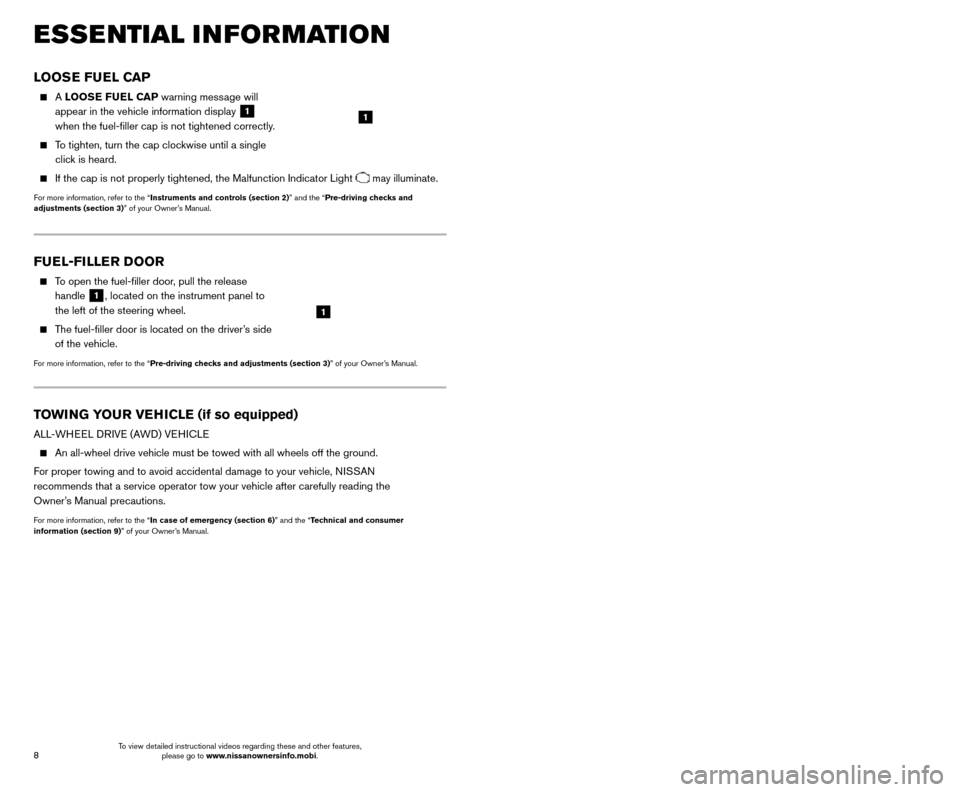
To adjust the time and the appearance of the
clock on the display:
1. Press the
SETTING button
1.
2.
Scroll by turning the
TUNE/SCROLL control
knob
2.
3. Select “Cloc
k Adjust”.
To adjust the minutes and hours, press the SETTING button1to select the item and
use the TUNE/SCROLL knob
2 to adjust the time.
SYSTEM WITH NAVIGATION
To adjust the time and the appearance of the clock on the display:
1.
Press the MENU button on the
control panel.
2.
T
ouch the
“Settings” key on the
Launch Bar.
3. T
ouch the “Clock” key.
The following settings can be adjusted:
•
On-screen Clock: The clock in the upper right corner of the display can be turned
ON or OFF.
•
Clock Format (24h): The clock can be set to 12 hours or 24 hours.
•
Offset (hour): The time can be adjusted by increasing or decreasing per hour.
•
Offset (min): The time can be adjusted by increasing or decreasing per minute.
•
Daylight Savings Time: The application of Daylight Savings Time can be turned
ON or OFF.
•
Time Zone: Adjust the time zone. Choose a time zone from the available list.
Touch the key or press the BACK button to return to the previous screen.
For more information, refer to the “Display screen, heater, air conditioner, audio and phone systems (section 4)”
of your Owner’s Manual or the “Getting started (section 2)” of your Navigation System Owner’s Manual.
FUEL-FILLER DOOR
To open the fuel-filler door, pull the release
handle
1, located on the instrument panel to
the left of the steering wheel.
The fuel-filler door is located on the driver’s side of the vehicle.
For more information, refer to the “Pre-driving checks and adjustments (section 3)” of your Owner’s Manual.
1
TOWING YOUR VEHICLE (if so equipped)
ALL-WHEEL DRIVE (AWD) VEHICLE
An all-wheel drive vehicle must be towed with all wheels off the ground.\
F
or proper towing and to avoid accidental damage to your vehicle, NISSAN
recommends that a service operator tow your vehicle after carefully read\
ing the
Owner’s Manual precautions.
For more information, refer to the “In case of emergency (section 6)” and the “Technical and consumer
information (section 9)” of your Owner’s Manual.
ESSE NTIAL I N FOR MATION
LOOSE FUEL CAP
A LOOSE FUEL CAP warning message will
appear in the vehicle information display
1
when the fuel-filler cap is not tightened correctly.
To tighten, turn the cap clockwise until a single click is heard.
If the cap is not properly tightened, the Malfunction Indicator Light may illuminate.
For more information, refer to the “Instruments and controls (section 2)” and the “Pre-driving checks and
adjustments (section 3)” of your Owner’s Manual.
1
2
1
To view detailed instructional videos regarding these and other features, please go to www.nissanownersinfo.mobi. To view detailed instructional videos regarding these and other features,
please go to www.nissanownersinfo.mobi.
Page 11 of 38

9
8
CLOCK SET/ADJUSTMENT
SYSTEM WITHOUT NAVIGATION
To adjust the time and the appearance of the
clock on the display:
1. Press the
SETTING button
1.
2.
Scroll by turning the
TUNE/SCROLL control
knob
2.
3. Select “Cloc
k Adjust”.
To adjust the minutes and hours, press the SETTING button1to select the item and
use the TUNE/SCROLL knob
2 to adjust the time.
SYSTEM WITH NAVIGATION
To adjust the time and the appearance of the clock on the display:
1.
Press the MENU button on the
control panel.
2.
T
ouch the
“Settings” key on the
Launch Bar.
3. T
ouch the “Clock” key.
The following settings can be adjusted:
•
On-screen Clock: The clock in the upper right corner of the display can be turned
ON or OFF.
•
Clock Format (24h): The clock can be set to 12 hours or 24 hours.
•
Offset (hour): The time can be adjusted by increasing or decreasing per hour.
•
Offset (min): The time can be adjusted by increasing or decreasing per minute.
•
Daylight Savings Time: The application of Daylight Savings Time can be turned
ON or OFF.
•
Time Zone: Adjust the time zone. Choose a time zone from the available list.
Touch the key or press the BACK button to return to the previous screen.
For more information, refer to the “Display screen, heater, air conditioner, audio and phone systems (section 4)”
of your Owner’s Manual or the “Getting started (section 2)” of your Navigation System Owner’s Manual.
FUEL-FILLER DOOR
To open the fuel-filler door, pull the release
handle
1, located on the instrument panel to
the left of the steering wheel.
The fuel-filler door is located on the driver’s side of the vehicle.
For more information, refer to the “Pre-driving checks and adjustments (section 3)” of your Owner’s Manual.
1
TOWING YOUR VEHICLE (if so equipped)
ALL-WHEEL DRIVE (AWD) VEHICLE
An all-wheel drive vehicle must be towed with all wheels off the ground.\
F
or proper towing and to avoid accidental damage to your vehicle, NISSAN
recommends that a service operator tow your vehicle after carefully read\
ing the
Owner’s Manual precautions.
For more information, refer to the “In case of emergency (section 6)” and the “Technical and consumer
information (section 9)” of your Owner’s Manual.
ESSE NTIAL I N FOR MATION
LOOSE FUEL CAP
A LOOSE FUEL CAP warning message will
appear in the vehicle information display
1
when the fuel-filler cap is not tightened correctly.
To tighten, turn the cap clockwise until a single click is heard.
If the cap is not properly tightened, the Malfunction Indicator Light may illuminate.
For more information, refer to the “Instruments and controls (section 2)” and the “Pre-driving checks and
adjustments (section 3)” of your Owner’s Manual.
1
2
1
To view detailed instructional videos regarding these and other features, please go to www.nissanownersinfo.mobi. To view detailed instructional videos regarding these and other features,
please go to www.nissanownersinfo.mobi.
Page 18 of 38
17
16
The blue indicator light will illuminate in the instrument panel. Pull the headlight
switch back to the original position to select the low beam. The blue indicator light
will extinguish.
Pull and release the headlight control switc h 5 to flash the headlight high beams
on and off.
FOG LIGHT SWITCH (if so equipped)
The headlights must be on and the low beams
selected for the fog lights to operate.
Turn the switch (inside collar) to the position
6 to turn the fog lights on.
Turn the switch (inside collar) to the OFF position to turn the fog lights off.
LANE CHANGE SIGNAL
Move the lever up or down until the turn signal begins to flash but th\
e lever does
not latch to signal a lane change. Hold the lever until the lane change is completed.
Move the lever up or down until the turn signal begins to flash but th\
e lever does not
latc h and release the lever. The turn signal will automatically flash three times.
Choose the appropriate method to signal a lane change based on the road and
traffic conditions.
For more information, refer to the “Instruments and controls (section 2)” of your Owner’s Manual.
6
FIRST DRIVE FEATURES
WIPER AND WASHER SWITCH
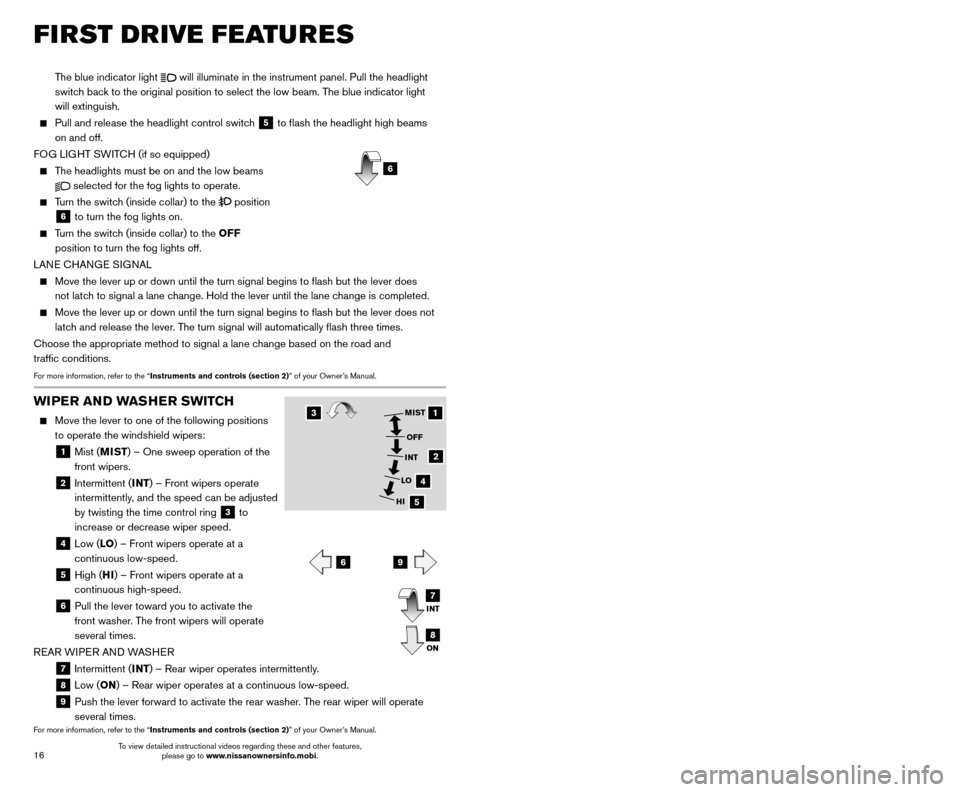
Move the lever to one of the following positions
to operate the windshield wipers:
1 Mist ( MIST) – One sweep operation of the
front wipers.
2 Intermittent ( INT) – Front wipers operate
intermittently, and the speed can be adjusted
by twisting the time control ring
3 to
increase or decrease wiper speed.
4 Low ( LO) – Front wipers operate at a
continuous low-speed.
5 High ( HI) – Front wipers operate at a
continuous high-speed.
6 Pull the lever toward you to activate the
front washer. The front wipers will operate
several times.
REAR WIPER AND WASHER
7 Intermittent (INT) – Rear wiper operates intermittently.
8 Low (ON) – Rear wiper operates at a continuous low-speed.
9 Push the lever forward to activate the rear washer . The rear wiper will operate
several times.
For more information, refer to the “Instruments and controls (section 2)” of your Owner’s Manual.
1
2
4
5
MIST
OFF
INT
LO
HI
69
3
INT
ON7
8
HEATER AND AIR CONDITIONER (automatic) (if so equipped)
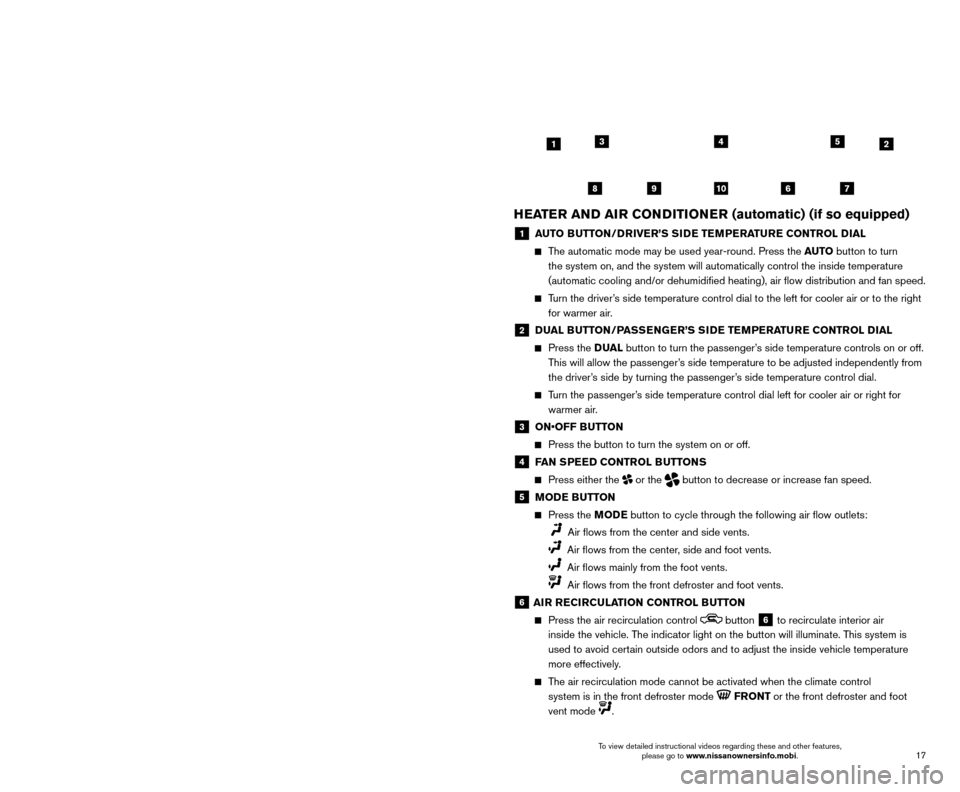
1 AUTO BUTTON/DRIVER’S SIDE TEMPERATURE CONTROL DIAL
The automatic mode may be used year-round. Press the AUTO button to turn
the system on, and the system will automatically control the inside temp\
erature
(automatic cooling and/or dehumidified heating), air flow distribu\
tion and fan speed.
Turn the driver’s side temperature control dial to the left for cooler air or to the rig\
ht for warmer air.
2 DUAL BUTTON/PASSENGER’S SIDE TEMPERATURE CONTROL DIAL
Press the D UAL button to turn the passenger’s side temperature controls on or off.
This will allow the passenger’s side temperature to be adjusted independently from
the driver’s side by turning the passenger’s side temperature control dial.
Turn the passenger’s side temperature control dial left for cooler air or right for warmer air.
3 ON•OFF B UTTON
Press the button to turn the system on or off.
4 FAN SPEED CONTROL BUTTONS
Press either the or the button to decrease or increase fan speed.
5 MODE BUTTON
Press the MODE button to cycle through the following air flow outlets:
Air flows from the center and side vents.
Air flows from the center, side and foot vents.
Air flows mainly from the foot vents.
Air flows from the front defroster and foot vents.
6 AIR RECIRCULATION CONTROL BUTTON
Press the air recirculation control button 6 to recirculate interior air
inside the vehicle. The indicator light on the button will illuminate. This system is
used to avoid certain outside odors and to adjust the inside vehicle temperature
more effectively.
The air recirculation mode cannot be activated when the climate control \
system is in the front defroster mode
FRONT or the front defroster and foot
vent mode
.
42135
910867
To view detailed instructional videos regarding these and other features, please go to www.nissanownersinfo.mobi. To view detailed instructional videos regarding these and other features,
please go to www.nissanownersinfo.mobi.
Page 19 of 38
17
16
The blue indicator light will illuminate in the instrument panel. Pull the headlight
switch back to the original position to select the low beam. The blue indicator light
will extinguish.
Pull and release the headlight control switc h 5 to flash the headlight high beams
on and off.
FOG LIGHT SWITCH (if so equipped)
The headlights must be on and the low beams
selected for the fog lights to operate.
Turn the switch (inside collar) to the position
6 to turn the fog lights on.
Turn the switch (inside collar) to the OFF position to turn the fog lights off.
LANE CHANGE SIGNAL
Move the lever up or down until the turn signal begins to flash but th\
e lever does
not latch to signal a lane change. Hold the lever until the lane change is completed.
Move the lever up or down until the turn signal begins to flash but th\
e lever does not
latc h and release the lever. The turn signal will automatically flash three times.
Choose the appropriate method to signal a lane change based on the road and
traffic conditions.
For more information, refer to the “Instruments and controls (section 2)” of your Owner’s Manual.
6
FIRST DRIVE FEATURES
WIPER AND WASHER SWITCH
Move the lever to one of the following positions
to operate the windshield wipers:
1 Mist ( MIST) – One sweep operation of the
front wipers.
2 Intermittent ( INT) – Front wipers operate
intermittently, and the speed can be adjusted
by twisting the time control ring
3 to
increase or decrease wiper speed.
4 Low ( LO) – Front wipers operate at a
continuous low-speed.
5 High ( HI) – Front wipers operate at a
continuous high-speed.
6 Pull the lever toward you to activate the
front washer. The front wipers will operate
several times.
REAR WIPER AND WASHER
7 Intermittent (INT) – Rear wiper operates intermittently.
8 Low (ON) – Rear wiper operates at a continuous low-speed.
9 Push the lever forward to activate the rear washer . The rear wiper will operate
several times.
For more information, refer to the “Instruments and controls (section 2)” of your Owner’s Manual.
1
2
4
5
MIST
OFF
INT
LO
HI
69
3
INT
ON7
8
HEATER AND AIR CONDITIONER (automatic) (if so equipped)
1 AUTO BUTTON/DRIVER’S SIDE TEMPERATURE CONTROL DIAL
The automatic mode may be used year-round. Press the AUTO button to turn
the system on, and the system will automatically control the inside temp\
erature
(automatic cooling and/or dehumidified heating), air flow distribu\
tion and fan speed.
Turn the driver’s side temperature control dial to the left for cooler air or to the rig\
ht for warmer air.
2 DUAL BUTTON/PASSENGER’S SIDE TEMPERATURE CONTROL DIAL
Press the D UAL button to turn the passenger’s side temperature controls on or off.
This will allow the passenger’s side temperature to be adjusted independently from
the driver’s side by turning the passenger’s side temperature control dial.
Turn the passenger’s side temperature control dial left for cooler air or right for warmer air.
3 ON•OFF B UTTON
Press the button to turn the system on or off.
4 FAN SPEED CONTROL BUTTONS
Press either the or the button to decrease or increase fan speed.
5 MODE BUTTON
Press the MODE button to cycle through the following air flow outlets:
Air flows from the center and side vents.
Air flows from the center, side and foot vents.
Air flows mainly from the foot vents.
Air flows from the front defroster and foot vents.
6 AIR RECIRCULATION CONTROL BUTTON
Press the air recirculation control button 6 to recirculate interior air
inside the vehicle. The indicator light on the button will illuminate. This system is
used to avoid certain outside odors and to adjust the inside vehicle temperature
more effectively.
The air recirculation mode cannot be activated when the climate control \
system is in the front defroster mode
FRONT or the front defroster and foot
vent mode
.
42135
910867
To view detailed instructional videos regarding these and other features, please go to www.nissanownersinfo.mobi. To view detailed instructional videos regarding these and other features,
please go to www.nissanownersinfo.mobi.