2017 NISSAN MURANO buttons
[x] Cancel search: buttonsPage 12 of 38

11
10
REMOTE ENGINE START* (if so equipped)
The remote start operating range is approximately 200 ft (60 m) from the vehicle. The
effective operating range may be shorter if there are walls, strong radi\
o wave sources
near the operating location or other obstructions between the key and th\
e vehicle.
For the remote start to function, the vehicle must be in the P (PARK) position with the ignition off and all doors must be closed and locked. Please see your Owner’s Manual
for additional information.
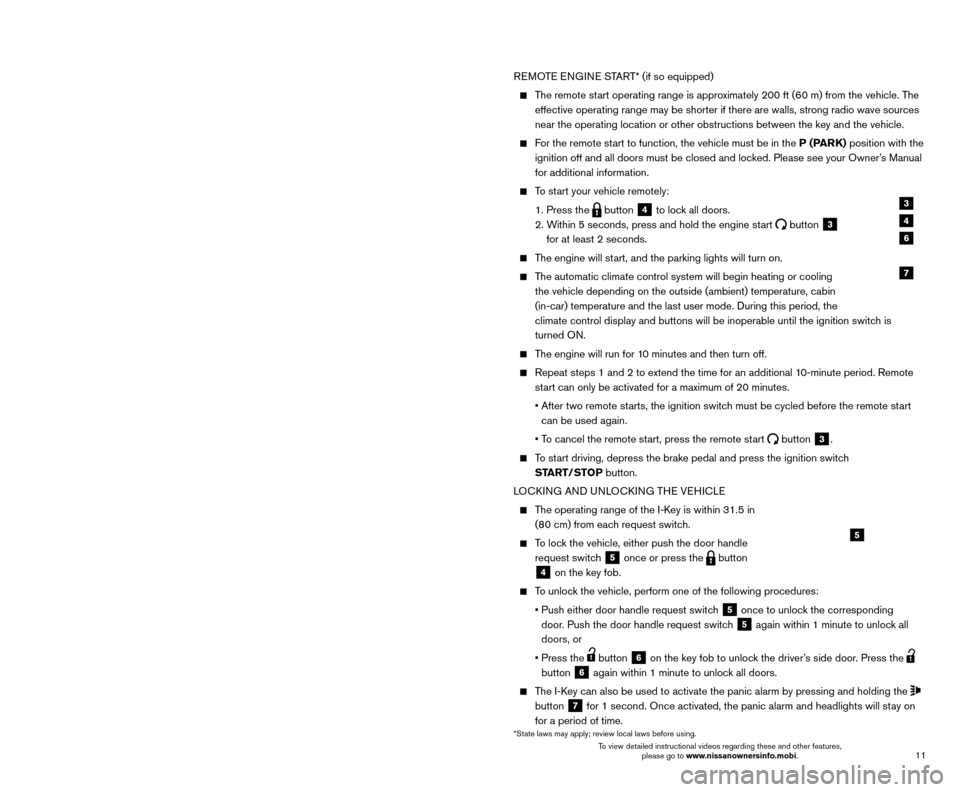
To start your vehicle remotely:
1. Press the button 4 to lock all doors.
2.
W
ithin 5 seconds, press and hold the engine start
button 3
for at least 2 seconds.
The engine will start, and the parking lights will turn on.
The automatic climate control system will begin heating or cooling the vehicle depending on the outside (ambient) temperature, cabin
(in-car) temperature and the last user mode. During this period, the
climate control display and buttons will be inoperable until the ignitio\
n switch is
turned ON.
The engine will run for 10 minutes and then turn off.
Repeat steps 1 and 2 to extend the time for an additional 1 0-minute period. Remote
start can only be activated for a maximum of 20 minutes.
•
After two remote st
arts, the ignition switch must be cycled before the remote start
can be used again.
•
T
o cancel the remote start, press the remote start
button 3.
To start driving, depress the brake pedal and press the ignition switch START/STOP button.
LOCKING AND UNLOCKING THE VEHICLE
The operating range of the I-Key is within 31.5 in (80 cm) from each request switch.
To lock the vehicle, either push the door handle request switch
5 once or press the button
4 on the key fob.
To unlock the vehicle, perform one of the following procedures:
•
Push either door handle request switc
h
5 once to unlock the corresponding
door. Push the door handle request switch
5 again within 1 minute to unlock all
doors, or
•
Press the button 6 on the key fob to unlock the driver’s side door. Press the
button
6 again within 1 minute to unlock all doors.
The I-Key can also be used to activate the panic alarm by pressing and holding \
the
button
7 for 1 second. Once activated, the panic alarm and headlights will stay on
for a period of time.
3
4
7
5
FIRST DRIVE FEATURES
6
NISSAN INTELLIGENT KEY® SYSTE M
The Nissan Intelligent Key® system allows you to lock or unlock your vehicle, open your
liftgate (if so equipped) and start the engine (if so equipped). It is important to make sure
the Intelligent Key (I-Key) is with you (that is, in your pocket or purse).
KEY-LINKED SYSTEM (if so equipped)
The vehicle information display has added features, allowing the Key-Linked System to remember some of the vehicle information display settings.
The Key-Linked System states which I-Key is being recognized
1, and enabling/disabling
of the system’s function can be easily accessed
through notifications on the vehicle
information display.
The Key-Linked System can be turned on or off through the vehicle information display “Settings”
screen
2.
You can set a maximum of four I-Keys to the Key-Linked System.
When the system is enabled, the recognized I-Key is displayed at engine start-up (engine ON)
as well as within the vehicle information display
“Settings” screen
2.
When the system is active, the vehicle information display setting items \
are memorized for each key that has been enabled in the Key-Linked System.
If two keys are in the vehicle, the K ey-Linked System will recognize the key that
was used most recently; this usually means the last key to unlock/lock the door from
the I-Key.
If there is a desire to c hange to another key that is in the vehicle, the user must turn off
the engine and initiate communication from the desired key.
1. T
urn the engine to OFF.
2. Press the button from the desired I-Key.
3. St
art the engine.
4.
T
he desired Key Number recognized should appear on the vehicle
information display.
The vehicle information display displays a pop-up notification at engin\
e ON for the recognition of the system with a shortcut function to the setup menu.
From the shortcut setup menu, users can select to enable or dis able the Key-Linked
System or select “Later” to keep the factory state.
When enabled, the Key-Linked System will remember the state of the items memorized automatically from the last ignition cycle.
2
1
*State laws may apply; review local laws before using.
To view detailed instructional videos regarding these and other features, please go to www.nissanownersinfo.mobi. To view detailed instructional videos regarding these and other features,
please go to www.nissanownersinfo.mobi.
Page 13 of 38
11
10
REMOTE ENGINE START* (if so equipped)
The remote start operating range is approximately 200 ft (60 m) from the vehicle. The
effective operating range may be shorter if there are walls, strong radi\
o wave sources
near the operating location or other obstructions between the key and th\
e vehicle.
For the remote start to function, the vehicle must be in the P (PARK) position with the ignition off and all doors must be closed and locked. Please see your Owner’s Manual
for additional information.
To start your vehicle remotely:
1. Press the button 4 to lock all doors.
2.
W
ithin 5 seconds, press and hold the engine start
button 3
for at least 2 seconds.
The engine will start, and the parking lights will turn on.
The automatic climate control system will begin heating or cooling the vehicle depending on the outside (ambient) temperature, cabin
(in-car) temperature and the last user mode. During this period, the
climate control display and buttons will be inoperable until the ignitio\
n switch is
turned ON.
The engine will run for 10 minutes and then turn off.
Repeat steps 1 and 2 to extend the time for an additional 1 0-minute period. Remote
start can only be activated for a maximum of 20 minutes.
•
After two remote st
arts, the ignition switch must be cycled before the remote start
can be used again.
•
T
o cancel the remote start, press the remote start
button 3.
To start driving, depress the brake pedal and press the ignition switch START/STOP button.
LOCKING AND UNLOCKING THE VEHICLE
The operating range of the I-Key is within 31.5 in (80 cm) from each request switch.
To lock the vehicle, either push the door handle request switch
5 once or press the button
4 on the key fob.
To unlock the vehicle, perform one of the following procedures:
•
Push either door handle request switc
h
5 once to unlock the corresponding
door. Push the door handle request switch
5 again within 1 minute to unlock all
doors, or
•
Press the button 6 on the key fob to unlock the driver’s side door. Press the
button
6 again within 1 minute to unlock all doors.
The I-Key can also be used to activate the panic alarm by pressing and holding \
the
button
7 for 1 second. Once activated, the panic alarm and headlights will stay on
for a period of time.
3
4
7
5
FIRST DRIVE FEATURES
6
NISSAN INTELLIGENT KEY® SYSTE M
The Nissan Intelligent Key® system allows you to lock or unlock your vehicle, open your
liftgate (if so equipped) and start the engine (if so equipped). It is important to make sure
the Intelligent Key (I-Key) is with you (that is, in your pocket or purse).
KEY-LINKED SYSTEM (if so equipped)
The vehicle information display has added features, allowing the Key-Linked System to remember some of the vehicle information display settings.
The Key-Linked System states which I-Key is being recognized
1, and enabling/disabling
of the system’s function can be easily accessed
through notifications on the vehicle
information display.
The Key-Linked System can be turned on or off through the vehicle information display “Settings”
screen
2.
You can set a maximum of four I-Keys to the Key-Linked System.
When the system is enabled, the recognized I-Key is displayed at engine start-up (engine ON)
as well as within the vehicle information display
“Settings” screen
2.
When the system is active, the vehicle information display setting items \
are memorized for each key that has been enabled in the Key-Linked System.
If two keys are in the vehicle, the K ey-Linked System will recognize the key that
was used most recently; this usually means the last key to unlock/lock the door from
the I-Key.
If there is a desire to c hange to another key that is in the vehicle, the user must turn off
the engine and initiate communication from the desired key.
1. T
urn the engine to OFF.
2. Press the button from the desired I-Key.
3. St
art the engine.
4.
T
he desired Key Number recognized should appear on the vehicle
information display.
The vehicle information display displays a pop-up notification at engin\
e ON for the recognition of the system with a shortcut function to the setup menu.
From the shortcut setup menu, users can select to enable or dis able the Key-Linked
System or select “Later” to keep the factory state.
When enabled, the Key-Linked System will remember the state of the items memorized automatically from the last ignition cycle.
2
1
*State laws may apply; review local laws before using.
To view detailed instructional videos regarding these and other features, please go to www.nissanownersinfo.mobi. To view detailed instructional videos regarding these and other features,
please go to www.nissanownersinfo.mobi.
Page 18 of 38
17
16
The blue indicator light will illuminate in the instrument panel. Pull the headlight
switch back to the original position to select the low beam. The blue indicator light
will extinguish.
Pull and release the headlight control switc h 5 to flash the headlight high beams
on and off.
FOG LIGHT SWITCH (if so equipped)
The headlights must be on and the low beams
selected for the fog lights to operate.
Turn the switch (inside collar) to the position
6 to turn the fog lights on.
Turn the switch (inside collar) to the OFF position to turn the fog lights off.
LANE CHANGE SIGNAL
Move the lever up or down until the turn signal begins to flash but th\
e lever does
not latch to signal a lane change. Hold the lever until the lane change is completed.
Move the lever up or down until the turn signal begins to flash but th\
e lever does not
latc h and release the lever. The turn signal will automatically flash three times.
Choose the appropriate method to signal a lane change based on the road and
traffic conditions.
For more information, refer to the “Instruments and controls (section 2)” of your Owner’s Manual.
6
FIRST DRIVE FEATURES
WIPER AND WASHER SWITCH
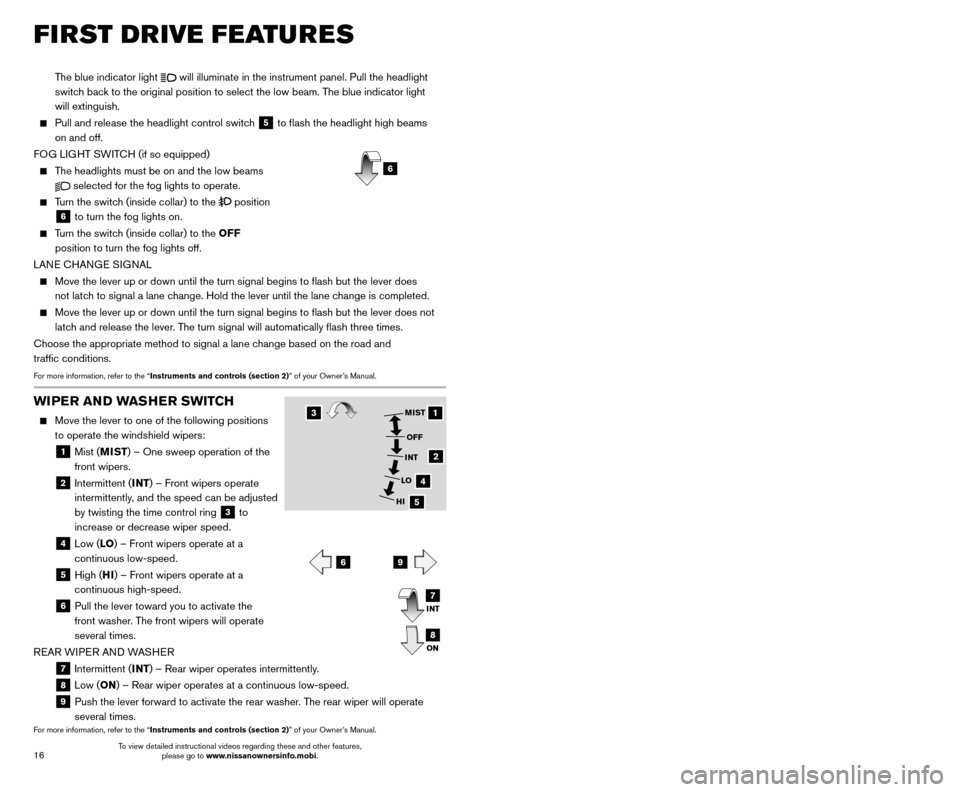
Move the lever to one of the following positions
to operate the windshield wipers:
1 Mist ( MIST) – One sweep operation of the
front wipers.
2 Intermittent ( INT) – Front wipers operate
intermittently, and the speed can be adjusted
by twisting the time control ring
3 to
increase or decrease wiper speed.
4 Low ( LO) – Front wipers operate at a
continuous low-speed.
5 High ( HI) – Front wipers operate at a
continuous high-speed.
6 Pull the lever toward you to activate the
front washer. The front wipers will operate
several times.
REAR WIPER AND WASHER
7 Intermittent (INT) – Rear wiper operates intermittently.
8 Low (ON) – Rear wiper operates at a continuous low-speed.
9 Push the lever forward to activate the rear washer . The rear wiper will operate
several times.
For more information, refer to the “Instruments and controls (section 2)” of your Owner’s Manual.
1
2
4
5
MIST
OFF
INT
LO
HI
69
3
INT
ON7
8
HEATER AND AIR CONDITIONER (automatic) (if so equipped)
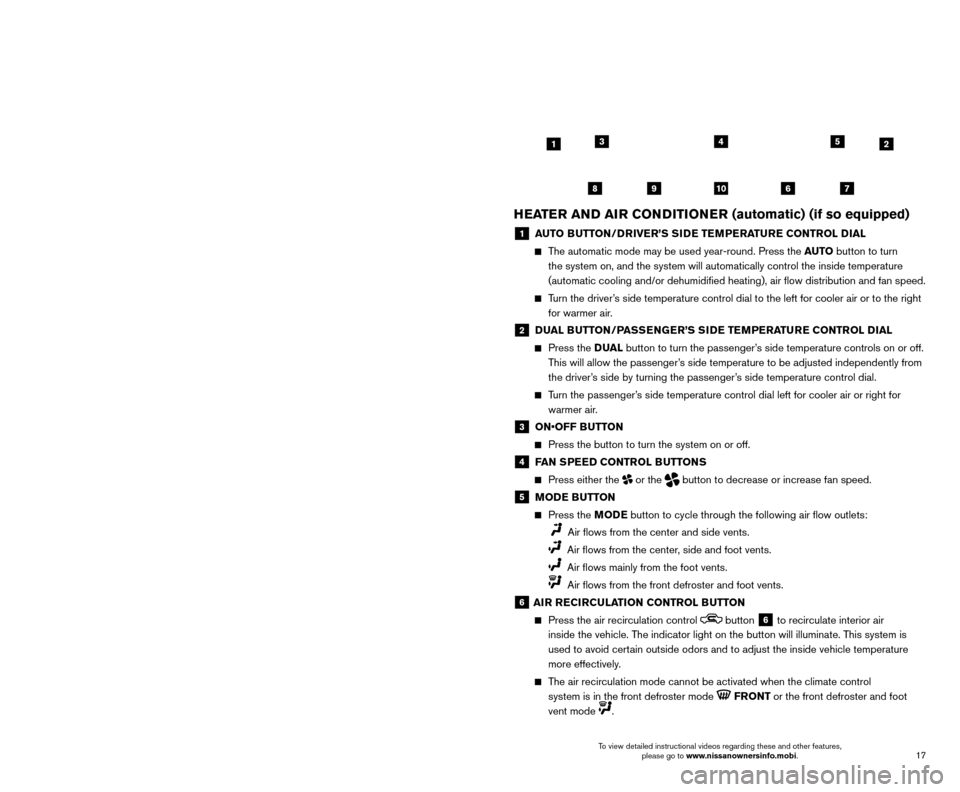
1 AUTO BUTTON/DRIVER’S SIDE TEMPERATURE CONTROL DIAL
The automatic mode may be used year-round. Press the AUTO button to turn
the system on, and the system will automatically control the inside temp\
erature
(automatic cooling and/or dehumidified heating), air flow distribu\
tion and fan speed.
Turn the driver’s side temperature control dial to the left for cooler air or to the rig\
ht for warmer air.
2 DUAL BUTTON/PASSENGER’S SIDE TEMPERATURE CONTROL DIAL
Press the D UAL button to turn the passenger’s side temperature controls on or off.
This will allow the passenger’s side temperature to be adjusted independently from
the driver’s side by turning the passenger’s side temperature control dial.
Turn the passenger’s side temperature control dial left for cooler air or right for warmer air.
3 ON•OFF B UTTON
Press the button to turn the system on or off.
4 FAN SPEED CONTROL BUTTONS
Press either the or the button to decrease or increase fan speed.
5 MODE BUTTON
Press the MODE button to cycle through the following air flow outlets:
Air flows from the center and side vents.
Air flows from the center, side and foot vents.
Air flows mainly from the foot vents.
Air flows from the front defroster and foot vents.
6 AIR RECIRCULATION CONTROL BUTTON
Press the air recirculation control button 6 to recirculate interior air
inside the vehicle. The indicator light on the button will illuminate. This system is
used to avoid certain outside odors and to adjust the inside vehicle temperature
more effectively.
The air recirculation mode cannot be activated when the climate control \
system is in the front defroster mode
FRONT or the front defroster and foot
vent mode
.
42135
910867
To view detailed instructional videos regarding these and other features, please go to www.nissanownersinfo.mobi. To view detailed instructional videos regarding these and other features,
please go to www.nissanownersinfo.mobi.
Page 19 of 38
17
16
The blue indicator light will illuminate in the instrument panel. Pull the headlight
switch back to the original position to select the low beam. The blue indicator light
will extinguish.
Pull and release the headlight control switc h 5 to flash the headlight high beams
on and off.
FOG LIGHT SWITCH (if so equipped)
The headlights must be on and the low beams
selected for the fog lights to operate.
Turn the switch (inside collar) to the position
6 to turn the fog lights on.
Turn the switch (inside collar) to the OFF position to turn the fog lights off.
LANE CHANGE SIGNAL
Move the lever up or down until the turn signal begins to flash but th\
e lever does
not latch to signal a lane change. Hold the lever until the lane change is completed.
Move the lever up or down until the turn signal begins to flash but th\
e lever does not
latc h and release the lever. The turn signal will automatically flash three times.
Choose the appropriate method to signal a lane change based on the road and
traffic conditions.
For more information, refer to the “Instruments and controls (section 2)” of your Owner’s Manual.
6
FIRST DRIVE FEATURES
WIPER AND WASHER SWITCH
Move the lever to one of the following positions
to operate the windshield wipers:
1 Mist ( MIST) – One sweep operation of the
front wipers.
2 Intermittent ( INT) – Front wipers operate
intermittently, and the speed can be adjusted
by twisting the time control ring
3 to
increase or decrease wiper speed.
4 Low ( LO) – Front wipers operate at a
continuous low-speed.
5 High ( HI) – Front wipers operate at a
continuous high-speed.
6 Pull the lever toward you to activate the
front washer. The front wipers will operate
several times.
REAR WIPER AND WASHER
7 Intermittent (INT) – Rear wiper operates intermittently.
8 Low (ON) – Rear wiper operates at a continuous low-speed.
9 Push the lever forward to activate the rear washer . The rear wiper will operate
several times.
For more information, refer to the “Instruments and controls (section 2)” of your Owner’s Manual.
1
2
4
5
MIST
OFF
INT
LO
HI
69
3
INT
ON7
8
HEATER AND AIR CONDITIONER (automatic) (if so equipped)
1 AUTO BUTTON/DRIVER’S SIDE TEMPERATURE CONTROL DIAL
The automatic mode may be used year-round. Press the AUTO button to turn
the system on, and the system will automatically control the inside temp\
erature
(automatic cooling and/or dehumidified heating), air flow distribu\
tion and fan speed.
Turn the driver’s side temperature control dial to the left for cooler air or to the rig\
ht for warmer air.
2 DUAL BUTTON/PASSENGER’S SIDE TEMPERATURE CONTROL DIAL
Press the D UAL button to turn the passenger’s side temperature controls on or off.
This will allow the passenger’s side temperature to be adjusted independently from
the driver’s side by turning the passenger’s side temperature control dial.
Turn the passenger’s side temperature control dial left for cooler air or right for warmer air.
3 ON•OFF B UTTON
Press the button to turn the system on or off.
4 FAN SPEED CONTROL BUTTONS
Press either the or the button to decrease or increase fan speed.
5 MODE BUTTON
Press the MODE button to cycle through the following air flow outlets:
Air flows from the center and side vents.
Air flows from the center, side and foot vents.
Air flows mainly from the foot vents.
Air flows from the front defroster and foot vents.
6 AIR RECIRCULATION CONTROL BUTTON
Press the air recirculation control button 6 to recirculate interior air
inside the vehicle. The indicator light on the button will illuminate. This system is
used to avoid certain outside odors and to adjust the inside vehicle temperature
more effectively.
The air recirculation mode cannot be activated when the climate control \
system is in the front defroster mode
FRONT or the front defroster and foot
vent mode
.
42135
910867
To view detailed instructional videos regarding these and other features, please go to www.nissanownersinfo.mobi. To view detailed instructional videos regarding these and other features,
please go to www.nissanownersinfo.mobi.
Page 20 of 38
19
18
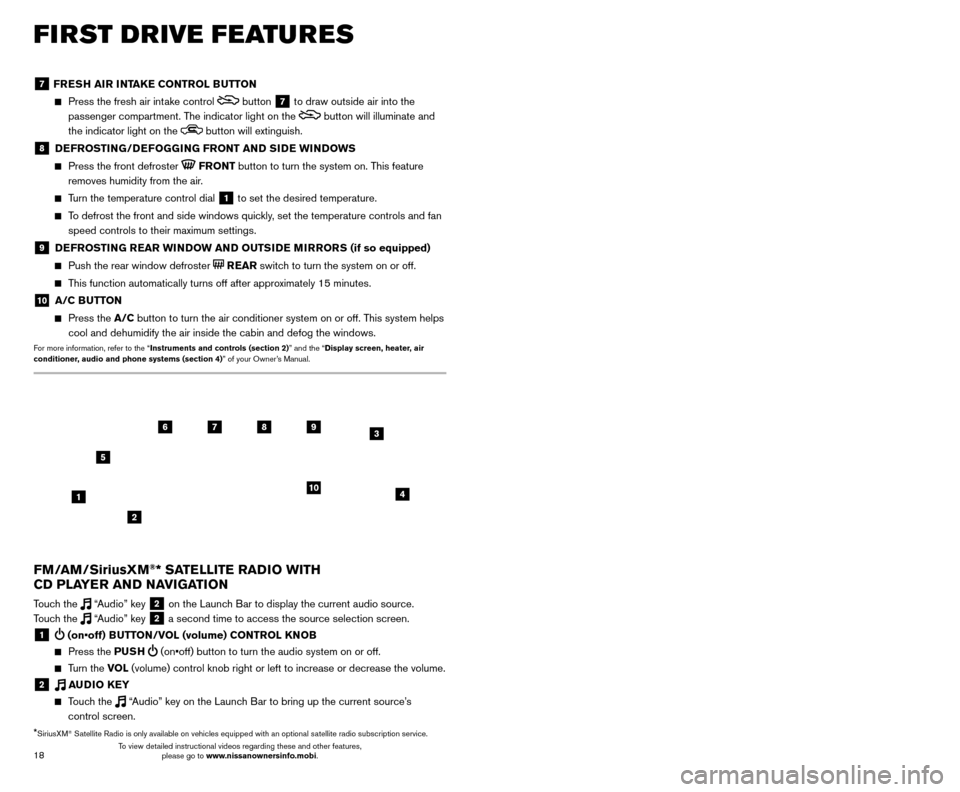
7 FRESH AIR INTAKE CONTROL BUTTON
Press the fresh air int ake control button 7 to draw outside air into the
passenger compartment. The indicator light on the
button will illuminate and
the indicator light on the
button will extinguish.
8 DEFROSTING/DEFOGGING FRONT AND SIDE WINDOWS
Press the front defroster FRONT button to turn the system on. This feature
removes humidity from the air.
Turn the temperature control dial 1 to set the desired temperature.
To defrost the front and side windows quickly, set the temperature controls and fan speed controls to their maximum settings.
9 DEFROSTING REAR WINDOW AND OUTSIDE MIRRORS (if so equipped)
Push the rear window defroster REAR switch to turn the system on or off.
This function automatically turns off after approximately 15 minutes.
10 A/C BUTTON
Press the A/C button to turn the air conditioner system on or off. This system helps
cool and dehumidify the air inside the cabin and defog the windows.
For more information, refer to the “Instruments and controls (section 2)” and the “Display screen, heater, air
conditioner, audio and phone systems (section 4)” of your Owner’s Manual.
FIRST DRIVE FEATURES
3 / (seek and cat/track) BUTTONS
To scan quickly through each broadcasting station, press the or button to
move to the previous or next broadcast station.
For satellite radio to switch to the first channel of the previous or next category, press the
or button.
To change tracks on a CD, press the or button.
To rewind or fast forward a track on a CD, press and hold the or button.
4 PUSH SOUND BUTTON/TUNE/SCROLL KNOB
Press the PU SH SOUND button to cycle through the audio settings individually
and use the TUNE/SCROLL knob to adjust the current setting.
Touch the “Settings” key on the Launch Bar and then touch the “Sound” key to
view all audio settings.
To manually tune the radio, turn the TUNE/SCROLL knob left or right.
5 AUDIO (source) BUTTON
Pressing this button will give access to the AM, FM, SXM, CD, USB1/iPod,
USB2/iPod, Bluetooth Audio or AUX audio source.
Twelve memory stations can be set for the FM band, six for the AM band and 18 for
satellite radio. These appear at the bottom of the screen when one of these sources
is selected.
To store a station in a preset, you must first select a radio band by touching the “AM”
6, “FM” 7 or “SXM” key 8 then tune to the desired AM, FM or satellite
radio station. Next, touch and hold the desired station preset key (1-6) until you
hear a beep. The channel indicator will then display, and the sound will resume.
Programing is now complete.
To retrieve a previously set station, select the radio band where the preset was stored then touch the corresponding station select key (1-6).
6 AM KEY / 7 FM KEY
Touch the “AM” 6 or “FM” 7 key. Next, the touch “AM Menu” or “FM Menu” key
to view the station list or turn HD mode on or off.
Tag favorite songs to save to an iPod®.
•
Apple® website: If you are listening to a radio station that supports iTunes
Tagging, you can tag a song you hear so you can preview and purchase it later on
the iTunes Store. Songs that can be tagged are marked with a tag icon next to the
song title or on the “Now Playing” screen.
8 SXM KEY
Touch the “SXM” key 8. Next, touch the “SXM Menu” key to bring up the
categories, favorites and replay options.
9 CD KEY
Touch the “CD Menu” key to view track list.
10 AUX KEY
A cable with 1/8-in (3.5 mm) stereo mini plugs is required for audio p\
laybac k.
For more information, refer to the “Audio system (section 3)” of your Navigation System Owner’s Manual.
4
6789
10
2
3
1
5
*SiriusXM® Satellite Radio is only available on vehicles equipped with an optional s\
atellite radio subscription service.
FM/AM/SiriusXM®* SATELLITE RADIO WITH
CD PLAYER AND NAVIGATION
Touch the “Audio” key 2 on the Launch Bar to display the current audio source.
Touch the “Audio” key 2 a second time to access the source selection screen.
1 (on•off) BUTTON/VOL (volume) CONTROL KNOB
Press the PU SH (on•off) button to turn the audio system on or off.
Turn the VO L (volume) control knob right or left to increase or decrease the volum\
e.
2 AUDIO KEY
Touch the “Audio” key on the Launch Bar to bring up the current source’s
control screen.
To view detailed instructional videos regarding these and other features, please go to www.nissanownersinfo.mobi. To view detailed instructional videos regarding these and other features,
please go to www.nissanownersinfo.mobi.
Page 21 of 38
19
18
7 FRESH AIR INTAKE CONTROL BUTTON
Press the fresh air int ake control button 7 to draw outside air into the
passenger compartment. The indicator light on the
button will illuminate and
the indicator light on the
button will extinguish.
8 DEFROSTING/DEFOGGING FRONT AND SIDE WINDOWS
Press the front defroster FRONT button to turn the system on. This feature
removes humidity from the air.
Turn the temperature control dial 1 to set the desired temperature.
To defrost the front and side windows quickly, set the temperature controls and fan speed controls to their maximum settings.
9 DEFROSTING REAR WINDOW AND OUTSIDE MIRRORS (if so equipped)
Push the rear window defroster REAR switch to turn the system on or off.
This function automatically turns off after approximately 15 minutes.
10 A/C BUTTON
Press the A/C button to turn the air conditioner system on or off. This system helps
cool and dehumidify the air inside the cabin and defog the windows.
For more information, refer to the “Instruments and controls (section 2)” and the “Display screen, heater, air
conditioner, audio and phone systems (section 4)” of your Owner’s Manual.
FIRST DRIVE FEATURES
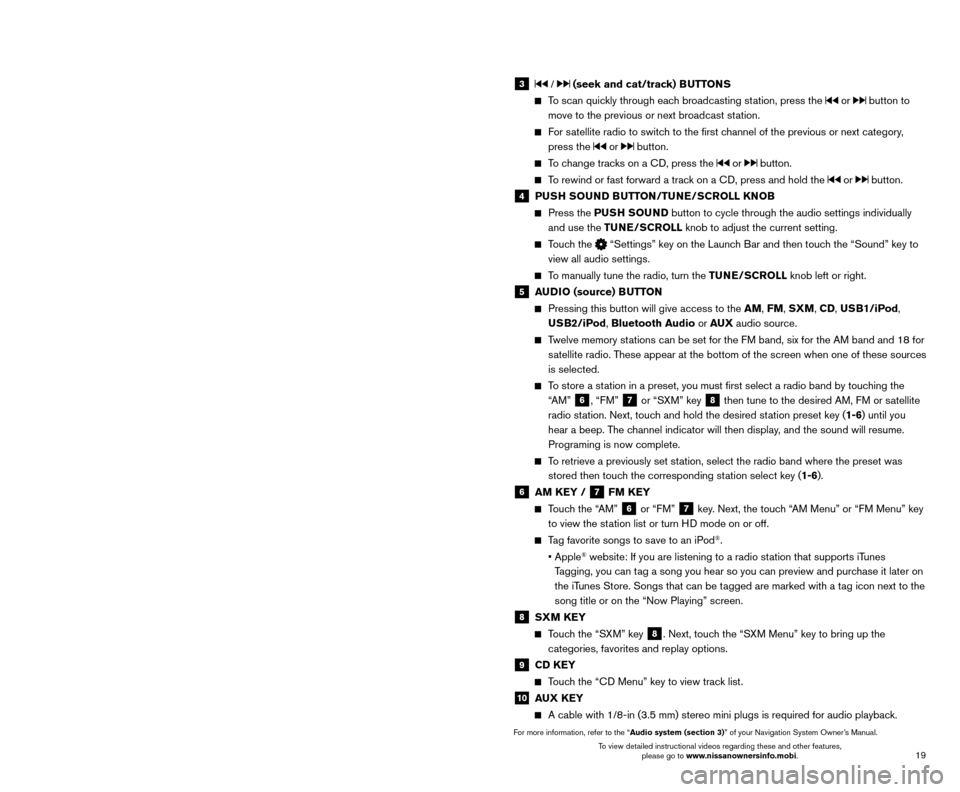
3 / (seek and cat/track) BUTTONS
To scan quickly through each broadcasting station, press the or button to
move to the previous or next broadcast station.
For satellite radio to switch to the first channel of the previous or next category, press the
or button.
To change tracks on a CD, press the or button.
To rewind or fast forward a track on a CD, press and hold the or button.
4 PUSH SOUND BUTTON/TUNE/SCROLL KNOB
Press the PU SH SOUND button to cycle through the audio settings individually
and use the TUNE/SCROLL knob to adjust the current setting.
Touch the “Settings” key on the Launch Bar and then touch the “Sound” key to
view all audio settings.
To manually tune the radio, turn the TUNE/SCROLL knob left or right.
5 AUDIO (source) BUTTON
Pressing this button will give access to the AM, FM, SXM, CD, USB1/iPod,
USB2/iPod, Bluetooth Audio or AUX audio source.
Twelve memory stations can be set for the FM band, six for the AM band and 18 for
satellite radio. These appear at the bottom of the screen when one of these sources
is selected.
To store a station in a preset, you must first select a radio band by touching the “AM”
6, “FM” 7 or “SXM” key 8 then tune to the desired AM, FM or satellite
radio station. Next, touch and hold the desired station preset key (1-6) until you
hear a beep. The channel indicator will then display, and the sound will resume.
Programing is now complete.
To retrieve a previously set station, select the radio band where the preset was stored then touch the corresponding station select key (1-6).
6 AM KEY / 7 FM KEY
Touch the “AM” 6 or “FM” 7 key. Next, the touch “AM Menu” or “FM Menu” key
to view the station list or turn HD mode on or off.
Tag favorite songs to save to an iPod®.
•
Apple® website: If you are listening to a radio station that supports iTunes
Tagging, you can tag a song you hear so you can preview and purchase it later on
the iTunes Store. Songs that can be tagged are marked with a tag icon next to the
song title or on the “Now Playing” screen.
8 SXM KEY
Touch the “SXM” key 8. Next, touch the “SXM Menu” key to bring up the
categories, favorites and replay options.
9 CD KEY
Touch the “CD Menu” key to view track list.
10 AUX KEY
A cable with 1/8-in (3.5 mm) stereo mini plugs is required for audio p\
laybac k.
For more information, refer to the “Audio system (section 3)” of your Navigation System Owner’s Manual.
4
6789
10
2
3
1
5
*SiriusXM® Satellite Radio is only available on vehicles equipped with an optional s\
atellite radio subscription service.
FM/AM/SiriusXM®* SATELLITE RADIO WITH
CD PLAYER AND NAVIGATION
Touch the “Audio” key 2 on the Launch Bar to display the current audio source.
Touch the “Audio” key 2 a second time to access the source selection screen.
1 (on•off) BUTTON/VOL (volume) CONTROL KNOB
Press the PU SH (on•off) button to turn the audio system on or off.
Turn the VO L (volume) control knob right or left to increase or decrease the volum\
e.
2 AUDIO KEY
Touch the “Audio” key on the Launch Bar to bring up the current source’s
control screen.
To view detailed instructional videos regarding these and other features, please go to www.nissanownersinfo.mobi. To view detailed instructional videos regarding these and other features,
please go to www.nissanownersinfo.mobi.
Page 24 of 38
23
22
SYSTEM GUIDE
TRIP COMPUTER
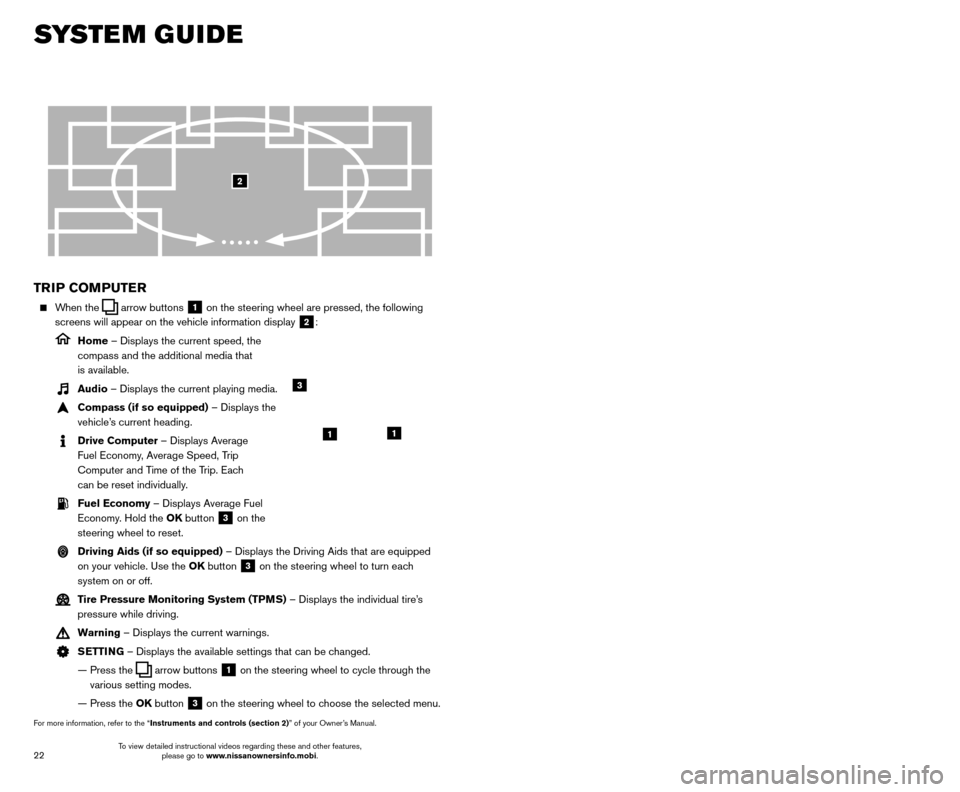
When the arrow buttons 1 on the steering wheel are pressed, the following
screens will appear on the vehicle information display
2:
Home – Displays the current speed, the
compass and the additional media that
is available.
Audio – Displays the current playing media.
Compass (if so equipped) – Displays the
vehicle’s current heading.
Drive Computer – Displays Average
Fuel Economy, Average Speed, Trip
Computer and Time of the Trip. Each
can be reset individually.
Fuel Economy – Displays Average Fuel Economy. Hold the OK button
3 on the
steering wheel to reset.
Driving Aids (if so equipped) – Displays the Driving Aids that are equipped on your vehicle. Use the OK button
3 on the steering wheel to turn each
system on or off.
Tire Pressure Monitoring System (TPMS) – Displays the individual tire’s pressure while driving.
Warning – Displays the current warnings.
SETTING – Displays the available settings that can be changed.
—
Press the arrow buttons 1 on the steering wheel to cycle through the
various setting modes.
— Press the
OK button
3 on the steering wheel to choose the selected menu.
For more information, refer to the “Instruments and controls (section 2)” of your Owner’s Manual.
3
11
2
HANDS-FREE TEXT MESSAGING
ASSISTANT1,2 (if so equipped)
This system allows for sending and receiving text messages through the vehicle’s interface.
Using predefined or custom mess ages, send a
text to a name or phone number stored in your
Bluetooth
® Hands-free Phone System3.
Once enabled, the text mess age, sender and delivery time are shown on the control
panel display when the vehicle speed is less than 5 mph (8 km/h).
Text messages have the option of being read aloud at all vehicle speeds.
Once the vehicle is in motion, text mess ages can only be replied to using the Voice
Recognition
button on the steering wheel.
Custom text mess ages can be created manually when the vehicle is not in motion.
Custom text messages must be created in advance.
Many cellular phones may require special permission to enable text mess aging.
Check the cellular phone’s screen during Bluetooth®,3 pairing and accept any
permission requests for message access or text messages. For some cellular phones,
you may need to enable “Notifications” in the cellular phone’\
s Bluetooth
®,3 menu for
text messages to appear on the touch-screen display. For more detailed information
and instructions, refer to your cellular phone’s Owner’s Manual.
Text message integration requires that the cellular phone support Message Access Profile (MAP) for both receiving and sending text messages. Some
cellular phones may not support all text messaging features. Please see
www.NissanUSA.com/bluetooth for compatibility information as well as
your device’s Owner’s Manual.
1 Laws in some jurisdictions may restrict the use of “T ext-to-Speech”. Some of the applications and features, such
as social networking and texting, may also be restricted. Check local regulations for any requirements before using
these features.
2 Compatible smartphone required. Text rates and/or data usage may apply.
3 Availability of specific features is dependent upon the cellular phone’\
s Bluetooth® support. Please refer to your cellular
phone’s Owner’s Manual for details. Bluetooth® word mark and logos are owned by Bluetooth SIG, Inc., and any use of
such marks by NISSAN is under license. See www.NissanUSA.com/bluetooth for details.
For more information, refer to the “Hands-free phone (section 4)” of your Navigation System Owner’s Manual.
To view detailed instructional videos regarding these and other features, please go to www.nissanownersinfo.mobi. To view detailed instructional videos regarding these and other features,
please go to www.nissanownersinfo.mobi.
Page 25 of 38

23
22
SYSTEM GUIDE
TRIP COMPUTER
When the arrow buttons 1 on the steering wheel are pressed, the following
screens will appear on the vehicle information display
2:
Home – Displays the current speed, the
compass and the additional media that
is available.
Audio – Displays the current playing media.
Compass (if so equipped) – Displays the
vehicle’s current heading.
Drive Computer – Displays Average
Fuel Economy, Average Speed, Trip
Computer and Time of the Trip. Each
can be reset individually.
Fuel Economy – Displays Average Fuel Economy. Hold the OK button
3 on the
steering wheel to reset.
Driving Aids (if so equipped) – Displays the Driving Aids that are equipped on your vehicle. Use the OK button
3 on the steering wheel to turn each
system on or off.
Tire Pressure Monitoring System (TPMS) – Displays the individual tire’s pressure while driving.
Warning – Displays the current warnings.
SETTING – Displays the available settings that can be changed.
—
Press the arrow buttons 1 on the steering wheel to cycle through the
various setting modes.
— Press the
OK button
3 on the steering wheel to choose the selected menu.
For more information, refer to the “Instruments and controls (section 2)” of your Owner’s Manual.
3
11
2
HANDS-FREE TEXT MESSAGING
ASSISTANT1,2 (if so equipped)
This system allows for sending and receiving text messages through the vehicle’s interface.
Using predefined or custom mess ages, send a
text to a name or phone number stored in your
Bluetooth
® Hands-free Phone System3.
Once enabled, the text mess age, sender and delivery time are shown on the control
panel display when the vehicle speed is less than 5 mph (8 km/h).
Text messages have the option of being read aloud at all vehicle speeds.
Once the vehicle is in motion, text mess ages can only be replied to using the Voice
Recognition
button on the steering wheel.
Custom text mess ages can be created manually when the vehicle is not in motion.
Custom text messages must be created in advance.
Many cellular phones may require special permission to enable text mess aging.
Check the cellular phone’s screen during Bluetooth®,3 pairing and accept any
permission requests for message access or text messages. For some cellular phones,
you may need to enable “Notifications” in the cellular phone’\
s Bluetooth
®,3 menu for
text messages to appear on the touch-screen display. For more detailed information
and instructions, refer to your cellular phone’s Owner’s Manual.
Text message integration requires that the cellular phone support Message Access Profile (MAP) for both receiving and sending text messages. Some
cellular phones may not support all text messaging features. Please see
www.NissanUSA.com/bluetooth for compatibility information as well as
your device’s Owner’s Manual.
1 Laws in some jurisdictions may restrict the use of “T ext-to-Speech”. Some of the applications and features, such
as social networking and texting, may also be restricted. Check local regulations for any requirements before using
these features.
2 Compatible smartphone required. Text rates and/or data usage may apply.
3 Availability of specific features is dependent upon the cellular phone’\
s Bluetooth® support. Please refer to your cellular
phone’s Owner’s Manual for details. Bluetooth® word mark and logos are owned by Bluetooth SIG, Inc., and any use of
such marks by NISSAN is under license. See www.NissanUSA.com/bluetooth for details.
For more information, refer to the “Hands-free phone (section 4)” of your Navigation System Owner’s Manual.
To view detailed instructional videos regarding these and other features, please go to www.nissanownersinfo.mobi. To view detailed instructional videos regarding these and other features,
please go to www.nissanownersinfo.mobi.