2017 NISSAN MURANO ESP
[x] Cancel search: ESPPage 227 of 466
USB (Universal Serial Bus)
Connection Port
WARNING
Do not connect, disconnect, or operate the
USB device while driving. Doing so can be
a distraction. If distracted you could lose
control of your vehicle and cause an acci-
dent or serious injury.
CAUTION
●Do not force the USB device into the
USB port. Inserting the USB device
tilted or up-side-down into the port may
damage the port. Make sure that the
USB device is connected correctly into
the USB port.
● Do not grab the USB port cover (if so
equipped) when pulling the USB device
out of the port. This could damage the
port and the cover.
● Do not leave the USB cable in a place
where it can be pulled unintentionally.
Pulling the cable may damage the port.
The vehicle is not equipped with a USB device.
USB devices should be purchased separately as
necessary. This system cannot be used to format USB de-
vices. To format a USB device, use a personal
computer.
In some jurisdictions, the USB device for the front
seats plays only sound without images for regu-
latory reasons, even when the vehicle is parked.
This system supports various USB memory de-
vices, USB hard drives and iPod® players. Some
USB devices may not be supported by this sys-
tem.
● Partitioned USB devices may not play cor-
rectly.
● Some characters used in other languages
(Chinese, Japanese, etc.) may not appear
properly in the display. Using English lan-
guage characters with a USB device is rec-
ommended.
● Not all Android devices are supported for
USB audio.
● For Apple products, only Apple or Apple
certified USB cables are supported. Some
aftermarket cables may not be supported.
General notes for USB use ● For additional information, refer to your de-
vice manufacturer’s owner information re-
garding the proper use and care of the de-
vice. Notes for iPod® use
iPod® is a trademark of Apple Inc., registered in
the U.S. and other countries.
● Improperly plugging in the iPod® may cause
a checkmark to be displayed on and off
(flickering) . Always make sure that the
iPod® is connected properly.
● An iPod® nano (1st Generation) may remain
in fast forward or rewind mode if it is con-
nected during a seek operation. In this case,
please manually reset the iPod®.
● An iPod® nano (2nd Generation) will con-
tinue to fast-forward or rewind if it is discon-
nected during a seek operation.
● An incorrect song title may appear when the
Play Mode is changed while using an iPod®
nano (2nd Generation) .
● Audiobooks may not play in the same order
as they appear on an iPod®.
● Large video files cause slow responses in an
iPod®. The vehicle center display may mo-
mentarily black out, but will soon recover.
● If an iPod® automatically selects large video
files while in the shuffle mode, the vehicle
center display may momentarily black out,
but will soon recover.
4-36Display screen, heater, air conditioner, audio and phone systems
Page 248 of 466
Initialization
When the ignition switch is placed in the ON
position, NISSAN Voice Recognition is initialized,
which takes a few seconds. If the
button is
pressed before the initialization completes, the
system will announce “Hands-free phone system
not ready” and will not react to voice commands.
Operating tips
To get the best performance out of the NISSAN
Voice Recognition system, observe the following:
● Keep the interior of the vehicle as quiet as
possible. Close the windows to eliminate
surrounding noises (traffic noises, vibration
sounds, etc.) , which may prevent the system
from recognizing voice commands correctly.
● Wait until the beep sounds before speaking
a command. Otherwise, the command will
not be received properly.
● Start speaking a command within 5 seconds
after the beep sounds.
● Speak in a natural voice without pausing
between words.
Giving voice commands
To operate NISSAN Voice Recognition, press
and release the
button located on the
steering wheel. After the beep sounds, speak a
command.
The command given is picked up by the micro-
phone, and voice feedback is given when the
command is accepted.
● If you need to hear the available commands
for the current menu again, say “Help” and
the system will repeat them.
● If a command is not recognized, the system
announces, “Command not recognized.
Please try again.” Make sure the command is
said exactly as prompted by the system and
repeat the command in a clear voice.
● If you want to go back to the previous com-
mand, you can say “Go back” or “Correc-
tion” any time the system is waiting for a
response. ●
You can cancel a command when the sys-
tem is waiting for a response by saying,
“Cancel” or “Quit.” The system announces
“Cancel” and ends the Voice Recognition
session. You can also press and hold
the
button on the steering wheel for
5 seconds at any time to end the Voice
Recognition session. Whenever the Voice
Recognition session is canceled, a double
beep is played to indicate you have exited
the system.
● If you want to adjust the volume of the voice
feedback, push the volume control switches
(+ or -) on the steering wheel while being
provided with feedback. You can also use
the radio volume control knob.
Voice Prompt Interrupt
In most cases you can interrupt the voice feed-
back to speak the next command by pressing
the
button on the steering wheel. After
interrupting the system, wait for a beep before
speaking your command.
One Shot Call
To use the system faster, you may speak the
second level commands with the main menu
command on the main menu. For example, press
the
button and after the beep say, “Call
Redial”.
Display screen, heater, air conditioner, audio and phone systems4-57
Page 252 of 466
●Outgoing Calls
Speak this command to list the last five
outgoing calls from the vehicle. If the call
was to an entry in the phonebook, the name
will be displayed. Otherwise, the phone
number of the outgoing call will be dis-
played.
Say “Dial” to call the number or “Send Text”
to send a text message to that number. Say
“Next Entry” or “Previous Entry” to move
through the list of outgoing calls.
● Redial
Speak this command to call the last number
dialed.
● Call Back
Speak this command to call the number of
the last incoming call to the vehicle.
“Messaging” (if so equipped)
Speak this command to access text messaging
functions. For additional information, refer to
“Text messaging” in this section.
“Select Phone”
Speak this command to select a phone to use
from a list of those phones connected to the
vehicle.
MAKING A CALL
To make a call from a phone connected to the
vehicle’s Bluetooth® Hands-Free Phone Sys-
tem:
1. Press the
button on the steering
wheel.
2. The system will prompt you for a command. Say “Call”.
3. Select one of the available voice commands to continue:
● “(A Name)” — Speak the name of a phone-
book entry to place a call to that entry. The
system will respond with the name it inter-
preted from your command and will prompt
you to confirm that the name is correct. Say
“Yes” to initiate the call or “No” to hear an-
other name from the phonebook. ●
“Phone Number” — Speak this command to
place a call by inputting numbers. For 7– to
10–digit phone number, speak the numbers.
Say “Correction” at any time in the process
to correct a misspoken or misinterpreted
number. For phone numbers with more dig-
its or special characters, say “Special Num-
ber”, then speak the digits. Up to 24 digits
can be entered. Available special characters
are “start”, “pound”, “plus”, and “pause”.
When finished, say “Dial” to initiate the call.
Say “Correction” at any time in the process
to correct a misspoken or misinterpreted
number or character.
● “Redial” – Speak this command to dial the
number of the last outgoing call. The system
will display “Re-dialing
The name of the phonebook entry will be
displayed if it available, otherwise the num-
ber being re-dialed will be displayed.
● “Call Back” – Speak this command to dial
the number of the last incoming call. The
system will display “Calling back
book entry will be displayed if it available,
otherwise the number being called back will
be displayed.
Display screen, heater, air conditioner, audio and phone systems4-61
Page 255 of 466
The text message, sender and delivery time are
shown on the screen. Use the tuning switch to
scroll through all text messages if more than one
are available. Press the
button to exit the
text message screen. Press the
button to
access the following options for replying to the
text message:
● Call Back
Speak this command to call the sender of
the text message using the Bluetooth®
Hands-Free Phone System.
● Send Text
Speak this command to send a text message
response to the sender of the text message.
● Read Text
Speak this command to read the text mes-
sage again.
● Previous Text
Speak this command to move to the previ-
ous text message (if available) .
● Next Text
Speak this command to move to the next text
message (if available) . Siri® Eyes Free
If a connected phone is equipped with Siri®, it
can also be used to create custom messages
that are sent through the phone. For additional
information, refer to “Siri® Eyes Free” in this
section.
NOTE:
Text messages are only displayed if the
vehicle speed is less than 5 mph (8 km/h).
NOTE:
For Apple iPhones®, text messages can
only be sent through Siri.
BLUETOOTH® SETTINGS
To access and adjust the settings for the
Bluetooth® Hands-Free Phone System:
1. Press the SETTING button.
2. Use the TUNE-SCROLL knob to select “Bluetooth” and then press the SETTING
button.
● Bluetooth
Select “On” or “Off” to turn the vehicle’s
Bluetooth® system on or off.
● Add Phone
For additional information, refer to “Con-
necting procedure” in this section.
LHA3540
4-64Display screen, heater, air conditioner, audio and phone systems
Page 257 of 466
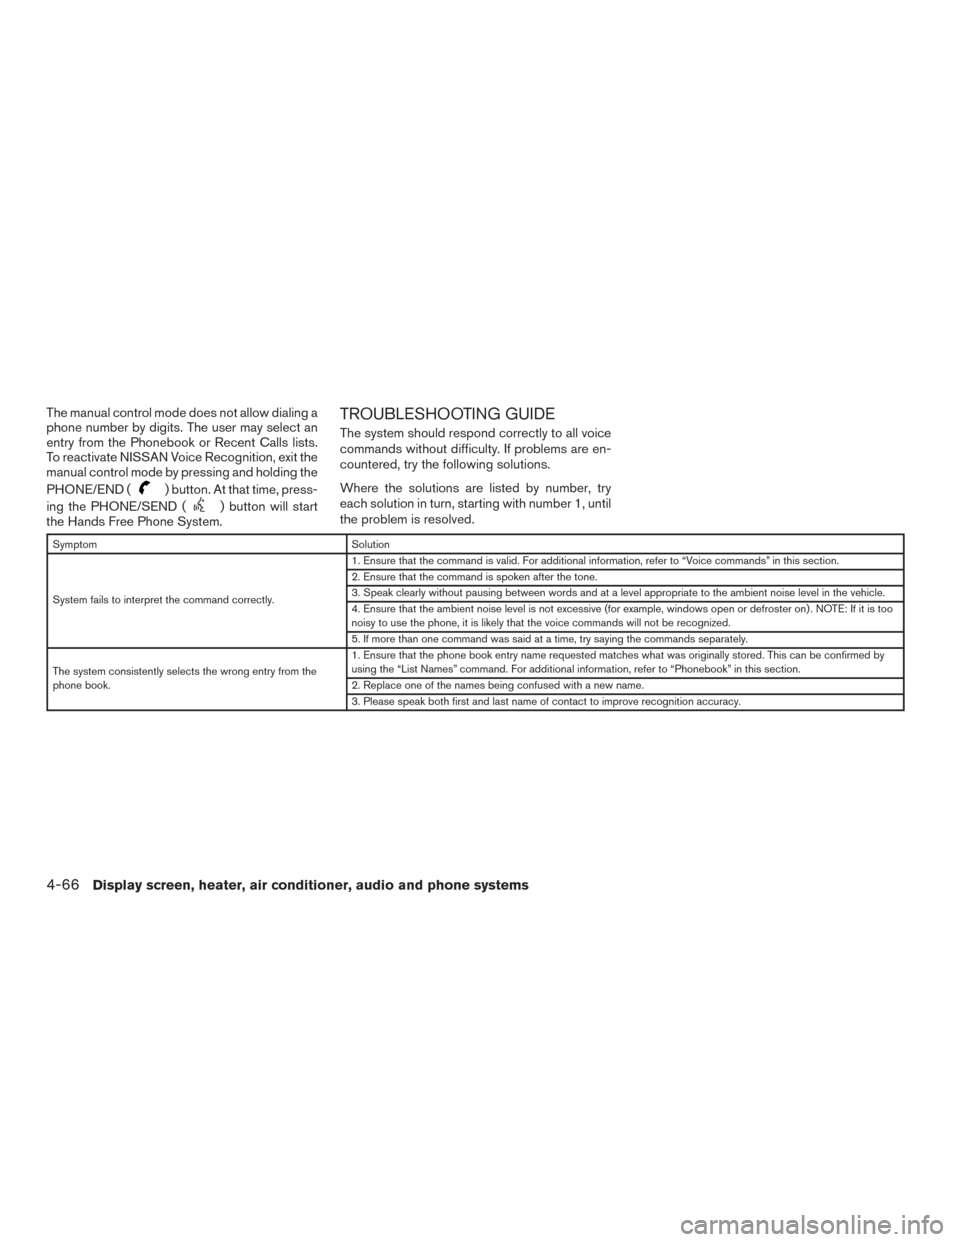
The manual control mode does not allow dialing a
phone number by digits. The user may select an
entry from the Phonebook or Recent Calls lists.
To reactivate NISSAN Voice Recognition, exit the
manual control mode by pressing and holding the
PHONE/END (
) button. At that time, press-
ing the PHONE/SEND (
) button will start
the Hands Free Phone System.
TROUBLESHOOTING GUIDE
The system should respond correctly to all voice
commands without difficulty. If problems are en-
countered, try the following solutions.
Where the solutions are listed by number, try
each solution in turn, starting with number 1, until
the problem is resolved.
Symptom Solution
System fails to interpret the command correctly. 1. Ensure that the command is valid. For additional information, refer to “Voice commands” in this section.
2. Ensure that the command is spoken after the tone.
3. Speak clearly without pausing between words and at a level appropriate to the ambient noise level in the vehicle.
4. Ensure that the ambient noise level is not excessive (for example, windows open or defroster on) . NOTE: If it is too
noisy to use the phone, it is likely that the voice commands will not be recognized.
5. If more than one command was said at a time, try saying the commands separately.
The system consistently selects the wrong entry from the
phone book. 1. Ensure that the phone book entry name requested matches what was originally stored. This can be confirmed by
using the “List Names” command. For additional information, refer to “Phonebook” in this section.
2. Replace one of the names being confused with a new name.
3. Please speak both first and last name of contact to improve recognition accuracy.
4-66Display screen, heater, air conditioner, audio and phone systems
Page 262 of 466
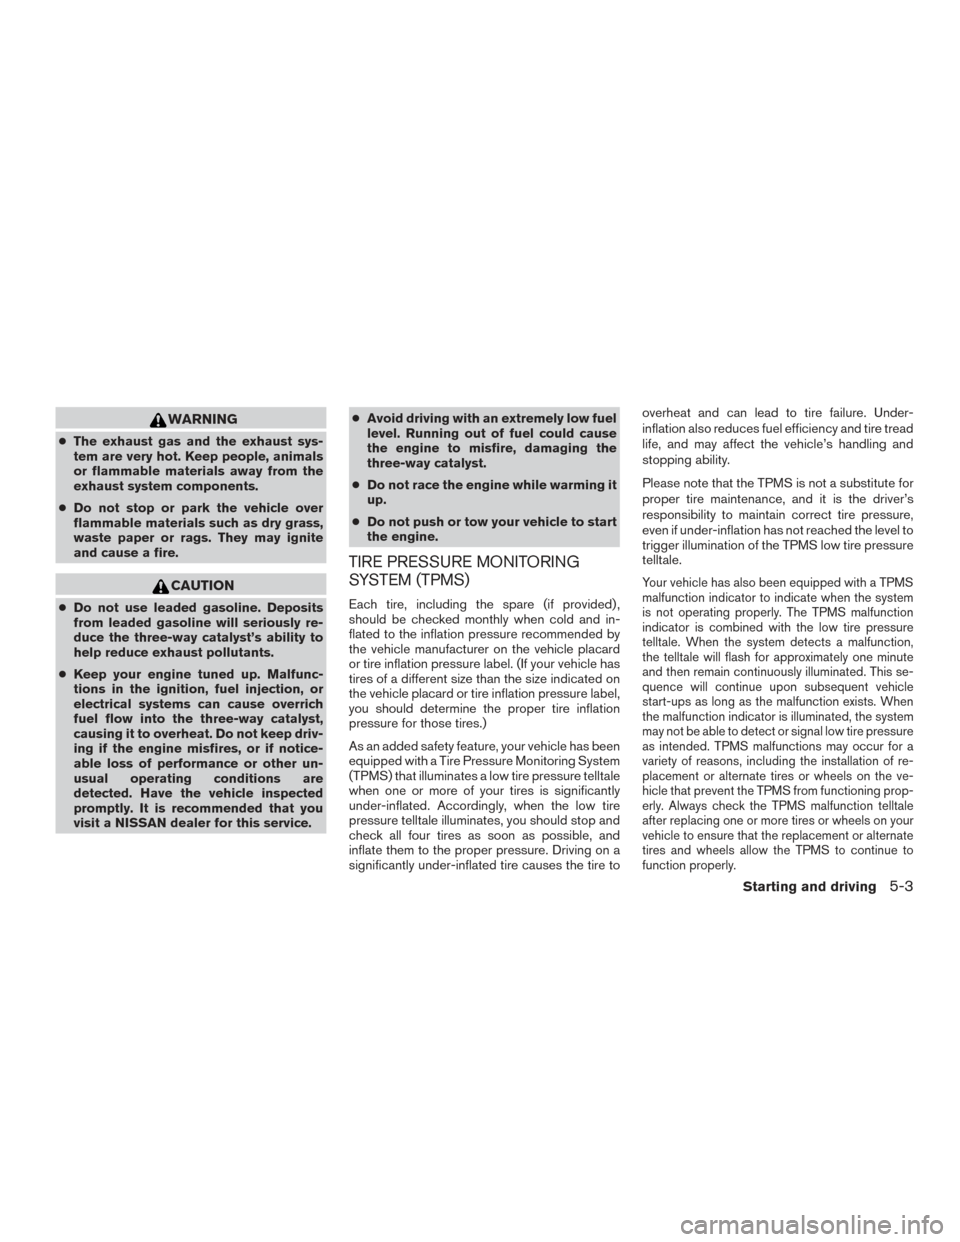
WARNING
●The exhaust gas and the exhaust sys-
tem are very hot. Keep people, animals
or flammable materials away from the
exhaust system components.
● Do not stop or park the vehicle over
flammable materials such as dry grass,
waste paper or rags. They may ignite
and cause a fire.
CAUTION
● Do not use leaded gasoline. Deposits
from leaded gasoline will seriously re-
duce the three-way catalyst’s ability to
help reduce exhaust pollutants.
● Keep your engine tuned up. Malfunc-
tions in the ignition, fuel injection, or
electrical systems can cause overrich
fuel flow into the three-way catalyst,
causing it to overheat. Do not keep driv-
ing if the engine misfires, or if notice-
able loss of performance or other un-
usual operating conditions are
detected. Have the vehicle inspected
promptly. It is recommended that you
visit a NISSAN dealer for this service. ●
Avoid driving with an extremely low fuel
level. Running out of fuel could cause
the engine to misfire, damaging the
three-way catalyst.
● Do not race the engine while warming it
up.
● Do not push or tow your vehicle to start
the engine.
TIRE PRESSURE MONITORING
SYSTEM (TPMS)
Each tire, including the spare (if provided) ,
should be checked monthly when cold and in-
flated to the inflation pressure recommended by
the vehicle manufacturer on the vehicle placard
or tire inflation pressure label. (If your vehicle has
tires of a different size than the size indicated on
the vehicle placard or tire inflation pressure label,
you should determine the proper tire inflation
pressure for those tires.)
As an added safety feature, your vehicle has been
equipped with a Tire Pressure Monitoring System
(TPMS) that illuminates a low tire pressure telltale
when one or more of your tires is significantly
under-inflated. Accordingly, when the low tire
pressure telltale illuminates, you should stop and
check all four tires as soon as possible, and
inflate them to the proper pressure. Driving on a
significantly under-inflated tire causes the tire to overheat and can lead to tire failure. Under-
inflation also reduces fuel efficiency and tire tread
life, and may affect the vehicle’s handling and
stopping ability.
Please note that the TPMS is not a substitute for
proper tire maintenance, and it is the driver’s
responsibility to maintain correct tire pressure,
even if under-inflation has not reached the level to
trigger illumination of the TPMS low tire pressure
telltale.
Your vehicle has also been equipped with a TPMS
malfunction indicator to indicate when the system
is not operating properly. The TPMS malfunction
indicator is combined with the low tire pressure
telltale. When the system detects a malfunction,
the telltale will flash for approximately one minute
and then remain continuously illuminated. This se-
quence will continue upon subsequent vehicle
start-ups as long as the malfunction exists. When
the malfunction indicator is illuminated, the system
may not be able to detect or signal low tire pressure
as intended. TPMS malfunctions may occur for a
variety of reasons, including the installation of re-
placement or alternate tires or wheels on the ve-
hicle that prevent the TPMS from functioning prop-
erly. Always check the TPMS malfunction telltale
after replacing one or more tires or wheels on your
vehicle to ensure that the replacement or alternate
tires and wheels allow the TPMS to continue to
function properly.
Starting and driving5-3
Page 263 of 466
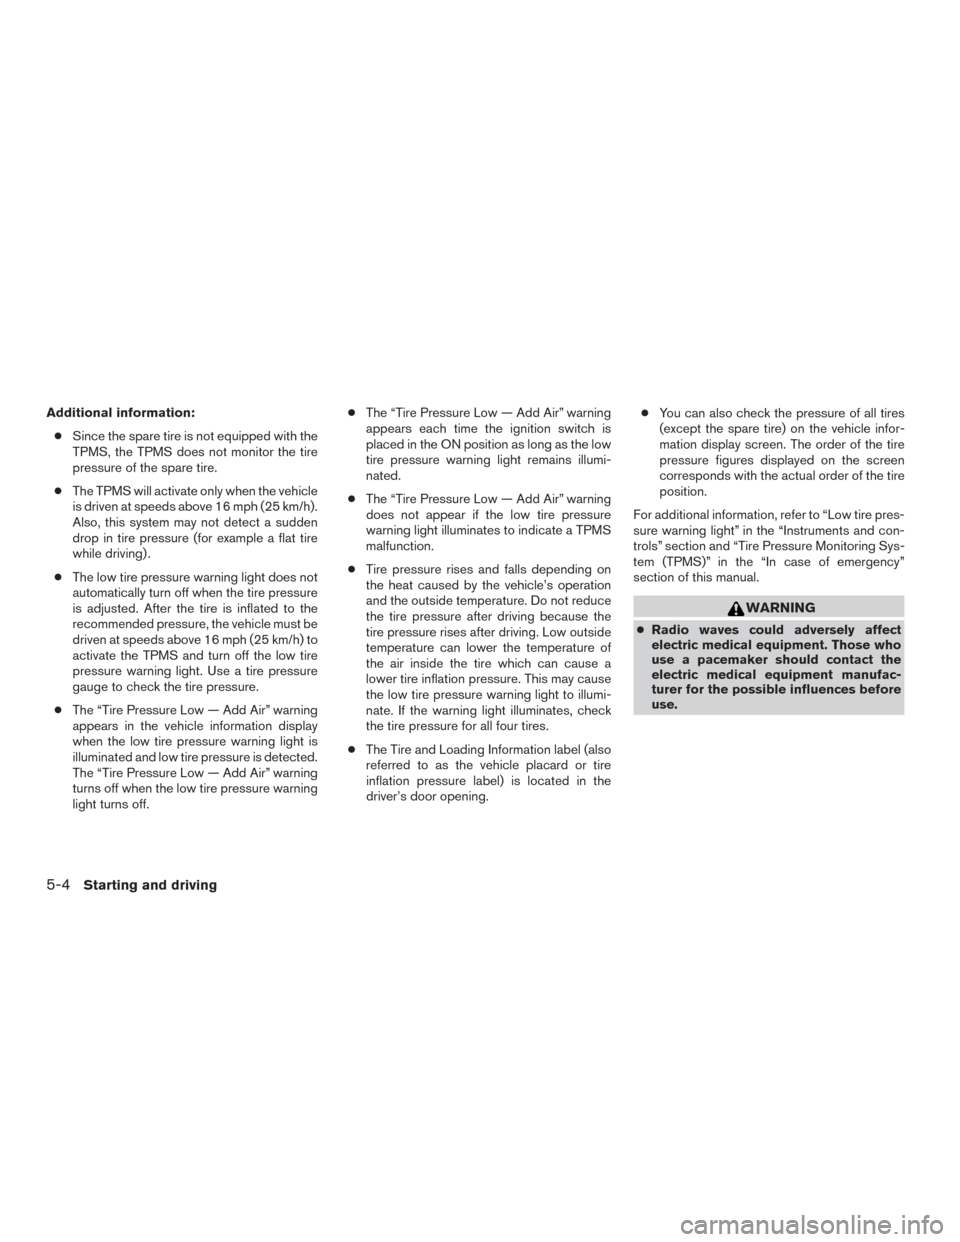
Additional information:● Since the spare tire is not equipped with the
TPMS, the TPMS does not monitor the tire
pressure of the spare tire.
● The TPMS will activate only when the vehicle
is driven at speeds above 16 mph (25 km/h).
Also, this system may not detect a sudden
drop in tire pressure (for example a flat tire
while driving) .
● The low tire pressure warning light does not
automatically turn off when the tire pressure
is adjusted. After the tire is inflated to the
recommended pressure, the vehicle must be
driven at speeds above 16 mph (25 km/h) to
activate the TPMS and turn off the low tire
pressure warning light. Use a tire pressure
gauge to check the tire pressure.
● The “Tire Pressure Low — Add Air” warning
appears in the vehicle information display
when the low tire pressure warning light is
illuminated and low tire pressure is detected.
The “Tire Pressure Low — Add Air” warning
turns off when the low tire pressure warning
light turns off. ●
The “Tire Pressure Low — Add Air” warning
appears each time the ignition switch is
placed in the ON position as long as the low
tire pressure warning light remains illumi-
nated.
● The “Tire Pressure Low — Add Air” warning
does not appear if the low tire pressure
warning light illuminates to indicate a TPMS
malfunction.
● Tire pressure rises and falls depending on
the heat caused by the vehicle’s operation
and the outside temperature. Do not reduce
the tire pressure after driving because the
tire pressure rises after driving. Low outside
temperature can lower the temperature of
the air inside the tire which can cause a
lower tire inflation pressure. This may cause
the low tire pressure warning light to illumi-
nate. If the warning light illuminates, check
the tire pressure for all four tires.
● The Tire and Loading Information label (also
referred to as the vehicle placard or tire
inflation pressure label) is located in the
driver’s door opening. ●
You can also check the pressure of all tires
(except the spare tire) on the vehicle infor-
mation display screen. The order of the tire
pressure figures displayed on the screen
corresponds with the actual order of the tire
position.
For additional information, refer to “Low tire pres-
sure warning light” in the “Instruments and con-
trols” section and “Tire Pressure Monitoring Sys-
tem (TPMS)” in the “In case of emergency”
section of this manual.
WARNING
● Radio waves could adversely affect
electric medical equipment. Those who
use a pacemaker should contact the
electric medical equipment manufac-
turer for the possible influences before
use.
5-4Starting and driving
Page 265 of 466
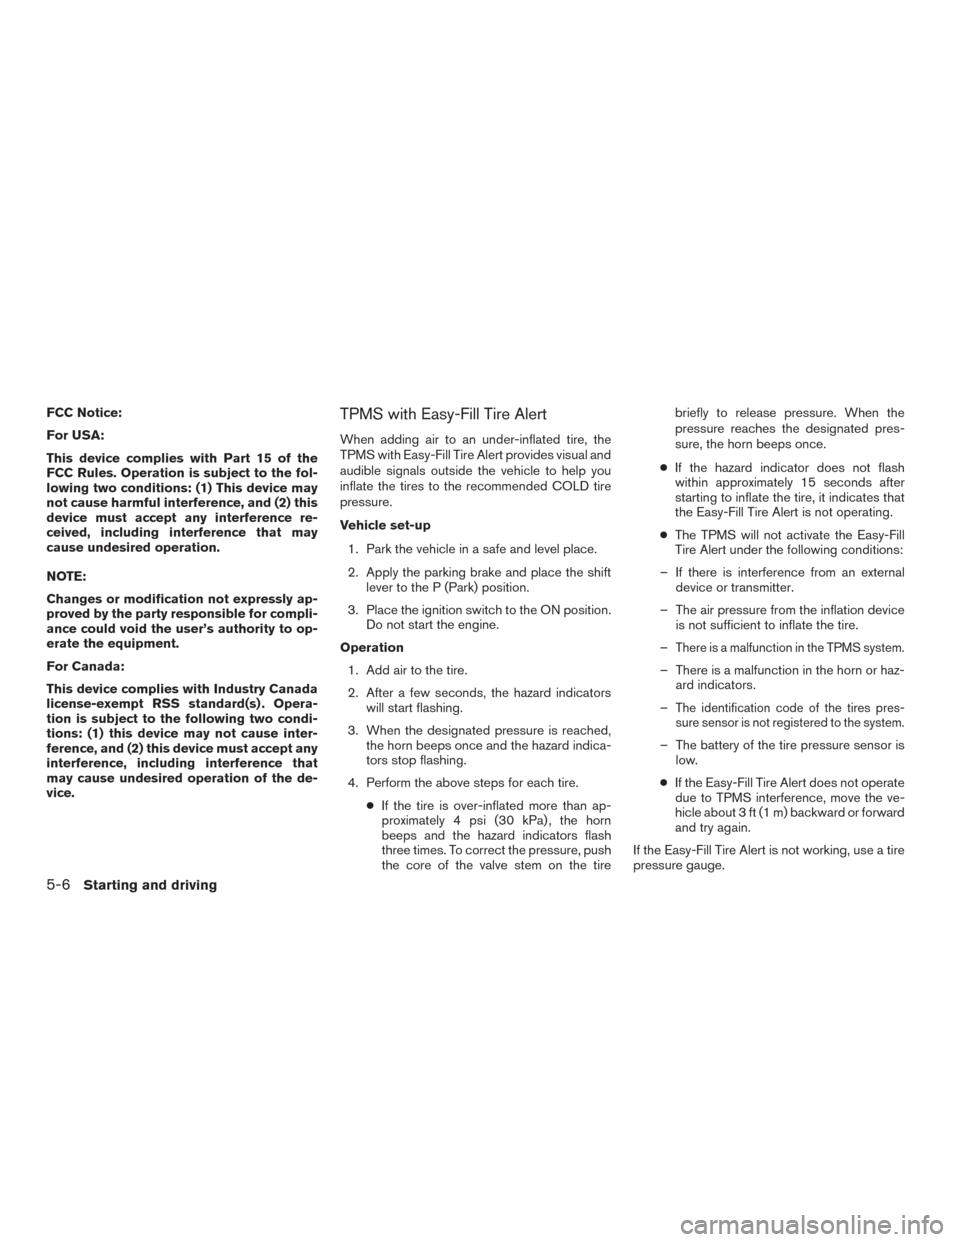
FCC Notice:
For USA:
This device complies with Part 15 of the
FCC Rules. Operation is subject to the fol-
lowing two conditions: (1) This device may
not cause harmful interference, and (2) this
device must accept any interference re-
ceived, including interference that may
cause undesired operation.
NOTE:
Changes or modification not expressly ap-
proved by the party responsible for compli-
ance could void the user’s authority to op-
erate the equipment.
For Canada:
This device complies with Industry Canada
license-exempt RSS standard(s) . Opera-
tion is subject to the following two condi-
tions: (1) this device may not cause inter-
ference, and (2) this device must accept any
interference, including interference that
may cause undesired operation of the de-
vice.TPMS with Easy-Fill Tire Alert
When adding air to an under-inflated tire, the
TPMS with Easy-Fill Tire Alert provides visual and
audible signals outside the vehicle to help you
inflate the tires to the recommended COLD tire
pressure.
Vehicle set-up1. Park the vehicle in a safe and level place.
2. Apply the parking brake and place the shift lever to the P (Park) position.
3. Place the ignition switch to the ON position. Do not start the engine.
Operation 1. Add air to the tire.
2. After a few seconds, the hazard indicators will start flashing.
3. When the designated pressure is reached, the horn beeps once and the hazard indica-
tors stop flashing.
4. Perform the above steps for each tire. ●If the tire is over-inflated more than ap-
proximately 4 psi (30 kPa) , the horn
beeps and the hazard indicators flash
three times. To correct the pressure, push
the core of the valve stem on the tire briefly to release pressure. When the
pressure reaches the designated pres-
sure, the horn beeps once.
● If the hazard indicator does not flash
within approximately 15 seconds after
starting to inflate the tire, it indicates that
the Easy-Fill Tire Alert is not operating.
● The TPMS will not activate the Easy-Fill
Tire Alert under the following conditions:
– If there is interference from an external device or transmitter.
– The air pressure from the inflation device is not sufficient to inflate the tire.
–
There is a malfunction in the TPMS system.
– There is a malfunction in the horn or haz- ard indicators.
–
The identification code of the tires pres-
sure sensor is not registered to the system.
– The battery of the tire pressure sensor is low.
● If the Easy-Fill Tire Alert does not operate
due to TPMS interference, move the ve-
hicle about 3 ft (1 m) backward or forward
and try again.
If the Easy-Fill Tire Alert is not working, use a tire
pressure gauge.
5-6Starting and driving