2017 NISSAN MURANO seat adjustment
[x] Cancel search: seat adjustmentPage 48 of 466
CAUTION
A child restraint in a closed vehicle can
become very hot. Check the seating sur-
face and buckles before placing a child in
the child restraint.
This vehicle is equipped with a universal child
restraint anchor system, referred to as the LATCH
(Lower Anchors and Tethers for CHildren) sys-
tem. Some child restraints include rigid or
webbing-mounted attachments that can be con-
nected to these anchors. For additional informa-
tion, refer to “LATCH (Lower Anchors and Teth-
ers for CHildren) system” in this section.
If you do not have a LATCH compatible child
restraint, the vehicle seat belts can be used.
Several manufacturers offer child restraints for
infants and children of various sizes. When se-
lecting any child restraint, keep the following
points in mind: ● Choose only a restraint with a label certifying
that it complies with Federal Motor Vehicle
Safety Standard 213 or Canadian Motor
Vehicle Safety Standard 213.
● Check the child restraint in your vehicle to be
sure it is compatible with the vehicle’s seat
and seat belt system. ●
If the child restraint is compatible with your
vehicle, place your child in the child restraint
and check the various adjustments to be
sure the child restraint is compatible with
your child. Choose a child restraint that is
designed for your child’s height and weight.
Always follow all recommended procedures.
● If the combined weight of the child and child
restraint is less than 65 lbs (29.5 kg) , you
may use either the LATCH anchors or the
seat belt to install the child restraint (not both
at the same time) .
● If the combined weight of the child and child
restraint is greater than 65 lbs (29.5 kg) , use
the vehicle’s seat belt (not the lower an-
chors) to install the child restraint.
● Be sure to follow the child restraint manufac-
turer’s instructions for installation.
All U.S. states and Canadian provinces or
territories require that infants and small
children be restrained in an approved child
restraint at all times while the vehicle is
being operated. Canadian law requires the
top tether strap on forward-facing child re-
straints be secured to the designated an-
chor point on the vehicle.
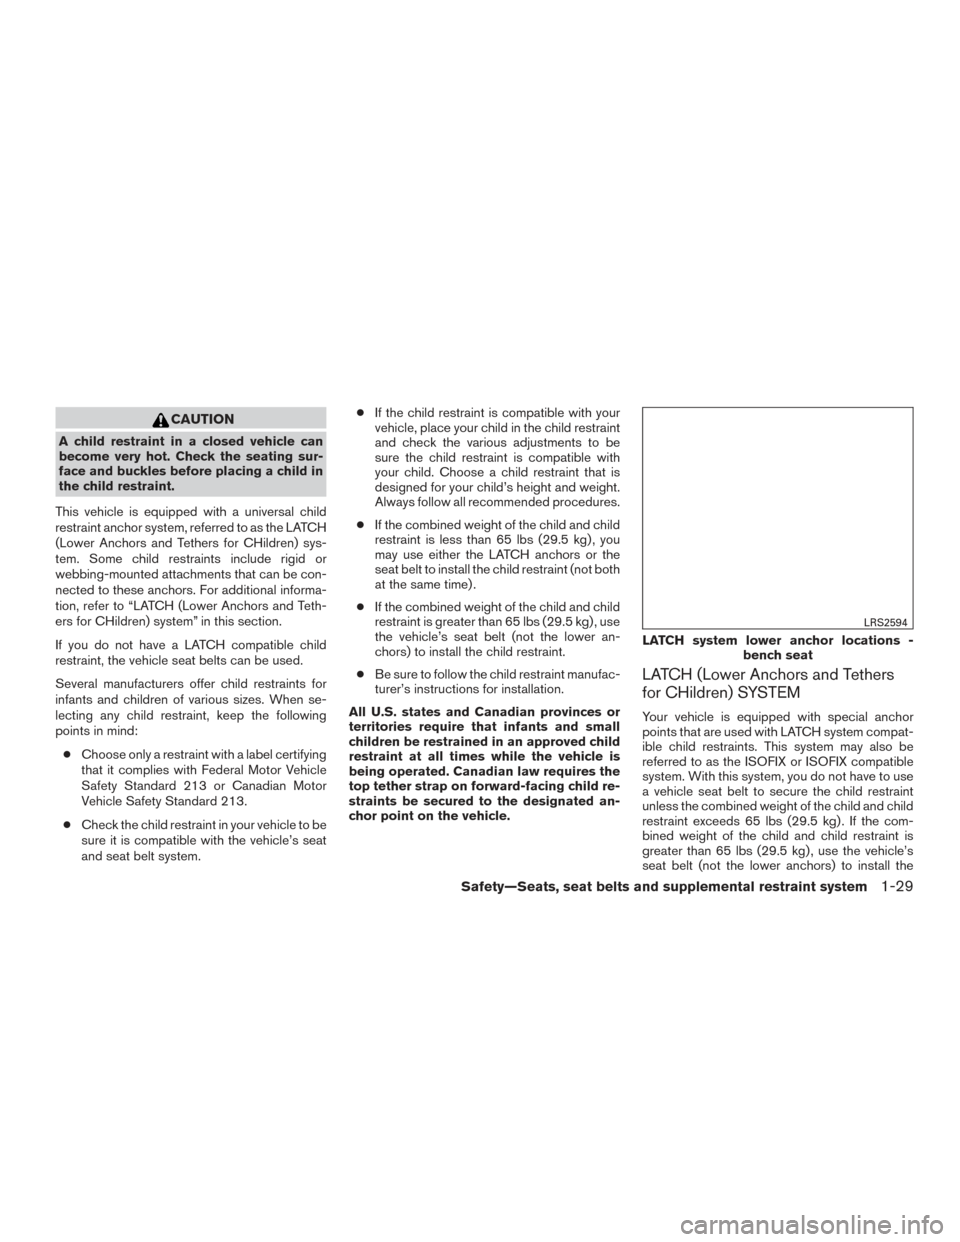
LATCH (Lower Anchors and Tethers
for CHildren) SYSTEM
Your vehicle is equipped with special anchor
points that are used with LATCH system compat-
ible child restraints. This system may also be
referred to as the ISOFIX or ISOFIX compatible
system. With this system, you do not have to use
a vehicle seat belt to secure the child restraint
unless the combined weight of the child and child
restraint exceeds 65 lbs (29.5 kg) . If the com-
bined weight of the child and child restraint is
greater than 65 lbs (29.5 kg) , use the vehicle’s
seat belt (not the lower anchors) to install the
LATCH system lower anchor locations - bench seat
LRS2594
Safety—Seats, seat belts and supplemental restraint system1-29
Page 57 of 466
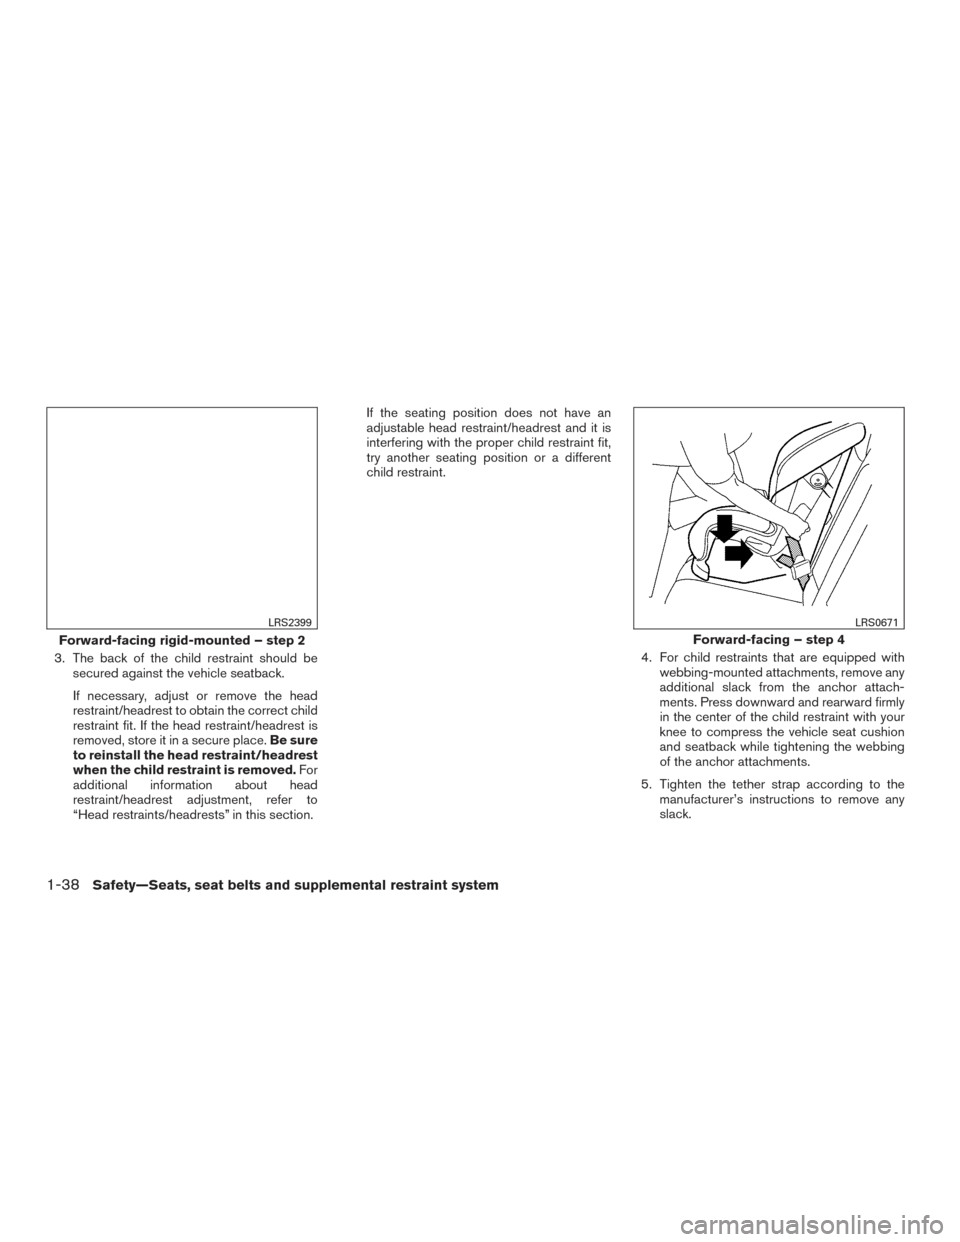
3. The back of the child restraint should besecured against the vehicle seatback.
If necessary, adjust or remove the head
restraint/headrest to obtain the correct child
restraint fit. If the head restraint/headrest is
removed, store it in a secure place. Be sure
to reinstall the head restraint/headrest
when the child restraint is removed. For
additional information about head
restraint/headrest adjustment, refer to
“Head restraints/headrests” in this section. If the seating position does not have an
adjustable head restraint/headrest and it is
interfering with the proper child restraint fit,
try another seating position or a different
child restraint.
4. For child restraints that are equipped withwebbing-mounted attachments, remove any
additional slack from the anchor attach-
ments. Press downward and rearward firmly
in the center of the child restraint with your
knee to compress the vehicle seat cushion
and seatback while tightening the webbing
of the anchor attachments.
5. Tighten the tether strap according to the manufacturer’s instructions to remove any
slack.
Forward-facing rigid-mounted – step 2
LRS2399
Forward-facing – step 4
LRS0671
1-38Safety—Seats, seat belts and supplemental restraint system
Page 60 of 466
Follow these steps to install a forward-facing
child restraint using the vehicle seat belt in the
rear seats or in the front passenger seat:1. If you must install a child restraint in
the front seat, it should be placed in a
forward-facing direction only. Move
the seat to the rearmost position. Child
restraints for infants must be used in
the rear-facing direction and, there-
fore, must not be used in the front seat.
2. Position the child restraint on the seat. Al- ways follow the child restraint manufactur-
er’s instructions.
The back of the child restraint should be
secured against the vehicle seatback.
If necessary, adjust or remove the head
restraint/headrest to obtain the correct child
restraint fit. If the head restraint/headrest is
removed, store it in a secure place. Be sure
to reinstall the head restraint/headrest
when the child restraint is removed. For
additional information about head
restraint/headrest adjustment, removal and
installation, refer to “Head
restraints/headrests” in this section. If the seating position does not have an
adjustable head restraint/headrest and it is
interfering with the proper child restraint fit,
try another seating position or a different
child restraint.
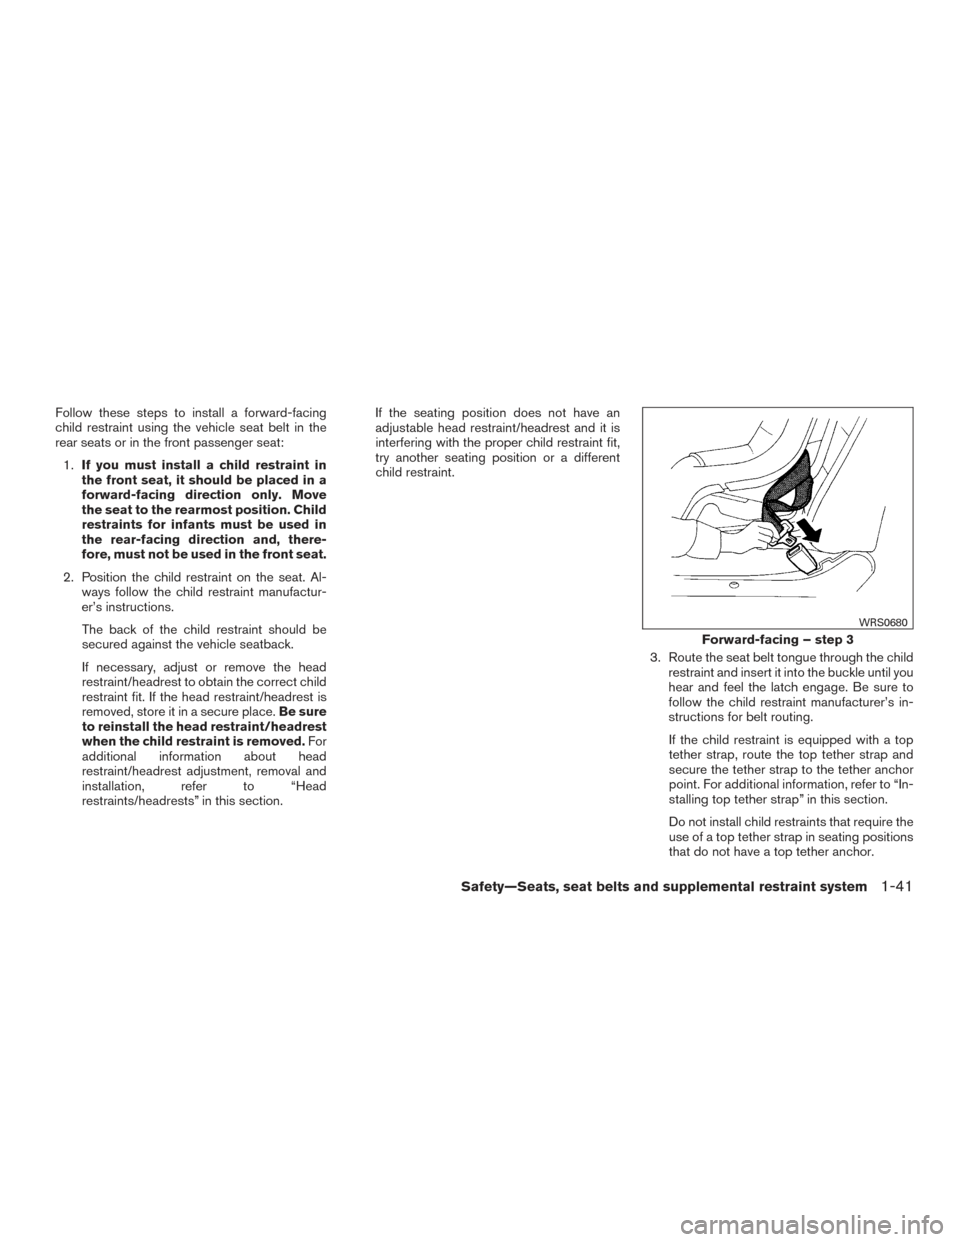
3. Route the seat belt tongue through the childrestraint and insert it into the buckle until you
hear and feel the latch engage. Be sure to
follow the child restraint manufacturer’s in-
structions for belt routing.
If the child restraint is equipped with a top
tether strap, route the top tether strap and
secure the tether strap to the tether anchor
point. For additional information, refer to “In-
stalling top tether strap” in this section.
Do not install child restraints that require the
use of a top tether strap in seating positions
that do not have a top tether anchor.
Forward-facing – step 3
WRS0680
Safety—Seats, seat belts and supplemental restraint system1-41
Page 65 of 466
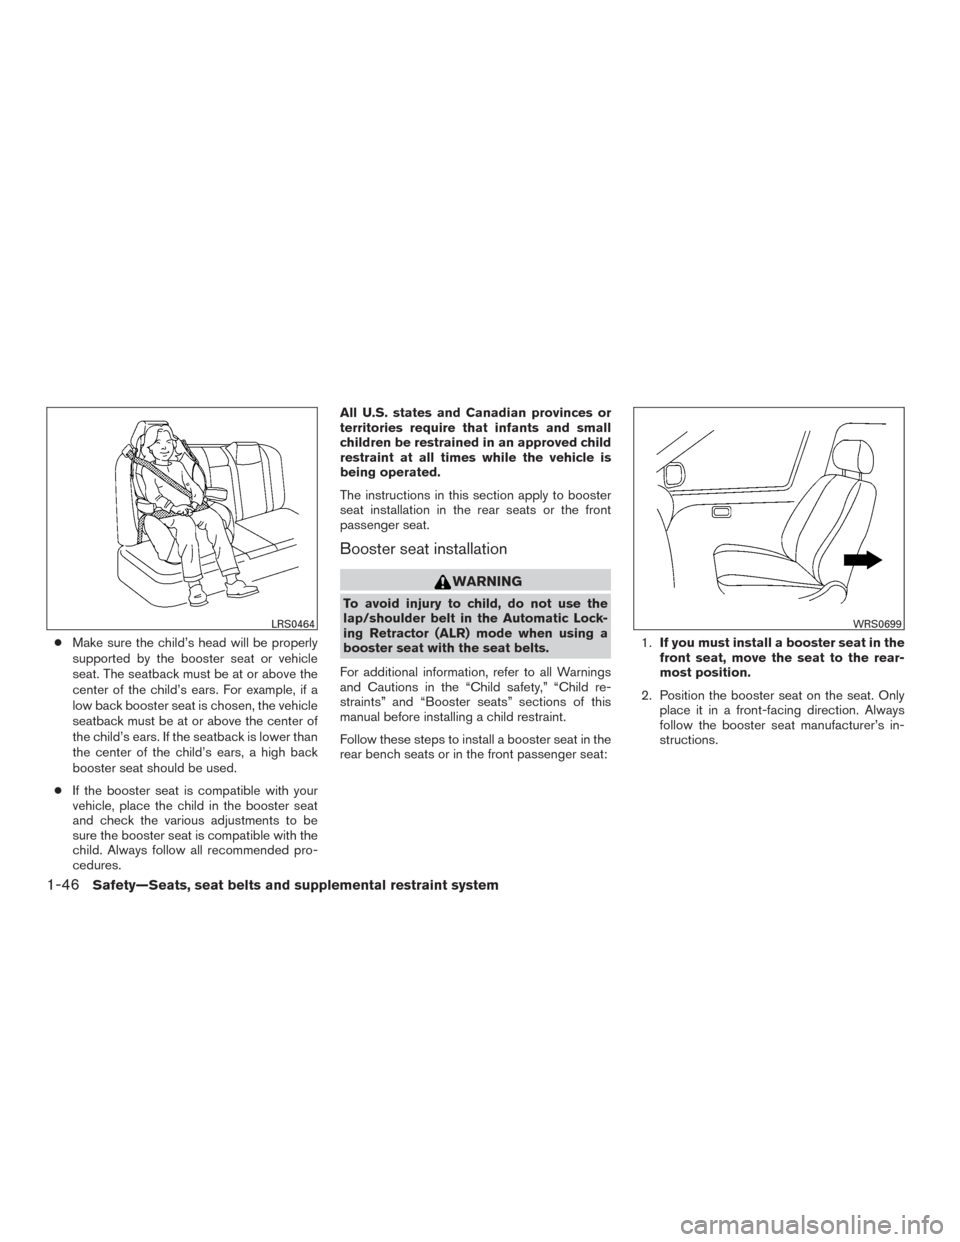
●Make sure the child’s head will be properly
supported by the booster seat or vehicle
seat. The seatback must be at or above the
center of the child’s ears. For example, if a
low back booster seat is chosen, the vehicle
seatback must be at or above the center of
the child’s ears. If the seatback is lower than
the center of the child’s ears, a high back
booster seat should be used.
● If the booster seat is compatible with your
vehicle, place the child in the booster seat
and check the various adjustments to be
sure the booster seat is compatible with the
child. Always follow all recommended pro-
cedures. All U.S. states and Canadian provinces or
territories require that infants and small
children be restrained in an approved child
restraint at all times while the vehicle is
being operated.
The instructions in this section apply to booster
seat installation in the rear seats or the front
passenger seat.
Booster seat installation
WARNING
To avoid injury to child, do not use the
lap/shoulder belt in the Automatic Lock-
ing Retractor (ALR) mode when using a
booster seat with the seat belts.
For additional information, refer to all Warnings
and Cautions in the “Child safety,” “Child re-
straints” and “Booster seats” sections of this
manual before installing a child restraint.
Follow these steps to install a booster seat in the
rear bench seats or in the front passenger seat: 1.
If you must install a booster seat in the
front seat, move the seat to the rear-
most position.
2. Position the booster seat on the seat. Only place it in a front-facing direction. Always
follow the booster seat manufacturer’s in-
structions.
LRS0464WRS0699
1-46Safety—Seats, seat belts and supplemental restraint system
Page 66 of 466
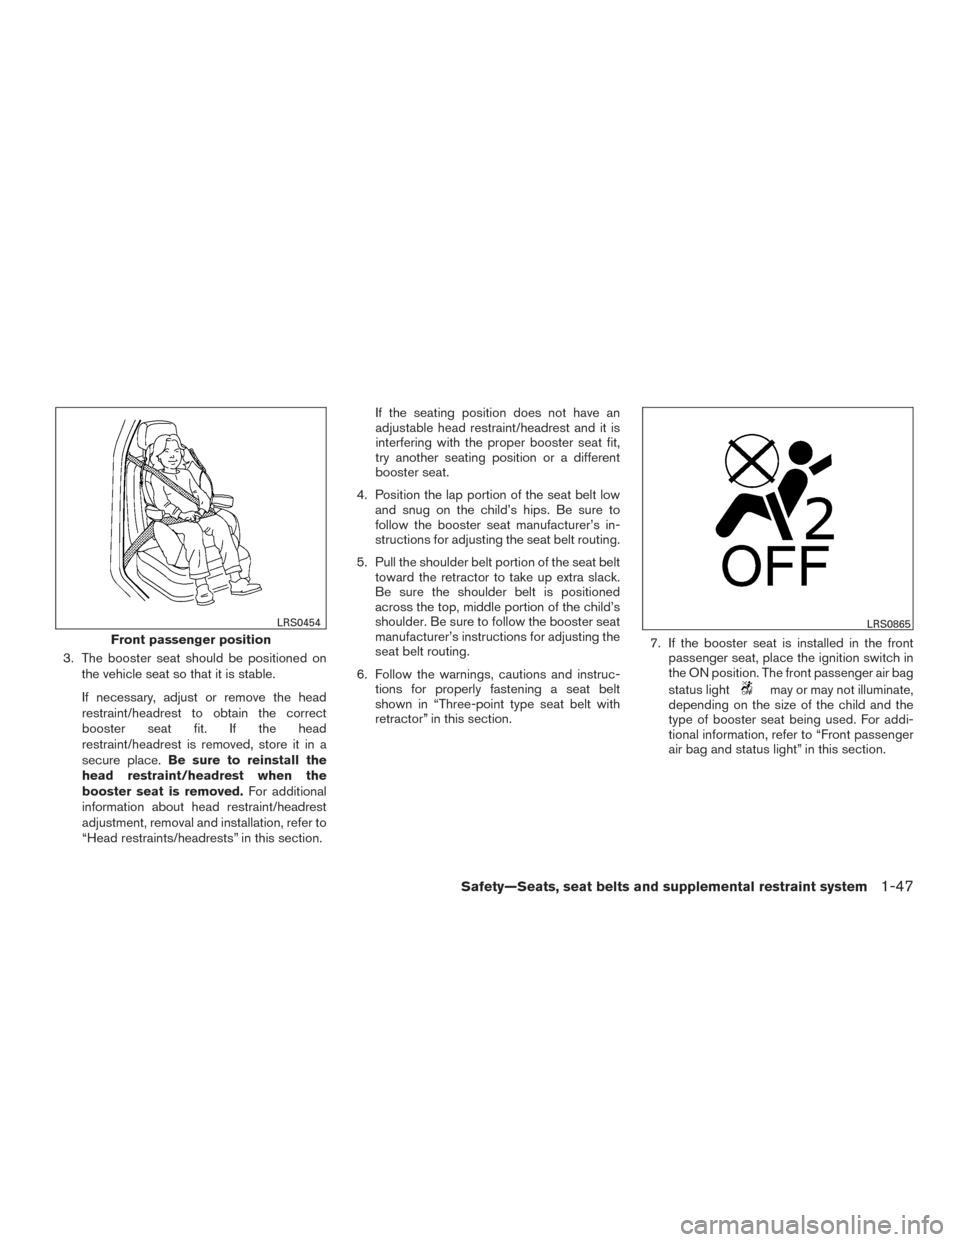
3. The booster seat should be positioned onthe vehicle seat so that it is stable.
If necessary, adjust or remove the head
restraint/headrest to obtain the correct
booster seat fit. If the head
restraint/headrest is removed, store it in a
secure place. Be sure to reinstall the
head restraint/headrest when the
booster seat is removed. For additional
information about head restraint/headrest
adjustment, removal and installation, refer to
“Head restraints/headrests” in this section. If the seating position does not have an
adjustable head restraint/headrest and it is
interfering with the proper booster seat fit,
try another seating position or a different
booster seat.
4. Position the lap portion of the seat belt low and snug on the child’s hips. Be sure to
follow the booster seat manufacturer’s in-
structions for adjusting the seat belt routing.
5. Pull the shoulder belt portion of the seat belt toward the retractor to take up extra slack.
Be sure the shoulder belt is positioned
across the top, middle portion of the child’s
shoulder. Be sure to follow the booster seat
manufacturer’s instructions for adjusting the
seat belt routing.
6. Follow the warnings, cautions and instruc- tions for properly fastening a seat belt
shown in “Three-point type seat belt with
retractor” in this section. 7. If the booster seat is installed in the front
passenger seat, place the ignition switch in
the ON position. The front passenger air bag
status light
may or may not illuminate,
depending on the size of the child and the
type of booster seat being used. For addi-
tional information, refer to “Front passenger
air bag and status light” in this section.
Front passenger position
LRS0454LRS0865
Safety—Seats, seat belts and supplemental restraint system1-47
Page 108 of 466
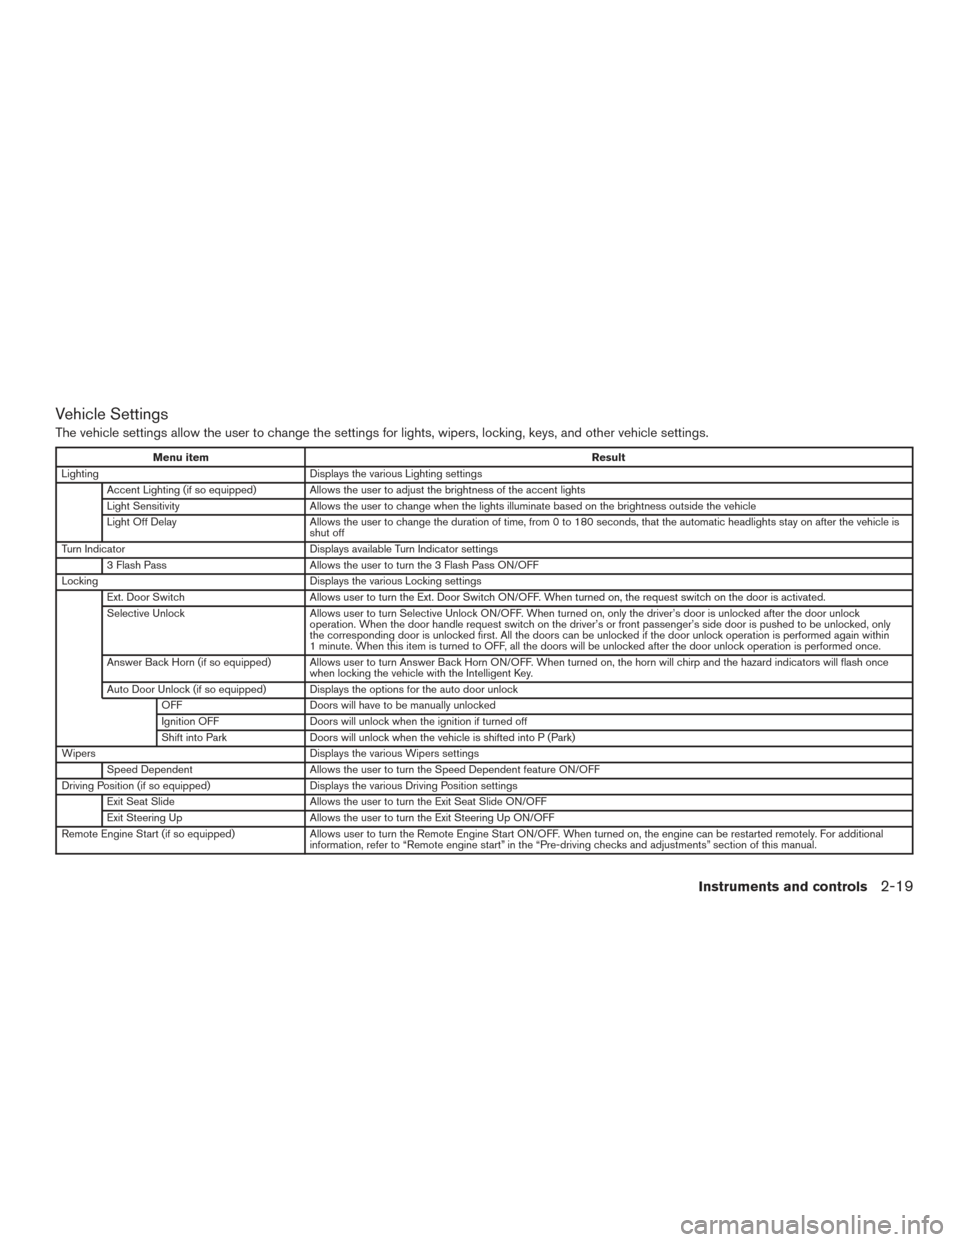
Vehicle Settings
The vehicle settings allow the user to change the settings for lights, wipers, locking, keys, and other vehicle settings.
Menu itemResult
Lighting Displays the various Lighting settings
Accent Lighting (if so equipped) Allows the user to adjust the brightness of the accent lights
Light Sensitivity Allows the user to change when the lights illuminate based on the brightness outside the vehicle
Light Off Delay Allows the user to change the duration of time, from 0 to 180 seconds, that the automatic headlights stay on after the vehicle is
shut off
Turn Indicator Displays available Turn Indicator settings
3 Flash Pass Allows the user to turn the 3 Flash Pass ON/OFF
Locking Displays the various Locking settings
Ext. Door Switch Allows user to turn the Ext. Door Switch ON/OFF. When turned on, the request switch on the door is activated.
Selective Unlock Allows user to turn Selective Unlock ON/OFF. When turned on, only the driver’s door is unlocked after the door unlock
operation. When the door handle request switch on the driver’s or front passenger’s side door is pushed to be unlocked, only
the corresponding door is unlocked first. All the doors can be unlocked if the door unlock operation is performed again within
1 minute. When this item is turned to OFF, all the doors will be unlocked after the door unlock operation is performed once.
Answer Back Horn (if so equipped) Allows user to turn Answer Back Horn ON/OFF. When turned on, the horn will chirp and the hazard indicators will flash once when locking the vehicle with the Intelligent Key.
Auto Door Unlock (if so equipped) Displays the options for the auto door unlock OFF Doors will have to be manually unlocked
Ignition OFF Doors will unlock when the ignition if turned off
Shift into Park Doors will unlock when the vehicle is shifted into P (Park)
Wipers Displays the various Wipers settings
Speed Dependent Allows the user to turn the Speed Dependent feature ON/OFF
Driving Position (if so equipped) Displays the various Driving Position settings
Exit Seat Slide Allows the user to turn the Exit Seat Slide ON/OFF
Exit Steering Up Allows the user to turn the Exit Steering Up ON/OFF
Remote Engine Start (if so equipped) Allows user to turn the Remote Engine Start ON/OFF. When turned on, the engine can be restarted remotely. For additional
information, refer to “Remote engine start” in the “Pre-driving checks and adjustments” section of this manual.
Instruments and controls2-19
Page 179 of 466
●Do not activate the power liftgate if one
or both of the liftgate struts are re-
moved. Damage to the liftgate or power
liftgate mechanisms may occur.
● Keep the power liftgate main switch in
the OFF position when washing or
working around the back of the vehicle
(with Intelligent Key) to prevent inad-
vertent opening/closing.
Liftgate release (manual and power)
The liftgate release mechanism allows the liftgate
to be opened in the event of a discharged battery.
To release the liftgate from the inside of the
vehicle, perform the following operations:
1. Position the rear bench seat forward. For additional information, refer to “Rear bench
seat adjustment” in the “Safety—Seats, seat
belts and supplemental restraint system”
section of this manual.
2. Insert a suitable tool into the top access opening at about a 45 degree angle and
rotate to the left until the lock releases. 3. Push the liftgate up to open.
NOTE:
If you had to open the liftgate using this
procedure, have your vehicle checked as
soon as possible. It is recommended that
you visit a NISSAN dealer for this service.
LIFTGATE POSITION SETTING
The liftgate can be set to open to a specific height
by performing the following: 1. Open the liftgate using the request switch or the Intelligent Key.
2. Pull the liftgate down to the desired position and hold the liftgate (the liftgate will have
some resistance when being manually ad-
justed) .
3. While holding the liftgate in position, push and hold the liftgate switch
located
on the liftgate for approximately 5 seconds
or until two beeps are heard.
The liftgate will open to the selected position
setting. To change the position of the liftgate,
repeat Steps 1-3 for setting the position of the
liftgate.
LPD2319
3-26Pre-driving checks and adjustments
Page 182 of 466
LOOSE FUEL CAP warning
The LOOSE FUEL CAP warning message ap-
pears in the vehicle information display when the
fuel-filler cap is not tightened correctly after the
vehicle has been refueled. It may take a few
driving trips for the message to be displayed. To
turn off the warning message, perform the follow-
ing:1. Remove and install the fuel-filler cap as soon as possible. For additional information, refer
to “Fuel-filler cap” in this section.
2. Tighten the fuel-filler cap until it clicks. 3. Press the
button on the steering
wheel for about one second to turn off the
LOOSE FUEL CAP warning message after
tightening the fuel-filler cap.WARNING
● Do not adjust the steering wheel while
driving. You could lose control of your
vehicle and cause an accident.
● Do not adjust the steering wheel any
closer to you than is necessary for
proper steering operation and comfort.
The driver’s air bag inflates with great
force. If you are unrestrained, leaning
forward, sitting sideways or out of posi-
tion in any way, you are at greater risk of
injury or death in a crash. You may also
receive serious or fatal injuries from the
air bag if you are up against it when it
inflates. Always sit back against the
seatback and as far away as practical
from the steering wheel. Always use the
seat belts.
LPD2298
STEERING WHEEL
Pre-driving checks and adjustments3-29