Page 281 of 424

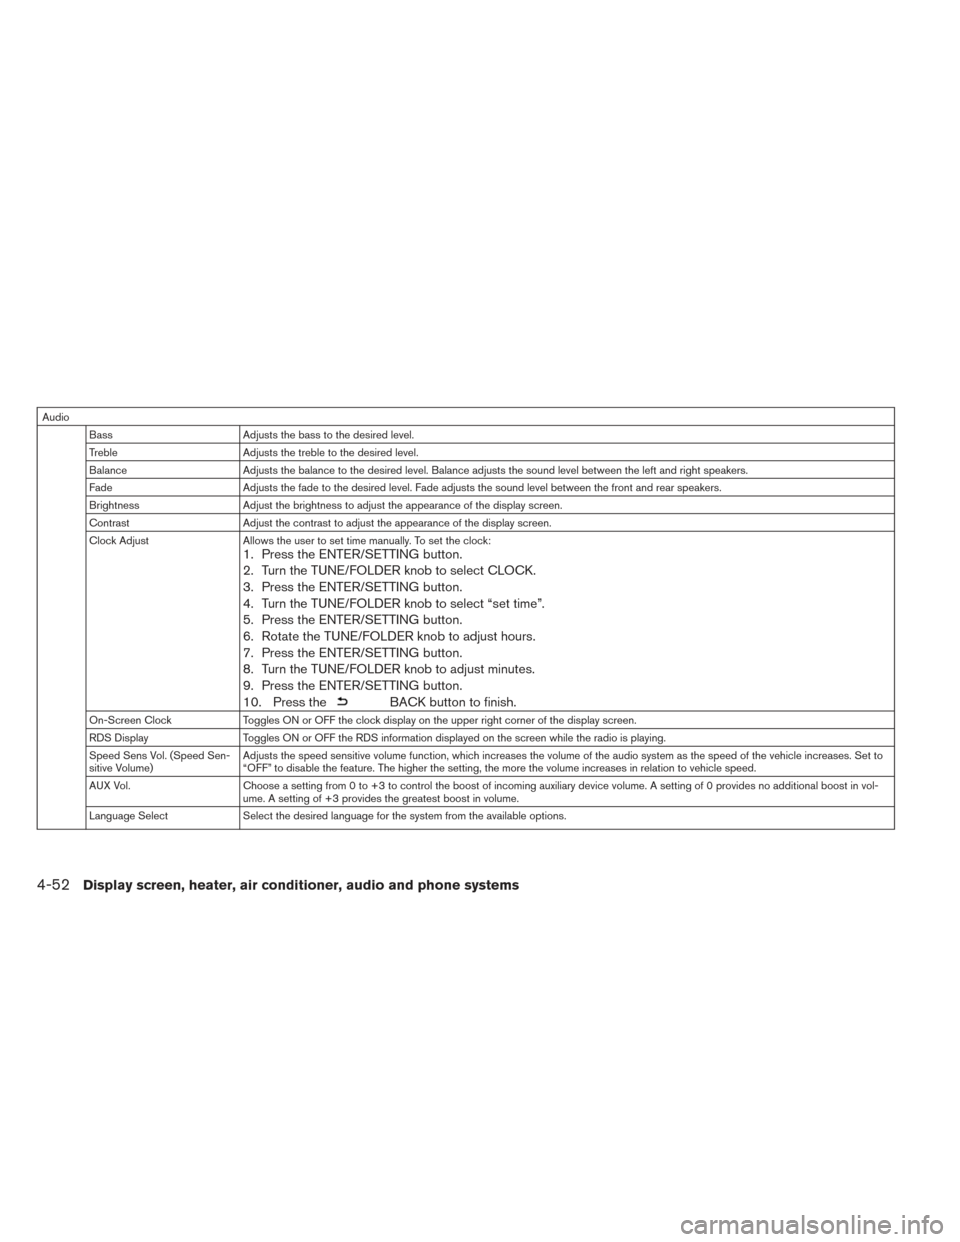
AudioBass Adjusts the bass to the desired level.
Treble Adjusts the treble to the desired level.
Balance Adjusts the balance to the desired level. Balance adjusts the sound level between the left and right speakers.
Fade Adjusts the fade to the desired level. Fade adjusts the sound level between the front and rear speakers.
Brightness Adjust the brightness to adjust the appearance of the display screen.
Contrast Adjust the contrast to adjust the appearance of the display screen.
Clock Adjust Allows the user to set time manually. To set the clock:
1. Press the ENTER/SETTING button.
2. Turn the TUNE/FOLDER knob to select CLOCK.
3. Press the ENTER/SETTING button.
4. Turn the TUNE/FOLDER knob to select “set time”.
5. Press the ENTER/SETTING button.
6. Rotate the TUNE/FOLDER knob to adjust hours.
7. Press the ENTER/SETTING button.
8. Turn the TUNE/FOLDER knob to adjust minutes.
9. Press the ENTER/SETTING button.
10. Press the
BACK button to finish.
On-Screen ClockToggles ON or OFF the clock display on the upper right corner of the display screen.
RDS Display Toggles ON or OFF the RDS information displayed on the screen while the radio is playing.
Speed Sens Vol. (Speed Sen-
sitive Volume) Adjusts the speed sensitive volume function, which increases the volume of the audio system as the speed of the vehicle increases. Set to
“OFF” to disable the feature. The higher the setting, the more the volume increases in relation to vehicle speed.
AUX Vol. Choose a setting from 0 to +3 to control the boost of incoming auxiliary device volume. A setting of 0 provides no additional boost in vol-
ume. A setting of +3 provides the greatest boost in volume.
Language Select Select the desired language for the system from the available options.
4-52Display screen, heater, air conditioner, audio and phone systems
Page 290 of 424

* These modes are only available when compat-
ible media storage is inserted into the device or
connected to the system.
Volume control switch
Push the volume control switch to increase or
decrease the volume.
Tuning switch
While the display is showing an audio screen, tilt
the tuning switch upward or downward to select
a station, track, CD or folder. For most audio
sources, tilting the switch up/down for more than
1.5 seconds provides a different function than a
tilting up/down for less than 1.5 seconds.
AM and FM:
• Tilt up/down for less than 1.5 seconds to in-crease or decrease the preset station.
• Tilt up/down for more than 1.5 seconds to seek up or down to the next station.
XM:
• Tilt up/down for less than 1.5 seconds to in- crease or decrease the preset station.
• Tilt up/down for more than 1.5 seconds to go to the next or previous category. iPod®:
• Tilt up/down for less than 1.5 seconds to in-
crease or decrease the track number.
CD:
• Tilt up/down for less than 1.5 seconds to in- crease or decrease the track number.
• Tilt up/down for more than 1.5 seconds to in- crease or decrease the folder number (if playing
compressed audio files) .
USB:
• Tilt up/down for less than 1.5 seconds to in- crease or decrease the track number.
• Tilt up/down for more than 1.5 seconds to in- crease or decrease the folder number.
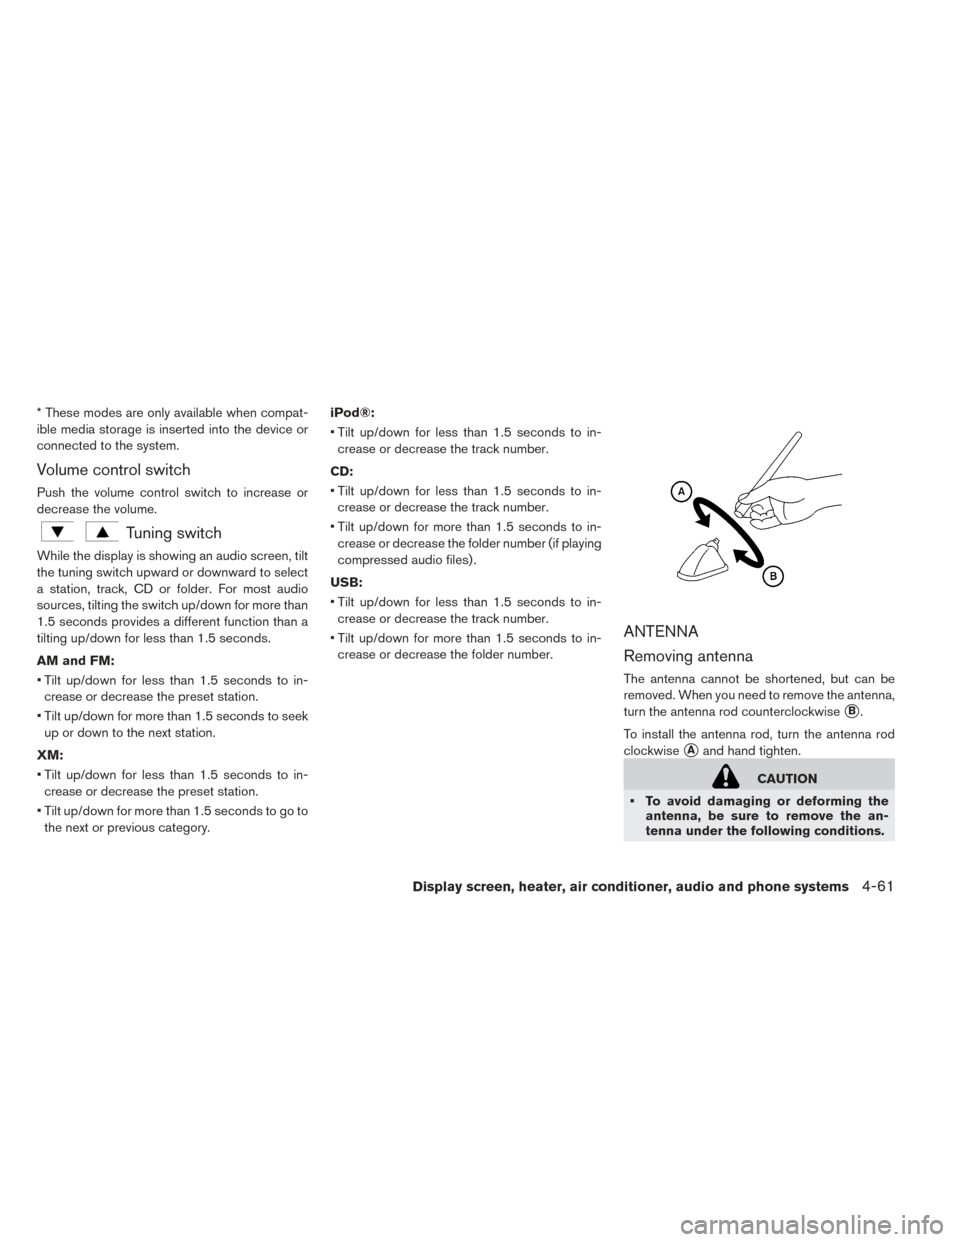
ANTENNA
Removing antenna
The antenna cannot be shortened, but can be
removed. When you need to remove the antenna,
turn the antenna rod counterclockwise
�B.
To install the antenna rod, turn the antenna rod
clockwise
�Aand hand tighten.
CAUTION
• To avoid damaging or deforming the antenna, be sure to remove the an-
tenna under the following conditions.
Display screen, heater, air conditioner, audio and phone systems4-61
Page 340 of 424
1. Take out the speed restriction sticker from theair compressor, then put it in a location where
the driver can see it while driving.
CAUTION
Do not put the speed restriction label on
the steering wheel pad, the speedometer
or the warning light locations.
2. Take the hose
�1and the power plug�2out
of the air compressor. Remove the cap of the
bottle holder from the air compressor. 3. Remove the cap from the tire sealant bottle,
and screw the bottle clockwise onto the bottle
holder. (Leave the bottle seal intact. Screwing
the bottle onto the bottle holder will pierce the
seal of the bottle.)
4. Remove the cap from the tire valve on the flat tire.
In case of emergency6-7
Page 417 of 424

Charging methods...............CH-21
Chargingrelatedindicatorlight........CH-27
Charging related remote function ......CH-26
Charging status indicator light ........CH-27
Chargingtimer.................CH-21
Charging troubleshooting guide .......CH-32
Checking .....................2-13
Checkingbulbs................2-13
Checkingcoolantlevel.............8-9
Child restraints ..................1-18
Boosterseats.................1-35
Precautions on child restraints .......1-19
Top tether strap ................1-23
Childsafety....................1-16
Child safety rear door lock ............3-6
Circuit breaker, Fusible link ...........8-18
Cleaning exterior and interior ........7-2,7-4
Climatecontrol..................4-41 Climate control service ............4-41
Climate control system refrigerant and
lubricant recommendations .........4-41
Climate control system .............4-22
Climate control operation ..........4-22
Climate Ctrl. Timer ............4-29,4-36
Clock.......................2-11
Clock setting (models without Navigation
System) ......................4-51
Cold weather driving ...............5-26
Consolebox...................2-55 Coolant
.......................8-9
Changingcoolant ...............8-9
Checking coolant level .............8-9
Recommended fluids/lubricants and
capacities ....................9-2
Cooling system ..................8-8
Corrosion protection ...............7-7
Cruisecontrol..................5-16
Cupholders...................2-52
D
Defroster switch, Rear window and outside
mirror defroster switch ..............2-42
Dimensionsandweights.............9-5
Display, vehicle information ...........2-23
Doors ........................3-4
Driving ......................5-26
Cold weather driving .............5-26
Driving vehicle ................5-11
Precautions when starting and driving ....5-2
Driving range ....................2-8
Driving vehicle ..................5-11
E
ECO .......................2-48
ECO switch ..................2-48
ECOindicator..................2-10
Efficient use of your vehicle ..........EV-23Emergencycharge ..............CH-11
Emergency EV (Electric Vehicle)
shutoff ...................5-10,6-3
Emergency shutoff system
...........EV-9
Emission control information label ........9-7
EV Characteristics ...............EV-9
Event Data Recorder (EDR) ...........9-17
EVSE (Electric Vehicle Supply
Equipment) ...................CH-11
EV system ....................EV-2
EV unique information .............EV-25
F
Flashers (Refer to hazard warning flasher
switch).......................6-2
Flat tire .......................6-3
Flattowing....................9-13
Floormatcleaning.................7-5
Fluid ........................8-10
Brake fluid ...................8-10
coolant.....................8-8
Recommended fluids/lubricants and
capacities ....................9-2
Reduction gear fluid .............8-10
Windshield-washer fluid ...........8-11
FM/AM/SAT Radio with Compact Disc (CD)
Player .......................4-50
F.M.V.S.S./C.M.V.S.S. certification label .....9-7
Foglightswitch .................2-46
10-2Index