2017 NISSAN FRONTIER steering
[x] Cancel search: steeringPage 302 of 478
WARNING
●Radio waves could adversely affect
electric medical equipment. Those who
use a pacemaker should contact the
electric medical equipment manufac-
turer for the possible influences before
use.
● If the low tire pressure warning light
illuminates while driving, avoid sudden
steering maneuvers or abrupt braking,
reduce vehicle speed, pull off the road
to a safe location and stop the vehicle
as soon as possible. Driving with under-
inflated tires may permanently damage
the tires and increase the likelihood of
tire failure. Serious vehicle damage
could occur and may lead to an accident
and could result in serious personal in-
jury. Check the tire pressure for all four
tires. Adjust the tire pressure to the
recommended COLD tire pressure
shown on the Tire and Loading Informa-
tion label to turn the low tire pressure
warning light OFF. If you have a flat tire,
replace it with a spare tire as soon as
possible. For additional information, re-
fer to “Flat tire” in the “In case of emer-
gency” section of this manual for
changing a flat tire. ●
Since the spare tire is not equipped with
the TPMS, when a spare tire is mounted
or a wheel is replaced, the TPMS will
not function and the low tire pressure
warning light will flash for approxi-
mately 1 minute. The light will remain
on after 1 minute. Have your tires re-
placed and/or TPMS system reset as
soon as possible. It is recommended
that you visit a NISSAN dealer for this
service.
● Replacing tires with those not originally
specified by NISSAN could affect the
proper operation of the TPMS.
● Do not inject any tire liquid or aerosol
tire sealant into the tires, as this may
cause a malfunction of the tire pressure
sensors.
CAUTION
Do not place metalized film or any metal
parts (antenna, etc.) on the windows. This
may cause poor reception of the signals
from the tire pressure sensors, and the
TPMS will not function properly.
Some devices and transmitters may temporarily
interfere with the operation of the TPMS and cause
the low tire pressure warning light to illuminate.
Some examples are:
● Facilities or electric devices using similar
radio frequencies are near the vehicle.
● If a transmitter set to similar frequencies is
being used in or near the vehicle.
● If a computer (or similar equipment) or a
DC/AC converter is being used in or near
the vehicle.
Low tire pressure warning light may illuminate in
the following cases: ● If the vehicle equipped with a wheel and tire
without TPMS.
● If the TPMS has been replaced and the ID
has not been registered.
● If the wheel is not originally specified by
NISSAN.
FCC Notice:
For USA:
This device complies with Part 15 of the
FCC Rules. Operation is subject to the fol-
lowing two conditions: (1) This device may
not cause harmful interference, and (2) this
device must accept any interference re-
ceived, including interference that may
cause undesired operation.
Starting and driving5-5
Page 303 of 478
NOTE:
Changes or modification not expressly ap-
proved by the party responsible for compli-
ance could void the user’s authority to op-
erate the equipment.
For Canada:
This device complies with Industry Canada
license-exempt RSS standard(s) . Opera-
tion is subject to the following two condi-
tions: (1) this device may not cause inter-
ference, and (2) this device must accept any
interference, including interference that
may cause undesired operation of the de-
vice.
ON-PAVEMENT AND OFF-ROAD
DRIVING PRECAUTIONS
Utility vehicles have a significantly higher
rollover rate than other types of vehicles.
They have higher ground clearance than passen-
ger cars to make them capable of performing in a
variety of on-pavement and off-road applications.
This gives them a higher center of gravity than
ordinary vehicles. An advantage of higher ground
clearance is a better view of the road, allowing
you to anticipate problems. However, they are not
designed for cornering at the same speeds as
conventional 2-wheel drive vehicles any morethan low-slung sports cars are designed to per-
form satisfactorily under off-road conditions. If at
all possible, avoid sharp turns at high speeds. As
with other vehicles of this type, failure to operate
this vehicle correctly may result in loss of control
or vehicle rollover. In a rollover crash, an unbelted
person is significantly more likely to die than a
person wearing a seat belt.
For additional information, refer to “Driving safety
precautions” in this section.
AVOIDING COLLISION AND
ROLLOVER
WARNING
Failure to operate this vehicle in a safe
and prudent manner may result in loss of
control or an accident.
Be alert and drive defensively at all times. Obey
all traffic regulations. Avoid excessive speed,
high speed cornering, or sudden steering ma-
neuvers, because these driving practices could
cause you to lose control of your vehicle.
As with any vehicle, loss of control could
result in a collision with other vehicles or
objects or cause the vehicle to roll over,
particularly if the loss of control causes the
vehicle to slide sideways. Be attentive at all times, and avoid driving when
tired. Never drive when under the influence of
alcohol or drugs (including prescription or over-
the-counter drugs which may cause drowsi-
ness) . Always wear your seat belt as outlined in
the “Safety – Seats, seat belts and supplemental
restraint system” section of this manual, and also
instruct your passengers to do so.
Seat belts help reduce the risk of injury in colli-
sions and rollovers.
In a rollover crash, an
unbelted or improperly belted person is
significantly more likely to be injured or
killed than a person properly wearing a
seat belt.OFF-ROAD RECOVERY
While driving, the right side or left side wheels
may unintentionally leave the road surface. If this
occurs, maintain control of the vehicle by follow-
ing the procedure below. Please note that this
procedure is only a general guide. The vehicle
must be driven as appropriate based on the con-
ditions of the vehicle, road and traffic.
1. Remain calm and do not overreact.
2. Do not apply the brakes.
3. Maintain a firm grip on the steering wheel with both hands and try to hold a straight
course.
5-6Starting and driving
Page 304 of 478
4. When appropriate, slowly release the accel-erator pedal to gradually slow the vehicle.
5. If there is nothing in the way, steer the ve- hicle to follow the road while vehicle speed
is reduced. Do not attempt to drive the ve-
hicle back onto the road surface until vehicle
speed is reduced.
6. When it is safe to do so, gradually turn the steering wheel until both tires return to the
road surface. When all tires are on the road
surface, steer the vehicle to stay in the ap-
propriate driving lane.
● If you decide that it is not safe to return the
vehicle to the road surface based on vehicle,
road or traffic conditions, gradually slow the
vehicle to a stop in a safe place off the road.
RAPID AIR PRESSURE LOSS
Rapid air pressure loss or a “blow-out” can occur
if the tire is punctured or is damaged due to
hitting a curb or pothole. Rapid air pressure loss
can also be caused by driving on under-inflated
tires.
Rapid air pressure loss can affect the handling
and stability of the vehicle, especially at highway
speeds. Help prevent rapid air pressure loss by maintain-
ing the correct air pressure and visually inspect
the tires for wear and damage. For additional
information, refer to “Wheels and tires” in the
“Do-it-yourself” section of this manual. If a tire
rapidly loses air pressure or “blows-out” while
driving, maintain control of the vehicle by follow-
ing the procedure below. Please note that this
procedure is only a general guide. The vehicle
must be driven as appropriate based on the con-
ditions of the vehicle, road and traffic.
WARNING
The following actions can increase the
chance of losing control of the vehicle if
there is a sudden loss of tire air pressure.
Losing control of the vehicle may cause a
collision and result in personal injury.
●
The vehicle generally moves or pulls in
the direction of the flat tire.
● Do not rapidly apply the brakes.
● Do not rapidly release the accelerator
pedal.
● Do not rapidly turn the steering wheel.
1. Remain calm and do not overreact. 2. Maintain a firm grip on the steering wheel
with both hands and try to hold a straight
course.
3. When appropriate, slowly release the accel- erator pedal to gradually slow the vehicle.
4. Gradually steer the vehicle to a safe location off the road and away from traffic if possible.
5. Lightly apply the brake pedal to gradually stop the vehicle.
6. Turn on the hazard warning flashers and contact a roadside emergency service to
change the tire. For additional information,
refer to “Changing a flat tire” in the “In case
of emergency” section of this manual.
DRINKING ALCOHOL/DRUGS AND
DRIVING
WARNING
Never drive under the influence of alcohol
or drugs. Alcohol in the bloodstream re-
duces coordination, delays reaction time
and impairs judgement. Driving after
drinking alcohol increases the likelihood
of being involved in an accident injuring
yourself and others. Additionally, if you
are injured in an accident, alcohol can
increase the severity of the injury.
Starting and driving5-7
Page 306 of 478
●To avoid raising the center of gravity
excessively, do not exceed the rated
capacity of the roof rack (if so equipped)
and evenly distribute the load. Secure
heavy loads in the cargo area as far
forward and as low as possible. Do not
equip the vehicle with tires larger than
specified in this manual. This could
cause your vehicle to roll over.
● Do not grip the inside or spokes of the
steering wheel when driving off-road.
The steering wheel could move sud-
denly and injure your hands. Instead
drive with your fingers and thumbs on
the outside of the rim.
● Before operating the vehicle, ensure
that the driver and all passengers have
their seat belts fastened.
● Always drive with the floor mats in place
as the floor may become hot.
● Lower your speed when encountering
strong crosswinds. With a higher center
of gravity, your NISSAN is more affected
by strong side winds. Slower speeds
ensure better vehicle control.
● Do not drive beyond the performance
capability of the tires, even with 4WD
engaged (if so equipped) . ●
For 4WD equipped vehicles, do not at-
tempt to raise two wheels off the
ground and shift the transmission to
any drive or reverse position with the
engine running. Doing so may result in
drivetrain damage or unexpected ve-
hicle movement which could result in
serious vehicle damage or personal
injury.
● Do not attempt to test a 4WD equipped
vehicle on a 2-wheel dynamometer
(such as the dynamometers used by
some states for emissions testing) , or
similar equipment even if the other two
wheels are raised off the ground. Make
sure you inform test facility personnel
that your vehicle is equipped with 4WD
before it is placed on a dynamometer.
Using the wrong test equipment may
result in drivetrain damage or unex-
pected vehicle movement which could
result in serious vehicle damage or per-
sonal injury.
● Accelerating quickly, sharp steering
maneuvers or sudden braking may
cause loss of control. ●
If at all possible, avoid sharp turning
maneuvers, particularly at high speeds.
Your NISSAN four-wheel drive vehicle
has a higher center of gravity than a
passenger car. The vehicle is not de-
signed for cornering at the same speeds
as passenger cars. Failure to operate
this vehicle correctly could result in loss
of control and/or a rollover accident.
● Always use tires of the same type, size,
brand, construction (bias, bias-belted,
or radial) , and tread pattern on all four
wheels. Install tire chains on the rear
wheels when driving on slippery roads
and drive carefully.
● Be sure to check the brakes immedi-
ately after driving in mud or water. For
additional information, refer to “Wet
brakes” in this section.
● Avoid parking your vehicle on steep
hills. If you get out of the vehicle and it
rolls forward, backward or sideways,
you could be injured.
Starting and driving5-9
Page 307 of 478
●Whenever you drive off-road through
sand, mud or water as deep as the
wheel hub, more frequent maintenance
may be required. For additional infor-
mation, refer to “Periodic maintenance”
in the “Maintenance and schedules”
section of this manual.WARNING
●Never remove the ignition key or place
the ignition switch in the LOCK position
while driving. The steering wheel will
lock (for models with a steering lock
mechanism) . This may cause the driver
to lose control of the vehicle and could
result in serious vehicle damage or per-
sonal injury.
AUTOMATIC TRANSMISSION (if so
equipped)
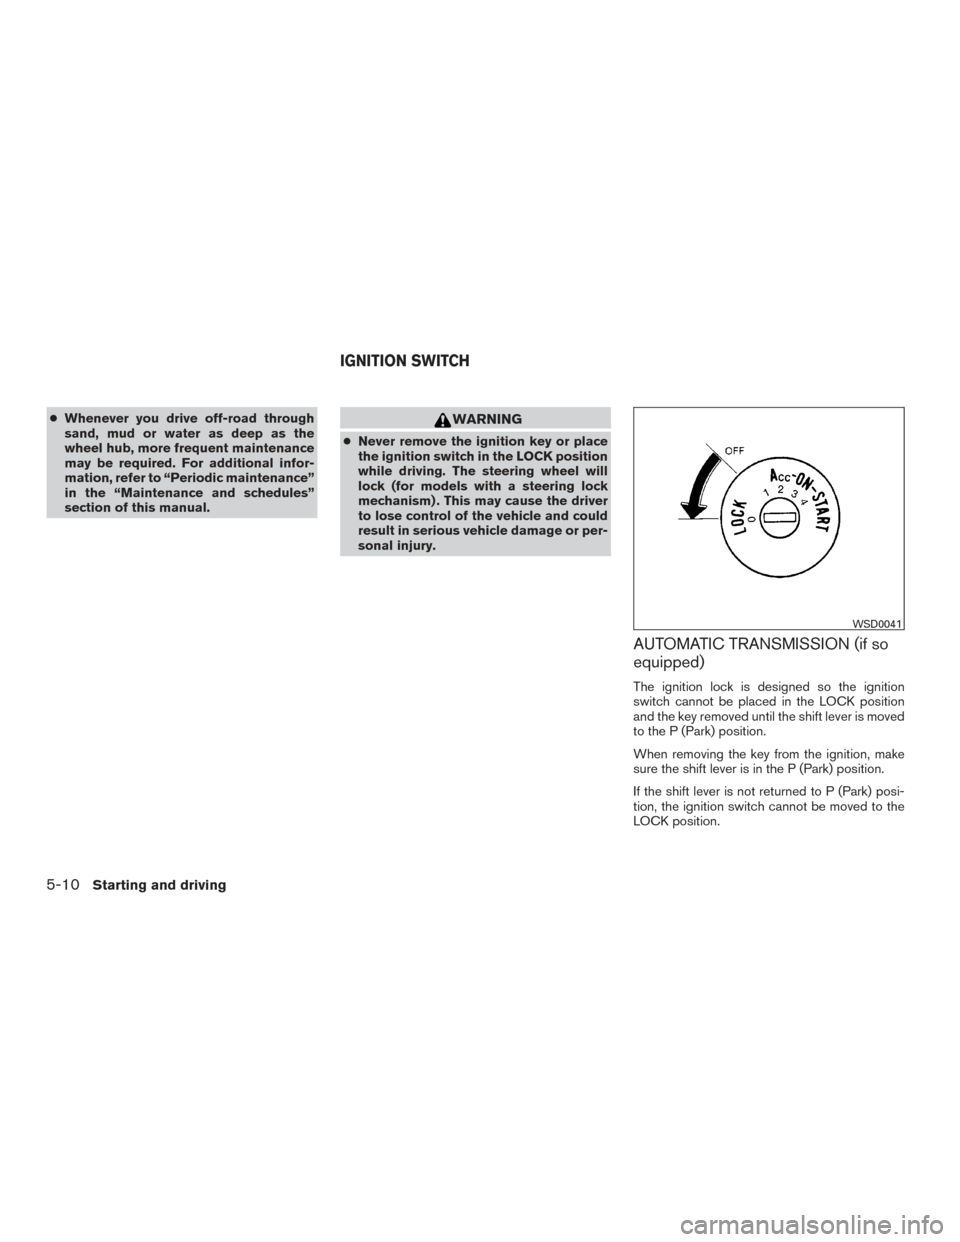
The ignition lock is designed so the ignition
switch cannot be placed in the LOCK position
and the key removed until the shift lever is moved
to the P (Park) position.
When removing the key from the ignition, make
sure the shift lever is in the P (Park) position.
If the shift lever is not returned to P (Park) posi-
tion, the ignition switch cannot be moved to the
LOCK position.
WSD0041
IGNITION SWITCH
5-10Starting and driving
Page 308 of 478
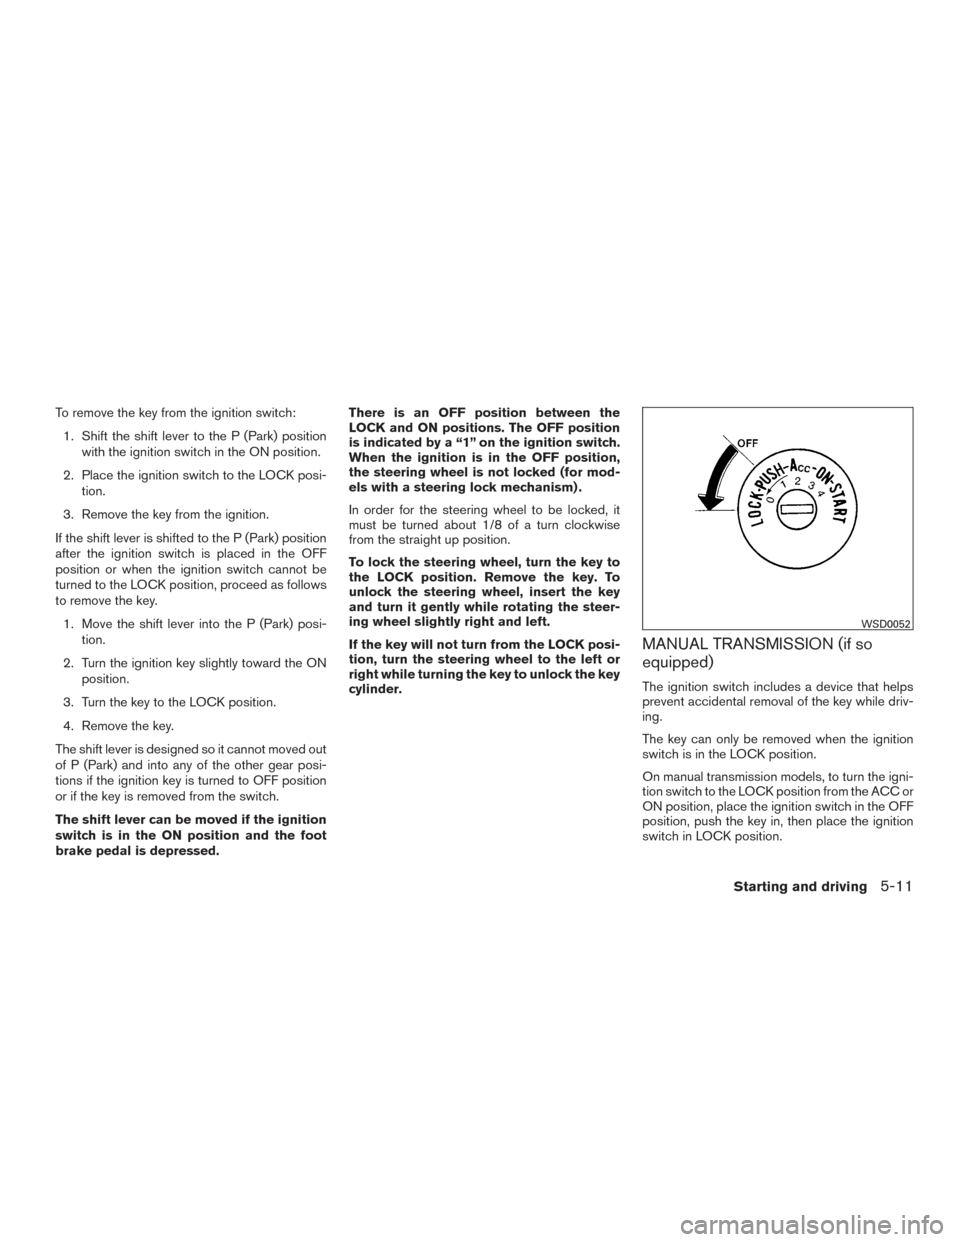
To remove the key from the ignition switch:1. Shift the shift lever to the P (Park) position with the ignition switch in the ON position.
2. Place the ignition switch to the LOCK posi- tion.
3. Remove the key from the ignition.
If the shift lever is shifted to the P (Park) position
after the ignition switch is placed in the OFF
position or when the ignition switch cannot be
turned to the LOCK position, proceed as follows
to remove the key. 1. Move the shift lever into the P (Park) posi- tion.
2. Turn the ignition key slightly toward the ON position.
3. Turn the key to the LOCK position.
4. Remove the key.
The shift lever is designed so it cannot moved out
of P (Park) and into any of the other gear posi-
tions if the ignition key is turned to OFF position
or if the key is removed from the switch.
The shift lever can be moved if the ignition
switch is in the ON position and the foot
brake pedal is depressed. There is an OFF position between the
LOCK and ON positions. The OFF position
is indicated by a “1” on the ignition switch.
When the ignition is in the OFF position,
the steering wheel is not locked (for mod-
els with a steering lock mechanism) .
In order for the steering wheel to be locked, it
must be turned about 1/8 of a turn clockwise
from the straight up position.
To lock the steering wheel, turn the key to
the LOCK position. Remove the key. To
unlock the steering wheel, insert the key
and turn it gently while rotating the steer-
ing wheel slightly right and left.
If the key will not turn from the LOCK posi-
tion, turn the steering wheel to the left or
right while turning the key to unlock the key
cylinder.
MANUAL TRANSMISSION (if so
equipped)
The ignition switch includes a device that helps
prevent accidental removal of the key while driv-
ing.
The key can only be removed when the ignition
switch is in the LOCK position.
On manual transmission models, to turn the igni-
tion switch to the LOCK position from the ACC or
ON position, place the ignition switch in the OFF
position, push the key in, then place the ignition
switch in LOCK position.
WSD0052
Starting and driving5-11
Page 313 of 478
Do not downshift into the 3 position at speeds
over the following and do not exceed the follow-
ing speeds in the 3 position.2WD:99 mph (160 km/h)
4H: 93 mph (150 km/h)
4LO: 34 mph (55 km/h)
2 (Second gear)
Use this position for hill climbing or engine brak-
ing on downhill grades.
Do not downshift into the 2 position at speeds
over the following and do not exceed the follow-
ing speeds in the 2 position. 2WD:62 mph (100 km/h)
4H: 59 mph (95 km/h)
4LO: 21 mph (35 km/h) 1 (Low gear)
Use this position when climbing steep hills slowly
or slow driving through deep snow, sand or mud,
or for maximum engine braking on steep downhill
grades.
Do not downshift into the 1 position at speeds
over the following and do not exceed the follow-
ing speeds in the 1 position.
2WD:37 mph (60 km/h)
4H: 37 mph (60 km/h)
4LO: 12 mph (20 km/h)
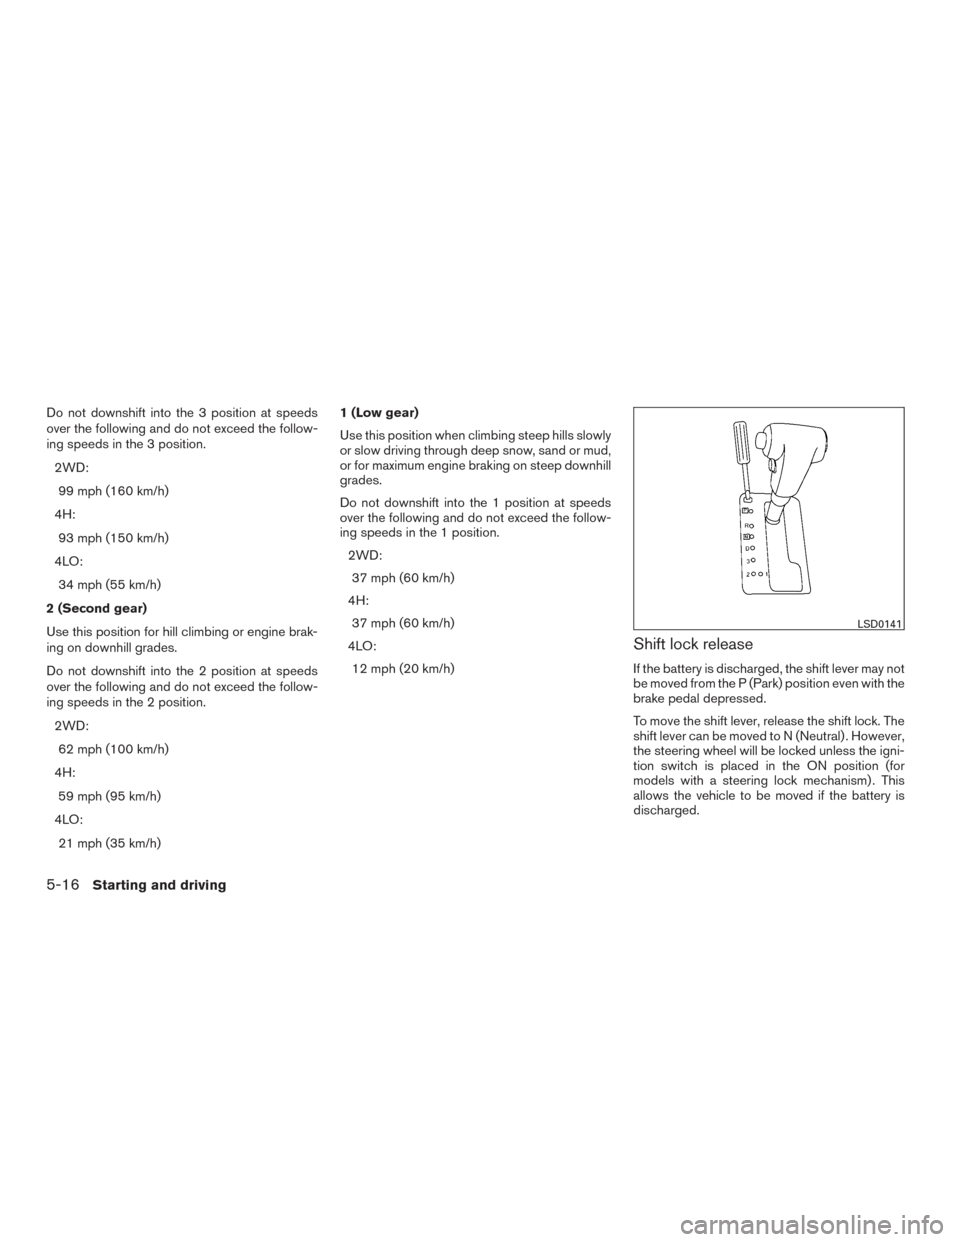
Shift lock release
If the battery is discharged, the shift lever may not
be moved from the P (Park) position even with the
brake pedal depressed.
To move the shift lever, release the shift lock. The
shift lever can be moved to N (Neutral) . However,
the steering wheel will be locked unless the igni-
tion switch is placed in the ON position (for
models with a steering lock mechanism) . This
allows the vehicle to be moved if the battery is
discharged.
LSD0141
5-16Starting and driving
Page 314 of 478
To push the shift lock release, complete the fol-
lowing procedure:1. Place the ignition switch in the LOCK posi- tion and remove the key.
2. Apply the parking brake.
3. Remove the shift lock release cover as shown.
4. Use a protective cloth on the tip of a small screwdriver before inserting it in the shift
lock release slot and pushing down.
5. Move the shift lever to the N (Neutral) posi- tion while holding down the shift lock re-
lease.
6. Place the ignition switch in the ON position to unlock the steering wheel (for models with
a steering lock mechanism) .
7. Now the vehicle may be moved to the de- sired location.
If the shift lever cannot be moved out of P (Park) ,
have the automatic transmission system checked
as soon as possible. It is recommended that you
visit a NISSAN dealer for this service.WARNING
If the shift lever cannot be moved from the
P (Park) position while the engine is run-
ning and the brake pedal is depressed, the
stop lights may not work. Malfunctioning
stop lights could cause an accident injur-
ing yourself and others.
Accelerator downshift
— in D (Drive) position —
For passing or hill climbing, depress the accel-
erator pedal to the floor. This shifts the transmis-
sion down into a lower gear, depending on the
vehicle speed.
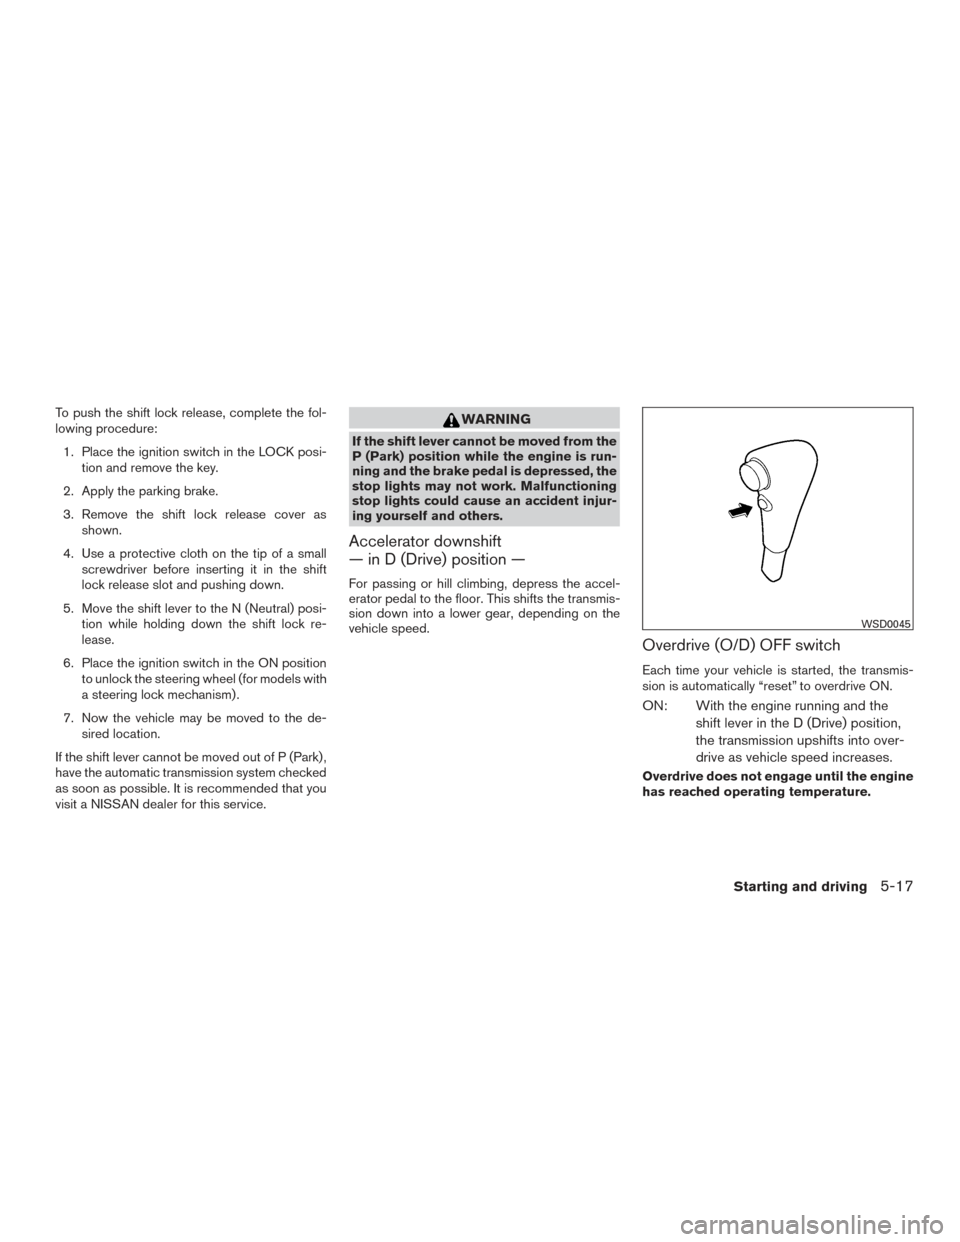
Overdrive (O/D) OFF switch
Each time your vehicle is started, the transmis-
sion is automatically “reset” to overdrive ON.
ON: With the engine running and the shift lever in the D (Drive) position,
the transmission upshifts into over-
drive as vehicle speed increases.
Overdrive does not engage until the engine
has reached operating temperature.
WSD0045
Starting and driving5-17