2017 NISSAN FRONTIER lock
[x] Cancel search: lockPage 45 of 478
●Periodically check to see that the seat
belt and the metal components, such as
buckles, tongues, retractors, flexible wires
and anchors, work properly. If loose parts,
deterioration, cuts or other damage on the
webbing is found, the entire seat belt as-
sembly should be replaced.WARNING
Do not allow children to play with the seat
belts. Most seating positions are
equipped with Automatic Locking Retrac-
tor (ALR) mode seat belts. If the seat belt
becomes wrapped around a child’s neck
with the ALR mode activated, the child can
be seriously injured or killed if the seat
belt retracts and becomes tight. This can
occur even if the vehicle is parked. Un-
buckle the seat belt to release the child. If
the seat belt cannot be unbuckled or is
already unbuckled, release the child by
cutting the seat belt with a suitable tool
(such as a knife or scissors) to release the
seat belt.
Children need adults to help protect them.
They need to be properly restrained.
In addition to the general information in this
manual, child safety information is available from
many other sources, including doctors, teachers,
government traffic safety offices, and community
organizations. Every child is different, so be sure
to learn the best way to transport your child. There are three basic types of child restraint
systems:
● Rear-facing child restraint
● Forward-facing child restraint
● Booster seat
The proper restraint depends on the child’s size.
Generally, infants up to about 1 year and less
than 20 lbs (9 kg) should be placed in rear-facing
child restraints. Forward-facing child restraints
are available for children who outgrow rear-
facing child restraints and are at least 1 year old.
Booster seats are used to help position a vehicle
lap/shoulder belt on a child who can no longer
use a forward-facing child restraint.
WARNING
Infants and children need special protec-
tion. The vehicle’s seat belts may not fit
them properly. The shoulder belt may
come too close to the face or neck. The lap
belt may not fit over their small hip bones.
In an accident, an improperly fitting seat
belt could cause serious or fatal injury.
Always use appropriate child restraints.
All U.S. states and Canadian provinces or territo-
ries require the use of approved child restraints
for infants and small children. For additional infor-
mation, refer to “Child restraints” in this section.
CHILD SAFETY
1-24Safety—Seats, seat belts and supplemental restraint system
Page 60 of 478
7. Check to make sure the child restraint isproperly secured prior to each use. If the
child restraint is loose, repeat steps 1
through 6.
REAR-FACING CHILD RESTRAINT
INSTALLATION USING THE SEAT
BELTS (Crew Cab models only)
WARNING
The three-point seat belt with Automatic
Locking Retractor (ALR) must be used
when installing a child restraint. Failure to
use the ALR mode will result in the child
restraint not being properly secured. The
restraint could tip over or be loose and
cause injury to a child in a sudden stop or
collision. Also, it can change the operation
of the front passenger air bag. For addi-
tional information, refer to “Front passen-
ger air bag and status light” in this section. For additional information, refer to all Warnings
and Cautions in the “Child safety” and “Child
restraints” sections of this manual before install-
ing a child restraint.
Do not use the lower anchors if the combined
weight of the child and the child restraint exceeds
65 lbs (29.5 kg) . If the combined weight of the
child and the child restraint is greater than 65 lbs,
(29.5 kg) use the vehicle’s seat belt (not the
lower anchors) to install the child restraint. Be
sure to follow the child restraint manufacturer’s
instructions for installation.
Follow these steps to install a rear-facing child
restraint using the vehicle seat belts in the rear
seats:
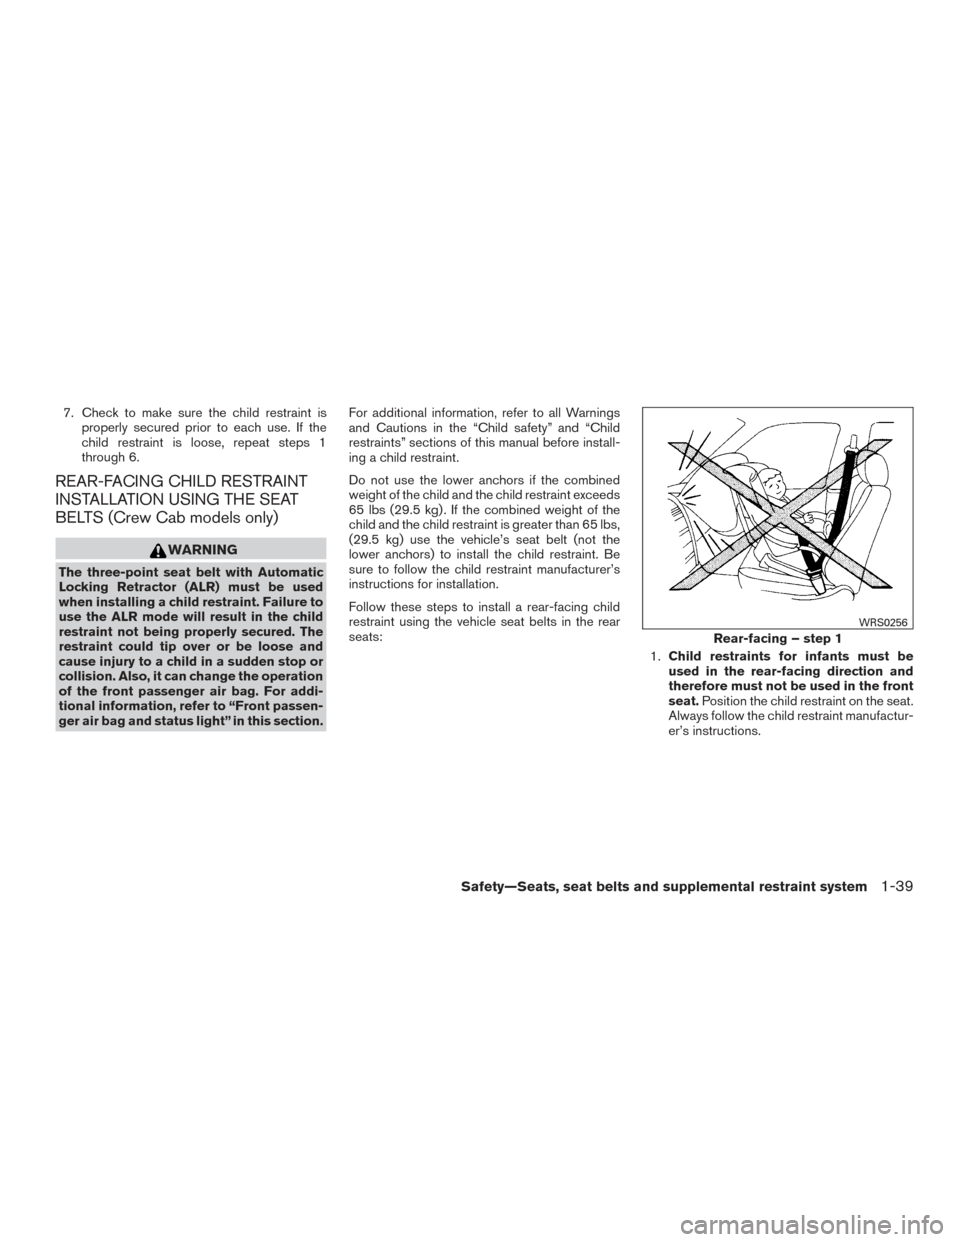
1.Child restraints for infants must be
used in the rear-facing direction and
therefore must not be used in the front
seat. Position the child restraint on the seat.
Always follow the child restraint manufactur-
er’s instructions.
Rear-facing – step 1
WRS0256
Safety—Seats, seat belts and supplemental restraint system1-39
Page 62 of 478
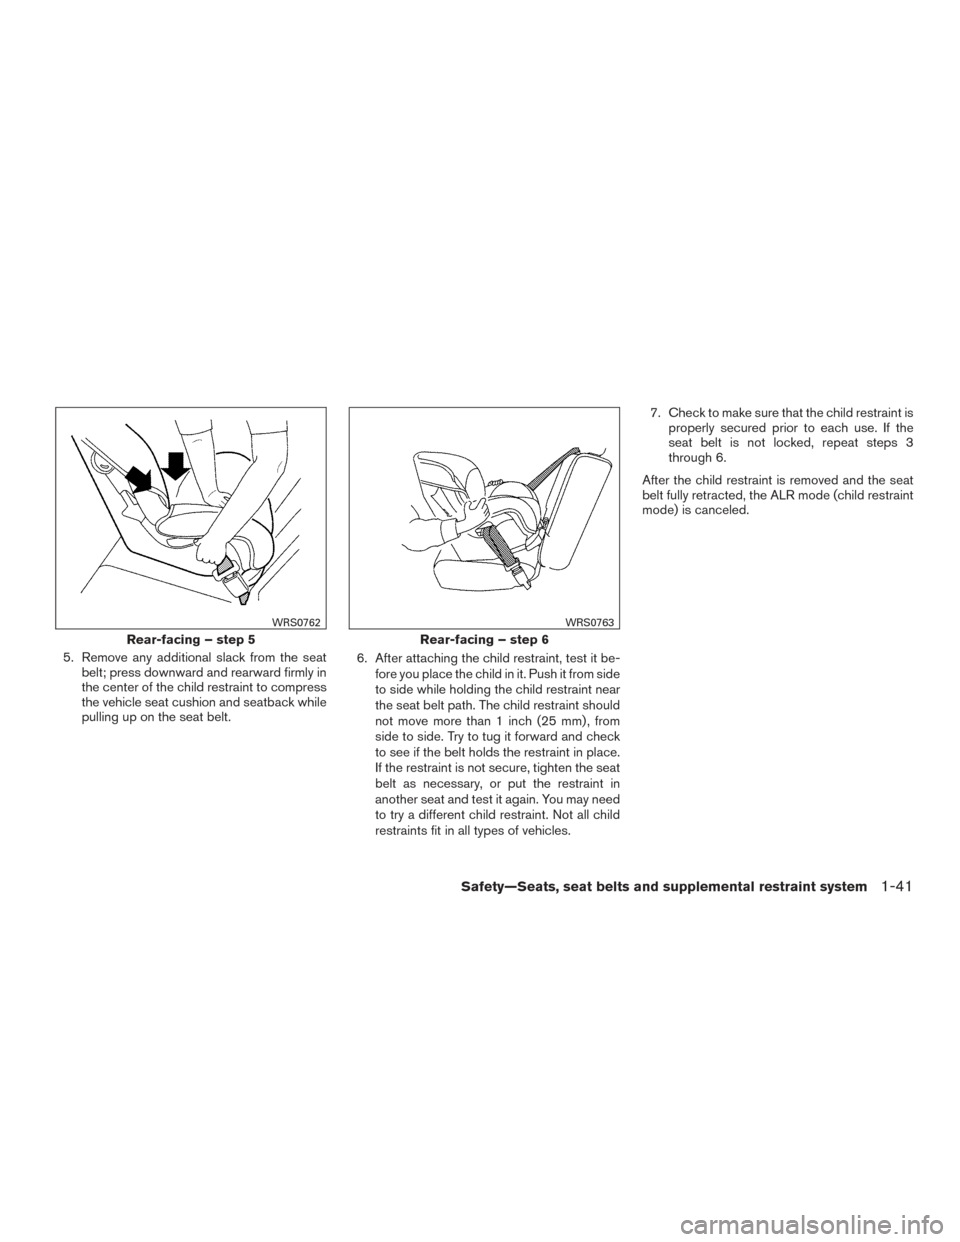
5. Remove any additional slack from the seatbelt; press downward and rearward firmly in
the center of the child restraint to compress
the vehicle seat cushion and seatback while
pulling up on the seat belt. 6. After attaching the child restraint, test it be-
fore you place the child in it. Push it from side
to side while holding the child restraint near
the seat belt path. The child restraint should
not move more than 1 inch (25 mm) , from
side to side. Try to tug it forward and check
to see if the belt holds the restraint in place.
If the restraint is not secure, tighten the seat
belt as necessary, or put the restraint in
another seat and test it again. You may need
to try a different child restraint. Not all child
restraints fit in all types of vehicles. 7. Check to make sure that the child restraint is
properly secured prior to each use. If the
seat belt is not locked, repeat steps 3
through 6.
After the child restraint is removed and the seat
belt fully retracted, the ALR mode (child restraint
mode) is canceled.
Rear-facing – step 5
WRS0762
Rear-facing – step 6
WRS0763
Safety—Seats, seat belts and supplemental restraint system1-41
Page 63 of 478
REAR-FACING CHILD RESTRAINT
INSTALLATION USING THE SEAT
BELTS — JUMP SEAT (King Cab
models only)
WARNING
●The three-point seat belt with Auto-
matic Locking Retractor (ALR) must be
used when installing a child restraint.
Failure to use the ALR mode will result
in the child restraint not being properly
secured. The restraint could tip over or
be loose and cause injury to a child in a
sudden stop or collision. Also, it can
change the operation of the front pas-
senger air bag. For additional informa-
tion, refer to “Front passenger air bag
and status light” in this section.
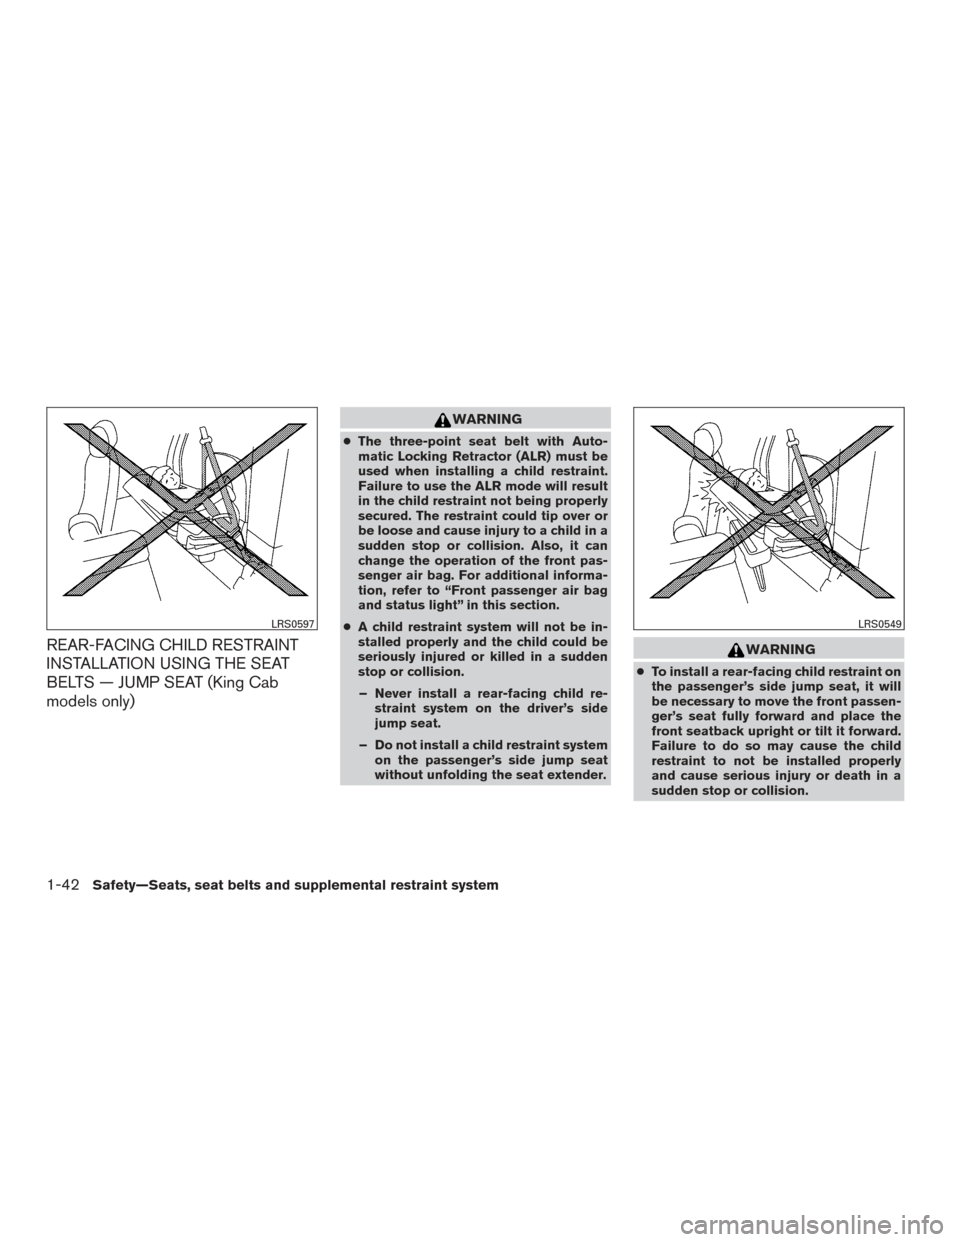
● A child restraint system will not be in-
stalled properly and the child could be
seriously injured or killed in a sudden
stop or collision.
– Never install a rear-facing child re- straint system on the driver’s side
jump seat.
– Do not install a child restraint system on the passenger’s side jump seat
without unfolding the seat extender.
WARNING
●To install a rear-facing child restraint on
the passenger’s side jump seat, it will
be necessary to move the front passen-
ger’s seat fully forward and place the
front seatback upright or tilt it forward.
Failure to do so may cause the child
restraint to not be installed properly
and cause serious injury or death in a
sudden stop or collision.
LRS0597LRS0549
1-42Safety—Seats, seat belts and supplemental restraint system
Page 67 of 478
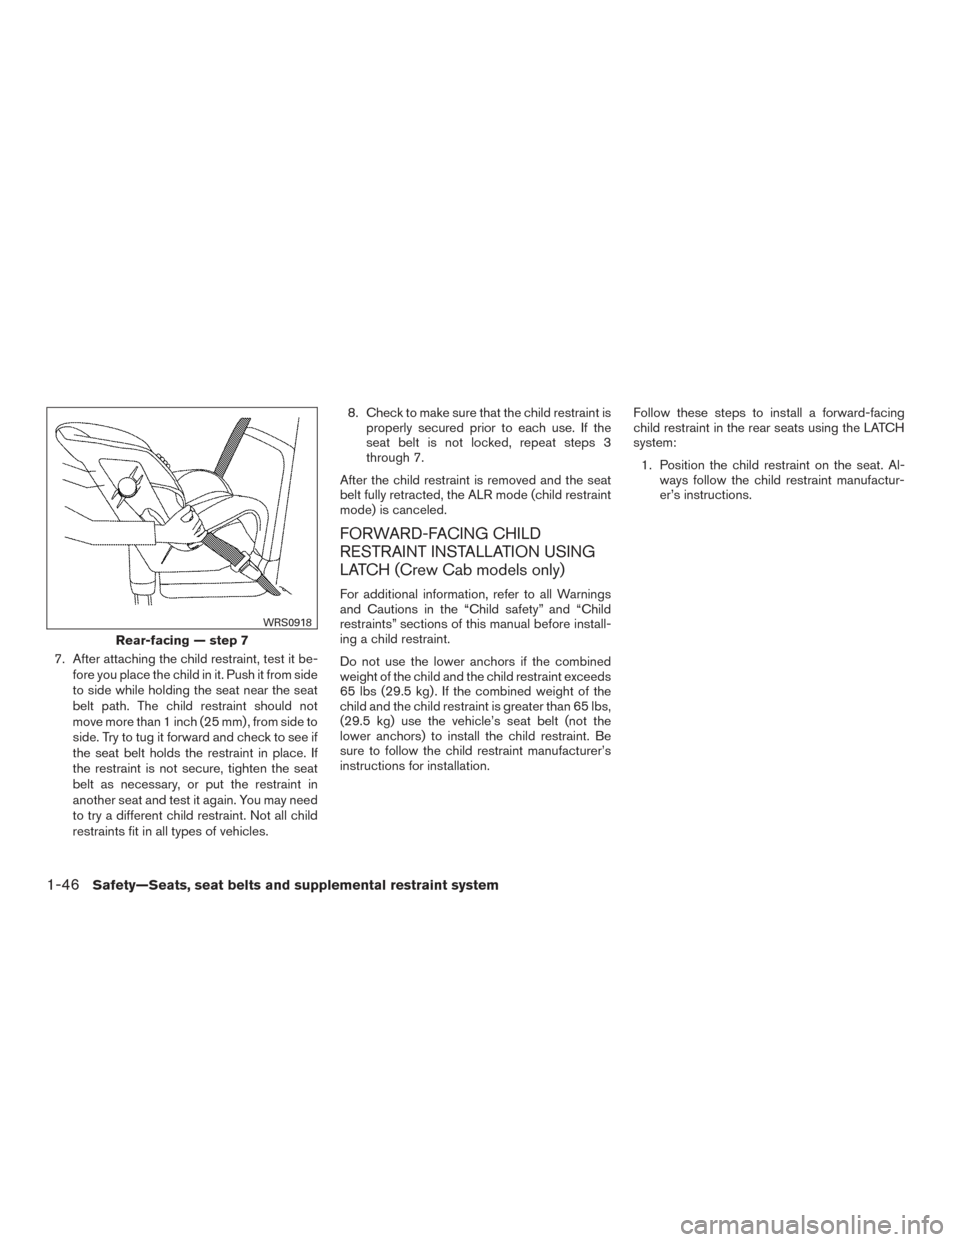
7. After attaching the child restraint, test it be-fore you place the child in it. Push it from side
to side while holding the seat near the seat
belt path. The child restraint should not
move more than 1 inch (25 mm) , from side to
side. Try to tug it forward and check to see if
the seat belt holds the restraint in place. If
the restraint is not secure, tighten the seat
belt as necessary, or put the restraint in
another seat and test it again. You may need
to try a different child restraint. Not all child
restraints fit in all types of vehicles. 8. Check to make sure that the child restraint is
properly secured prior to each use. If the
seat belt is not locked, repeat steps 3
through 7.
After the child restraint is removed and the seat
belt fully retracted, the ALR mode (child restraint
mode) is canceled.
FORWARD-FACING CHILD
RESTRAINT INSTALLATION USING
LATCH (Crew Cab models only)
For additional information, refer to all Warnings
and Cautions in the “Child safety” and “Child
restraints” sections of this manual before install-
ing a child restraint.
Do not use the lower anchors if the combined
weight of the child and the child restraint exceeds
65 lbs (29.5 kg) . If the combined weight of the
child and the child restraint is greater than 65 lbs,
(29.5 kg) use the vehicle’s seat belt (not the
lower anchors) to install the child restraint. Be
sure to follow the child restraint manufacturer’s
instructions for installation. Follow these steps to install a forward-facing
child restraint in the rear seats using the LATCH
system:
1. Position the child restraint on the seat. Al- ways follow the child restraint manufactur-
er’s instructions.
Rear-facing — step 7
WRS0918
1-46Safety—Seats, seat belts and supplemental restraint system
Page 70 of 478
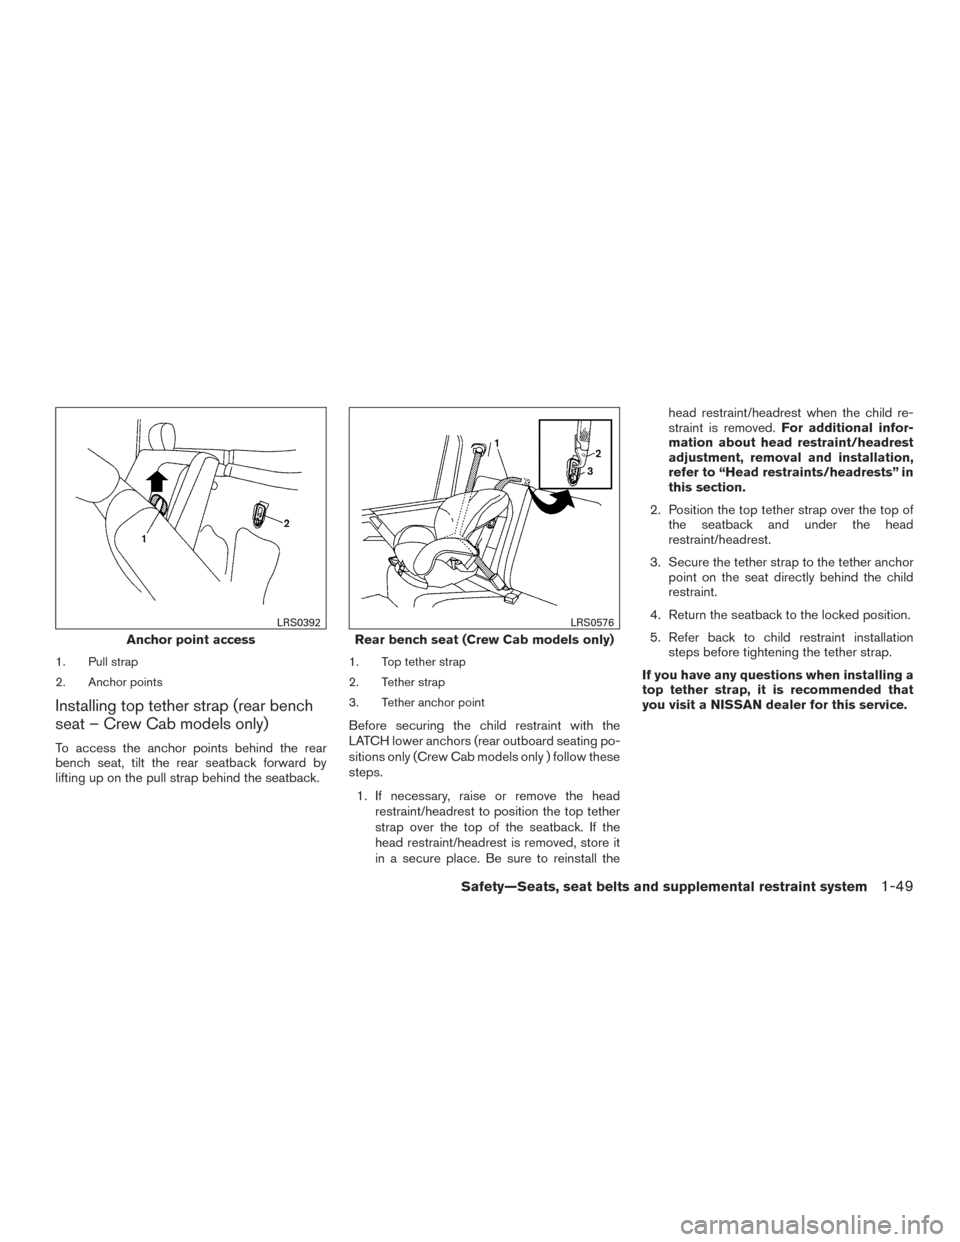
1. Pull strap
2. Anchor points
Installing top tether strap (rear bench
seat – Crew Cab models only)
To access the anchor points behind the rear
bench seat, tilt the rear seatback forward by
lifting up on the pull strap behind the seatback.
1. Top tether strap
2. Tether strap
3. Tether anchor point
Before securing the child restraint with the
LATCH lower anchors (rear outboard seating po-
sitions only (Crew Cab models only ) follow these
steps.1. If necessary, raise or remove the head restraint/headrest to position the top tether
strap over the top of the seatback. If the
head restraint/headrest is removed, store it
in a secure place. Be sure to reinstall the head restraint/headrest when the child re-
straint is removed.
For additional infor-
mation about head restraint/headrest
adjustment, removal and installation,
refer to “Head restraints/headrests” in
this section.
2. Position the top tether strap over the top of the seatback and under the head
restraint/headrest.
3. Secure the tether strap to the tether anchor point on the seat directly behind the child
restraint.
4. Return the seatback to the locked position.
5. Refer back to child restraint installation steps before tightening the tether strap.
If you have any questions when installing a
top tether strap, it is recommended that
you visit a NISSAN dealer for this service.
Anchor point access
LRS0392
Rear bench seat (Crew Cab models only)
LRS0576
Safety—Seats, seat belts and supplemental restraint system1-49
Page 75 of 478
●Child restraint anchorages are de-
signed to withstand only those loads
imposed by correctly fitted child re-
straints. Under no circumstances are
they to be used to attach adult seat
belts or other items or equipment to the
vehicle. Doing so could damage the
child restraint anchorages. The child re-
straint will not be properly installed us-
ing the damaged anchorages, and a
child could be seriously injured or killed
in a collision.
The child restraint top tether strap must be used
when installing the child restraint with LATCH
lower anchor attachments.
First, secure the child restraint with the LATCH
lower anchors (rear seating positions) . 1. Pull the cover plate off to access the top tether strap routing bracket for the jump
seat.
2. Route the top tether strap through the rout- ing bracket.
3. Secure the top tether strap to the tether anchor point located between the seat belt
buckles in the center of the vehicle.
4. Refer back to child restraint installation steps before tightening the tether strap. If you have any questions when installing a
top tether strap, it is recommended that
you visit a NISSAN dealer for this service.
FORWARD-FACING CHILD
RESTRAINT INSTALLATION USING
THE SEAT BELTS — FRONT
PASSENGER AND REAR BENCH
SEAT (Crew Cab models only)
WARNING
The three-point seat belt with Automatic
Locking Retractor (ALR) must be used
when installing a child restraint. Failure to
use the ALR mode will result in the child
restraint not being properly secured. The
restraint could tip over or be loose and
cause injury to a child in a sudden stop or
collision. Also, it can change the operation
of the front passenger air bag. For addi-
tional information, refer to “Front passen-
ger air bag and status light” in this section.
For additional information, refer to all Warnings
and Cautions in the “Child safety” and “Child
restraints” sections of this manual before install-
ing a child restraint.
Do not use the lower anchors if the combined
weight of the child and the child restraint exceeds
65 lbs (29.5 kg) . If the combined weight of the
child and the child restraint is greater than 65 lbs
(29.5 kg) , use the vehicle’s seat belt (not the
lower anchors) to install the child restraint. Be
sure to follow the child restraint manufacturer’s
instructions for installation.
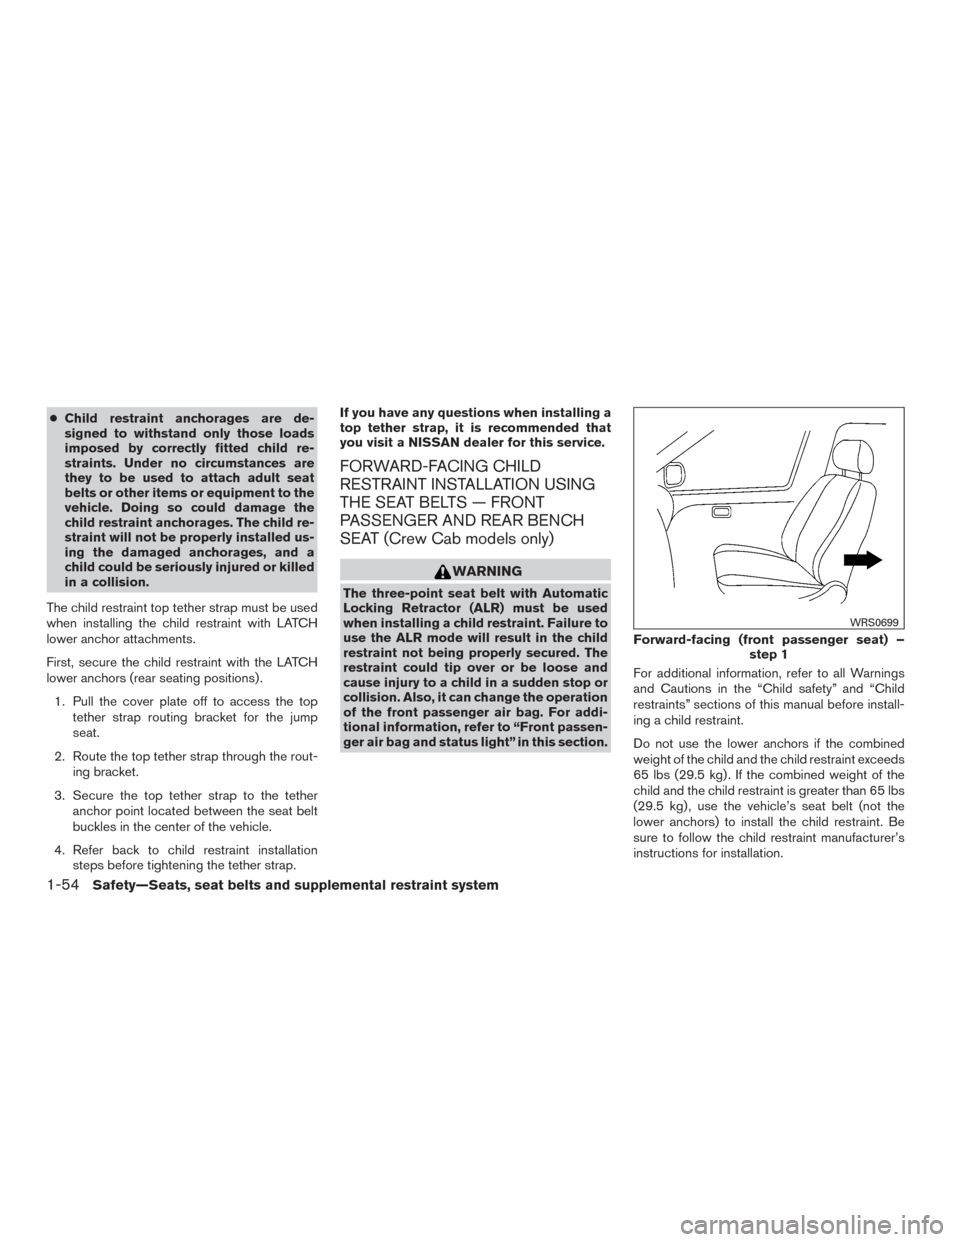
Forward-facing (front passenger seat) –
step 1
WRS0699
1-54Safety—Seats, seat belts and supplemental restraint system
Page 78 of 478
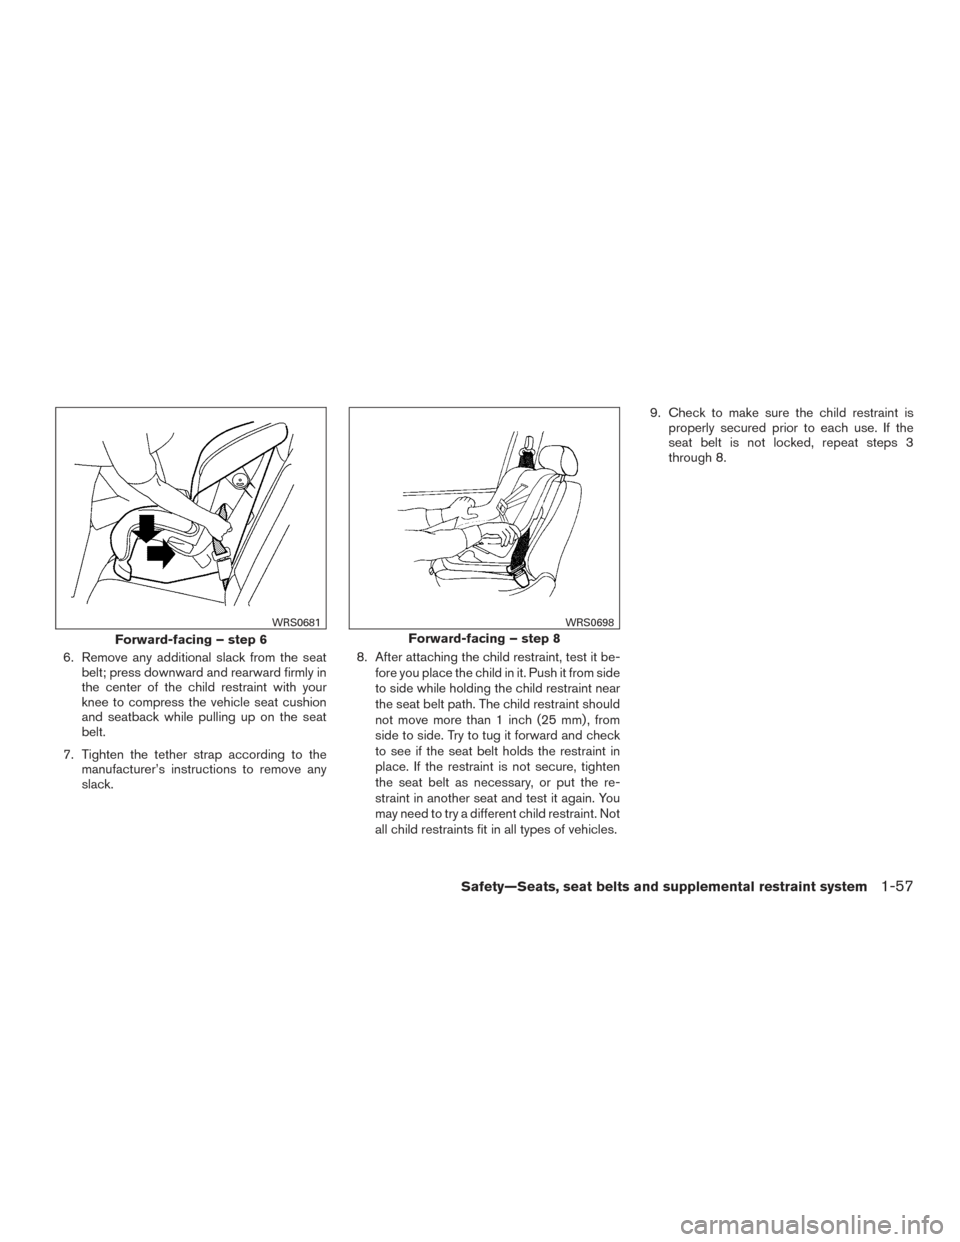
6. Remove any additional slack from the seatbelt; press downward and rearward firmly in
the center of the child restraint with your
knee to compress the vehicle seat cushion
and seatback while pulling up on the seat
belt.
7. Tighten the tether strap according to the manufacturer’s instructions to remove any
slack. 8. After attaching the child restraint, test it be-
fore you place the child in it. Push it from side
to side while holding the child restraint near
the seat belt path. The child restraint should
not move more than 1 inch (25 mm) , from
side to side. Try to tug it forward and check
to see if the seat belt holds the restraint in
place. If the restraint is not secure, tighten
the seat belt as necessary, or put the re-
straint in another seat and test it again. You
may need to try a different child restraint. Not
all child restraints fit in all types of vehicles. 9. Check to make sure the child restraint is
properly secured prior to each use. If the
seat belt is not locked, repeat steps 3
through 8.
Forward-facing – step 6
WRS0681
Forward-facing – step 8
WRS0698
Safety—Seats, seat belts and supplemental restraint system1-57