2017 NISSAN FRONTIER navigation
[x] Cancel search: navigationPage 201 of 478
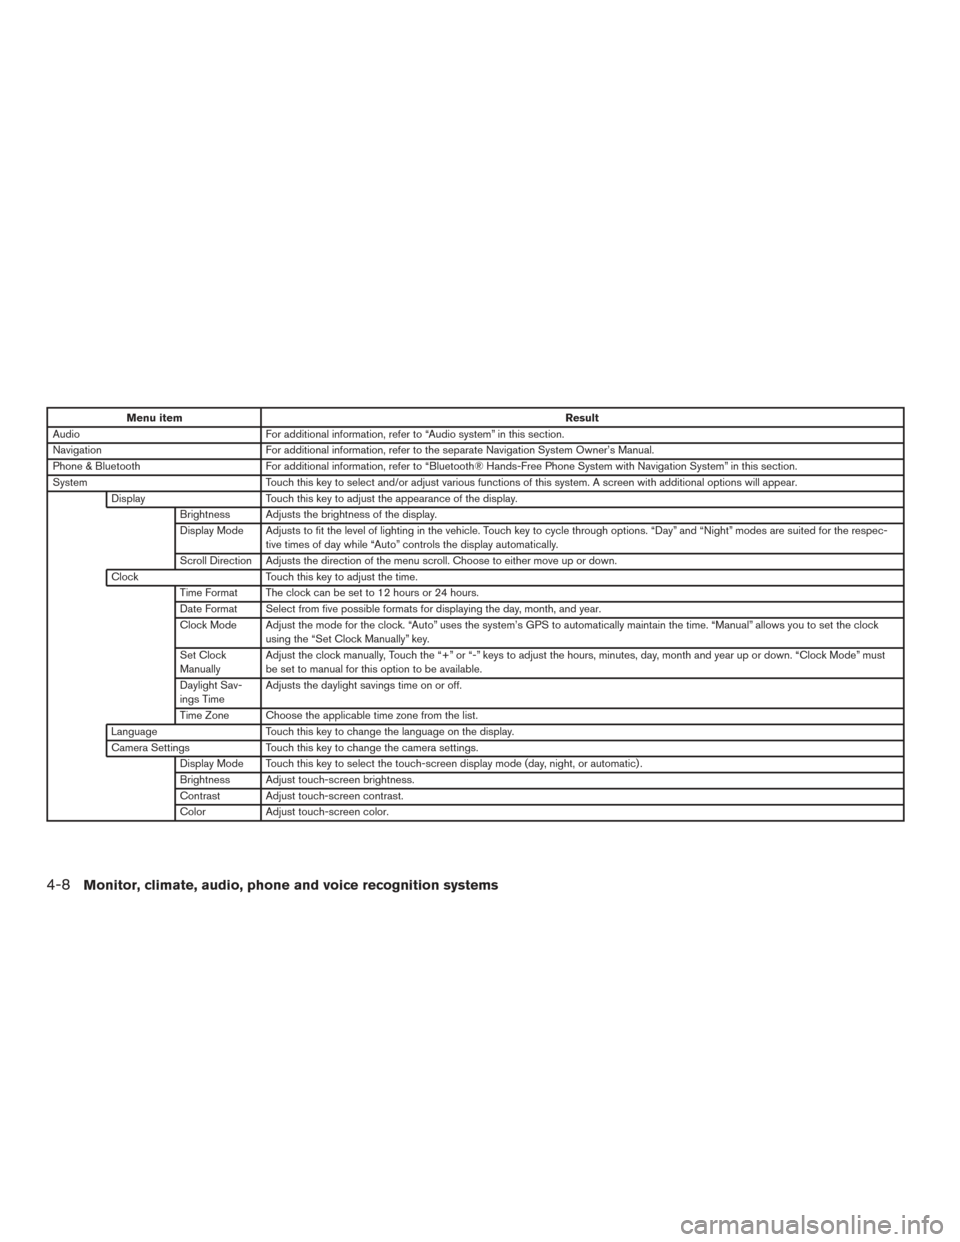
Menu itemResult
Audio For additional information, refer to “Audio system” in this section.
Navigation For additional information, refer to the separate Navigation System Owner’s Manual.
Phone & Bluetooth For additional information, refer to “Bluetooth® Hands-Free Phone System with Navigation System” in this section.
System Touch this key to select and/or adjust various functions of this system. A screen with additional options will appear.
Display Touch this key to adjust the appearance of the display.
Brightness Adjusts the brightness of the display.
Display Mode Adjusts to fit the level of lighting in the vehicle. Touch key to cycle through options. “Day” and “Night” modes are suited for the respec- tive times of day while “Auto” controls the display automatically.
Scroll Direction Adjusts the direction of the menu scroll. Choose to either move up or down.
Clock Touch this key to adjust the time.
Time Format The clock can be set to 12 hours or 24 hours.
Date Format Select from five possible formats for displaying the day, month, and year.
Clock Mode Adjust the mode for the clock. “Auto” uses the system’s GPS to automatically maintain the time. “Manual” allows you to set the clock using the “Set Clock Manually” key.
Set Clock
Manually Adjust the clock manually, Touch the “+” or “-” keys to adjust the hours, minutes, day, month and year up or down. “Clock Mode” must
be set to manual for this option to be available.
Daylight Sav-
ings Time Adjusts the daylight savings time on or off.
Time Zone Choose the applicable time zone from the list.
Language Touch this key to change the language on the display.
Camera Settings Touch this key to change the camera settings.
Display Mode Touch this key to select the touch-screen display mode (day, night, or automatic) .
Brightness Adjust touch-screen brightness.
Contrast Adjust touch-screen contrast.
Color Adjust touch-screen color.
4-8Monitor, climate, audio, phone and voice recognition systems
Page 202 of 478
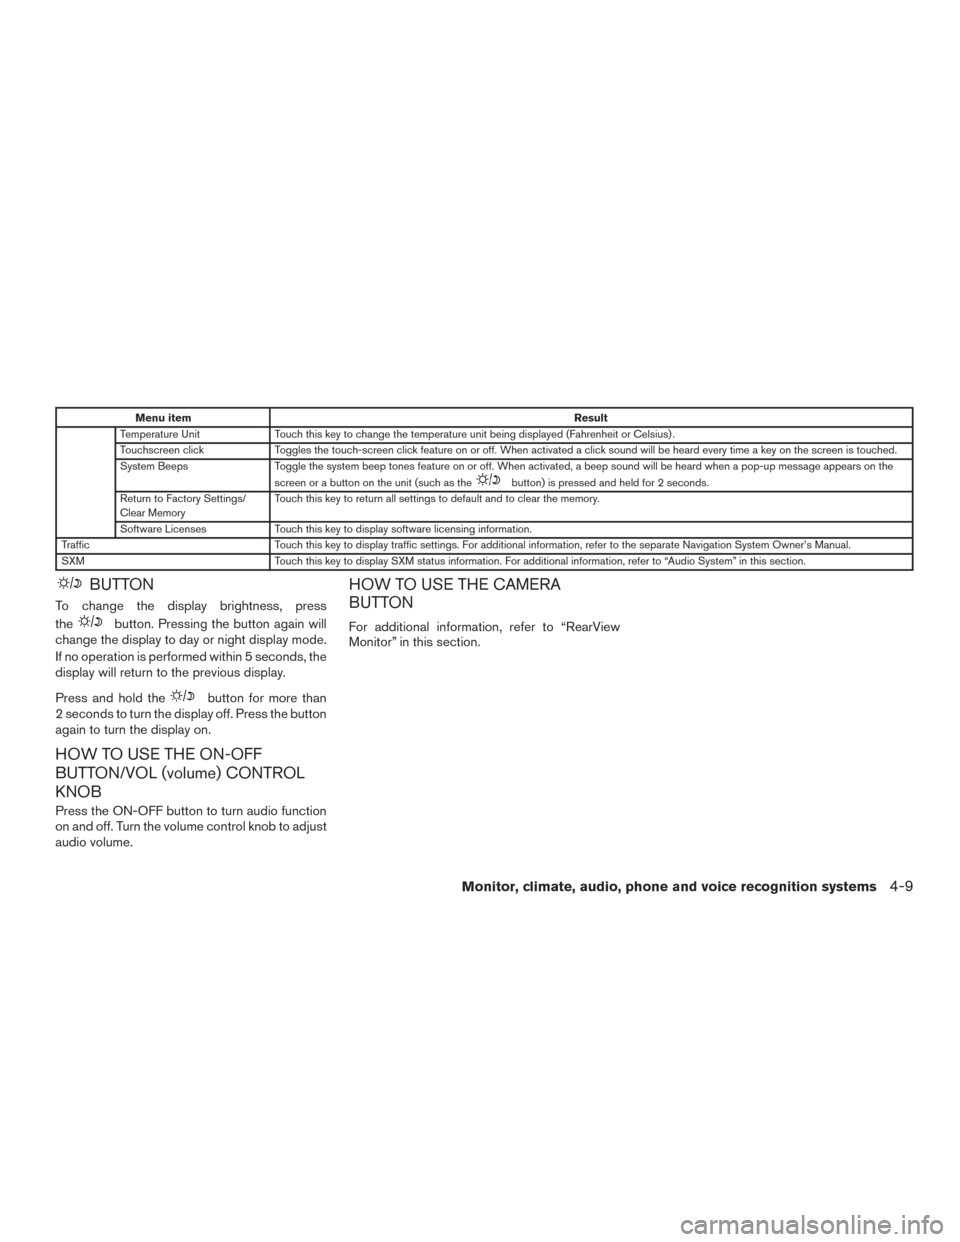
Menu itemResult
Temperature Unit Touch this key to change the temperature unit being displayed (Fahrenheit or Celsius) .
Touchscreen click Toggles the touch-screen click feature on or off. When activated a click sound will be heard every time a key on the screen is touched.
System Beeps Toggle the system beep tones feature on or off. When activated, a beep sound will be heard when a pop-up message appears on the
screen or a button on the unit (such as the
button) is pressed and held for 2 seconds.
Return to Factory Settings/
Clear Memory Touch this key to return all settings to default and to clear the memory.
Software Licenses Touch this key to display software licensing information.
Traffic Touch this key to display traffic settings. For additional information, refer to the separate Navigation System Owner’s Manual.
SXM Touch this key to display SXM status information. For additional information, refer to “Audio System” in this section.
BUTTON
To change the display brightness, press
the
button. Pressing the button again will
change the display to day or night display mode.
If no operation is performed within 5 seconds, the
display will return to the previous display.
Press and hold the
button for more than
2 seconds to turn the display off. Press the button
again to turn the display on.
HOW TO USE THE ON-OFF
BUTTON/VOL (volume) CONTROL
KNOB
Press the ON-OFF button to turn audio function
on and off. Turn the volume control knob to adjust
audio volume.
HOW TO USE THE CAMERA
BUTTON
For additional information, refer to “RearView
Monitor” in this section.
Monitor, climate, audio, phone and voice recognition systems4-9
Page 203 of 478
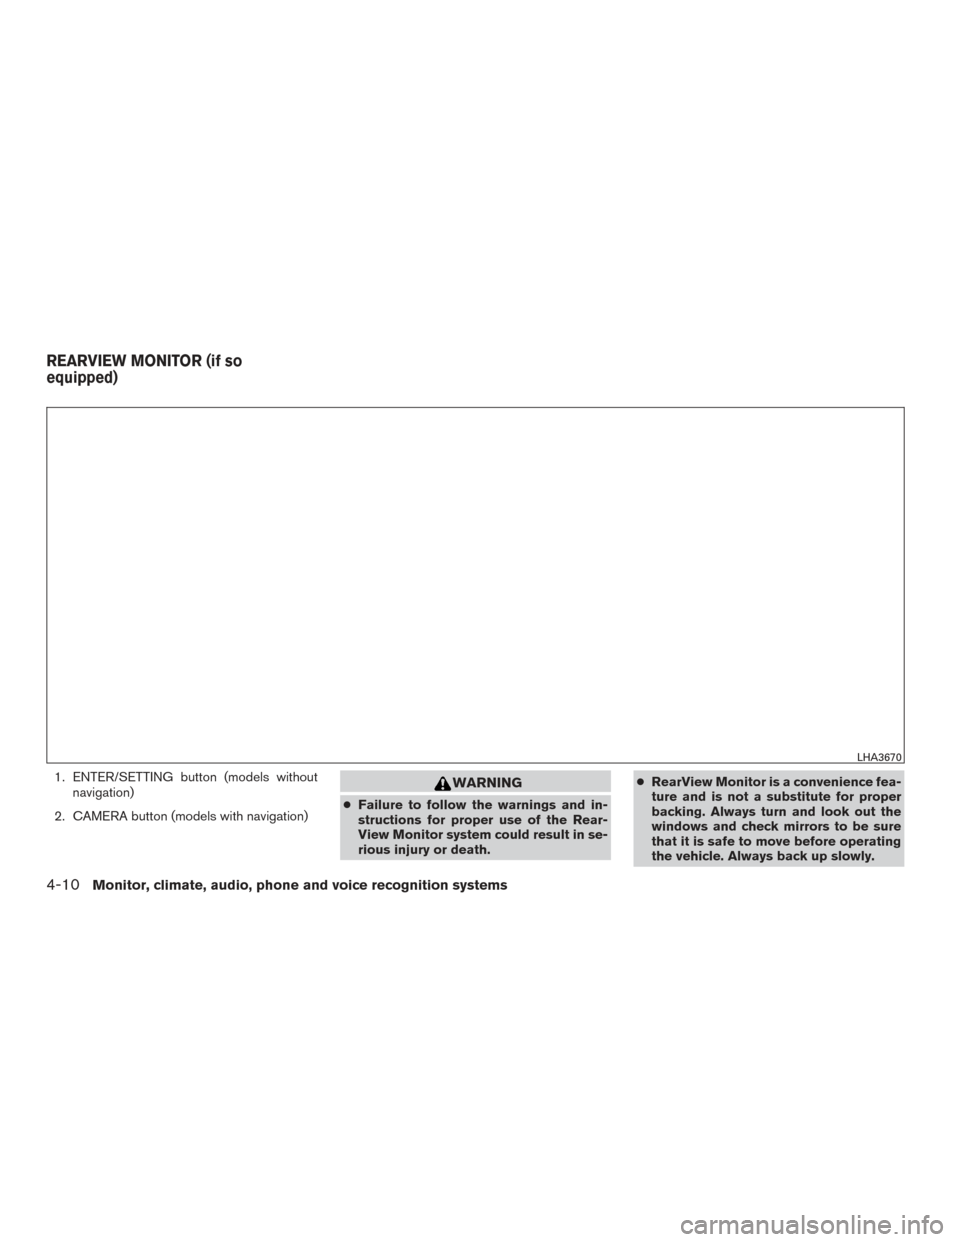
1. ENTER/SETTING button (models withoutnavigation)
2. CAMERA button (models with navigation)WARNING
● Failure to follow the warnings and in-
structions for proper use of the Rear-
View Monitor system could result in se-
rious injury or death. ●
RearView Monitor is a convenience fea-
ture and is not a substitute for proper
backing. Always turn and look out the
windows and check mirrors to be sure
that it is safe to move before operating
the vehicle. Always back up slowly.
LHA3670
REARVIEW MONITOR (if so
equipped)
4-10Monitor, climate, audio, phone and voice recognition systems
Page 207 of 478
ADJUSTING THE SCREEN
The procedure for adjusting the display settings
of the screen differs depending on the type of
screen present on the vehicle.
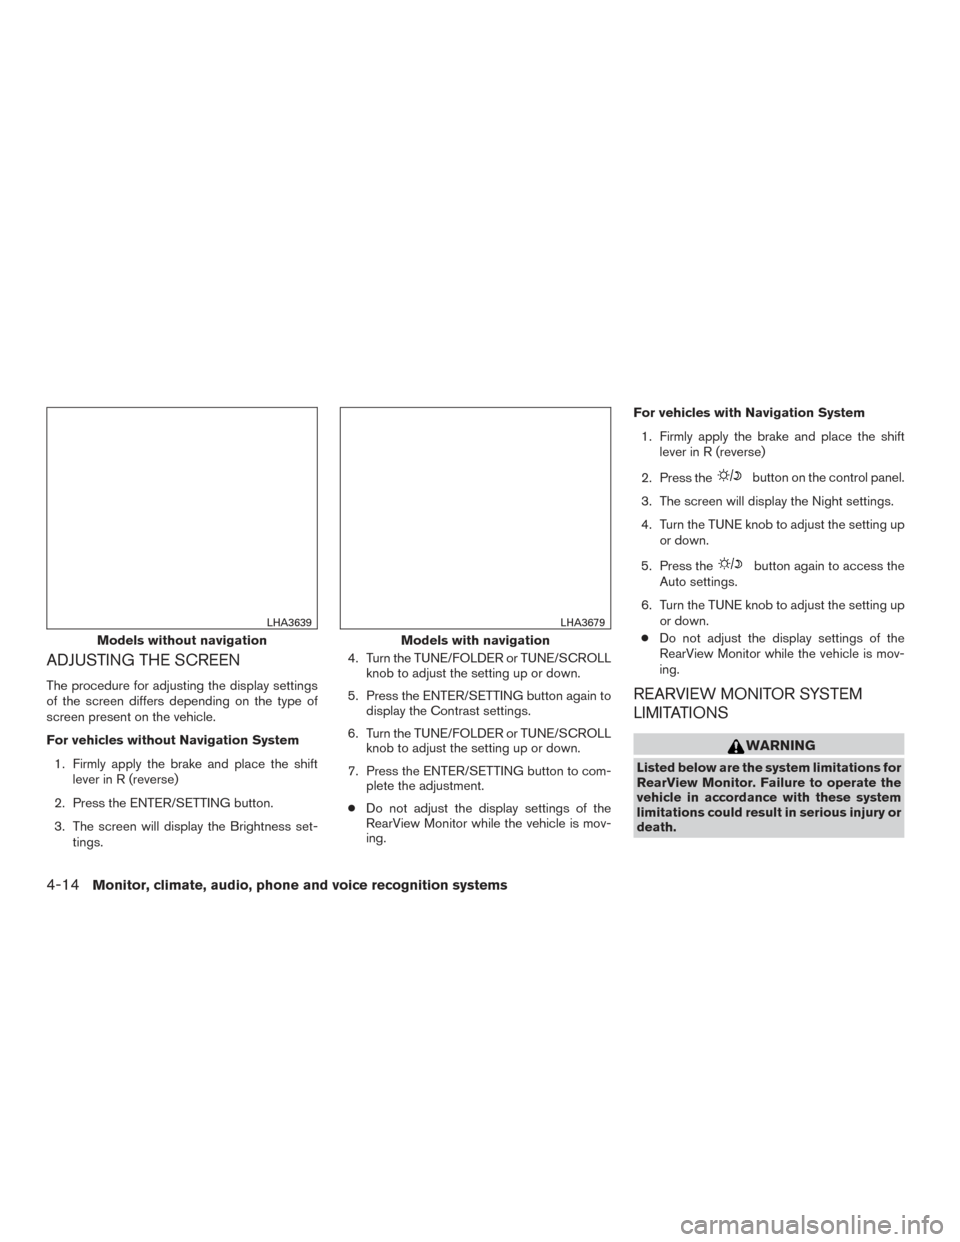
For vehicles without Navigation System1. Firmly apply the brake and place the shift lever in R (reverse)
2. Press the ENTER/SETTING button.
3. The screen will display the Brightness set- tings. 4. Turn the TUNE/FOLDER or TUNE/SCROLL
knob to adjust the setting up or down.
5. Press the ENTER/SETTING button again to display the Contrast settings.
6. Turn the TUNE/FOLDER or TUNE/SCROLL knob to adjust the setting up or down.
7. Press the ENTER/SETTING button to com- plete the adjustment.
● Do not adjust the display settings of the
RearView Monitor while the vehicle is mov-
ing. For vehicles with Navigation System
1. Firmly apply the brake and place the shift lever in R (reverse)
2. Press the
button on the control panel.
3. The screen will display the Night settings.
4. Turn the TUNE knob to adjust the setting up or down.
5. Press the
button again to access the
Auto settings.
6. Turn the TUNE knob to adjust the setting up or down.
● Do not adjust the display settings of the
RearView Monitor while the vehicle is mov-
ing.
REARVIEW MONITOR SYSTEM
LIMITATIONS
WARNING
Listed below are the system limitations for
RearView Monitor. Failure to operate the
vehicle in accordance with these system
limitations could result in serious injury or
death.
Models without navigation
LHA3639
Models with navigation
LHA3679
4-14Monitor, climate, audio, phone and voice recognition systems
Page 239 of 478
Clock Set1. Press the ENTER/SETTING button.
2. Turn the TUNE/FOLDER knob to select CLOCK.
3. Press the ENTER/SETTING button.
4. Turn the TUNE/FOLDER knob to select “set time”.
5. Press the ENTER/SETTING button.
6. Rotate the TUNE/FOLDER knob to adjust hours.
7. Press the ENTER/SETTING button.
8. Turn the TUNE/FOLDER knob to adjust min- utes.
9. Press the ENTER/SETTING button.
10. Press the
BACK button to finish.
DISP button
The display screen can be turned off by pressing
the DISP button. You can listen to music while the
display is off. If you want to turn the screen on,
either press the DISP button or press the FM·AM,
CD or MEDIA button. iPod MENU button
This button can only be used for iPod® opera-
tions. For additional information, refer to “iPod®
player operation without Navigation System” in
this section.
FM/AM radio operation
FM·AM button
Press the FM·AM button to change the band as
follows:
AM
→FM1 →FM2 →AM
If another audio source is playing when the
FM·AM button is pressed, the audio source play-
ing will automatically be turned off and the last
radio station played will begin playing.
TUNE/FOLDER knob (Tuning)
Turn the TUNE/FOLDER knob to the left or right
for manual tuning.
SEEK tuning
Press the
SEEK button orTRACK
button to tune from low to high or high to low
frequencies and to stop at the next broadcasting
station. SCAN tuning
Press the SCAN button to stop at each broad-
casting station for 5 seconds. SCAN will appear
on the screen while the radio is scan tuning.
Pressing the button again during this 5 second
period will stop SCAN tuning and the radio will
remain tuned to that station. If the SCAN button is
not pressed within 5 seconds, SCAN tuning
moves to the next station.
1 to 6 Station memory operations
Six stations can be set for the AM band. Twelve
stations can be set for the FM band (six for FM1,
six for FM2) .
1. Choose the radio band AM, FM1 or FM2 using the FM·AM button.
2. Tune to the desired station using manual, SEEK or SCAN tuning. Press and hold any
of the desired station memory buttons (1 –
6) until the preset number is updated on the
display and the sound is briefly muted.
3. The channel indicator will then come on and the sound will resume. Programming is now
complete.
4.
Other buttons can be set in the same manner.
If the battery cable is disconnected, or if the fuse
opens, the radio memory will be canceled. In that
case, reset the desired stations.
4-46Monitor, climate, audio, phone and voice recognition systems
Page 241 of 478
The current play pattern of the CD is displayed on
the screen unless no pattern is applied.
EJECT button
When the
button is pressed with a com-
pact disc loaded, the compact disc will eject and
the last source will be played.
When the
button is pressed twice with a
compact disc loaded, the compact disc will be
ejected further for easier CD removal. If the disc
is not removed within 20 seconds, the disc will
reload.
Additional features
For additional information, refer to “iPod® player
operation without Navigation System” in this sec-
tion.
For additional information, refer to “USB (Univer-
sal Serial Bus) connection port (models without
Navigation System)” in this section.
For additional information, refer to “Bluetooth®
streaming audio without Navigation System” in
this section.
FM/AM/SAT RADIO WITH
COMPACT DISC (CD) PLAYER (Type
A) (if so equipped)
For additional information, refer to “Audio opera-
tion precautions” in this section. 1.
CD eject button
2. RPT button
3. RDM button
4. Display screen
LHA3017
4-48Monitor, climate, audio, phone and voice recognition systems
Page 244 of 478
Clock Set1. Press the ENTER/SETTING button.
2. Turn the TUNE/SCROLL knob to select CLOCK.
3. Press the ENTER/SETTING button.
4. Turn the TUNE/SCROLL knob to select “set time”.
5. Press the ENTER/SETTING button.
6. Rotate the TUNE/SCROLL knob to adjust hours.
7. Press the ENTER/SETTING button.
8. Turn the TUNE/SCROLL knob to adjust min- utes.
9. Press the ENTER/SETTING button.
10. Press the
BACK button to finish.
DISP button
The display screen can be turned off by pressing
the DISP button. You can listen to music while the
display is off. If you want to turn the screen on,
either press the DISP button or press the FM·AM,
CD or MEDIA button.
Apps button
Press the Apps button to display a list of smart-
phone apps available. For additional information on connecting your
phone, refer to the “Bluetooth® Hands-Free
Phone System without Navigation (Type B)” in
this section.
FM/AM/SAT radio operation
FM·AM button
Press the FM·AM button to change the band as
follows:
AM
→FM1 →FM2 →AM
If another audio source is playing when the
FM·AM button is pressed, the audio source play-
ing will automatically be turned off and the last
radio station played will begin playing.
XM band select
Press the XM button to change the band as
follows:
XM1* →XM2* →XM3* →XM1 (satellite, if so
equipped)
When the XM button is pressed while the ignition
switch is in the ACC or ON position, the radio will
come on at the station last played.
The last station played will also come on when
the
(power) button is pressed on.
*When the XM button is pressed, the satellite
radio reception will not be available unless an optional satellite receiver and antenna are in-
stalled and a SiriusXM® Satellite Radio service
subscription is active. Satellite radio is not avail-
able in Alaska, Hawaii and Guam.
If a compact disc is playing when the XM button
is pressed, the compact disc will automatically be
turned off and the last radio station played will
come on.
TUNE/FOLDER knob (Tuning)
Turn the TUNE/FOLDER knob to the left or right
for manual tuning.
SEEK tuning
Press the
SEEK button orTRACK
button to tune from low to high or high to low
frequencies and to stop at the next broadcasting
station.
SCAN tuning
Press the SCAN button to stop at each broad-
casting station for 5 seconds. SCAN will appear
on the screen while the radio is scan tuning.
Pressing the button again during this 5 second
period will stop SCAN tuning and the radio will
remain tuned to that station. If the SCAN button is
not pressed within 5 seconds, SCAN tuning
moves to the next station.
Monitor, climate, audio, phone and voice recognition systems4-51
Page 246 of 478
OFF: No repeat play pattern is applied. The indi-
cator on the display will turn off.
The current play pattern of the CD is displayed on
the screen unless no pattern is applied.
RDM (random) button
When the RDM button is pressed while a com-
pact disc is playing, the play pattern can be
changed as follows:
CD:
1 Disc Random←→OFF
CD with MP3 or WMA:
1 Disc Random →1 Folder Random →OFF
1 Disc Random: all tracks on the disc will be
played randomly.
1 Folder Random: all tracks in the current folder
will be played randomly.
OFF: No random play pattern is applied. The
indicator on the display will turn off.
The current play pattern of the CD is displayed on
the screen unless no pattern is applied.
EJECT button
When the
button is pressed with a com-
pact disc loaded, the compact disc will eject and
the last source will be played. When the
button is pressed twice with a
compact disc loaded, the compact disc will be
ejected further for easier CD removal. If the disc
is not removed within 20 seconds, the disc will
reload.
Additional features
For additional information, refer to “iPod® player
operation without Navigation System” in this sec-
tion.
For additional information, refer to “USB (Univer-
sal Serial Bus) connection port (models without
Navigation System)” in this section.
For additional information, refer to “Bluetooth®
streaming audio without Navigation System” in
this section.
Monitor, climate, audio, phone and voice recognition systems4-53