Page 308 of 478

To remove the key from the ignition switch:1. Shift the shift lever to the P (Park) position with the ignition switch in the ON position.
2. Place the ignition switch to the LOCK posi- tion.
3. Remove the key from the ignition.
If the shift lever is shifted to the P (Park) position
after the ignition switch is placed in the OFF
position or when the ignition switch cannot be
turned to the LOCK position, proceed as follows
to remove the key. 1. Move the shift lever into the P (Park) posi- tion.
2. Turn the ignition key slightly toward the ON position.
3. Turn the key to the LOCK position.
4. Remove the key.
The shift lever is designed so it cannot moved out
of P (Park) and into any of the other gear posi-
tions if the ignition key is turned to OFF position
or if the key is removed from the switch.
The shift lever can be moved if the ignition
switch is in the ON position and the foot
brake pedal is depressed. There is an OFF position between the
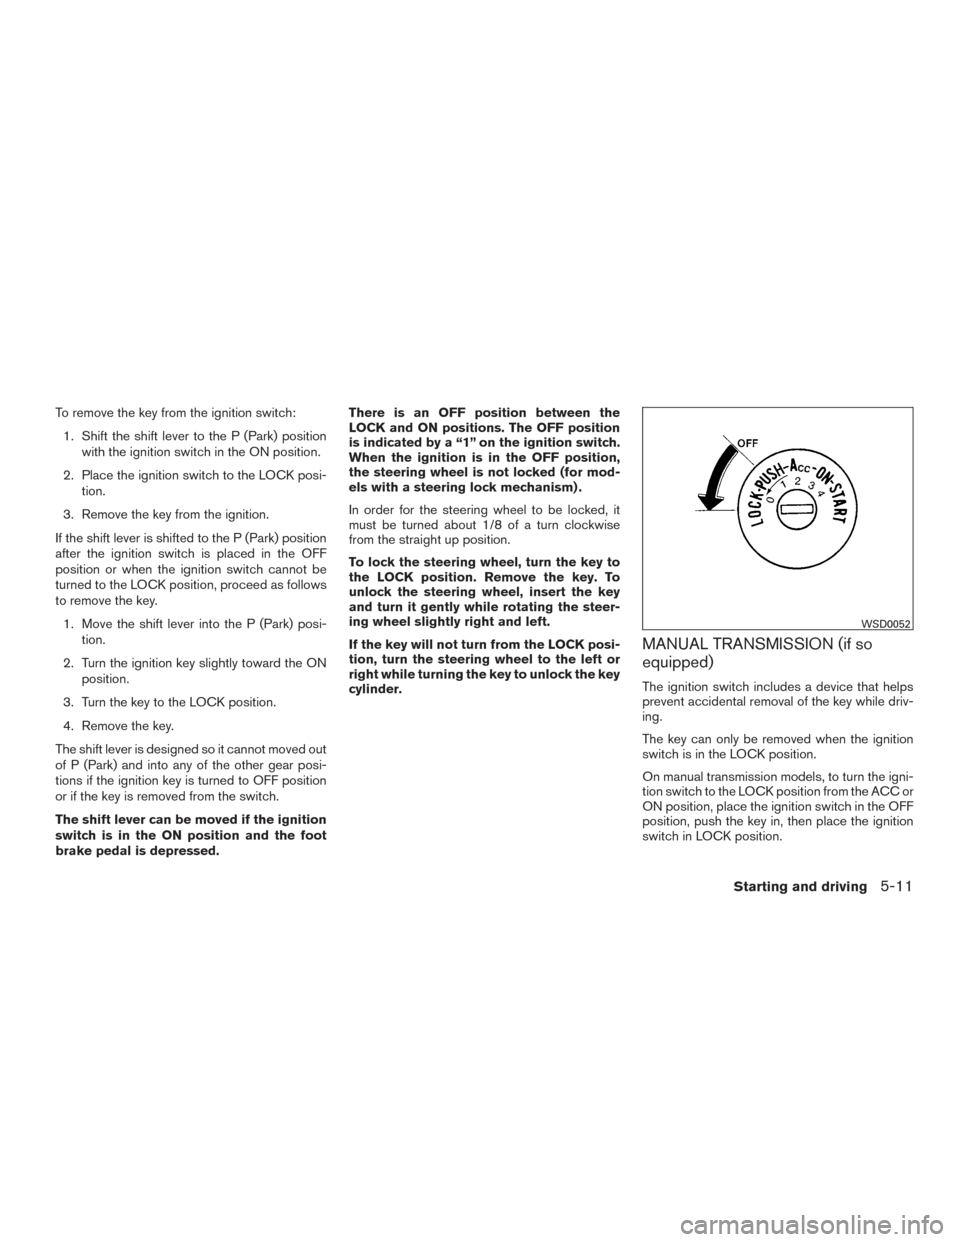
LOCK and ON positions. The OFF position
is indicated by a “1” on the ignition switch.
When the ignition is in the OFF position,
the steering wheel is not locked (for mod-
els with a steering lock mechanism) .
In order for the steering wheel to be locked, it
must be turned about 1/8 of a turn clockwise
from the straight up position.
To lock the steering wheel, turn the key to
the LOCK position. Remove the key. To
unlock the steering wheel, insert the key
and turn it gently while rotating the steer-
ing wheel slightly right and left.
If the key will not turn from the LOCK posi-
tion, turn the steering wheel to the left or
right while turning the key to unlock the key
cylinder.
MANUAL TRANSMISSION (if so
equipped)
The ignition switch includes a device that helps
prevent accidental removal of the key while driv-
ing.
The key can only be removed when the ignition
switch is in the LOCK position.
On manual transmission models, to turn the igni-
tion switch to the LOCK position from the ACC or
ON position, place the ignition switch in the OFF
position, push the key in, then place the ignition
switch in LOCK position.
WSD0052
Starting and driving5-11
Page 346 of 478
A. Blocks
B. Flat tire
Blocking wheels
Place suitable blocks at both the front and back
of the wheel diagonally opposite the flat tire to
prevent the vehicle from moving when it is jacked
up.
WARNING
Be sure to block the wheel as the vehicle
may move and result in personal injury.
Getting the spare tire and tools (King
Cab models)
The tool storage compartment is located be-
tween the two rear jump seats.1. Turn the knob from the lock to the unlock position and remove the lid from the tool
storage compartment.
2. Release the strap to remove the tool bag. 3. Collapse the jack to remove it from the stor-
age location by inserting the wheel-nut
wrench into the jack screw at the top of the
jack as shown. Turn the wheel-nut wrench
counterclockwise as shown until the jack
screw becomes loose. Then loosen the jack
with your fingers to free.
4. Remove the jack.
5. To reinstall the jack and tools, reverse steps 1 to 4.
LCE2142LCE0109LCE0110
In case of emergency6-5
Page 348 of 478
Getting the spare tire and tools (All
models)
1. Seat the T-shaped end of the jack rod intothe T-shaped opening of the spare tire
winch. Apply pressure to keep the jack rod
engaged in the spare tire winch and turn the jack rod counterclockwise to lower the
spare tire.
2. Once the spare tire is completely lowered, reach under the vehicle, remove the retainer
chain, and carefully slide the tire from under
the rear of the vehicle.
3. To reinstall the wheel, insert the tire chainthrough the wheel. Be sure the rubber
spacer is centered on the wheel before lift-
ing. Use the assembled jack rod and slowly
rotate the winch clockwise to raise the
wheel to the vehicle.
NOTE:
Inspect the spacer every six years and re-
place as necessary. It is recommended that
you visit a NISSAN dealer for this service.
WCE0070
LCE2022
In case of emergency6-7
Page 350 of 478
●Never run the engine with a wheel(s) off
the ground. It may cause the vehicle to
move.
Always refer to the illustration for the correct
placement and jack-up points for your specific
vehicle model and jack type.
Carefully read the caution label attached to
the jack body and the following instruc-
tions. 1. Loosen each wheel nut 1 or 2 turns by
turning counterclockwise with the wheel nut
wrench. Do not remove the wheel nuts
until the tire is off the ground.
WCE0152
In case of emergency6-9
Page 375 of 478
CAUTION
Oil level should be checked regularly. Op-
erating the engine with an insufficient
amount of oil can damage the engine, and
such damage is not covered by warranty.
CHANGING ENGINE OIL
1. Park the vehicle on a level surface and applythe parking brake. 2. Start the engine and let it idle until it reaches
operating temperature, then turn it off.
3. Remove the oil filler cap�Aby turning it
counterclockwise.
VQ40DE
LDI2832
QR25DE
LDI2833
8-8Do-it-yourself
Page 376 of 478

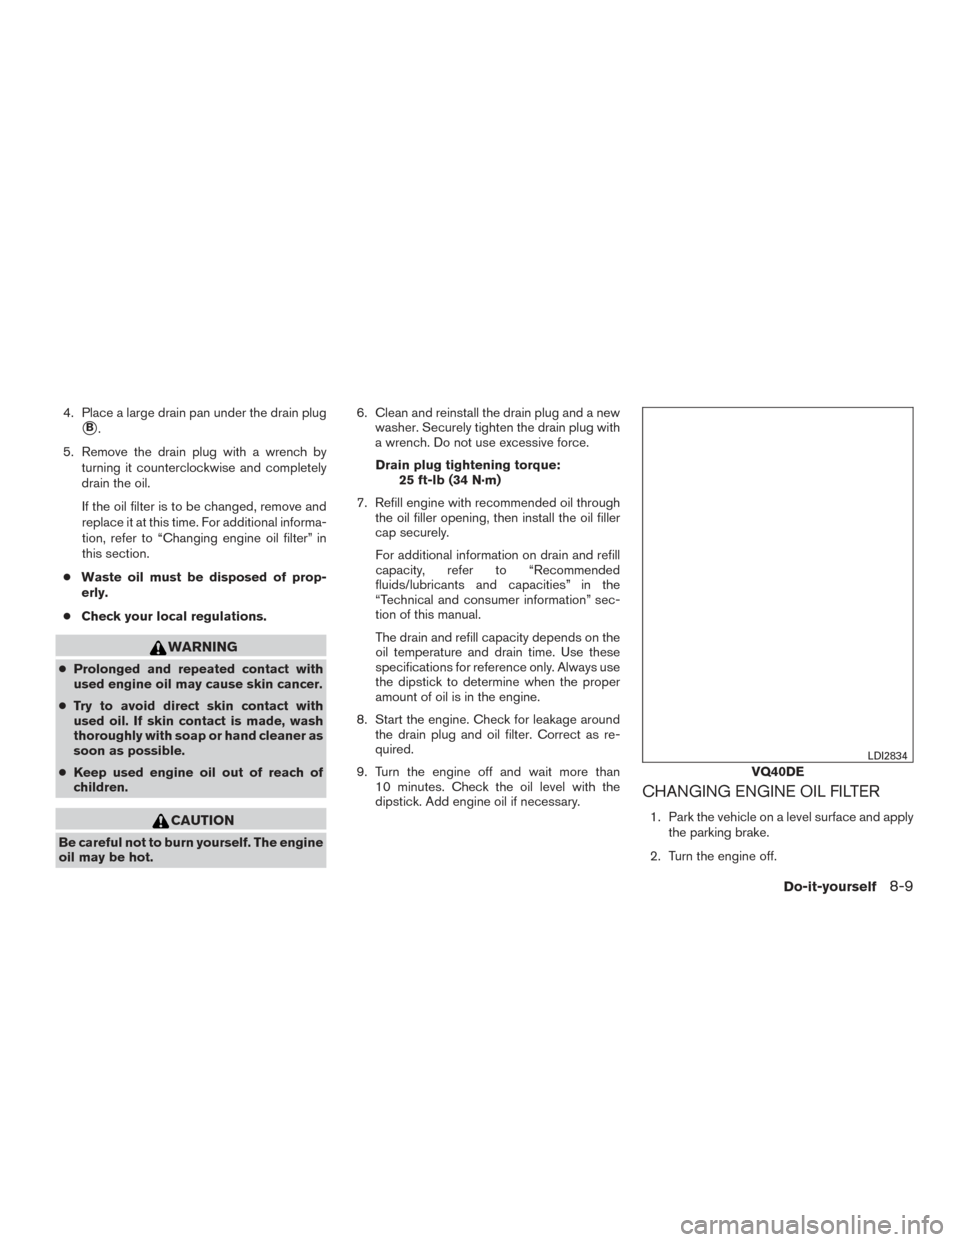
4. Place a large drain pan under the drain plug
�B.
5. Remove the drain plug with a wrench by turning it counterclockwise and completely
drain the oil.
If the oil filter is to be changed, remove and
replace it at this time. For additional informa-
tion, refer to “Changing engine oil filter” in
this section.
● Waste oil must be disposed of prop-
erly.
● Check your local regulations.
WARNING
●Prolonged and repeated contact with
used engine oil may cause skin cancer.
● Try to avoid direct skin contact with
used oil. If skin contact is made, wash
thoroughly with soap or hand cleaner as
soon as possible.
● Keep used engine oil out of reach of
children.
CAUTION
Be careful not to burn yourself. The engine
oil may be hot. 6. Clean and reinstall the drain plug and a new
washer. Securely tighten the drain plug with
a wrench. Do not use excessive force.
Drain plug tightening torque: 25 ft-lb (34 N·m)
7. Refill engine with recommended oil through the oil filler opening, then install the oil filler
cap securely.
For additional information on drain and refill
capacity, refer to “Recommended
fluids/lubricants and capacities” in the
“Technical and consumer information” sec-
tion of this manual.
The drain and refill capacity depends on the
oil temperature and drain time. Use these
specifications for reference only. Always use
the dipstick to determine when the proper
amount of oil is in the engine.
8. Start the engine. Check for leakage around the drain plug and oil filter. Correct as re-
quired.
9. Turn the engine off and wait more than 10 minutes. Check the oil level with the
dipstick. Add engine oil if necessary.
CHANGING ENGINE OIL FILTER
1. Park the vehicle on a level surface and apply
the parking brake.
2. Turn the engine off.
VQ40DE
LDI2834
Do-it-yourself8-9
Page 377 of 478

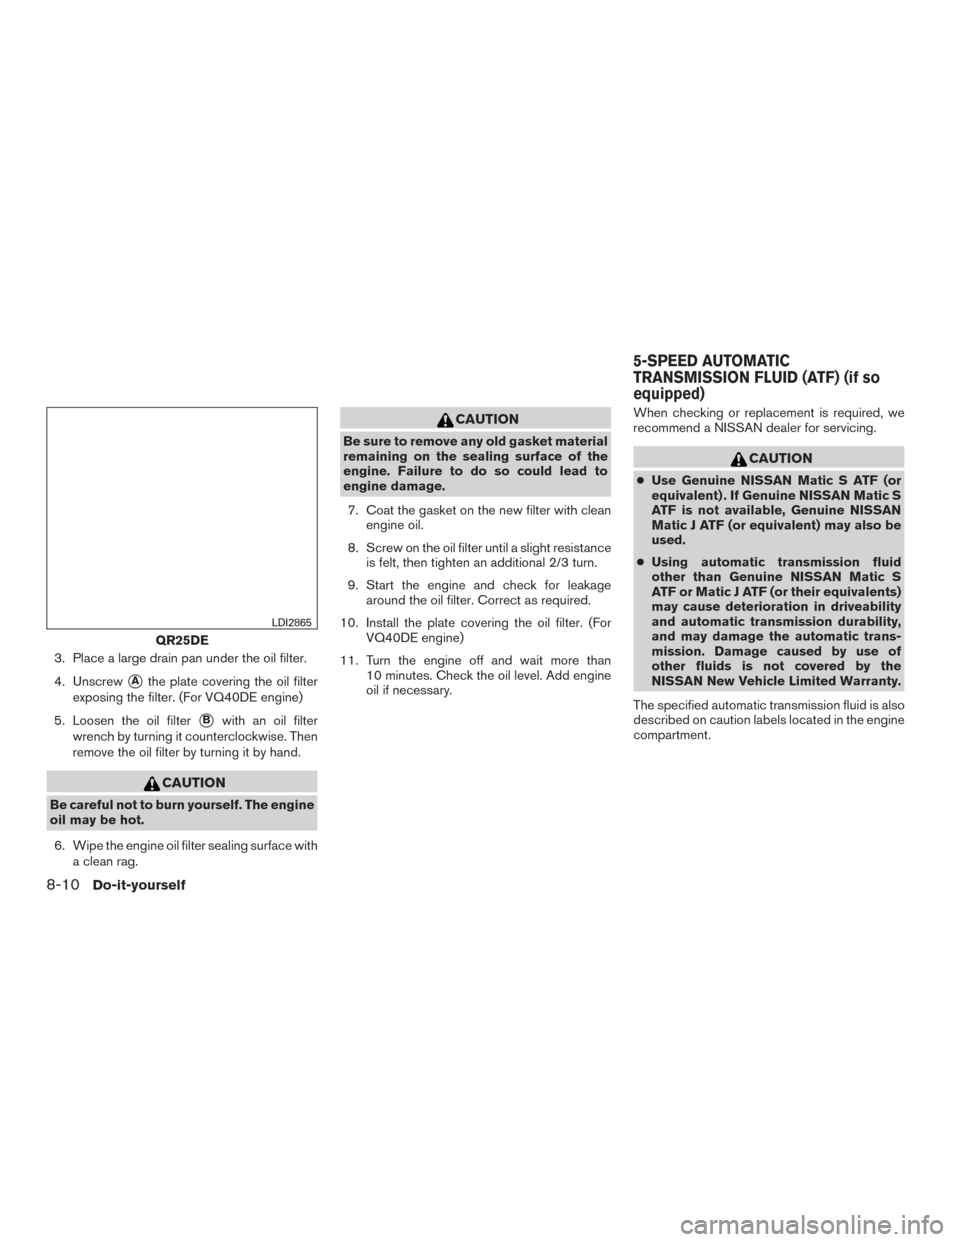
3. Place a large drain pan under the oil filter.
4. Unscrew
�Athe plate covering the oil filter
exposing the filter. (For VQ40DE engine)
5. Loosen the oil filter
�Bwith an oil filter
wrench by turning it counterclockwise. Then
remove the oil filter by turning it by hand.
CAUTION
Be careful not to burn yourself. The engine
oil may be hot.
6. Wipe the engine oil filter sealing surface with a clean rag.
CAUTION
Be sure to remove any old gasket material
remaining on the sealing surface of the
engine. Failure to do so could lead to
engine damage.
7. Coat the gasket on the new filter with clean engine oil.
8. Screw on the oil filter until a slight resistance is felt, then tighten an additional 2/3 turn.
9. Start the engine and check for leakage around the oil filter. Correct as required.
10. Install the plate covering the oil filter. (For VQ40DE engine)
11. Turn the engine off and wait more than 10 minutes. Check the oil level. Add engine
oil if necessary. When checking or replacement is required, we
recommend a NISSAN dealer for servicing.
CAUTION
●
Use Genuine NISSAN Matic S ATF (or
equivalent) . If Genuine NISSAN Matic S
ATF is not available, Genuine NISSAN
Matic J ATF (or equivalent) may also be
used.
● Using automatic transmission fluid
other than Genuine NISSAN Matic S
ATF or Matic J ATF (or their equivalents)
may cause deterioration in driveability
and automatic transmission durability,
and may damage the automatic trans-
mission. Damage caused by use of
other fluids is not covered by the
NISSAN New Vehicle Limited Warranty.
The specified automatic transmission fluid is also
described on caution labels located in the engine
compartment.
QR25DE
LDI2865
5-SPEED AUTOMATIC
TRANSMISSION FLUID (ATF) (if so
equipped)
8-10Do-it-yourself
Page 394 of 478

Removing the headlight bulb
1. Open the hood.
2. Disconnect the negative (-) battery cable.
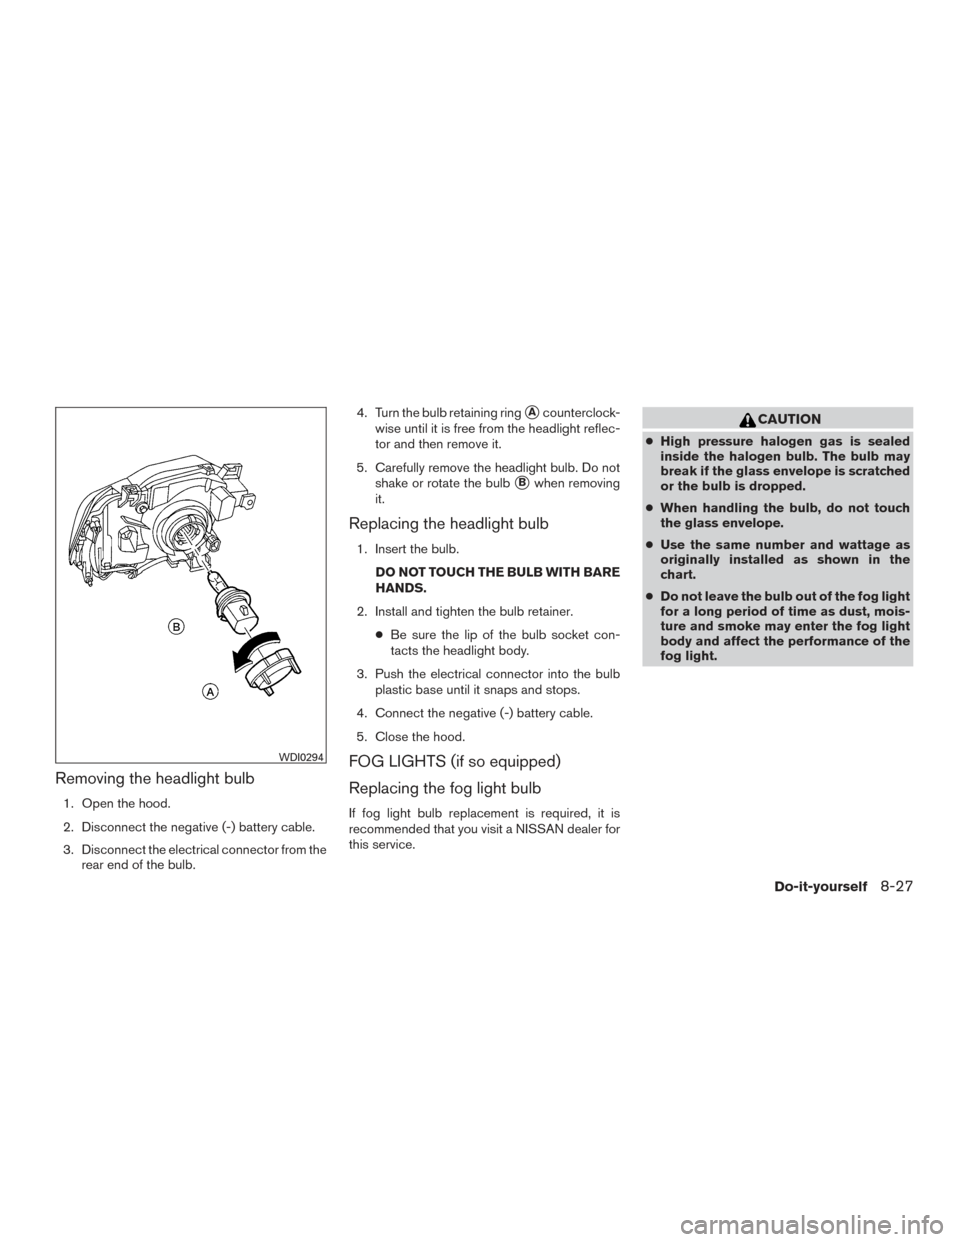
3. Disconnect the electrical connector from therear end of the bulb. 4. Turn the bulb retaining ring
�Acounterclock-
wise until it is free from the headlight reflec-
tor and then remove it.
5. Carefully remove the headlight bulb. Do not shake or rotate the bulb
�Bwhen removing
it.
Replacing the headlight bulb
1. Insert the bulb.
DO NOT TOUCH THE BULB WITH BARE
HANDS.
2. Install and tighten the bulb retainer. ●Be sure the lip of the bulb socket con-
tacts the headlight body.
3. Push the electrical connector into the bulb plastic base until it snaps and stops.
4. Connect the negative (-) battery cable.
5. Close the hood.
FOG LIGHTS (if so equipped)
Replacing the fog light bulb
If fog light bulb replacement is required, it is
recommended that you visit a NISSAN dealer for
this service.
CAUTION
● High pressure halogen gas is sealed
inside the halogen bulb. The bulb may
break if the glass envelope is scratched
or the bulb is dropped.
● When handling the bulb, do not touch
the glass envelope.
● Use the same number and wattage as
originally installed as shown in the
chart.
● Do not leave the bulb out of the fog light
for a long period of time as dust, mois-
ture and smoke may enter the fog light
body and affect the performance of the
fog light.
WDI0294
Do-it-yourself8-27